Flutter
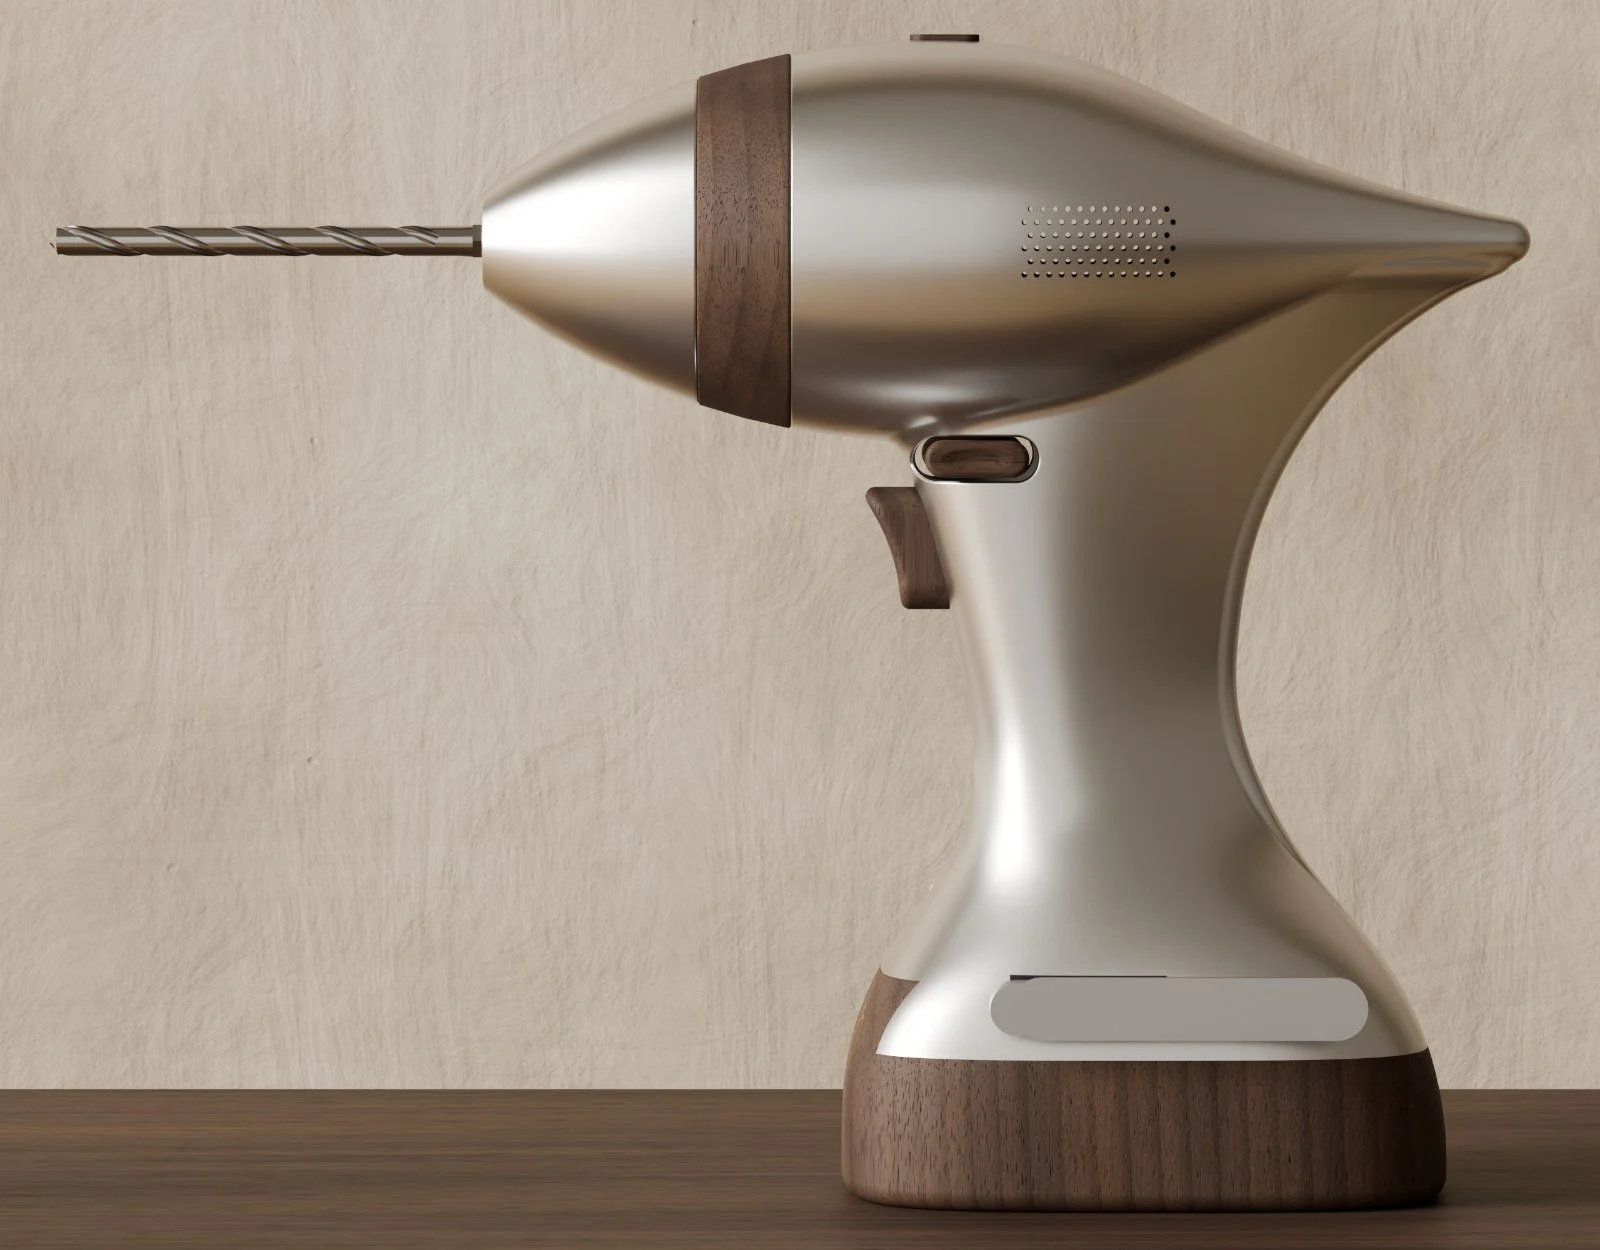
Flutter is a cordless drill and a screwdriver drawn from Raymond Loewy's 1933 streamlined pencil sharpener: one egg of revolution, drawn out into a long tail. Power tools are designed to be put away. These are designed to be left out. The drill runs on the motor, gearbox and battery of a Makita tool, so the shell is new and the drive is proven. The screwdriver has no motor at all.
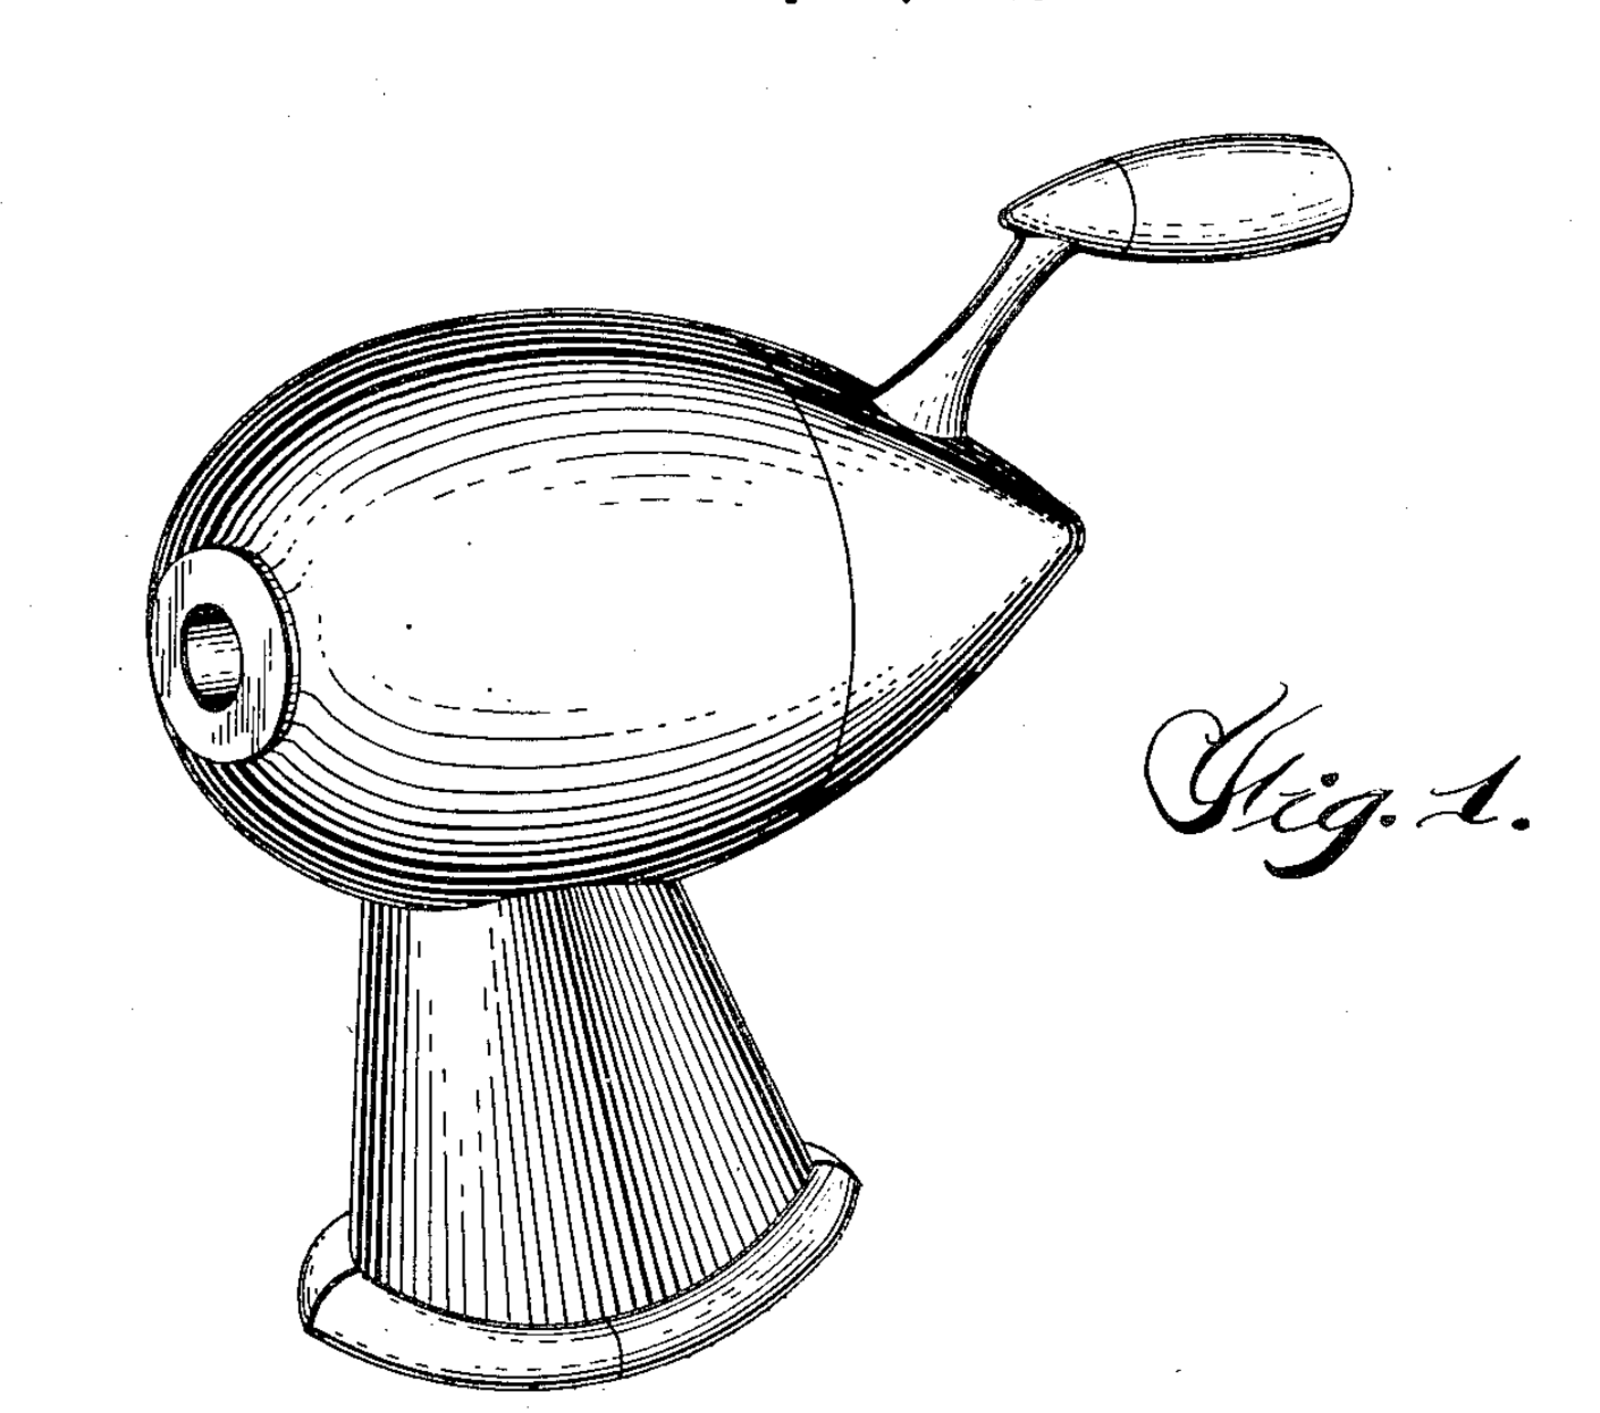
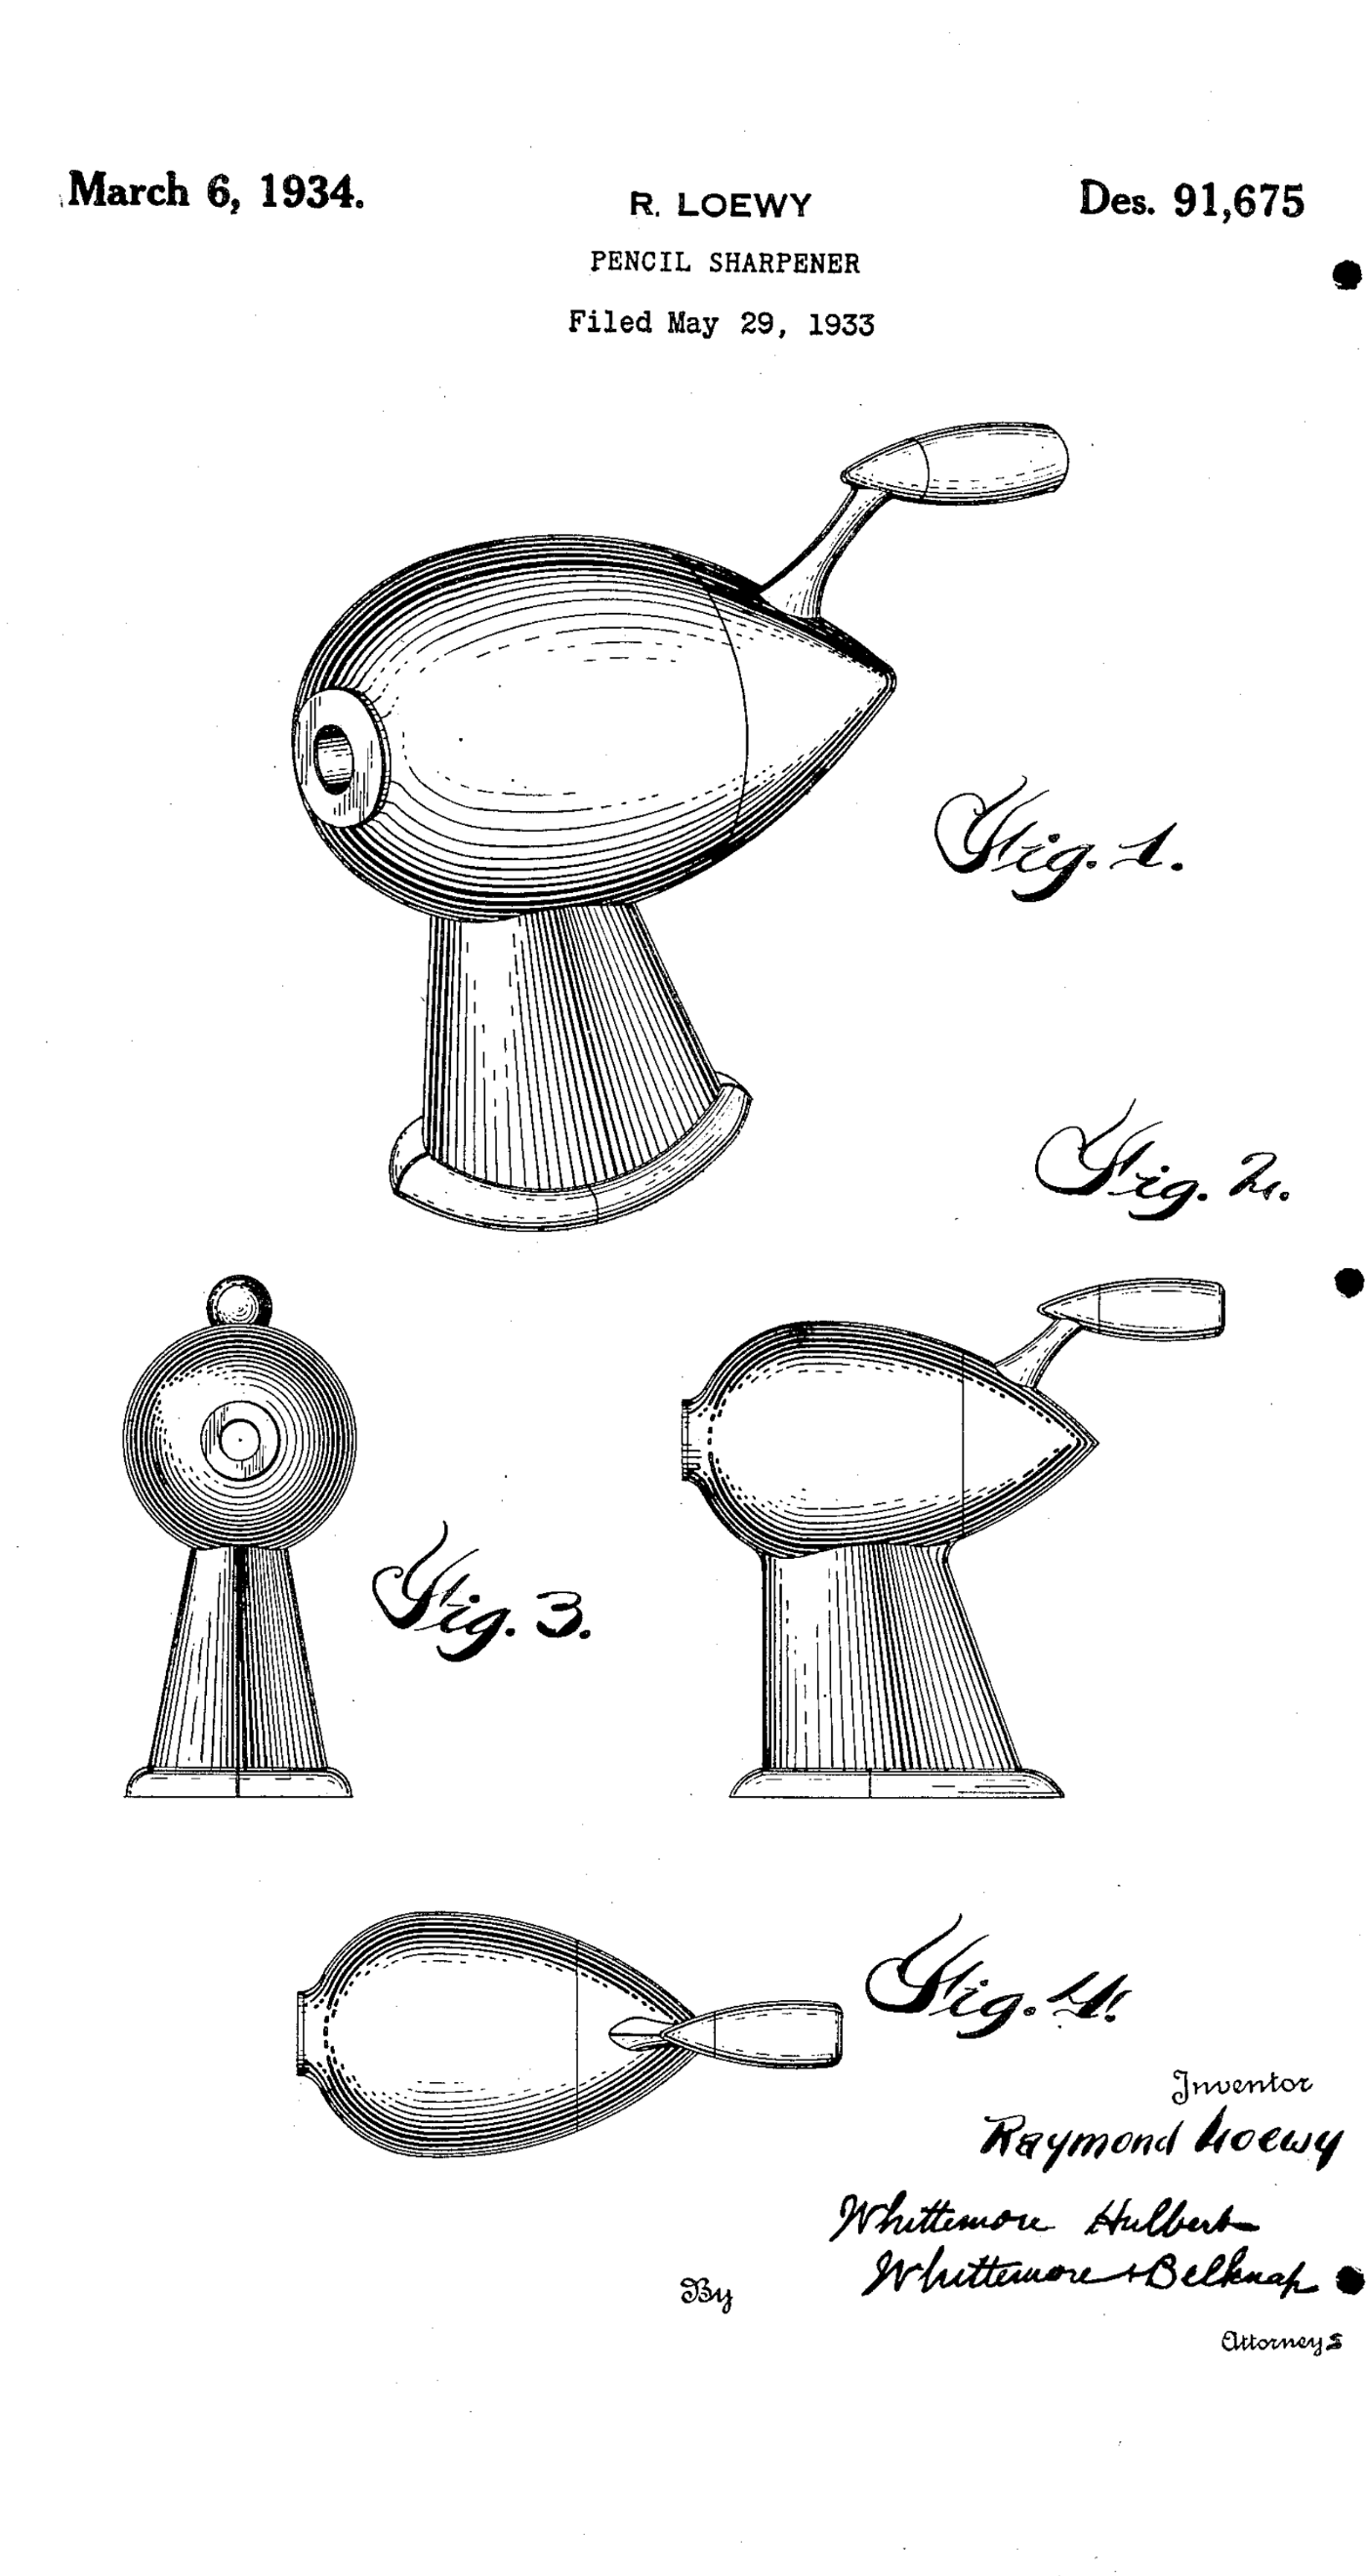
The reference. Raymond Loewy, Design for a Pencil Sharpener, US Des. 91,675, filed May 29, 1933, issued March 6, 1934. Patent drawing, public domain.
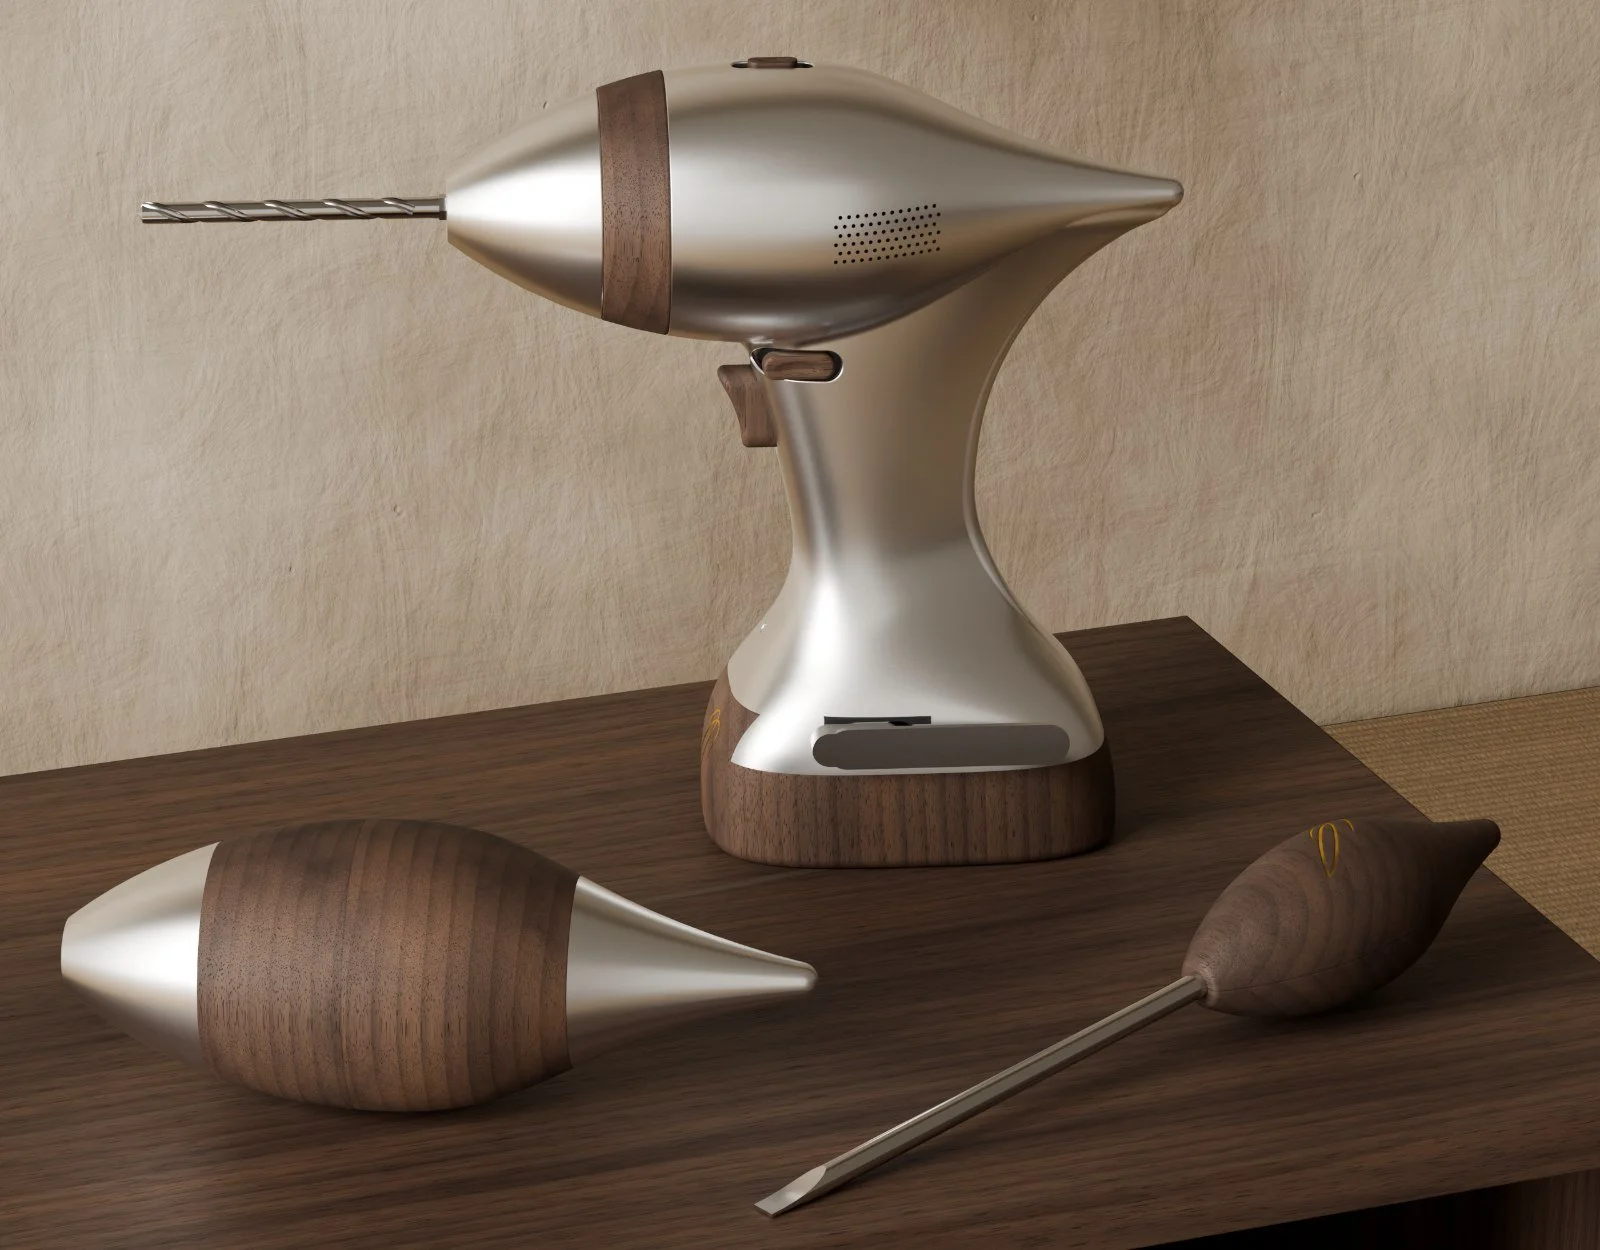
The drill
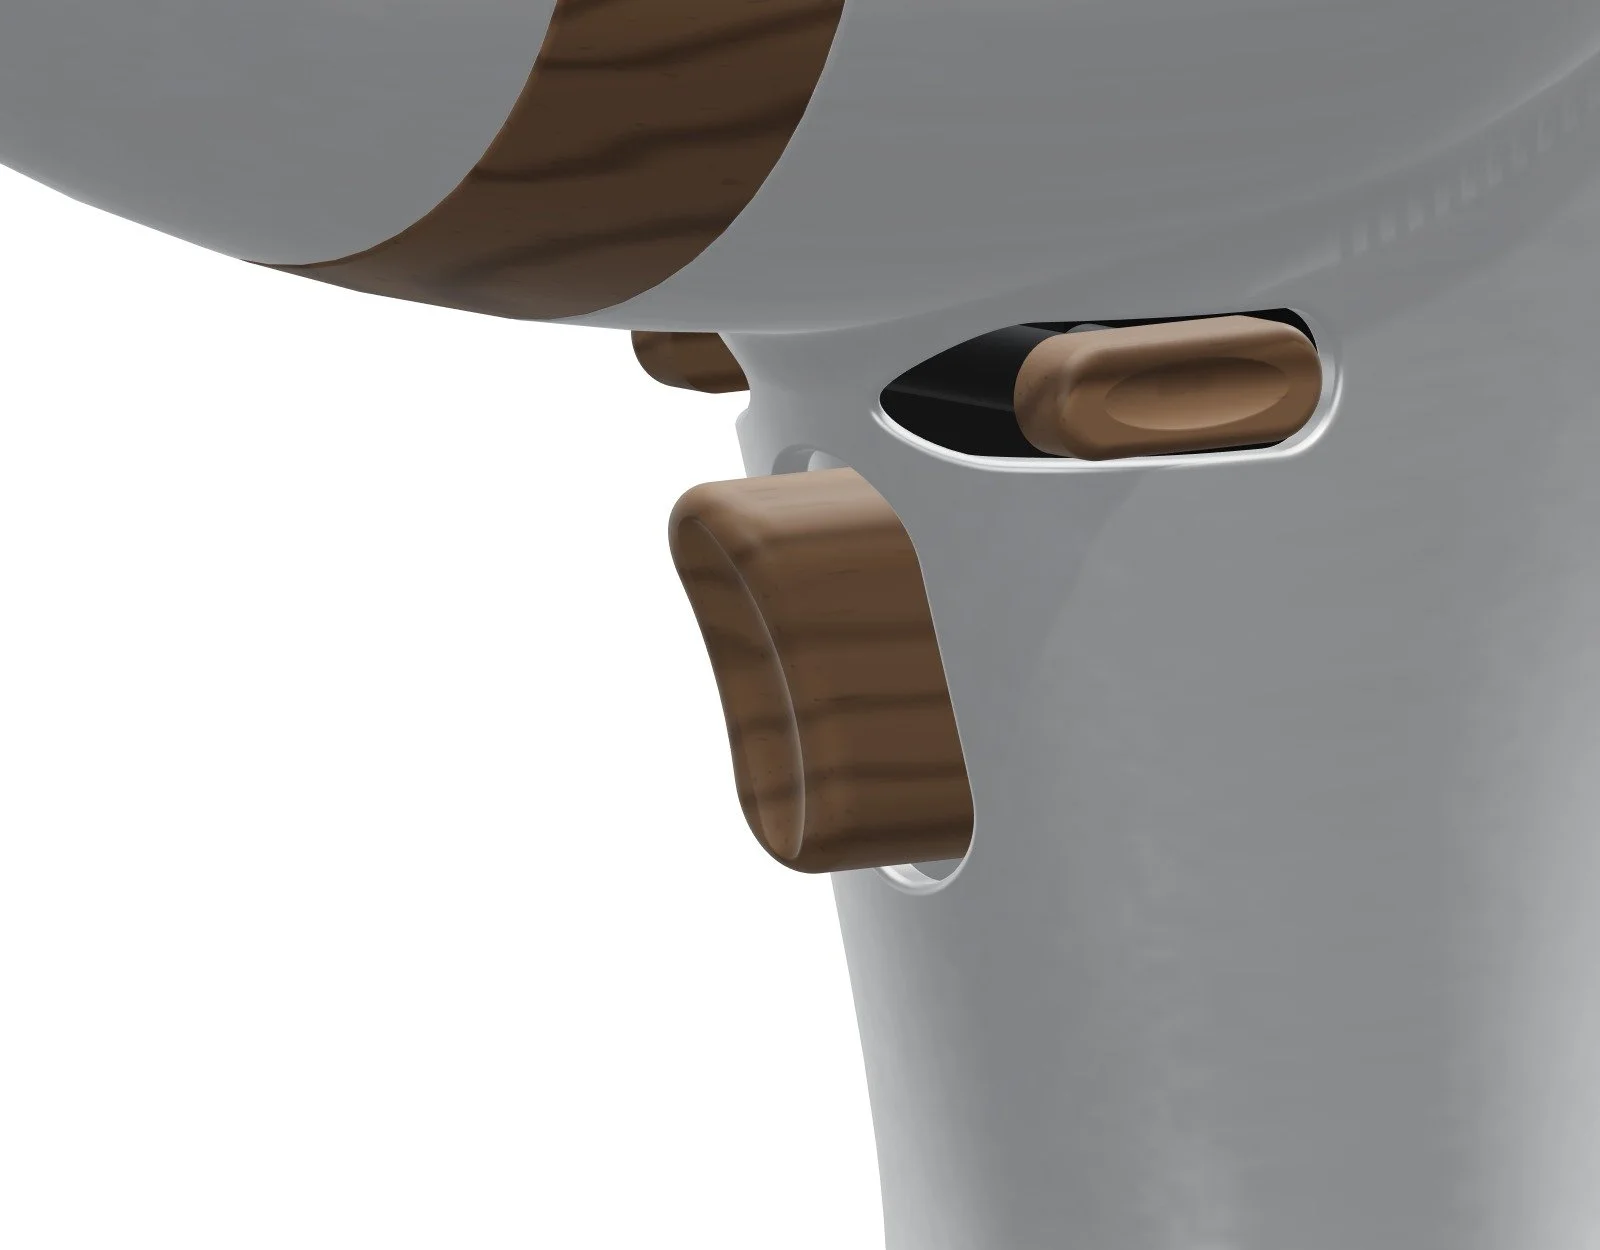
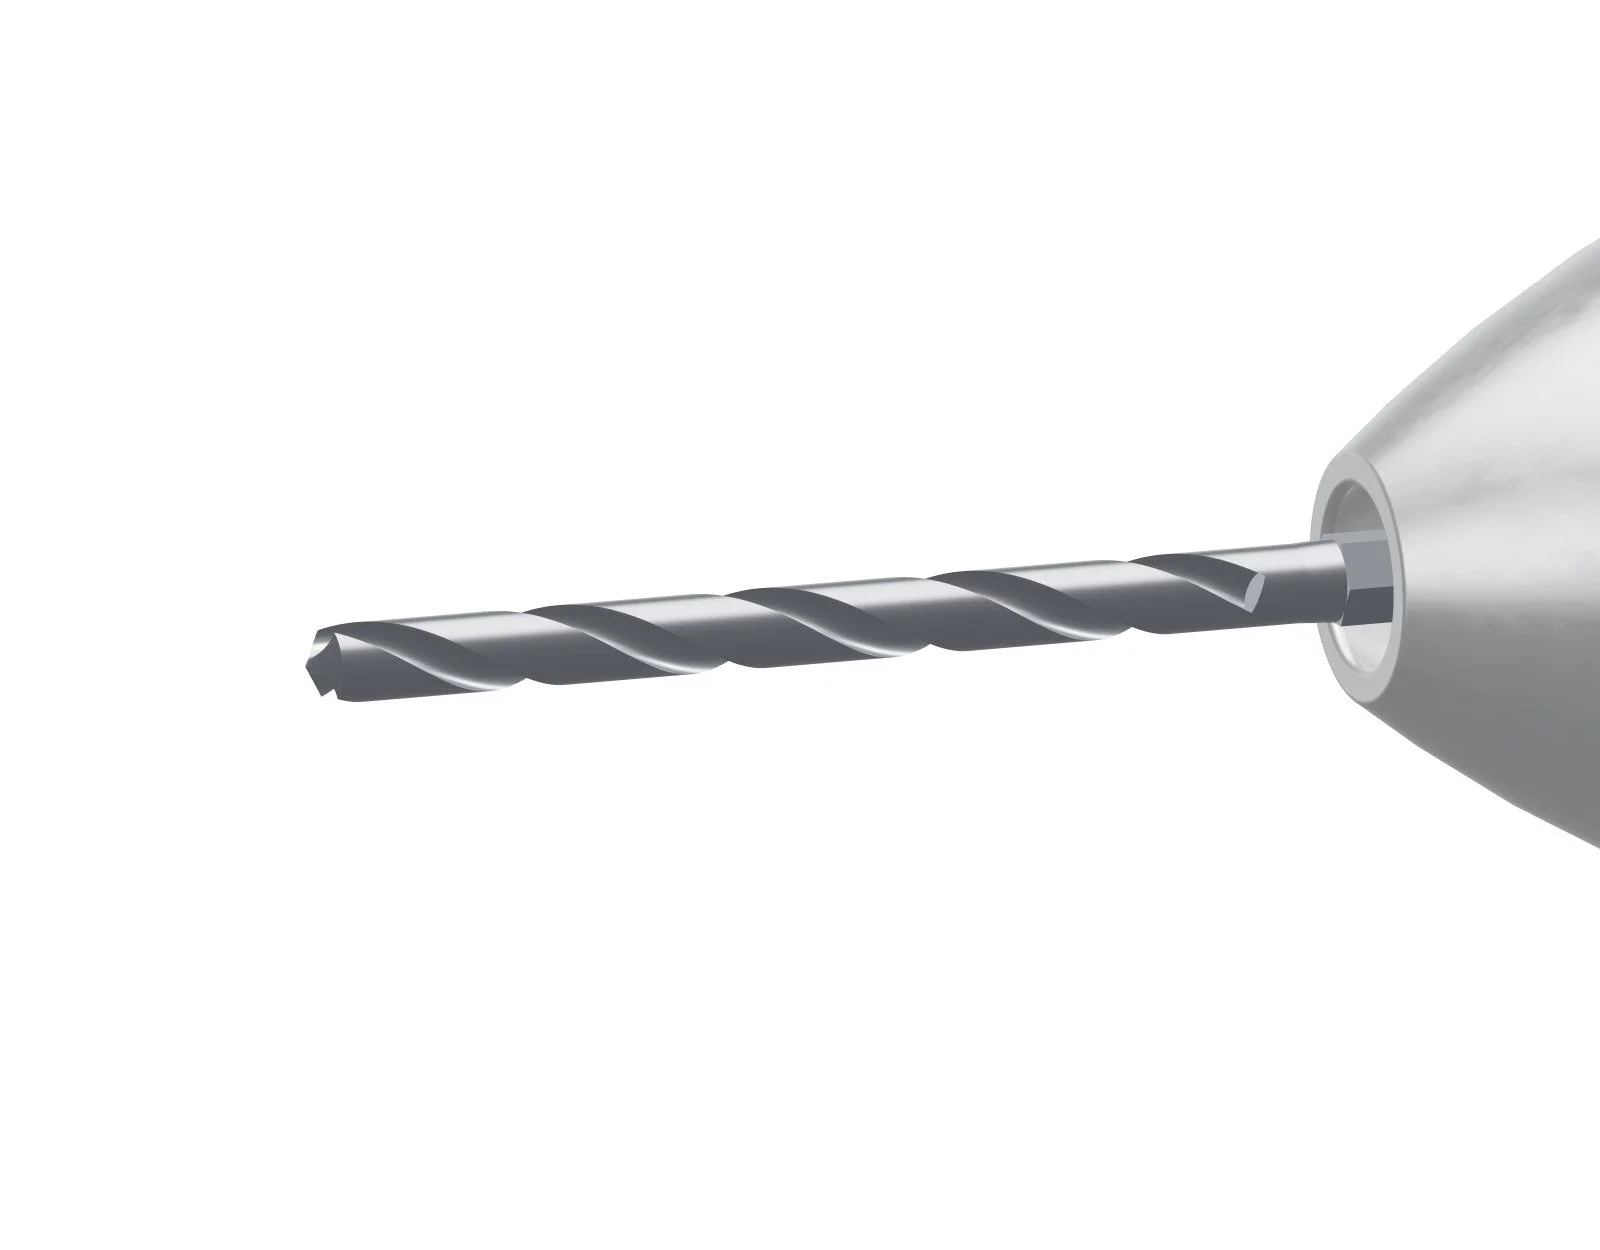
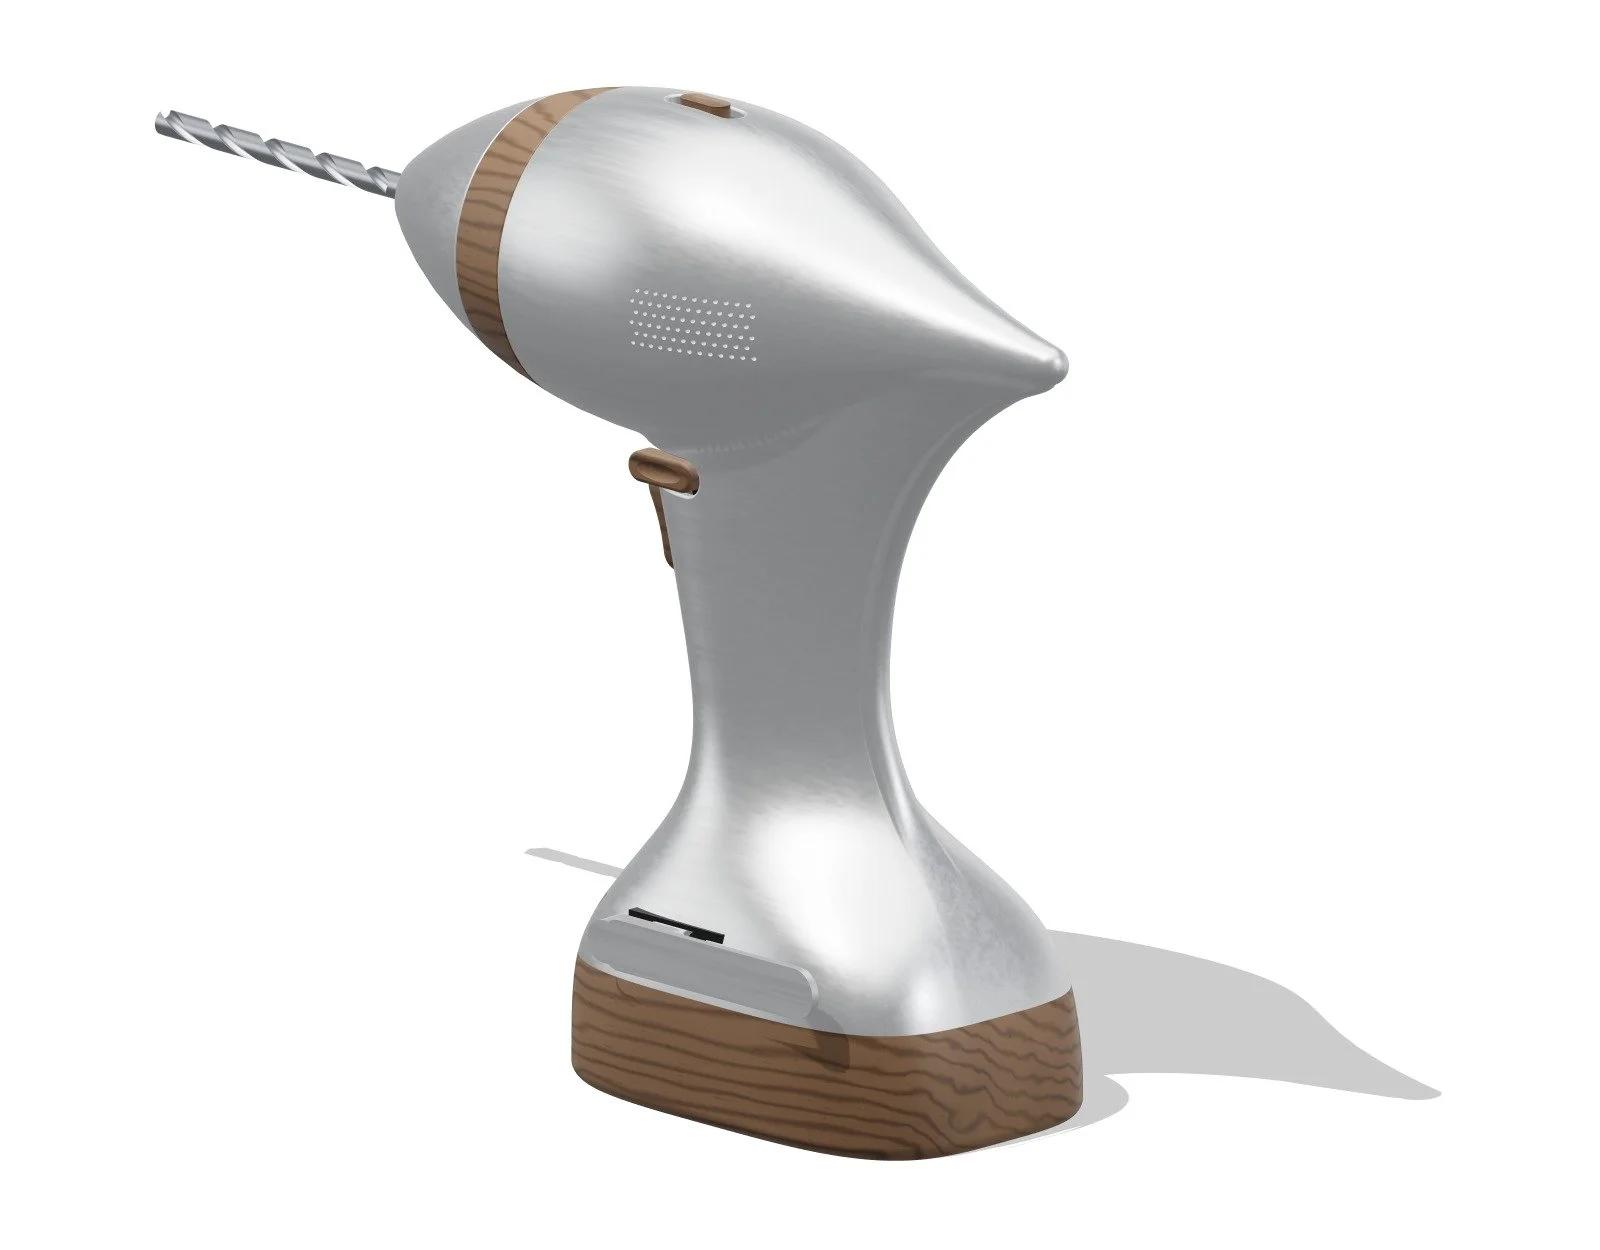
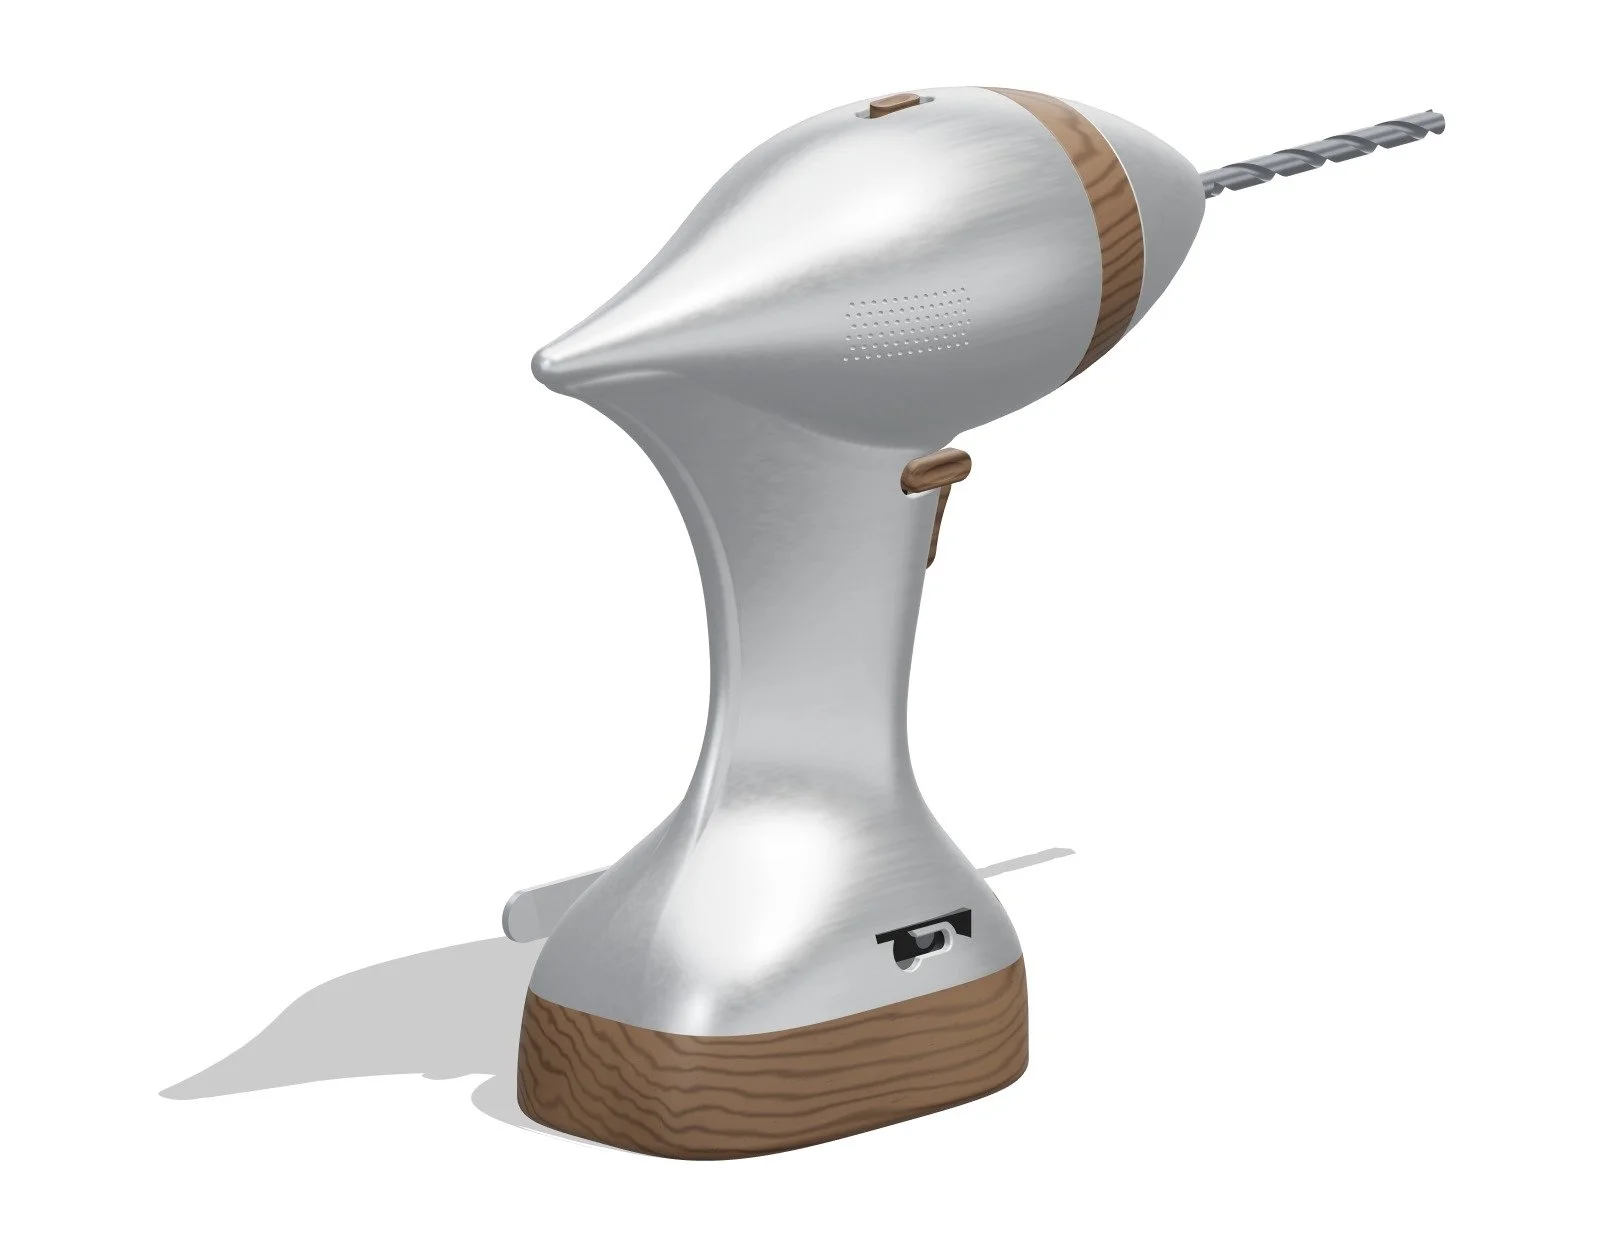
Every surface does a job. The nose is bonded to the chuck's release sleeve: pull it forward to change bits. The bit shown is a real one, a 6 mm twist drill on a 1/4" hex shank. The walnut band turns the clutch. The shell is one piece of brushed aluminium, with no screws or seams down its sides, and the motor breathes through a field of 1 mm perforations. The trigger is a curved walnut tab whose front is one concave sweep for the finger; the direction buttons and the speed slider are walnut pills. Each has a shallow oval dish where the finger lands. The work light sits behind a pinhole and can't be seen until it's on.
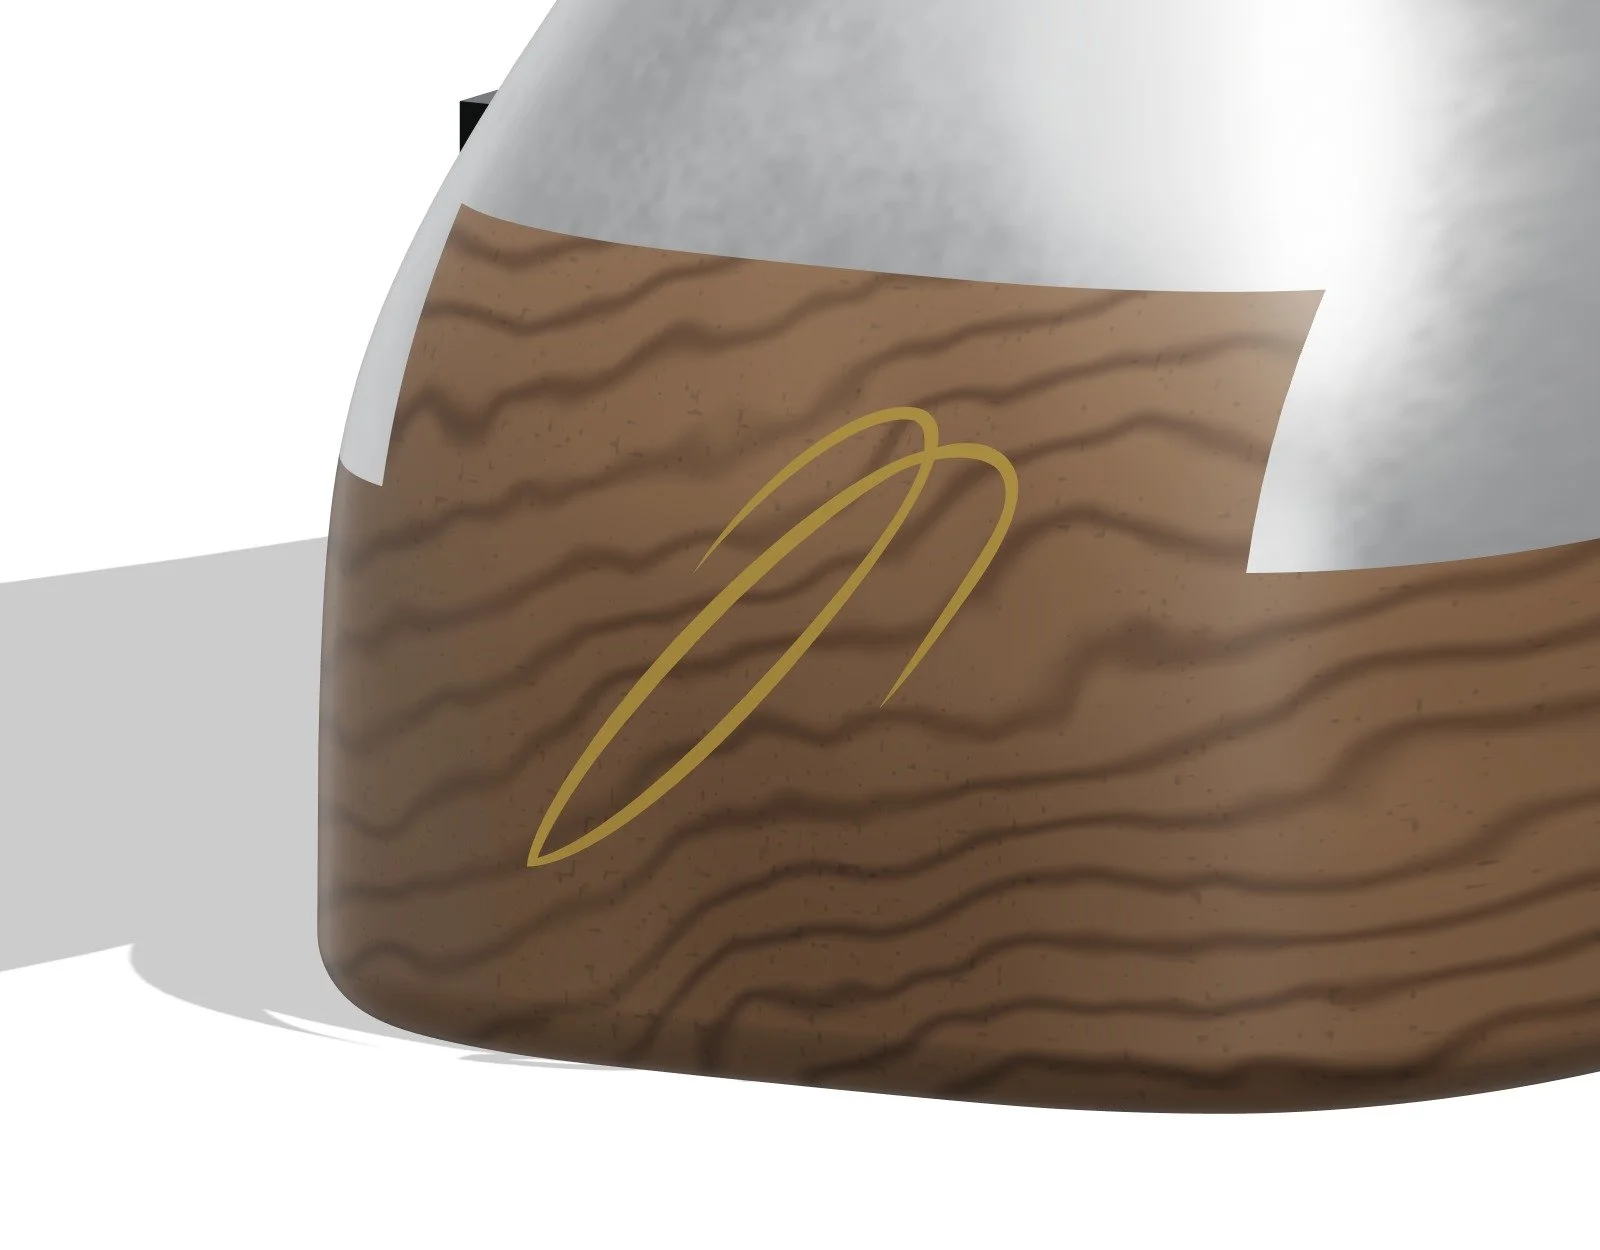
The foot is the battery. A walnut shoe holds a Makita 12V CXT pack and slides into the shell on the pack's own rails, the way the pack slides onto the donor drill. A walnut tongue at the front closes the rail opening and is what you pull to change packs, so nothing black or plastic shows. The foot is a soft squircle sized round the pack, and the drill stands on it the way the sharpener stands on its base. The mark is inlaid in brass in the front of the foot.
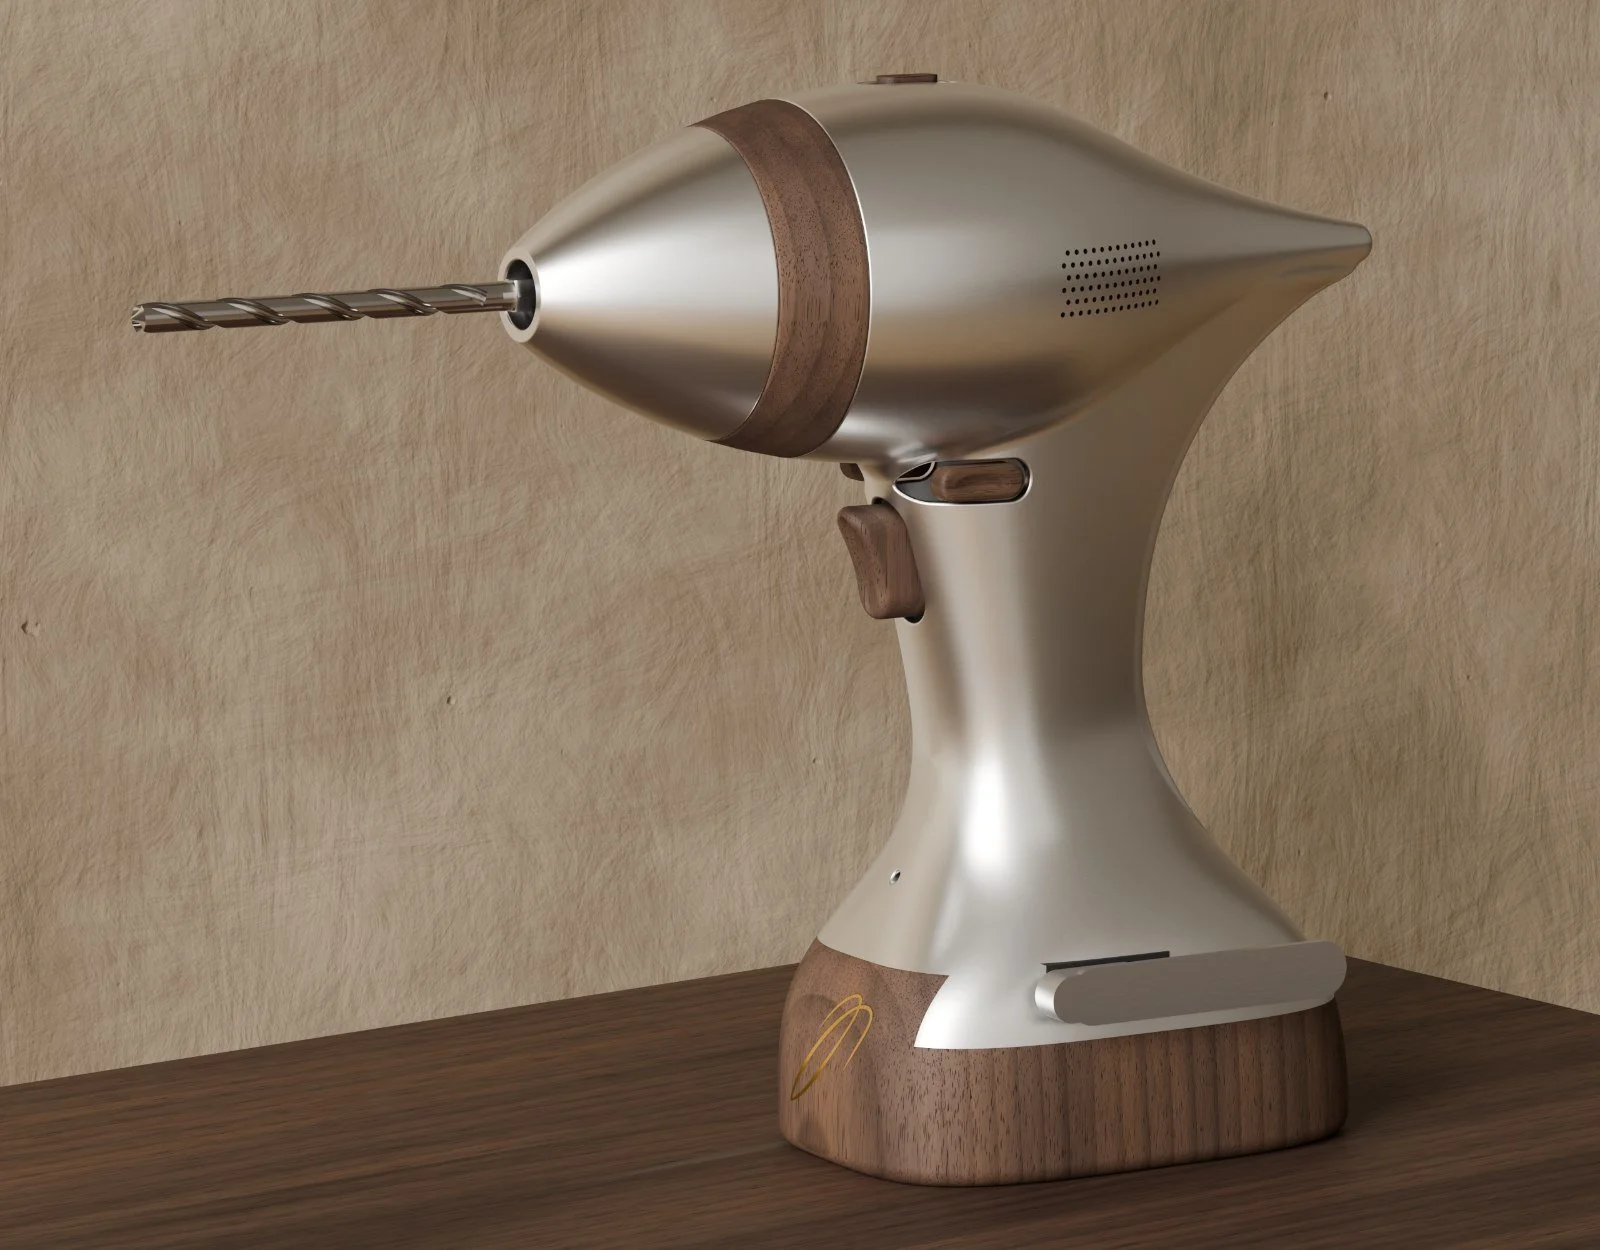
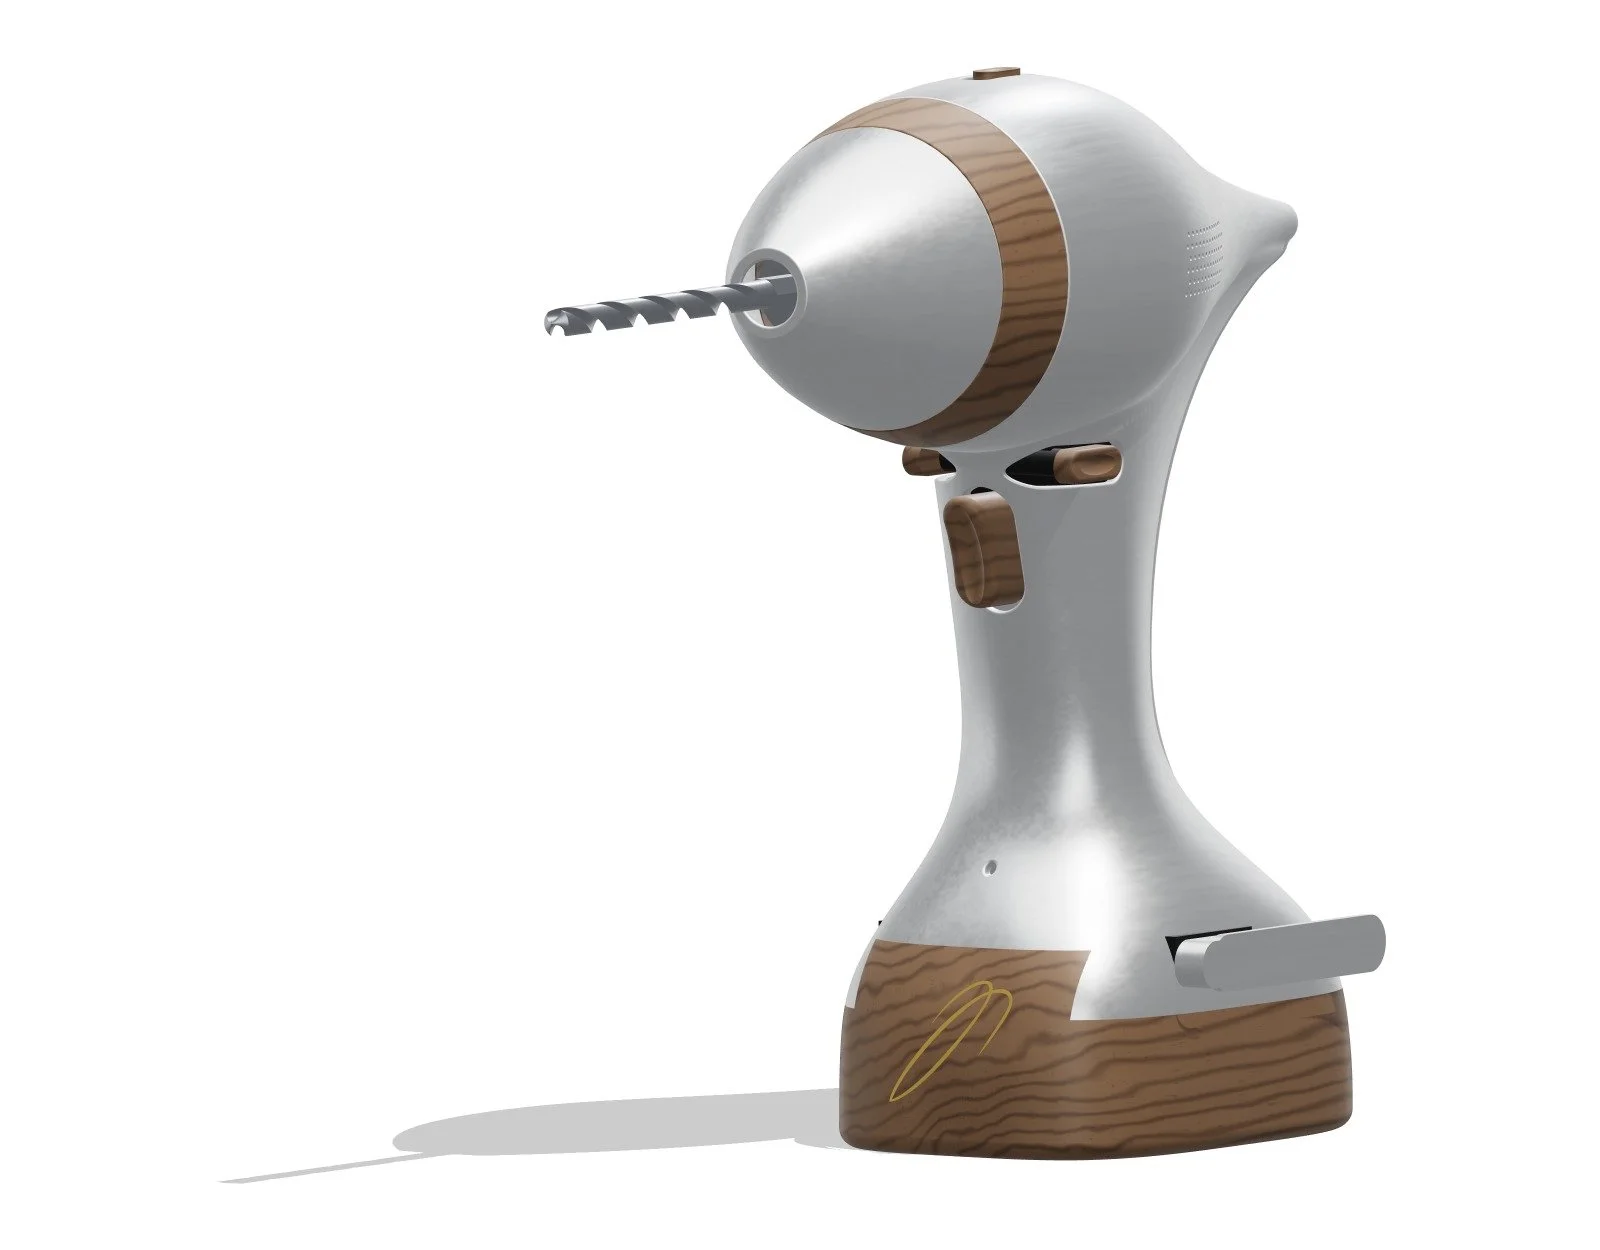
The belt clip comes off. A brushed steel blade stands off the side of the foot, so the drill hangs from a belt or a waistband. Its key drops into a keyhole in the foot and slides forward until a magnet behind the wall pulls it home with a click. To take it off, slide it back and lift. There is a keyhole on both sides, for either hip, and with the clip off all that shows is a small keyhole.
The screwdriver
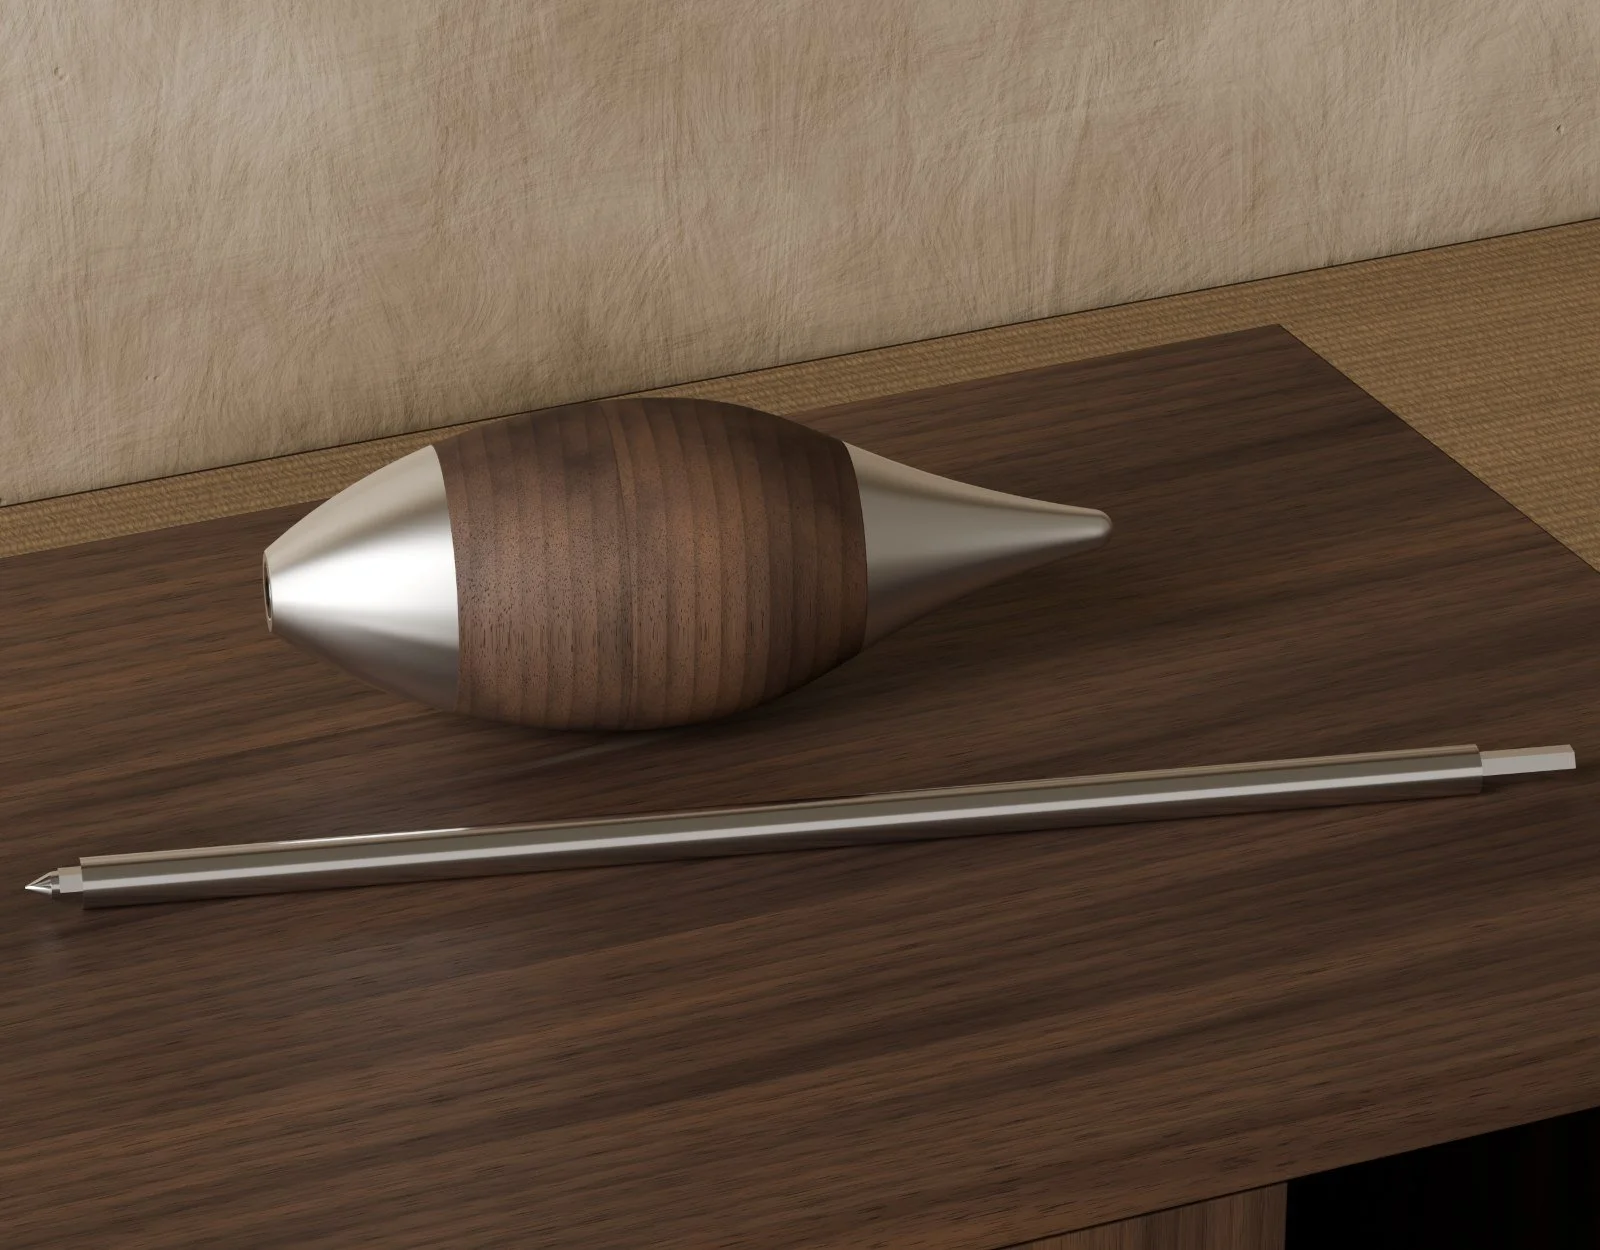
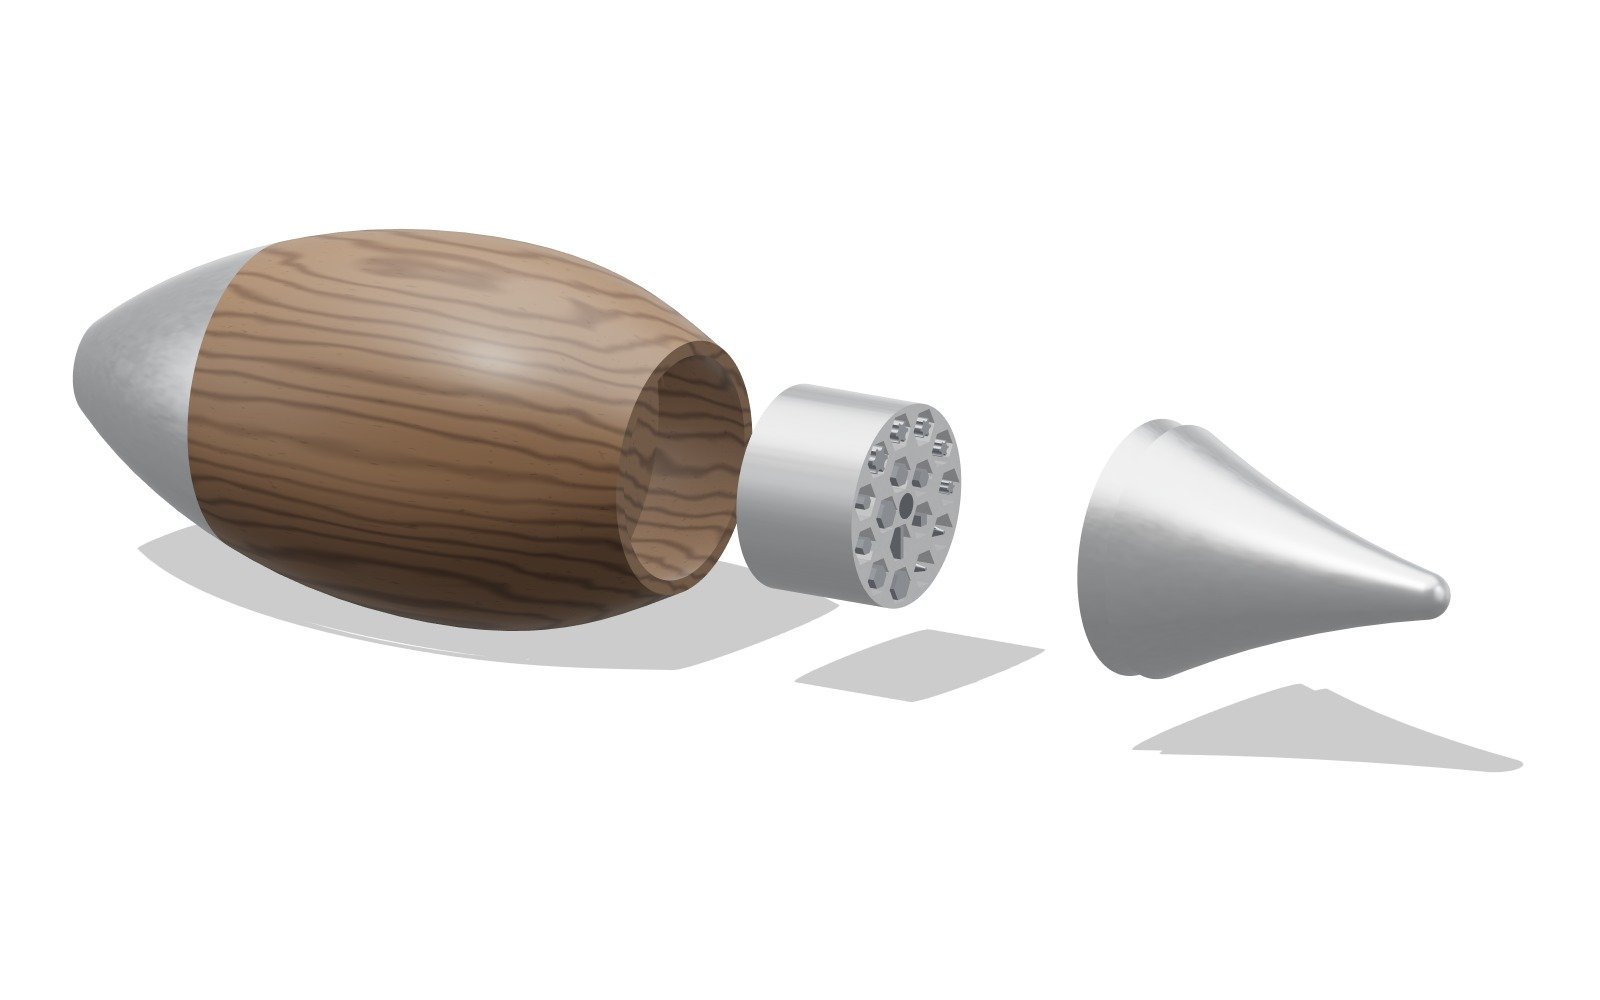
The same egg as a hand screwdriver. At 75 mm across, the handle turns like a doorknob and gives far more leverage than a slim grip. A steel 1/4" hex socket in the solid nose takes a 320 mm magnetic extension. Pull off the tail and an aluminium cartridge slides out of the walnut waist with sixteen bits: Torx T10 to T30, metric hex 2.5 to 5 mm, imperial hex 1/8, 5/32 and 3/16", Phillips 1 and 2, a 1/4" slot and a square #2. The three parts meet on the seams of the original model.
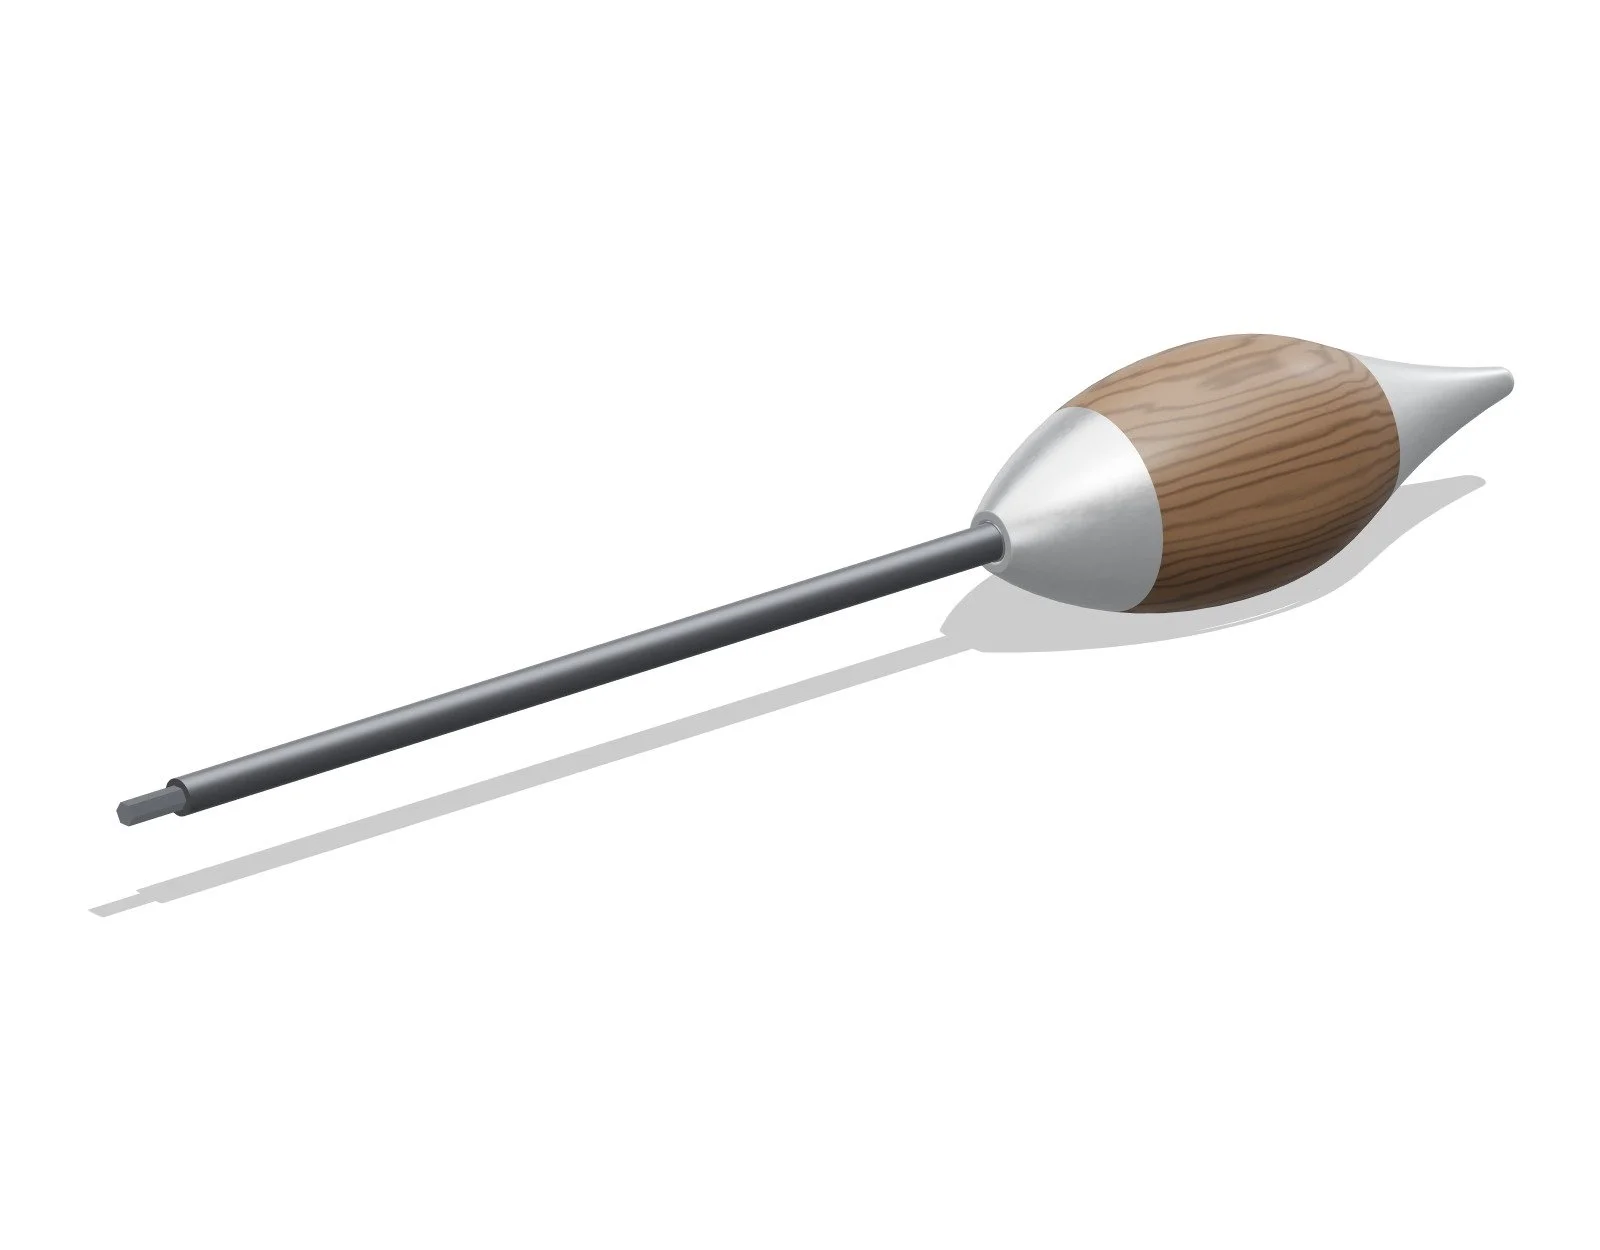
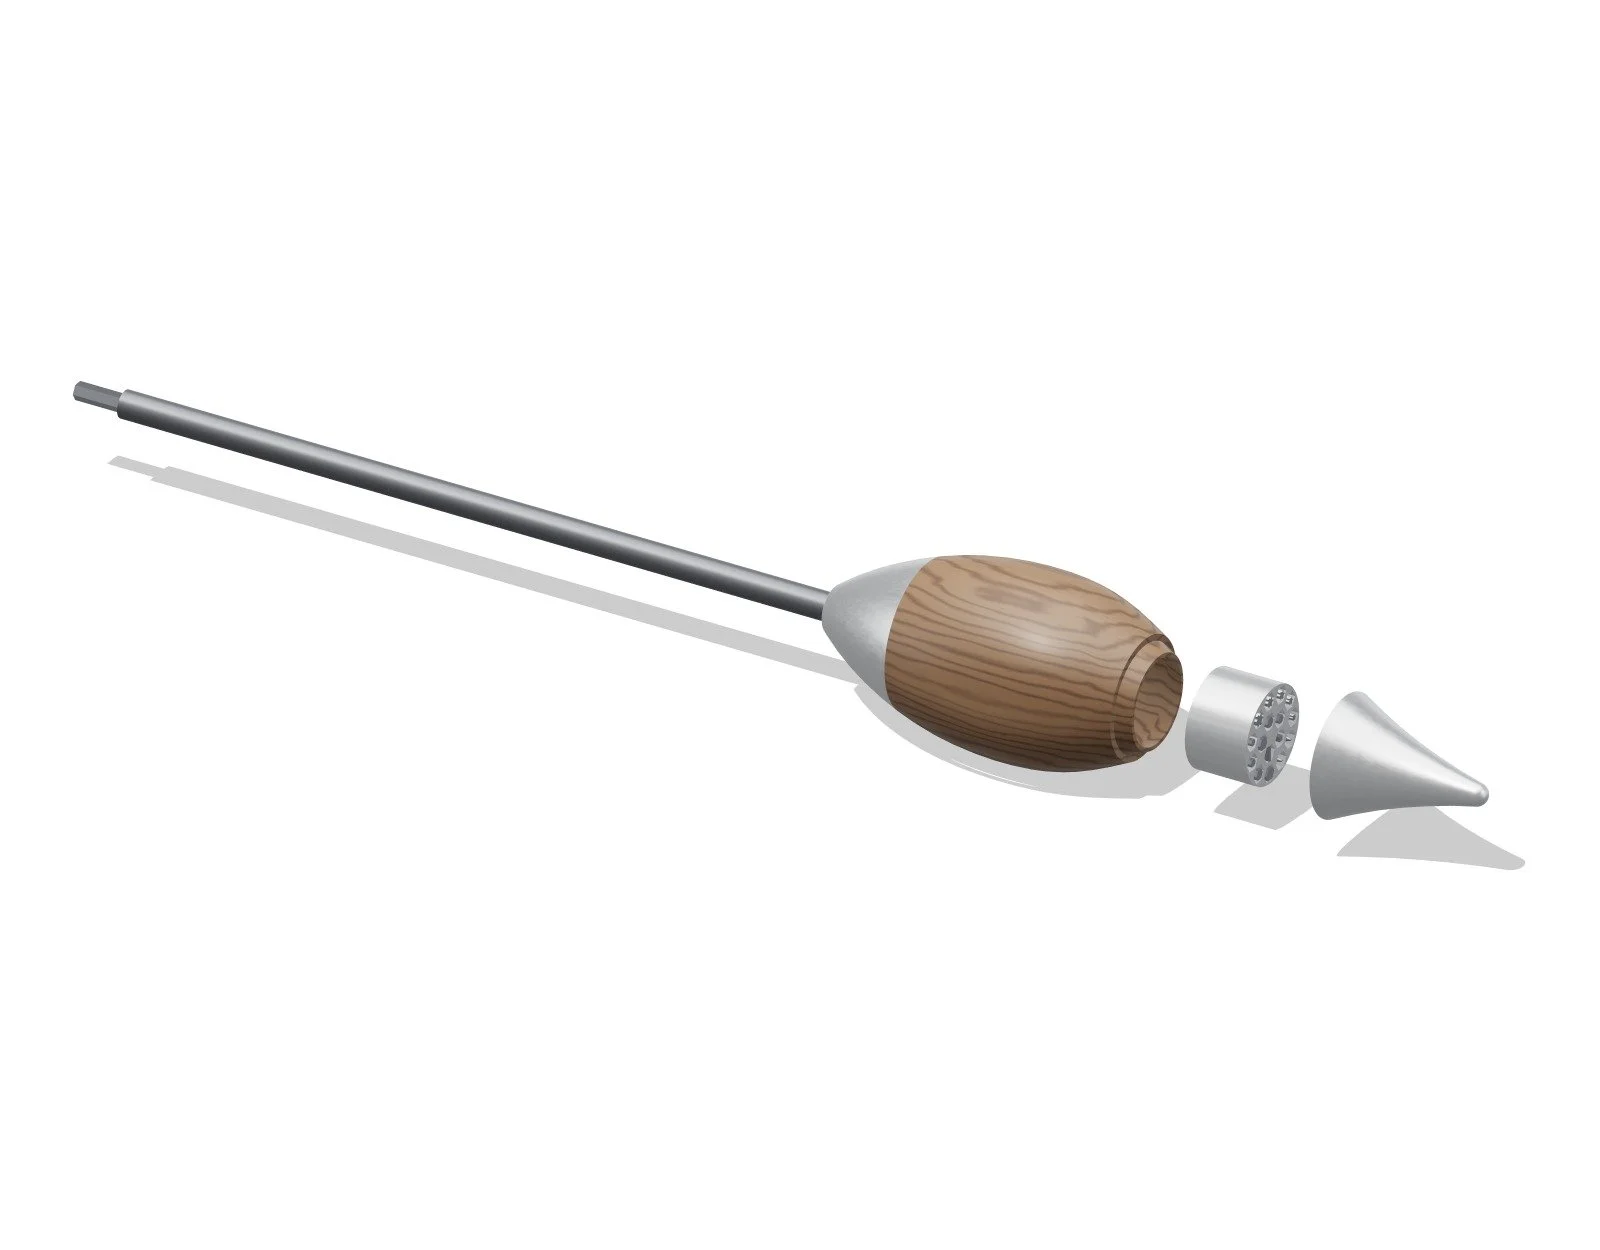
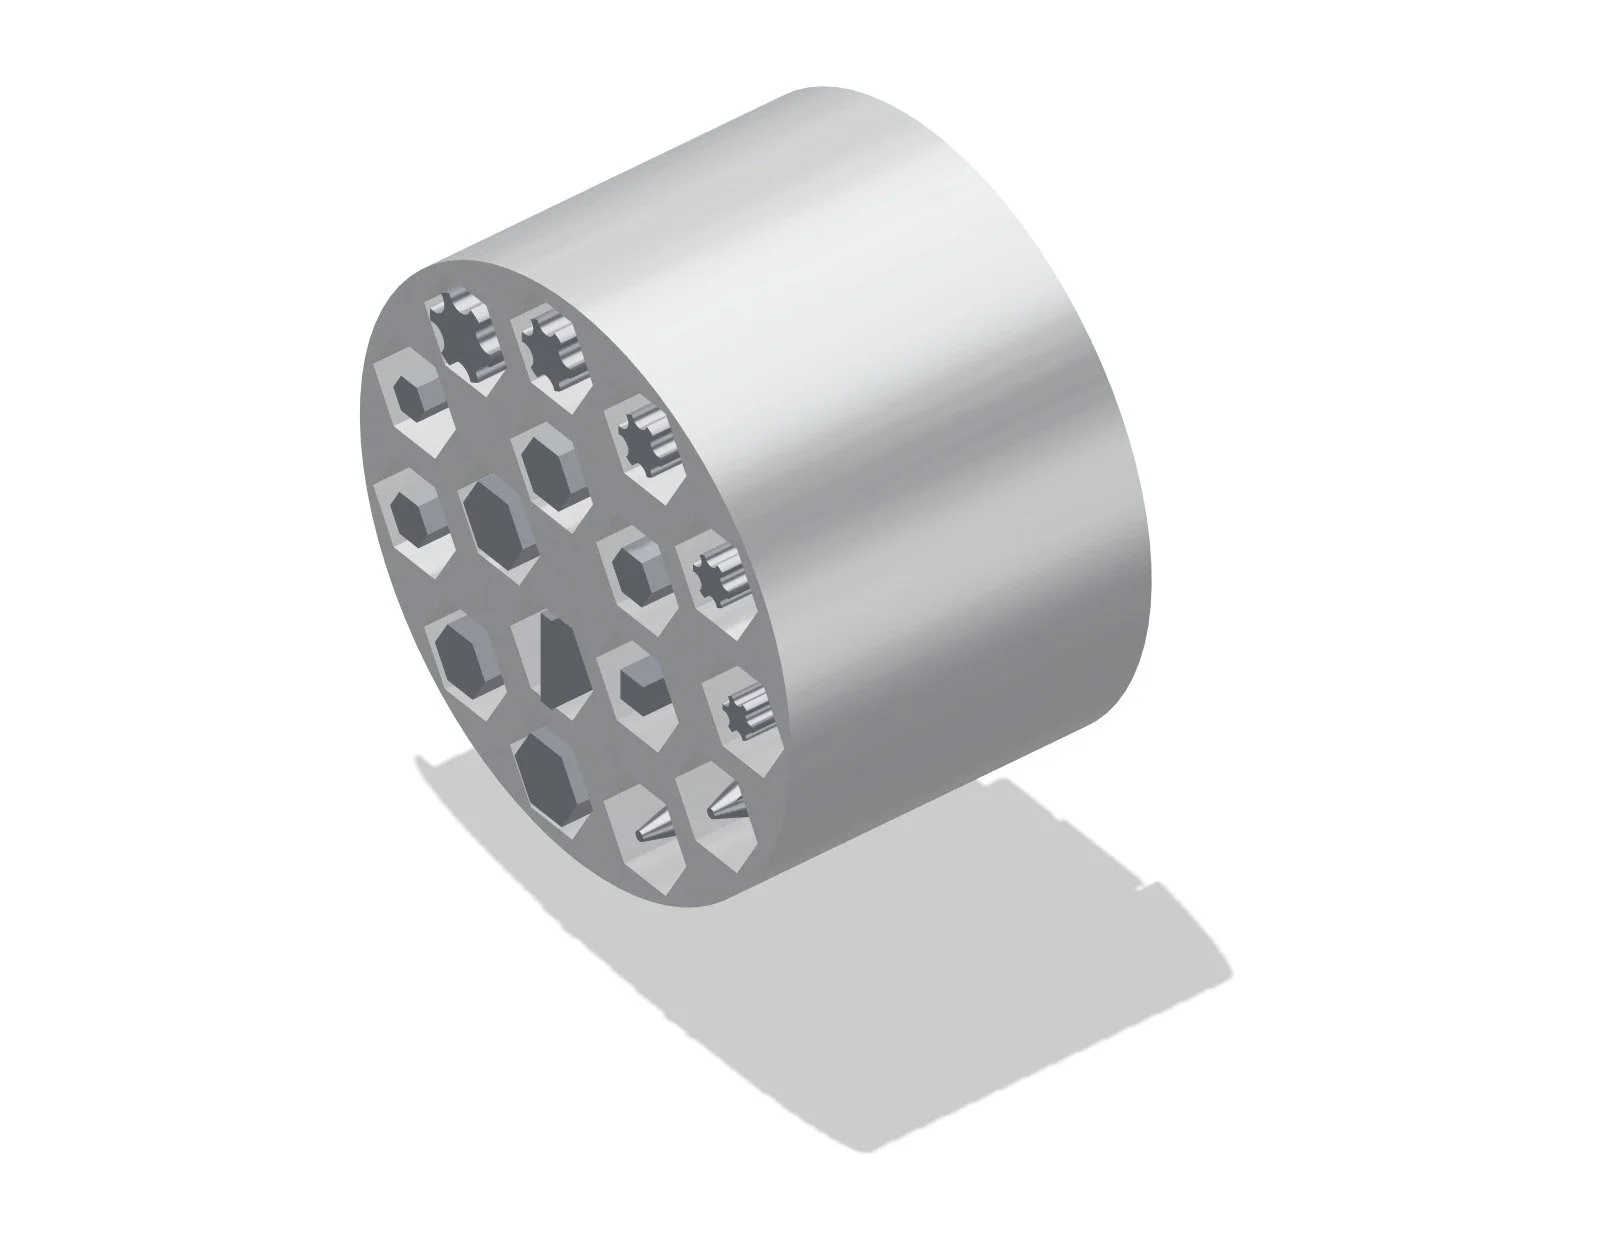
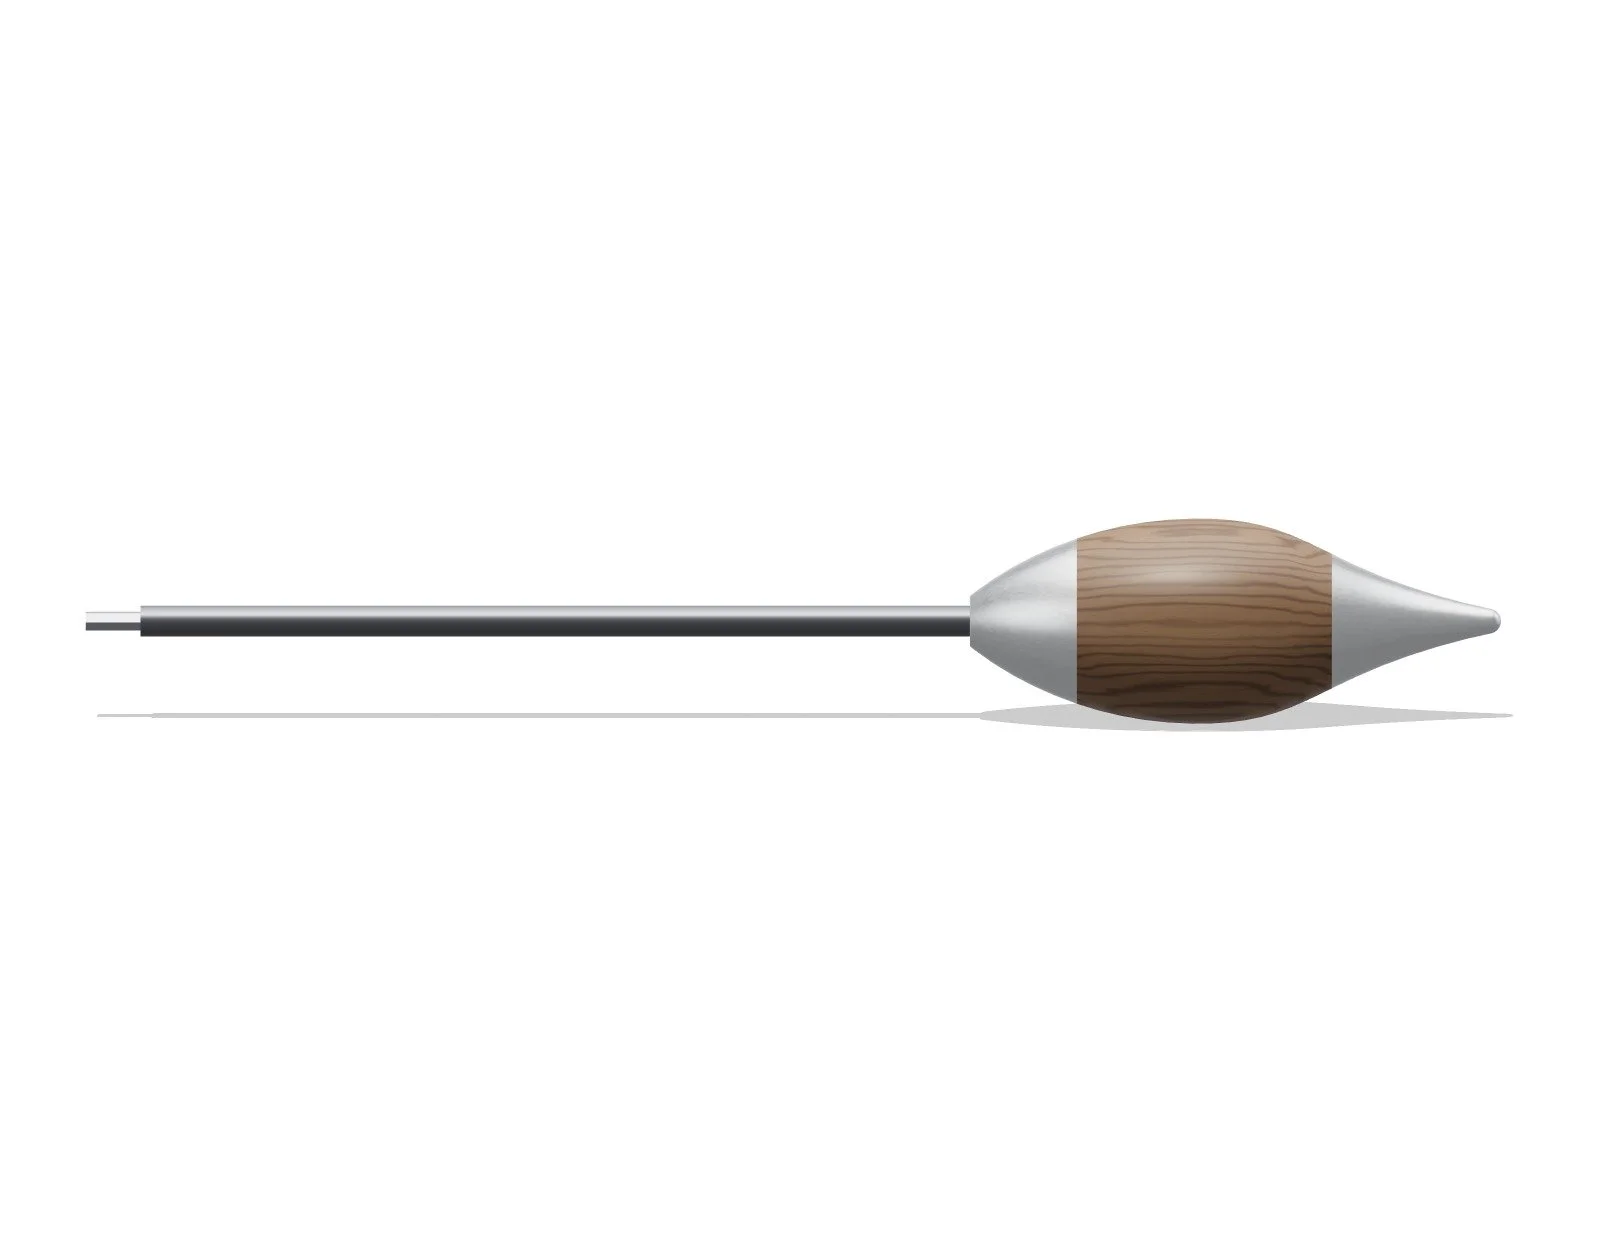
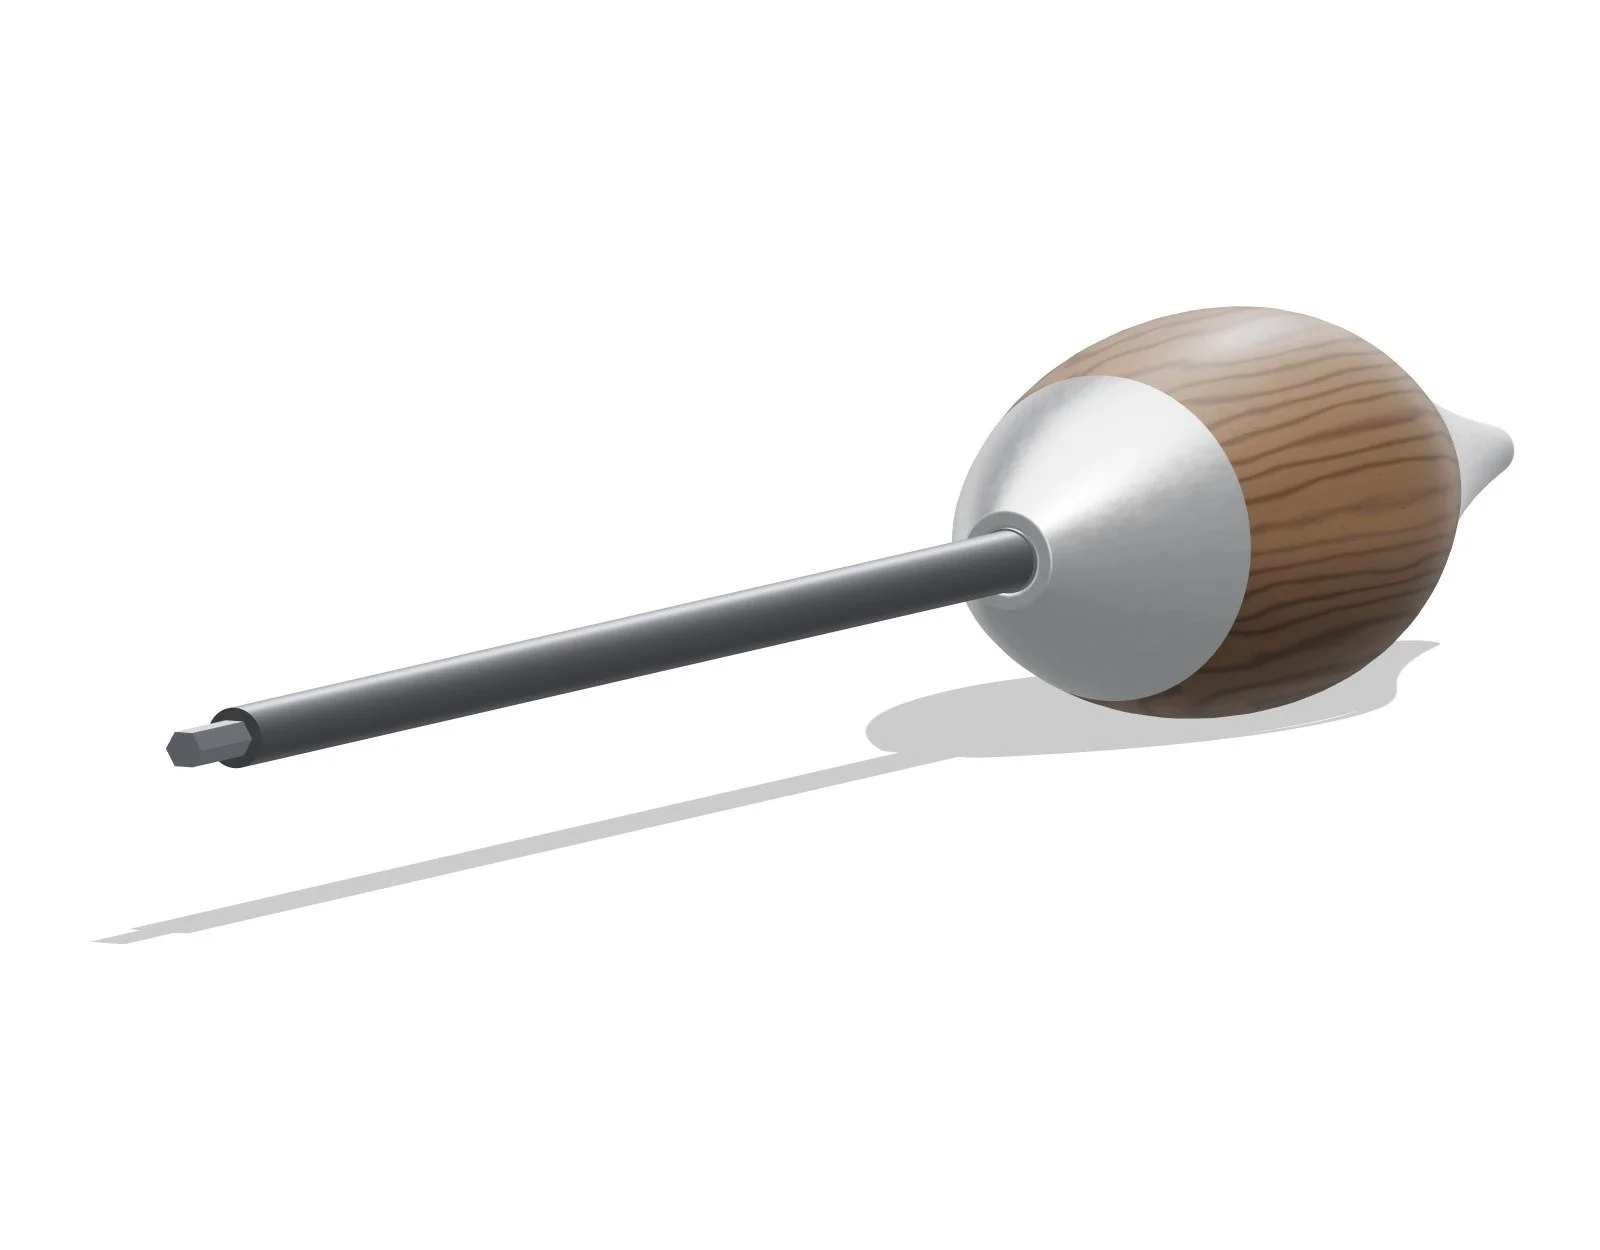
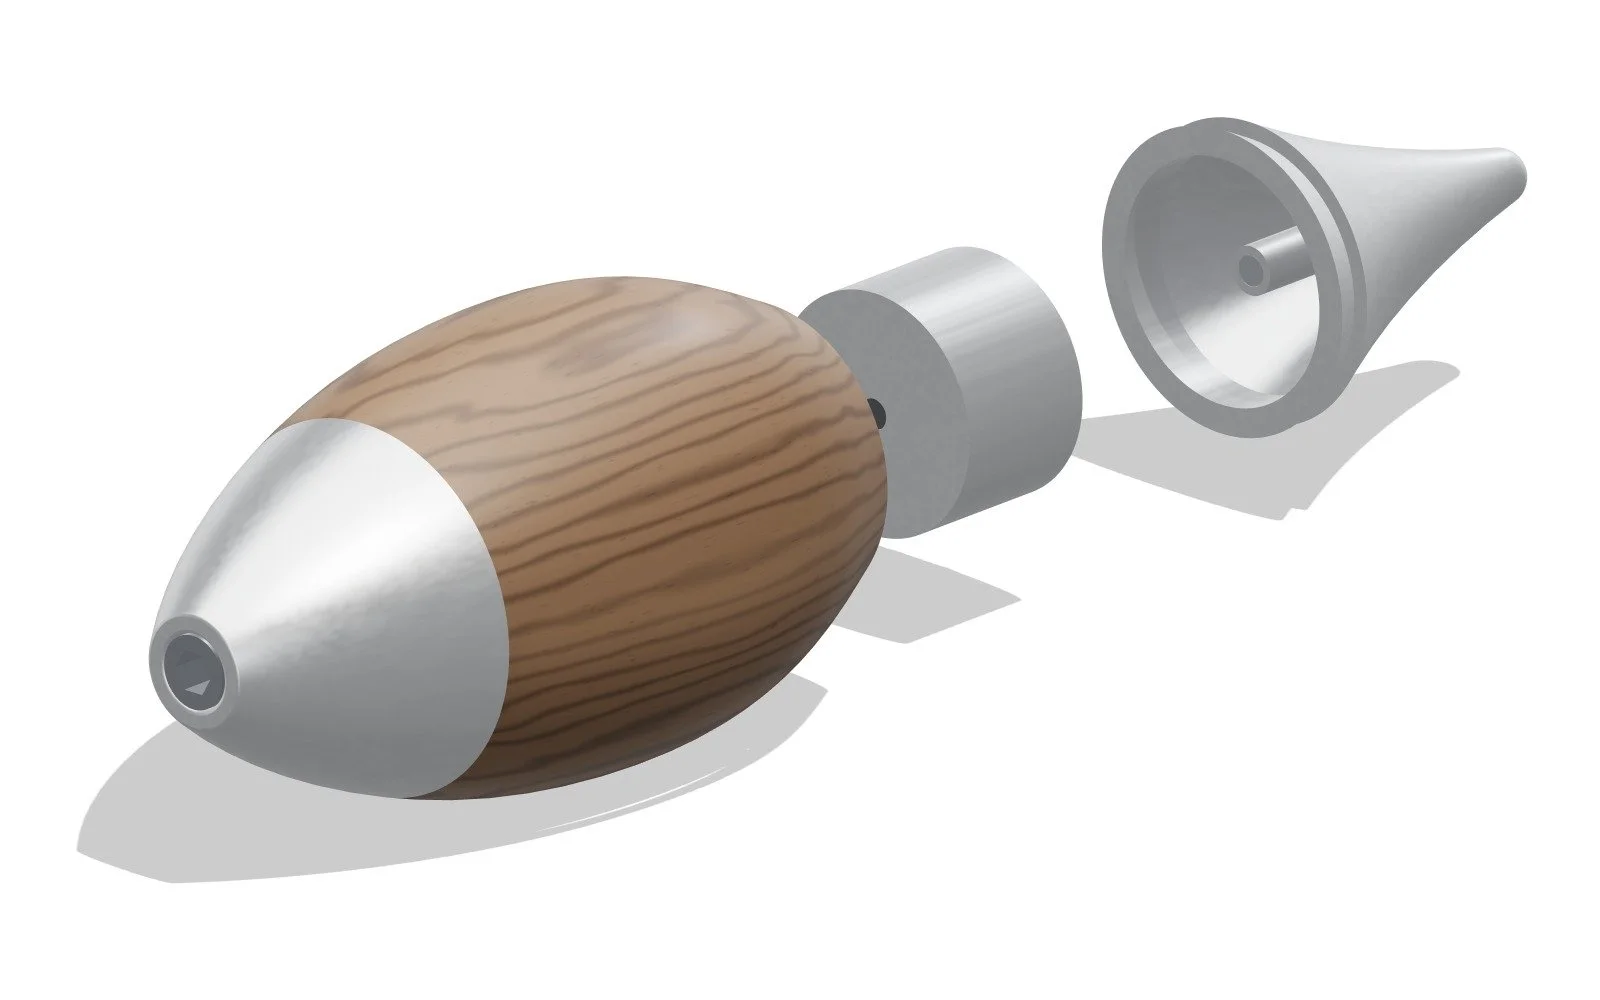
How it goes together. The nose and the walnut waist are glued for good, and the socket is pressed and bonded into the nose, so the torque goes straight from your hand to the bit. The tail is a cap with a spigot that slides into the open end of the waist. Down the middle of the tail runs a stem with a magnet in its end, and it meets a magnet in the back of the cartridge. A smaller magnet in the front of the cartridge meets one in the waist's bulkhead. Pull the tail and the cartridge comes out with it. Pull the two apart and the bits face you. Push the cartridge back in and it clicks home.
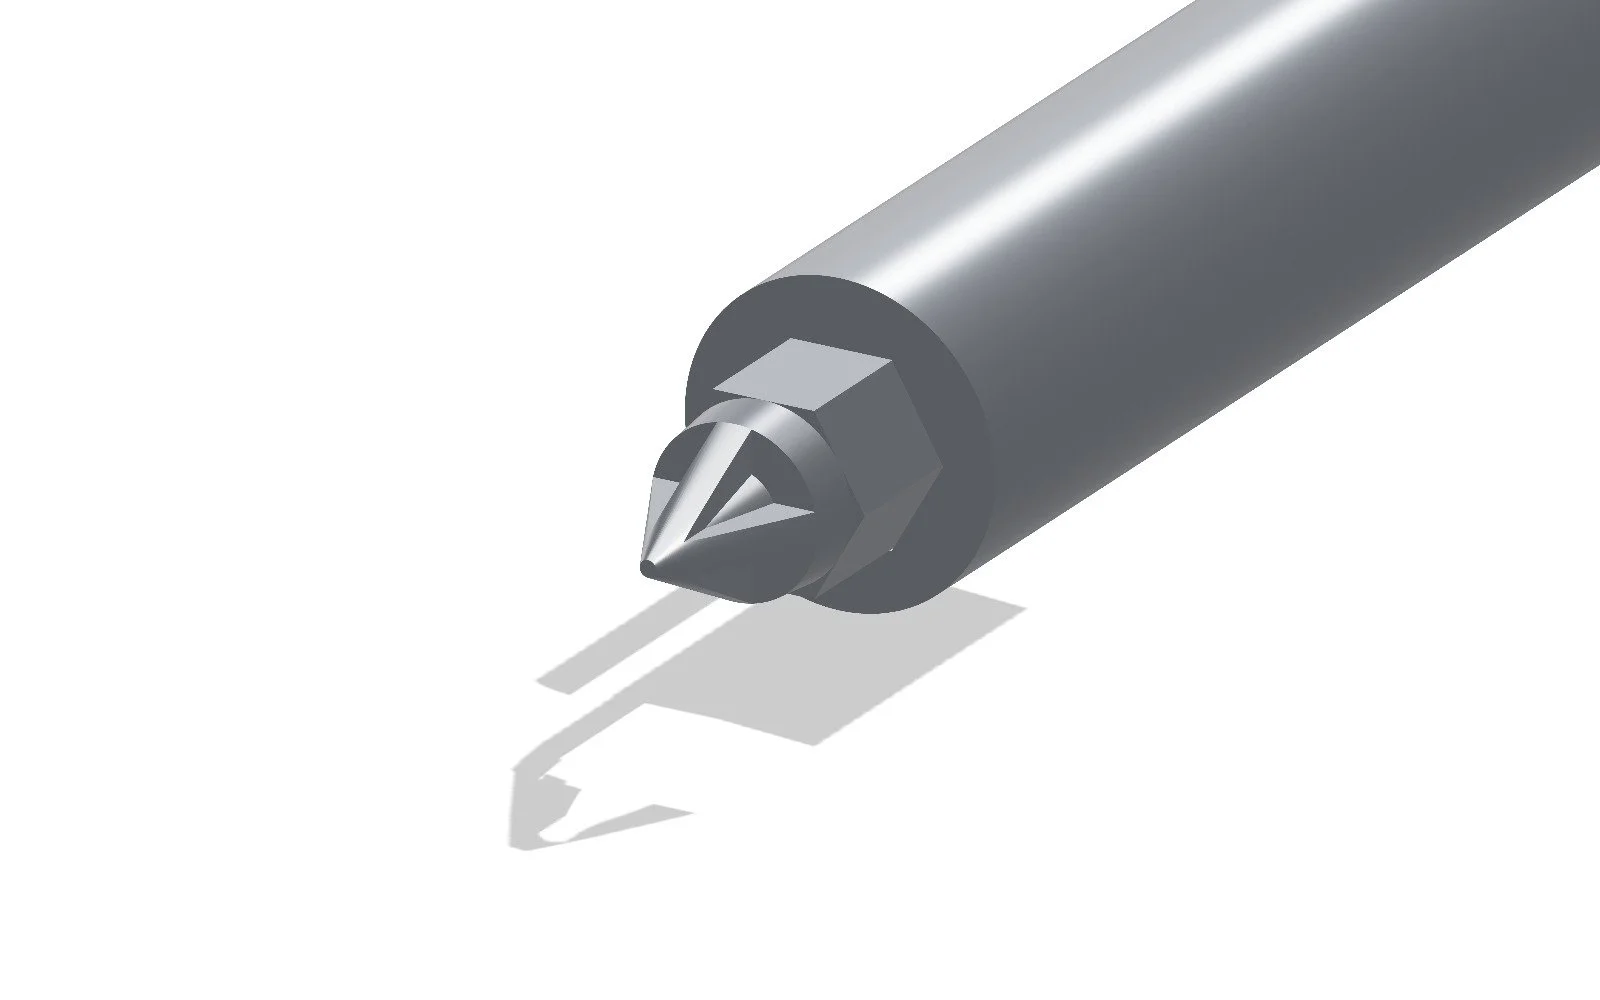
The extension ends in a real bit: a 25 mm PH2 insert bit on a 1/4" hex, held in the extension's magnetic sleeve.
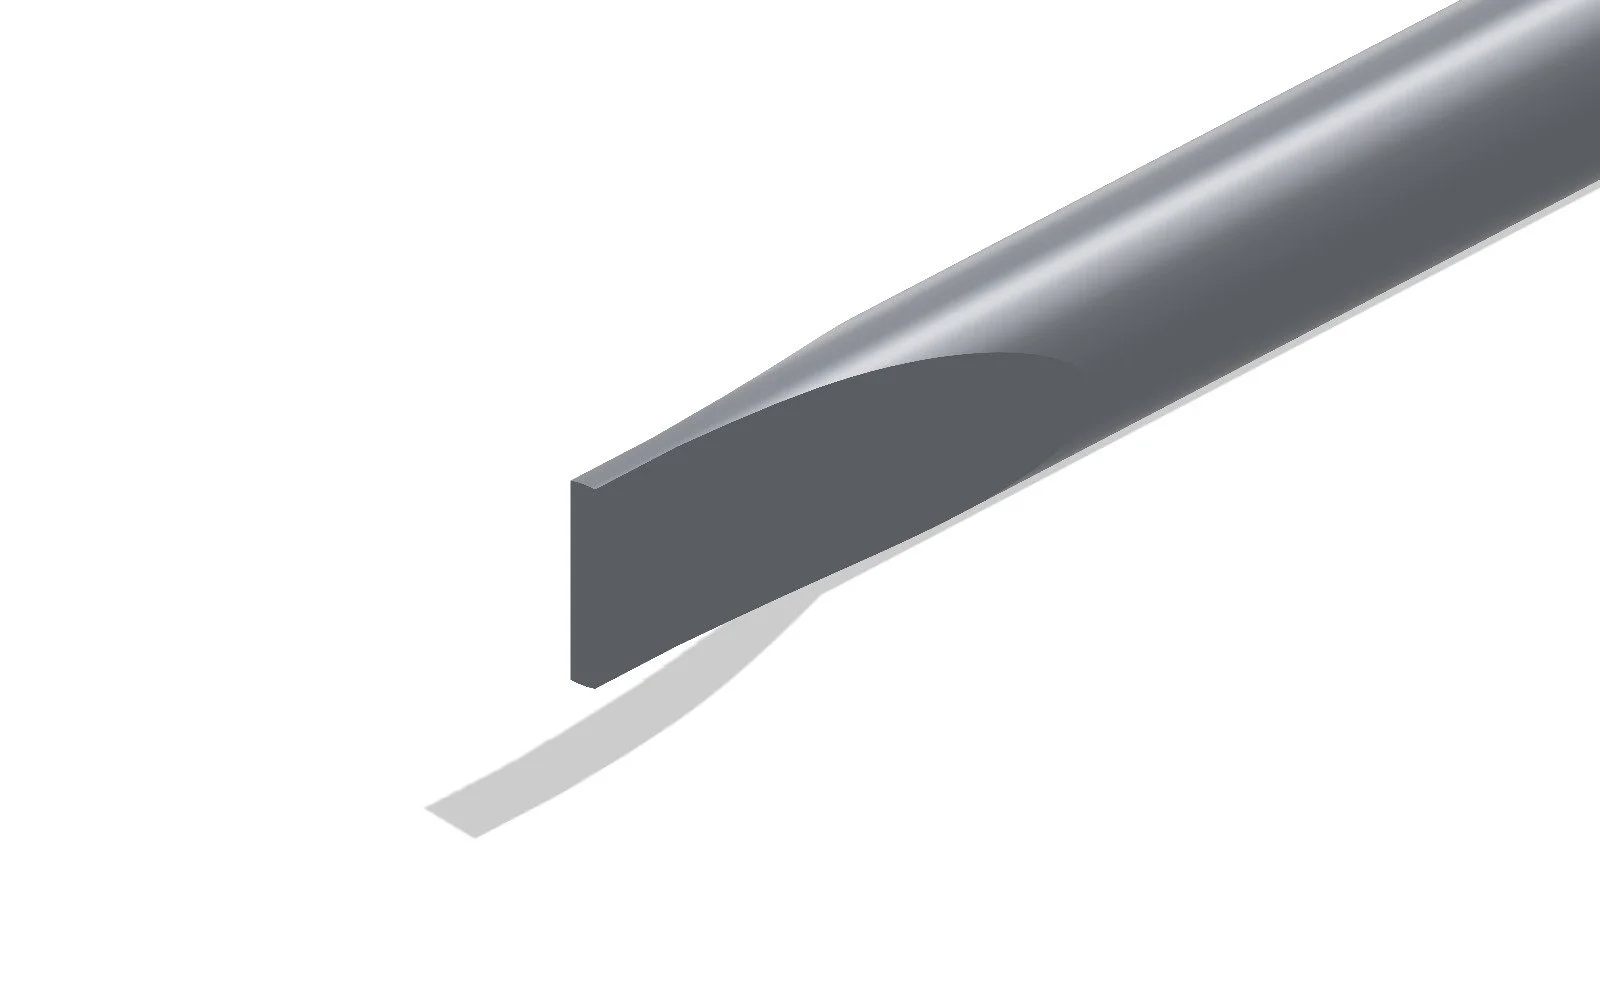
For cabinetmakers there is a version in one piece, sized like a 6-inch cabinet-pattern screwdriver: the same egg scaled to a 113 mm walnut handle, with a fixed 7 mm round blade 150 mm long, 263 mm overall. The tip is hollow ground on both faces down to a parallel tip 1 mm thick and the full 7 mm wide, so it sits square in a slotted screw without marking the wood around it. The mark is inlaid in brass in the side of the handle.
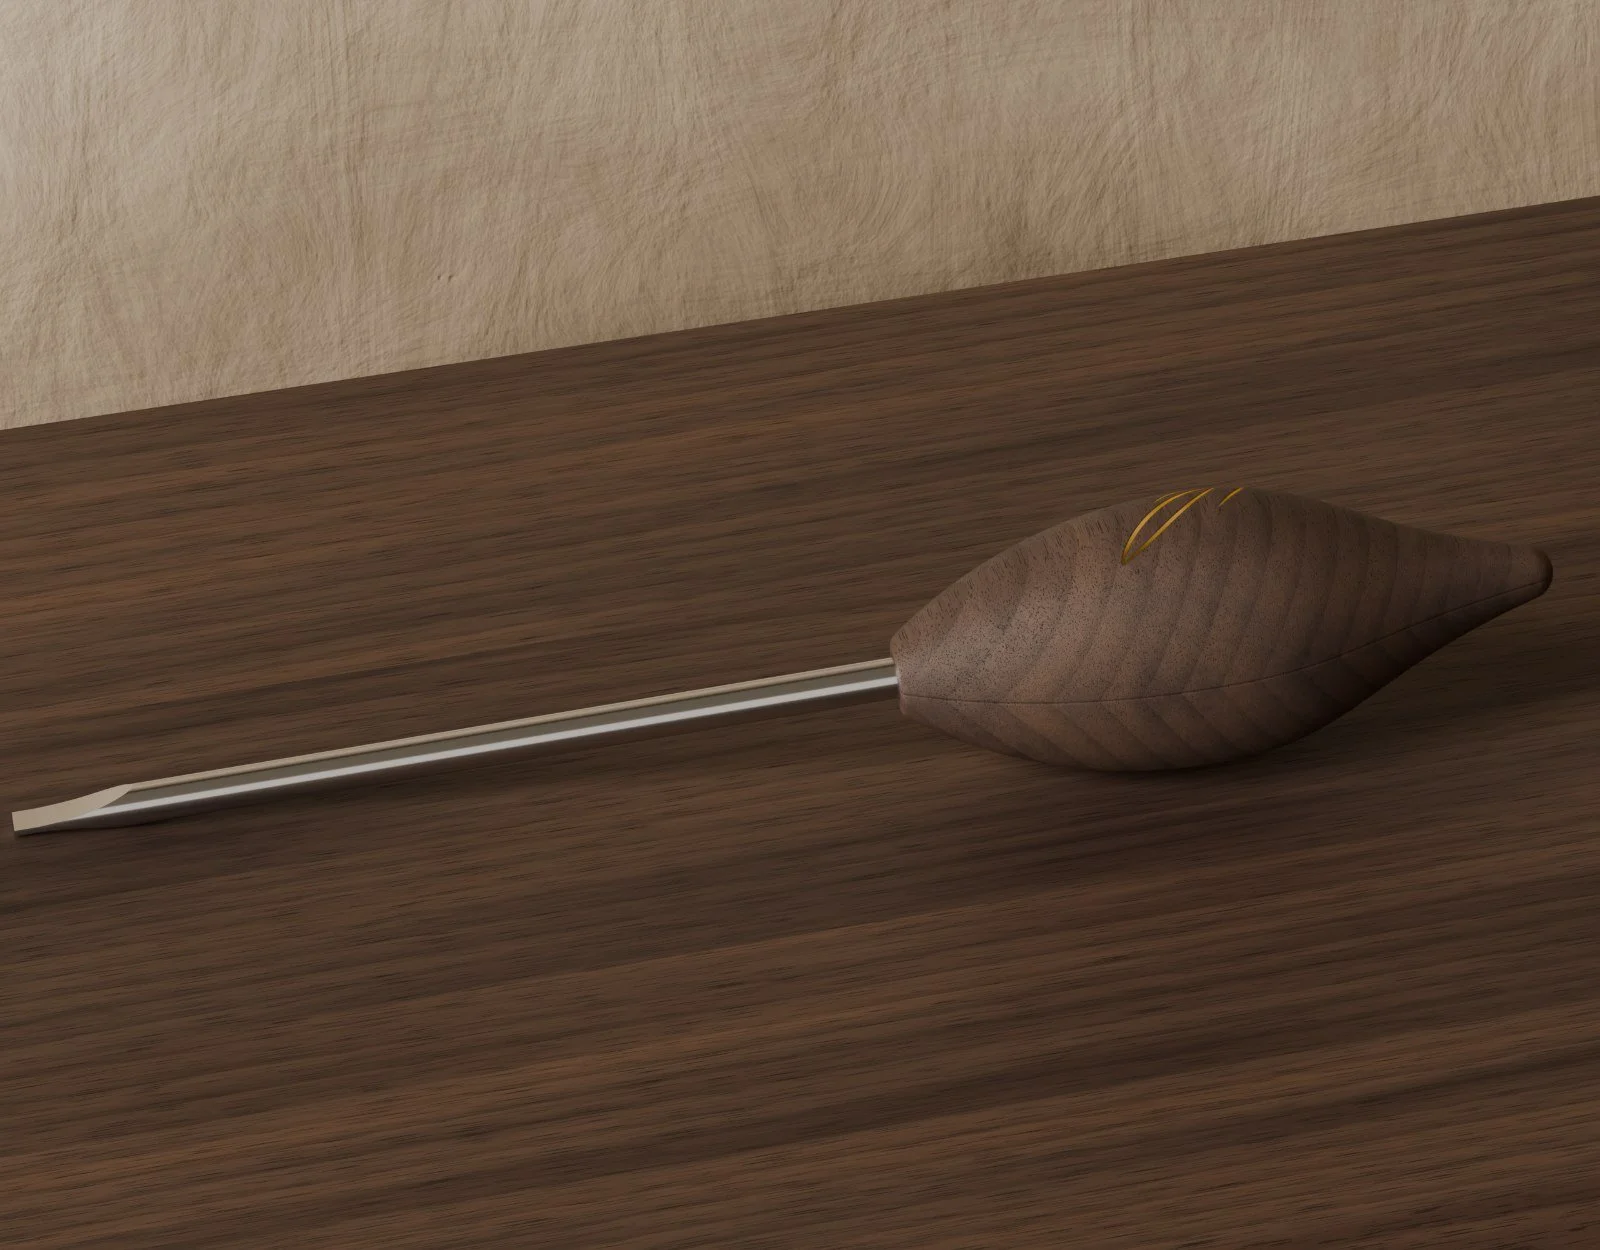
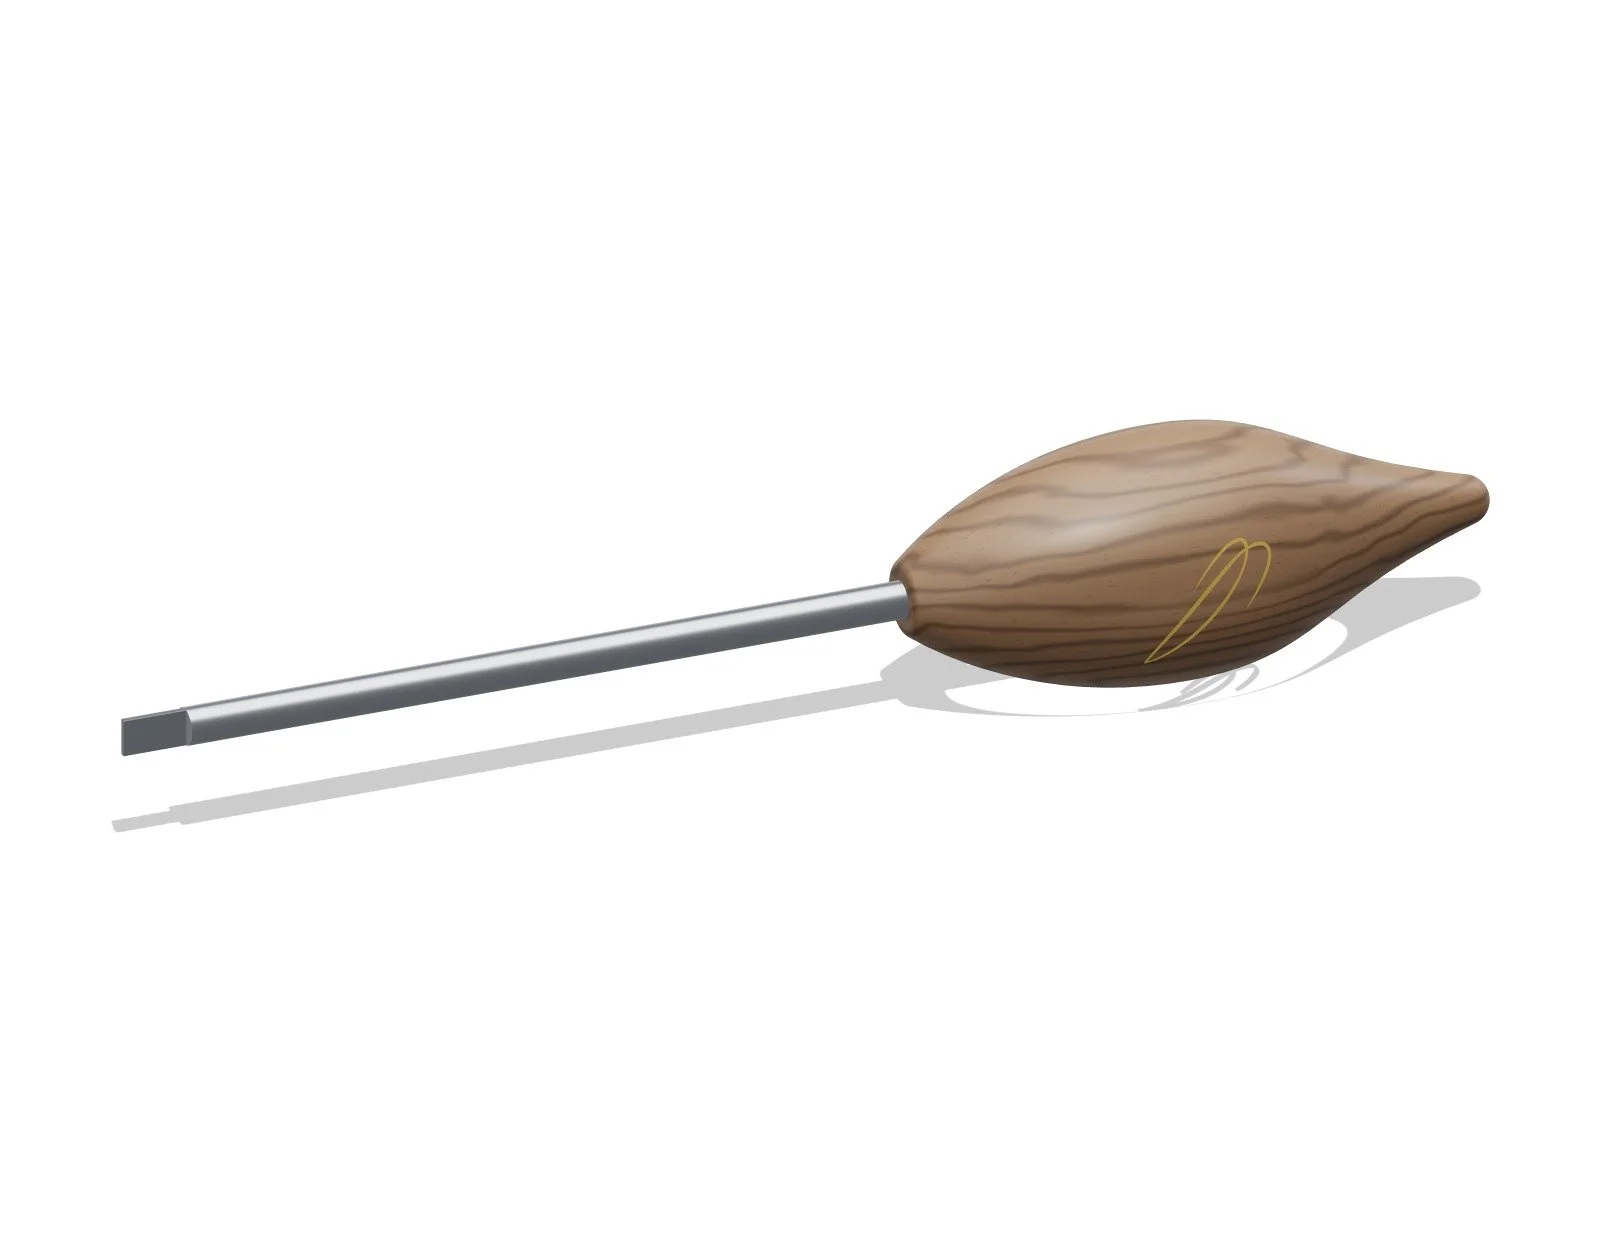
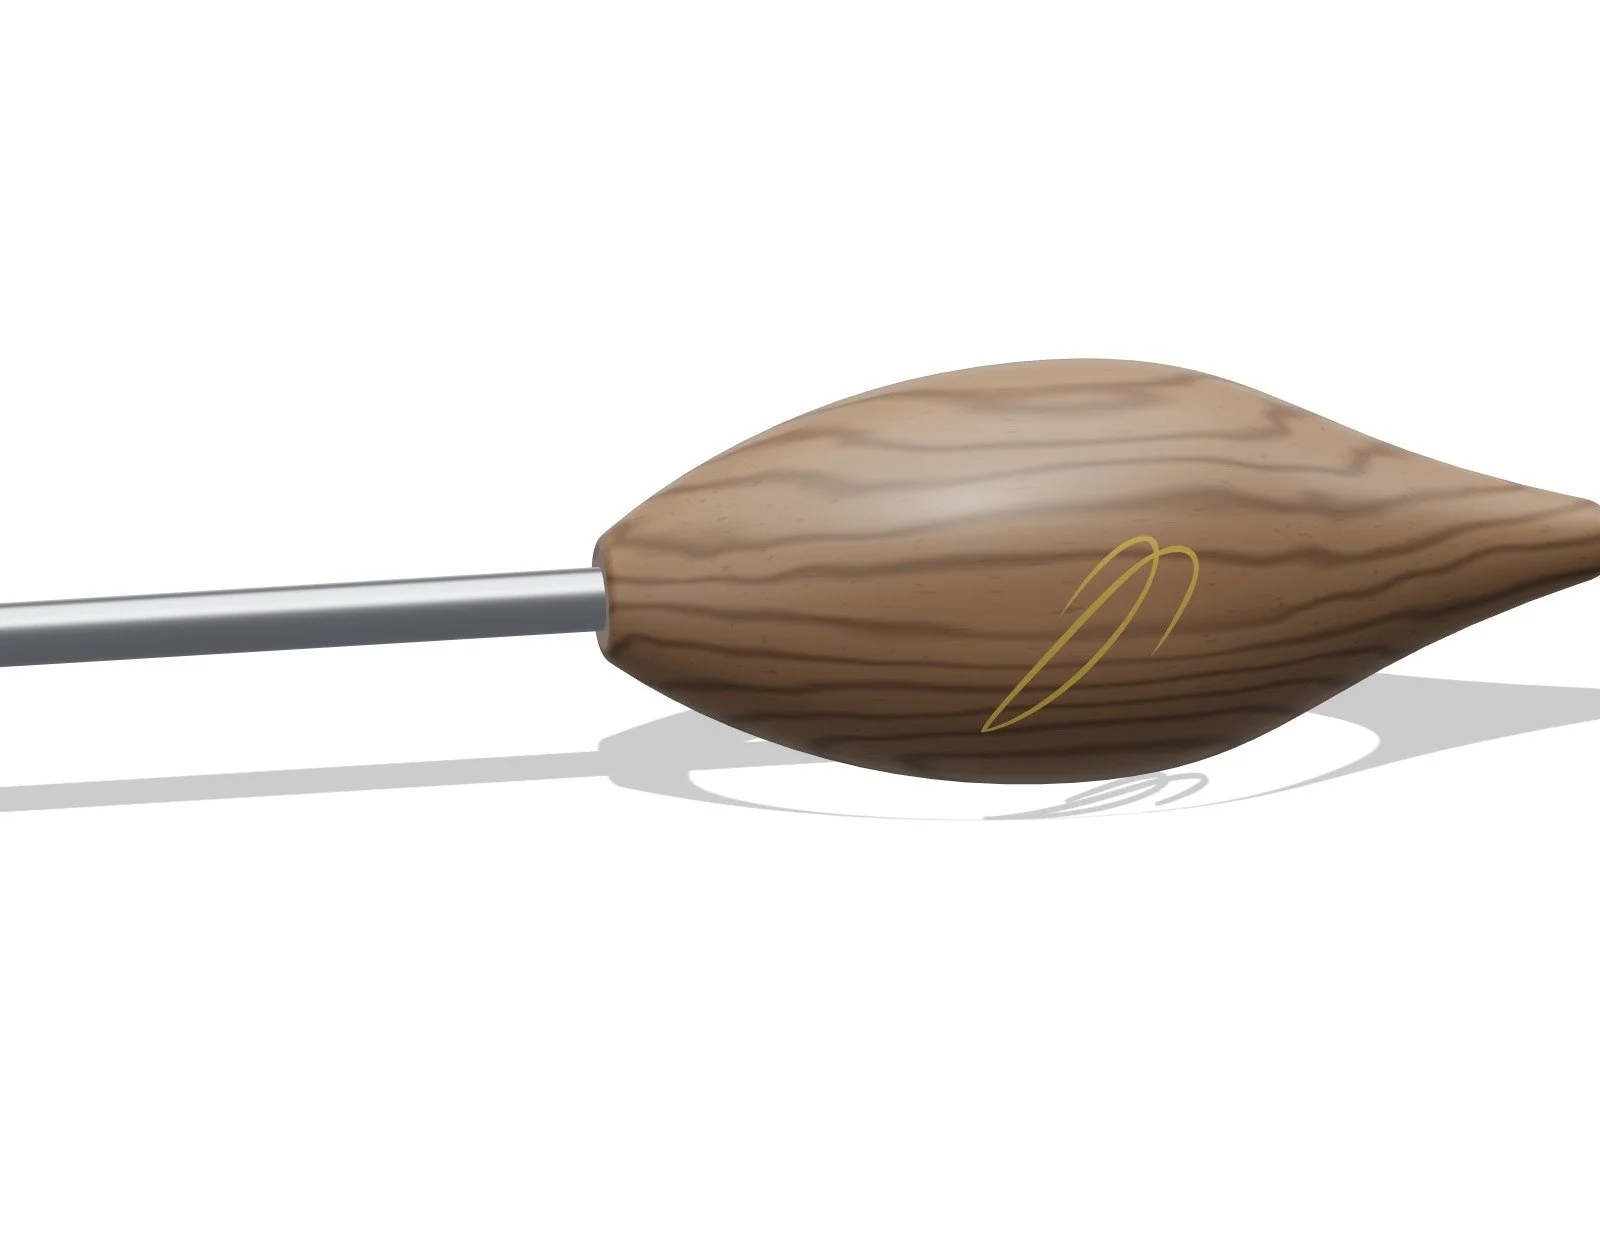
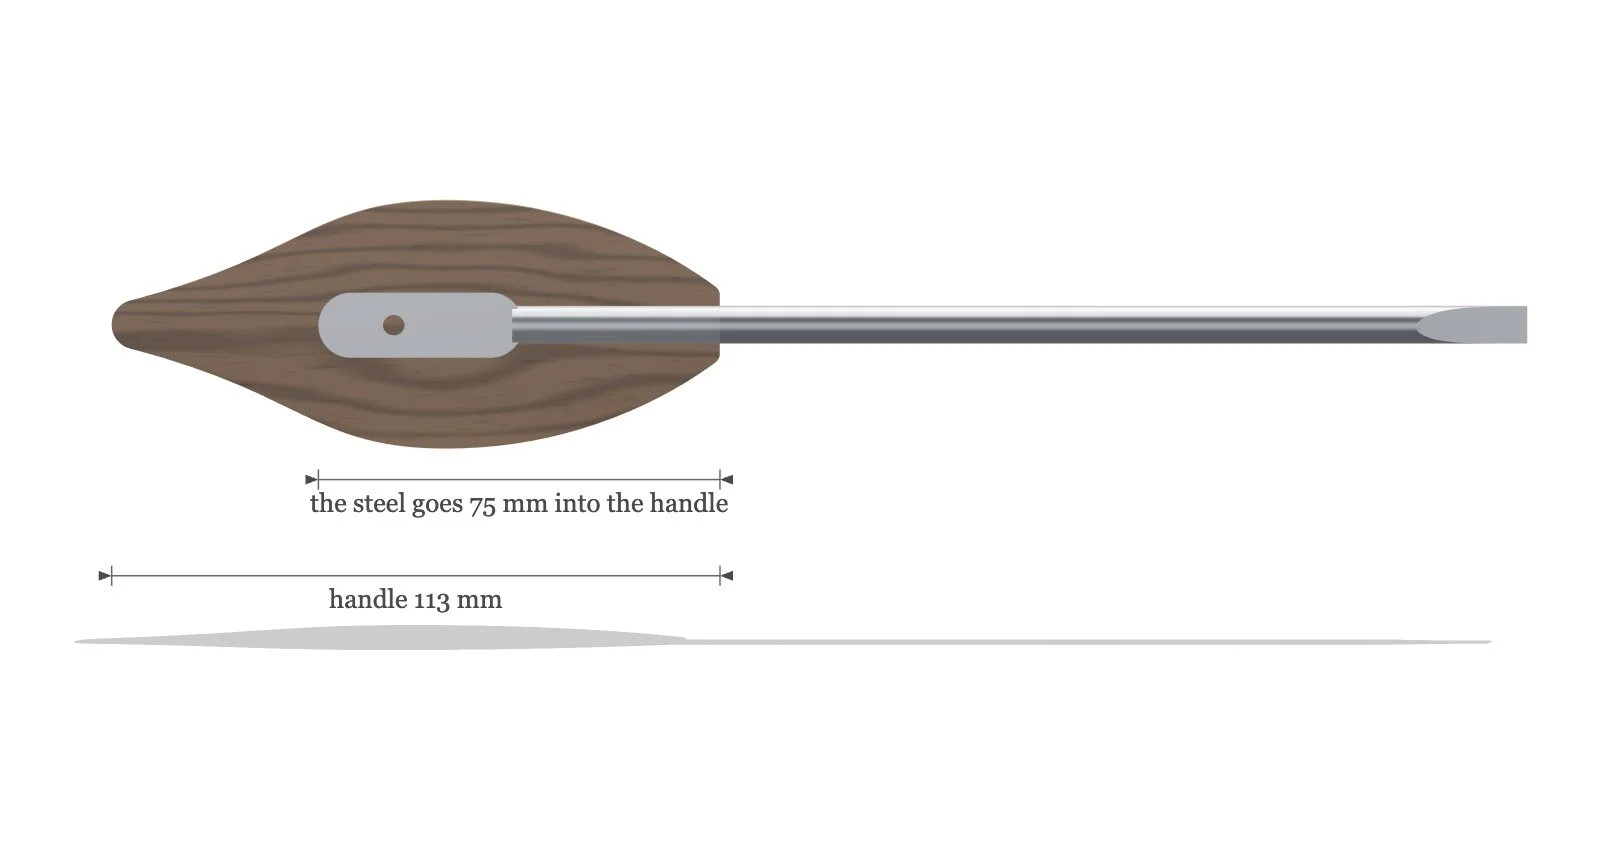
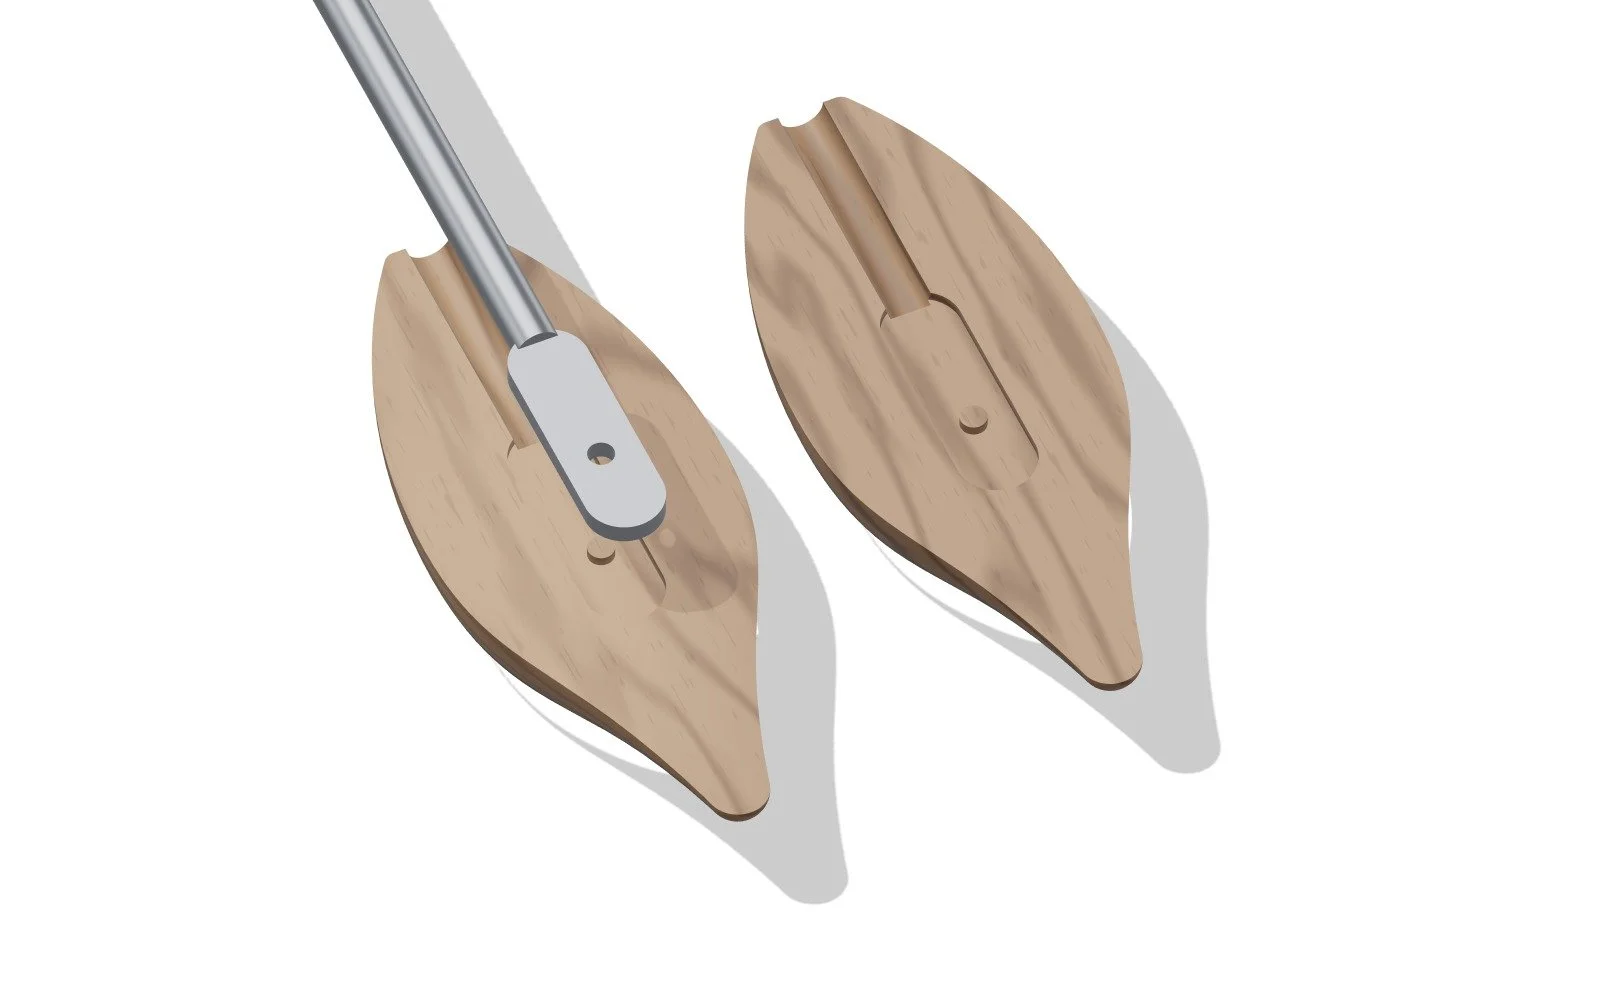
The steel goes 75 mm into the handle, two-thirds of its length. The last 38 mm of the blade is forged flat, 12 by 3.2 mm, so it can't turn in the wood, and it has a 4 mm hole that the epoxy keys through. The handle is two bookmatched halves cut from one walnut board. Each half has half of the blade's channel routed into it. The blade is set in epoxy, the halves are glued and clamped, and then the egg is turned. The glue line runs along the top and bottom of the handle, and the brass mark sits in the middle of one half.
Design process
01The reference. Raymond Loewy's 1933 pencil sharpener: one egg of revolution drawn out into a long tail, standing on a round base. The first models were sketches in solid form of a drill and a screwdriver on that egg.
02A fair surface. The curve of the egg had small lumps in it. I measured the original at every ring of its surface, 1 mm apart, and fitted one smooth curve to it. It stays within 0.27 mm of the original and has a single inflection, where the body turns into the tail.
03One line. The back of the grip follows a curve drawn over the first render: one sweep from the tail, close behind the hand, out to the back of the foot. Every horizontal section of the grip is a teardrop, and it turns into a squircle as it reaches the foot.
04Safer ends. Both tails used to end in a needle point. Now each one rolls over into a dome 9 mm across, tangent to the curve, so the line still reads as a point from across the room but is safe to hold and to set down.
05Real parts. The drill takes the drivetrain of a Makita DF032D: 12V, brushless, two speeds, a 20-step clutch and a 1/4" hex locking chuck. The battery in the model is a published CAD model of the real Makita 12V CXT pack, so the foot is built round the actual part. The chuck, clutch ring, gearbox, motor, switch, controller and work light follow Makita's official parts breakdown and carry its part numbers; their sizes stay estimates until the donor is taken apart and measured. Each shell is one parametric feature in Onshape, and every time the shape changes it checks every part against the walls and reports any clash.
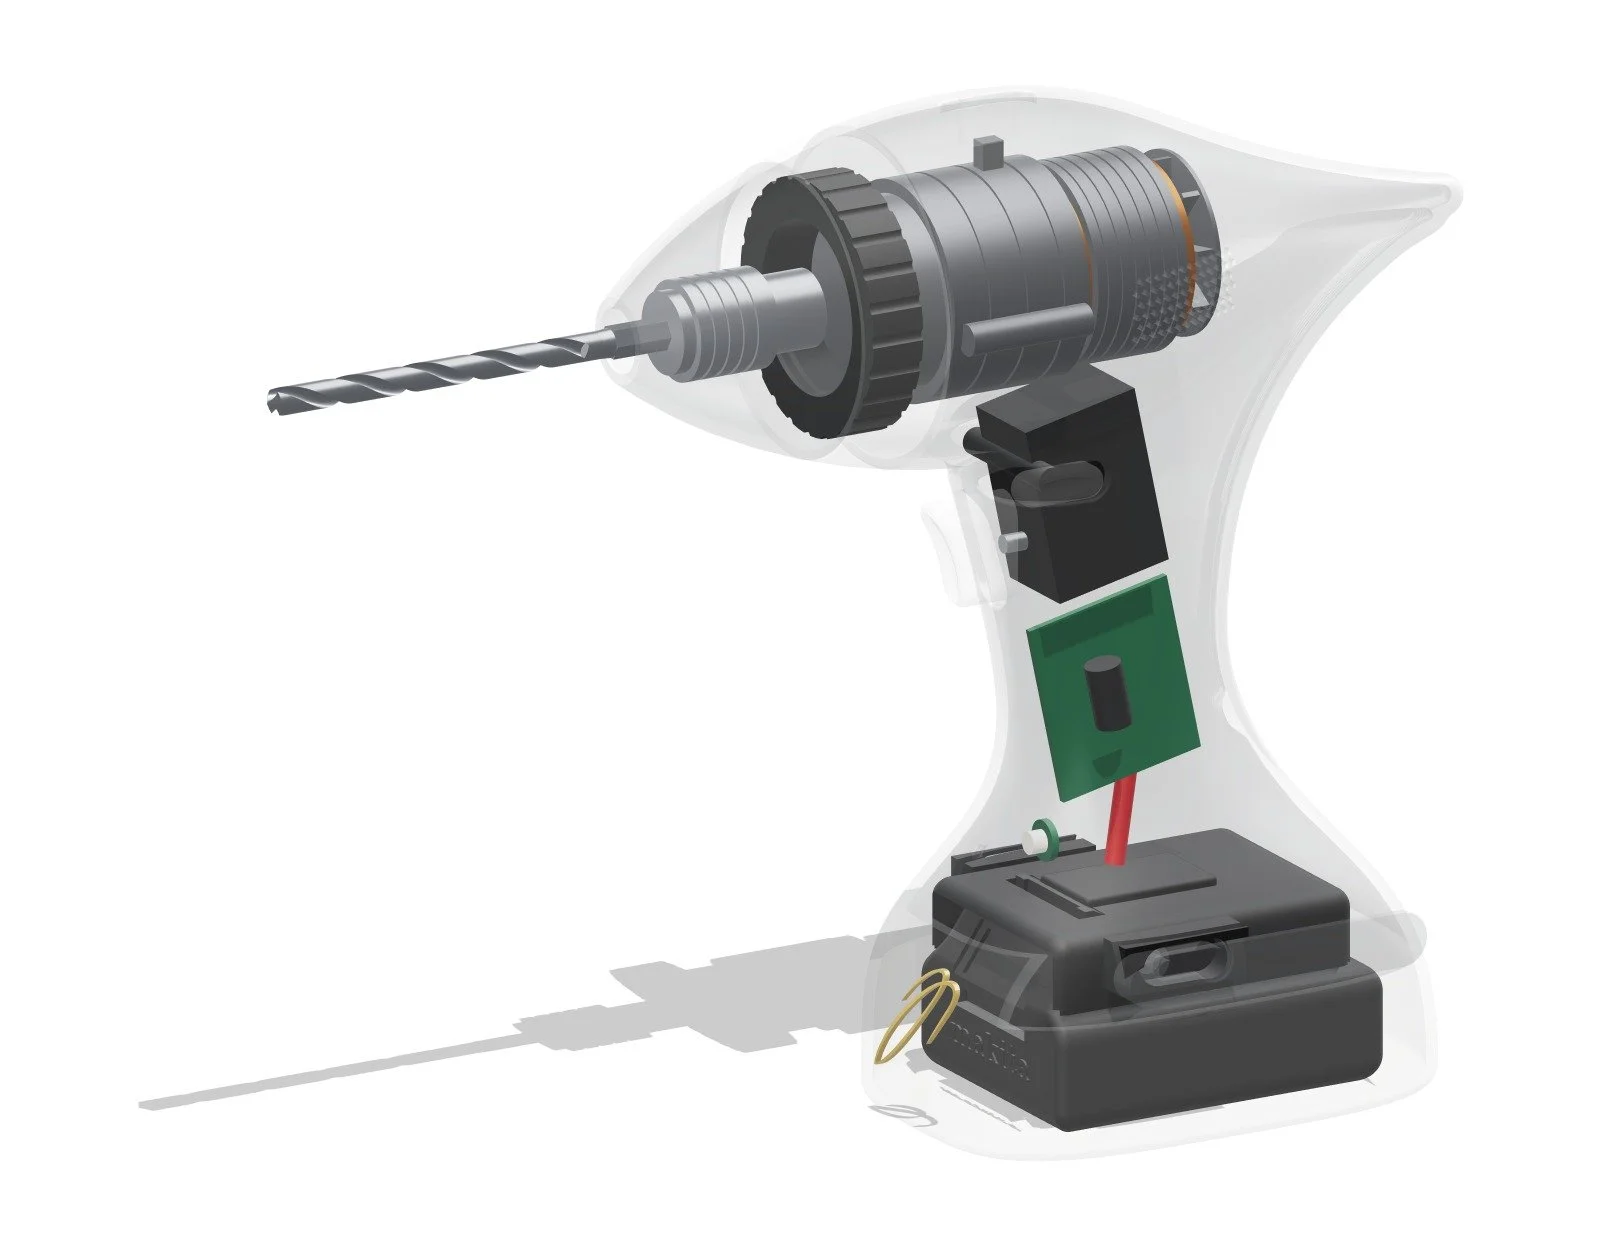
06No black. The first shells were black and read as cheap. They became brushed aluminium, with oiled walnut for the parts your hand works: the clutch band, the battery shoe, the screwdriver's waist and, later, the controls.
07Walnut controls. The trigger, the direction buttons and the speed slider moved from aluminium to walnut, and the grain was drawn tighter so it holds up at the size of a button.
08A clip that comes off. A brushed steel belt clip with a keyhole key: drop it in, slide it forward, and a magnet behind the wall pulls it home. There is a keyhole on both sides.
09Bits in the handle. The screwdriver's waist holds an aluminium cartridge of sixteen bits: Torx, metric and imperial hex, Phillips, slotted and square.
10One piece for cabinetmakers. A version turned from solid walnut with a fixed blade. Cabinet-pattern screwdrivers are sold in blade lengths from 3 to 10 inches, about 7 to 17 inches overall. This one is sized as a 6-inch, the middle of that range: a 150 mm blade and, once the tail is rounded over, a 113 mm handle, 263 mm overall.
11Finger dishes. Every walnut control has a shallow oval dish where the finger lands: 1.2 mm deep in the trigger, 0.7 mm in the direction buttons and 0.55 mm in the speed slider.
12The mark in brass. Once the logo was redrawn so its strokes meet at one intersection, it went into the tools as a brass inlay, flush with the wood and 1.2 mm deep: 26 mm tall in the front of the drill's foot, 22 mm on the side of the cabinetmaker's handle.
13A sleeker back. The top of the back curve was redrawn. It now leaves the tip of the tail tangentially and runs down to the waist as a single circular arc, 81.6 mm in radius, so there is no corner where the tail meets the grip and no bulge below it.
14A curved trigger. The trigger stopped being a straight pill. Its front is now one concave arc, 38 mm in radius, a rest for the finger that sweeps back as it goes down. It stays 9 mm proud of the grip at the bottom, so it never crowds the hand.
15A real bit. The plain rod in the chuck became an actual bit: a 6 mm HSS twist drill on a 1/4" hex shank with its detent groove, two flutes at a 30 degree helix and a 118 degree point.
16Magnets, not threads. I drew both ways of holding the tail on. A thread works, but the spigot sits on the taper of the egg, so it would need a tapered thread, and a fine thread in a printed or turned part strips easily. It also takes four turns to open. Magnets find their own place, click shut and come apart with one pull. Two pairs of N52 discs, 5 mm across, do it: one pair between the tail and the cartridge, a weaker pair between the cartridge and the waist, so the cartridge always comes out with the tail. The thread version stays here as the one I didn't choose.
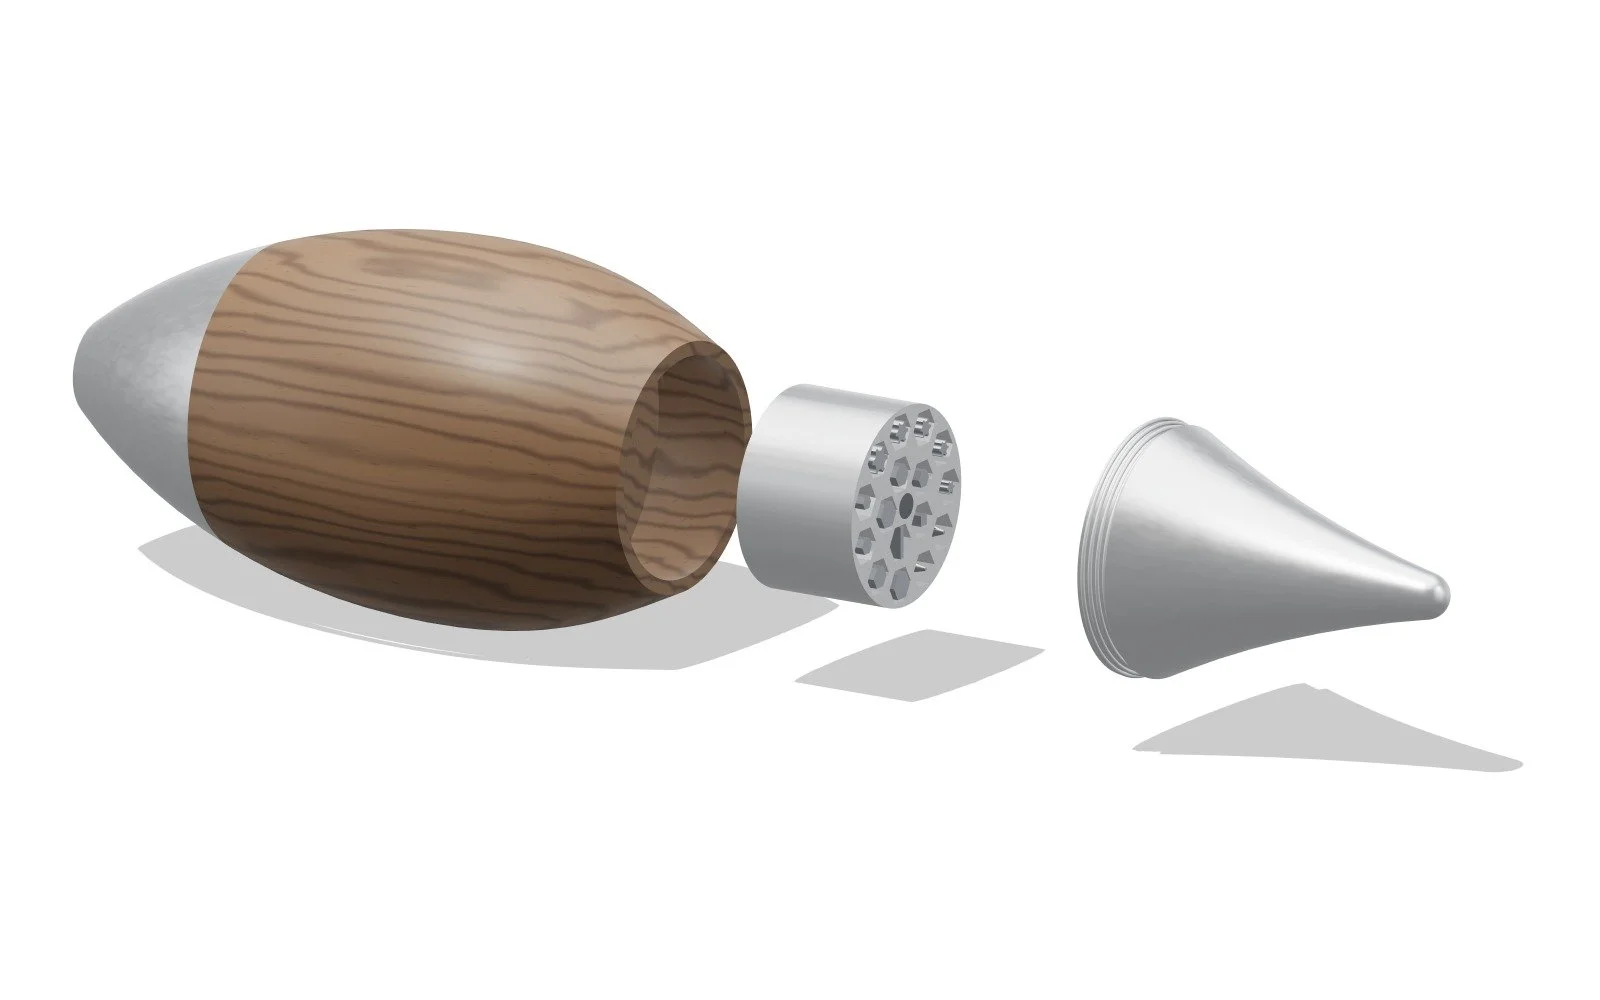
17The spigot moves to the tail. Drawing the joints showed a real fault. The spigot had been on the waist, and because it follows the egg's taper it narrowed to 35 mm, which would have trapped the 39.6 mm cartridge inside. The spigot is now on the tail and bored to 40.2 mm, so the cartridge slides straight out.
18Real tips. The plain hex at the end of the extension became a PH2 insert bit, and the cabinetmaker's blade got a proper hollow-ground parallel tip.
19Blade and glue-up. The blade now goes two-thirds of the way into the handle and ends in a flat tang. The handle is made as two bookmatched halves glued around it. Measuring the model also corrected the handle's length: 113 mm once the tail rolls over, not the 141 mm first given.
20The clip, moving. The belt clip is easier to understand moving than in stills, so it now has its own animation. The shell turns clear for a moment to show the key in its track and the magnet that holds it.
21In a room. The tools were rendered in Blender (Cycles) in the same room as my walnut case: its limewashed wall, its light and its tung-oiled walnut, with the drill standing on top of the case and the screwdrivers lying beside it. The geometry is the Onshape model itself, exported part by part, and every part gets the material it would be made of: brushed aluminium, oiled walnut, polished steel and brass.
22Next. Take the donor drill apart and measure it, update the parts, then print, fit and finish the shells, and cut the inlays.