The Dancers
The machines Fairy Ring sends work to / a guide to each, with every part
Fairy Ring designs the thing. The dancers make it. Each of these is a cheap machine, or a head for one you already have, that takes one kind of job from Fairy Ring: veneer cut files, wax prints, grow molds, joinery, glue lines, scans. Every one comes with the parts to buy, the files to print and cut, and the steps to build it.
In the ring
Tap a machine / or see where each one sits in the Fairy Ring pipeline
 Drag QueenVeneer cutter
 Queen BeeWax printer
 MotherMycelium molds
 Lady LinerLayout lines and templates
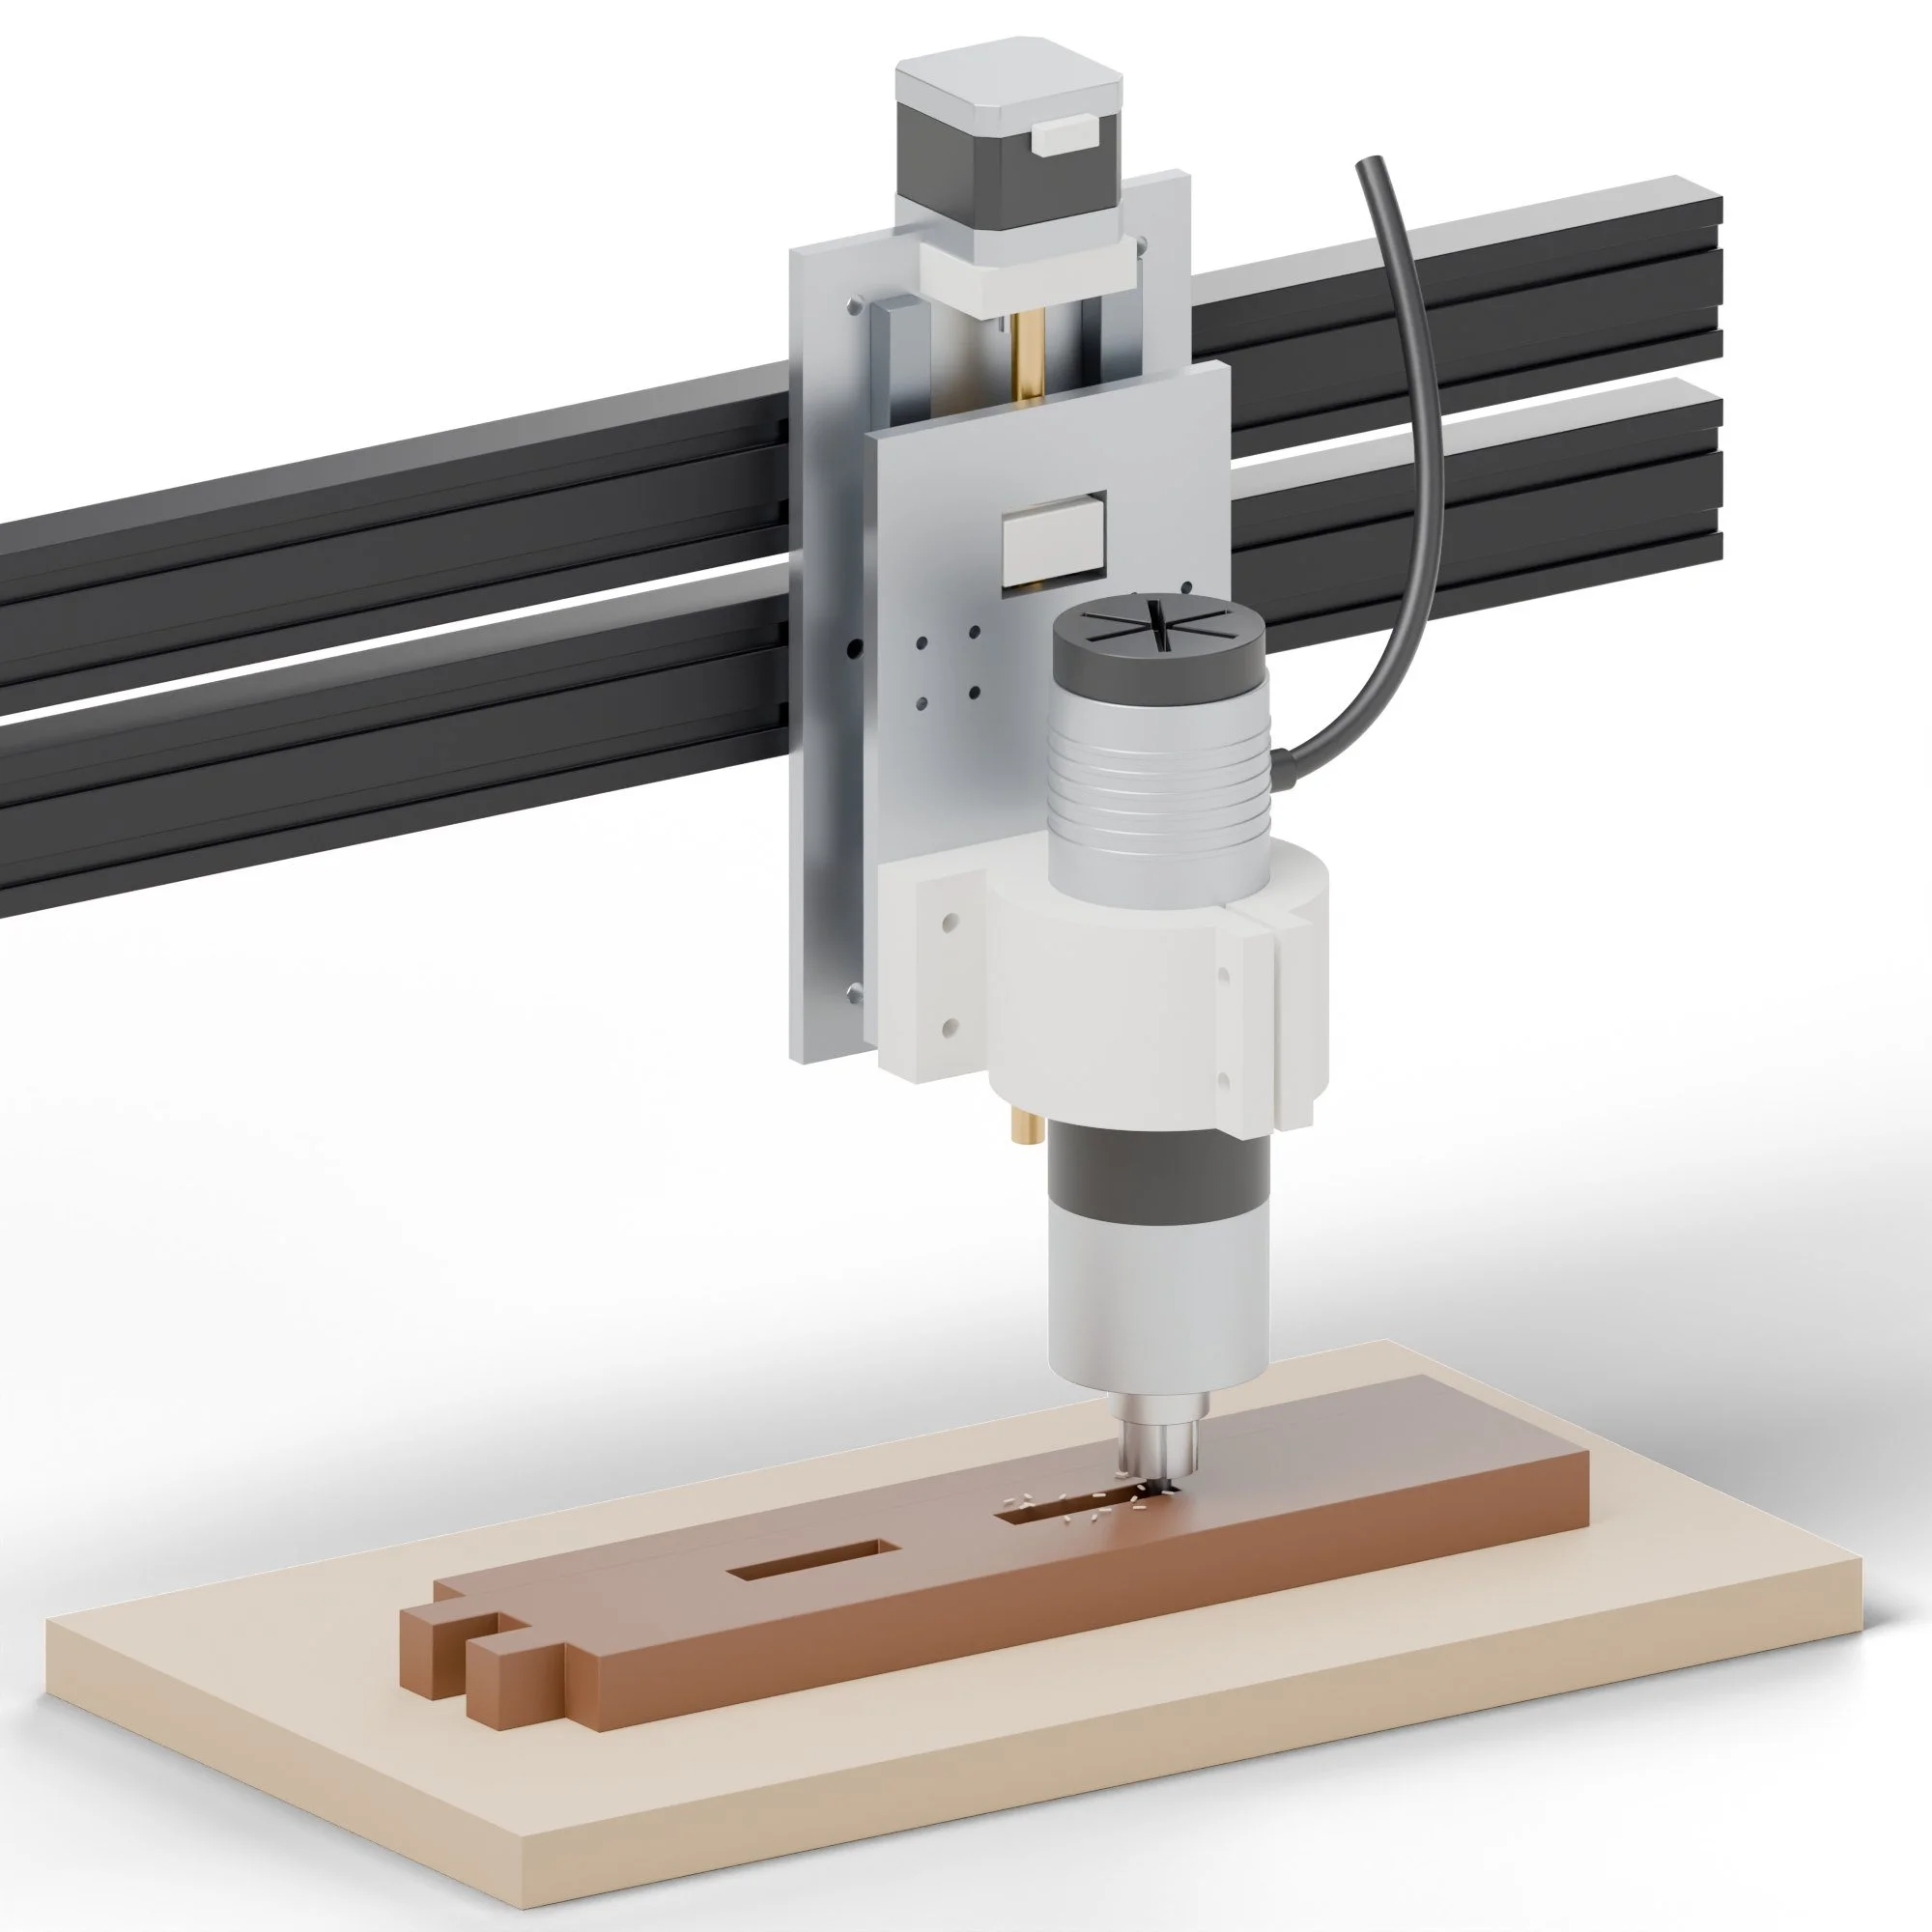 MortishaJoinery toolpaths
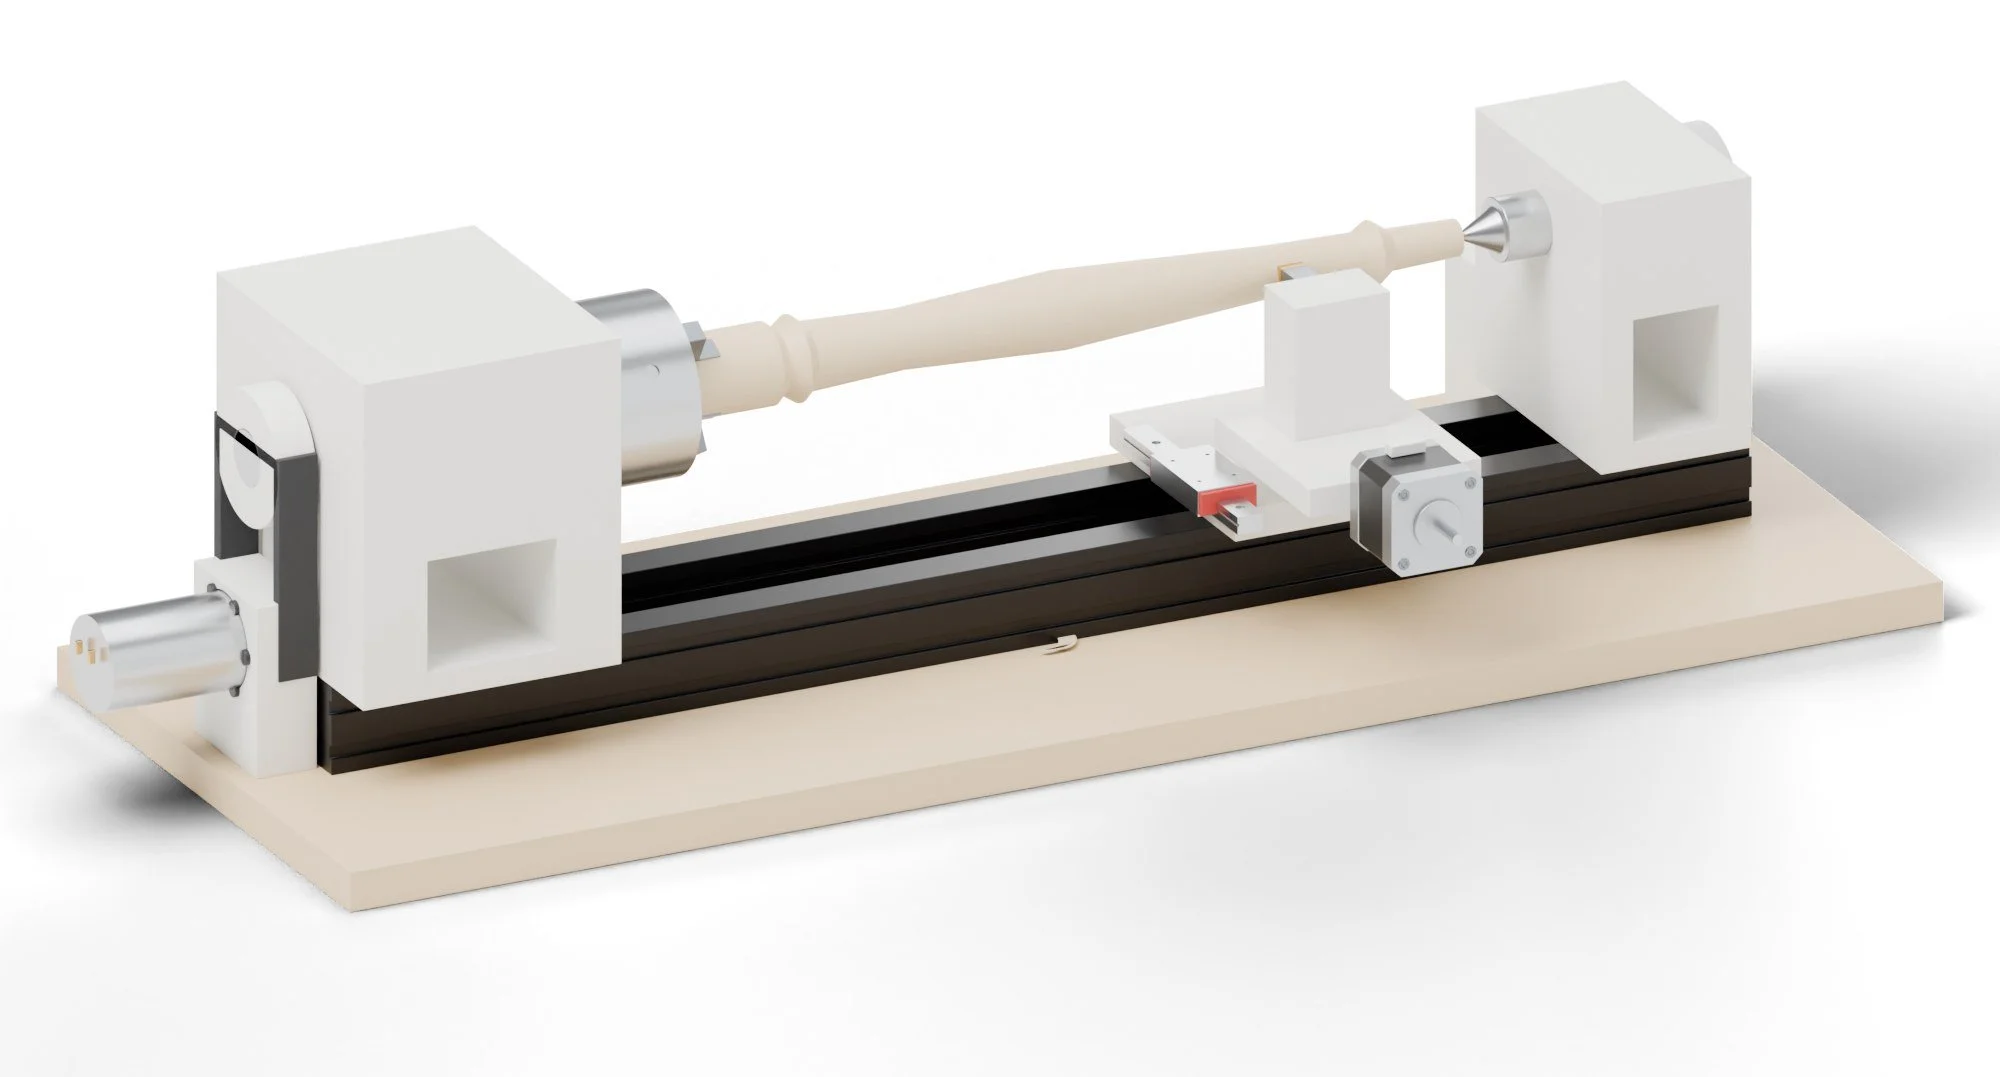 Lathe MinnelliTurning profiles
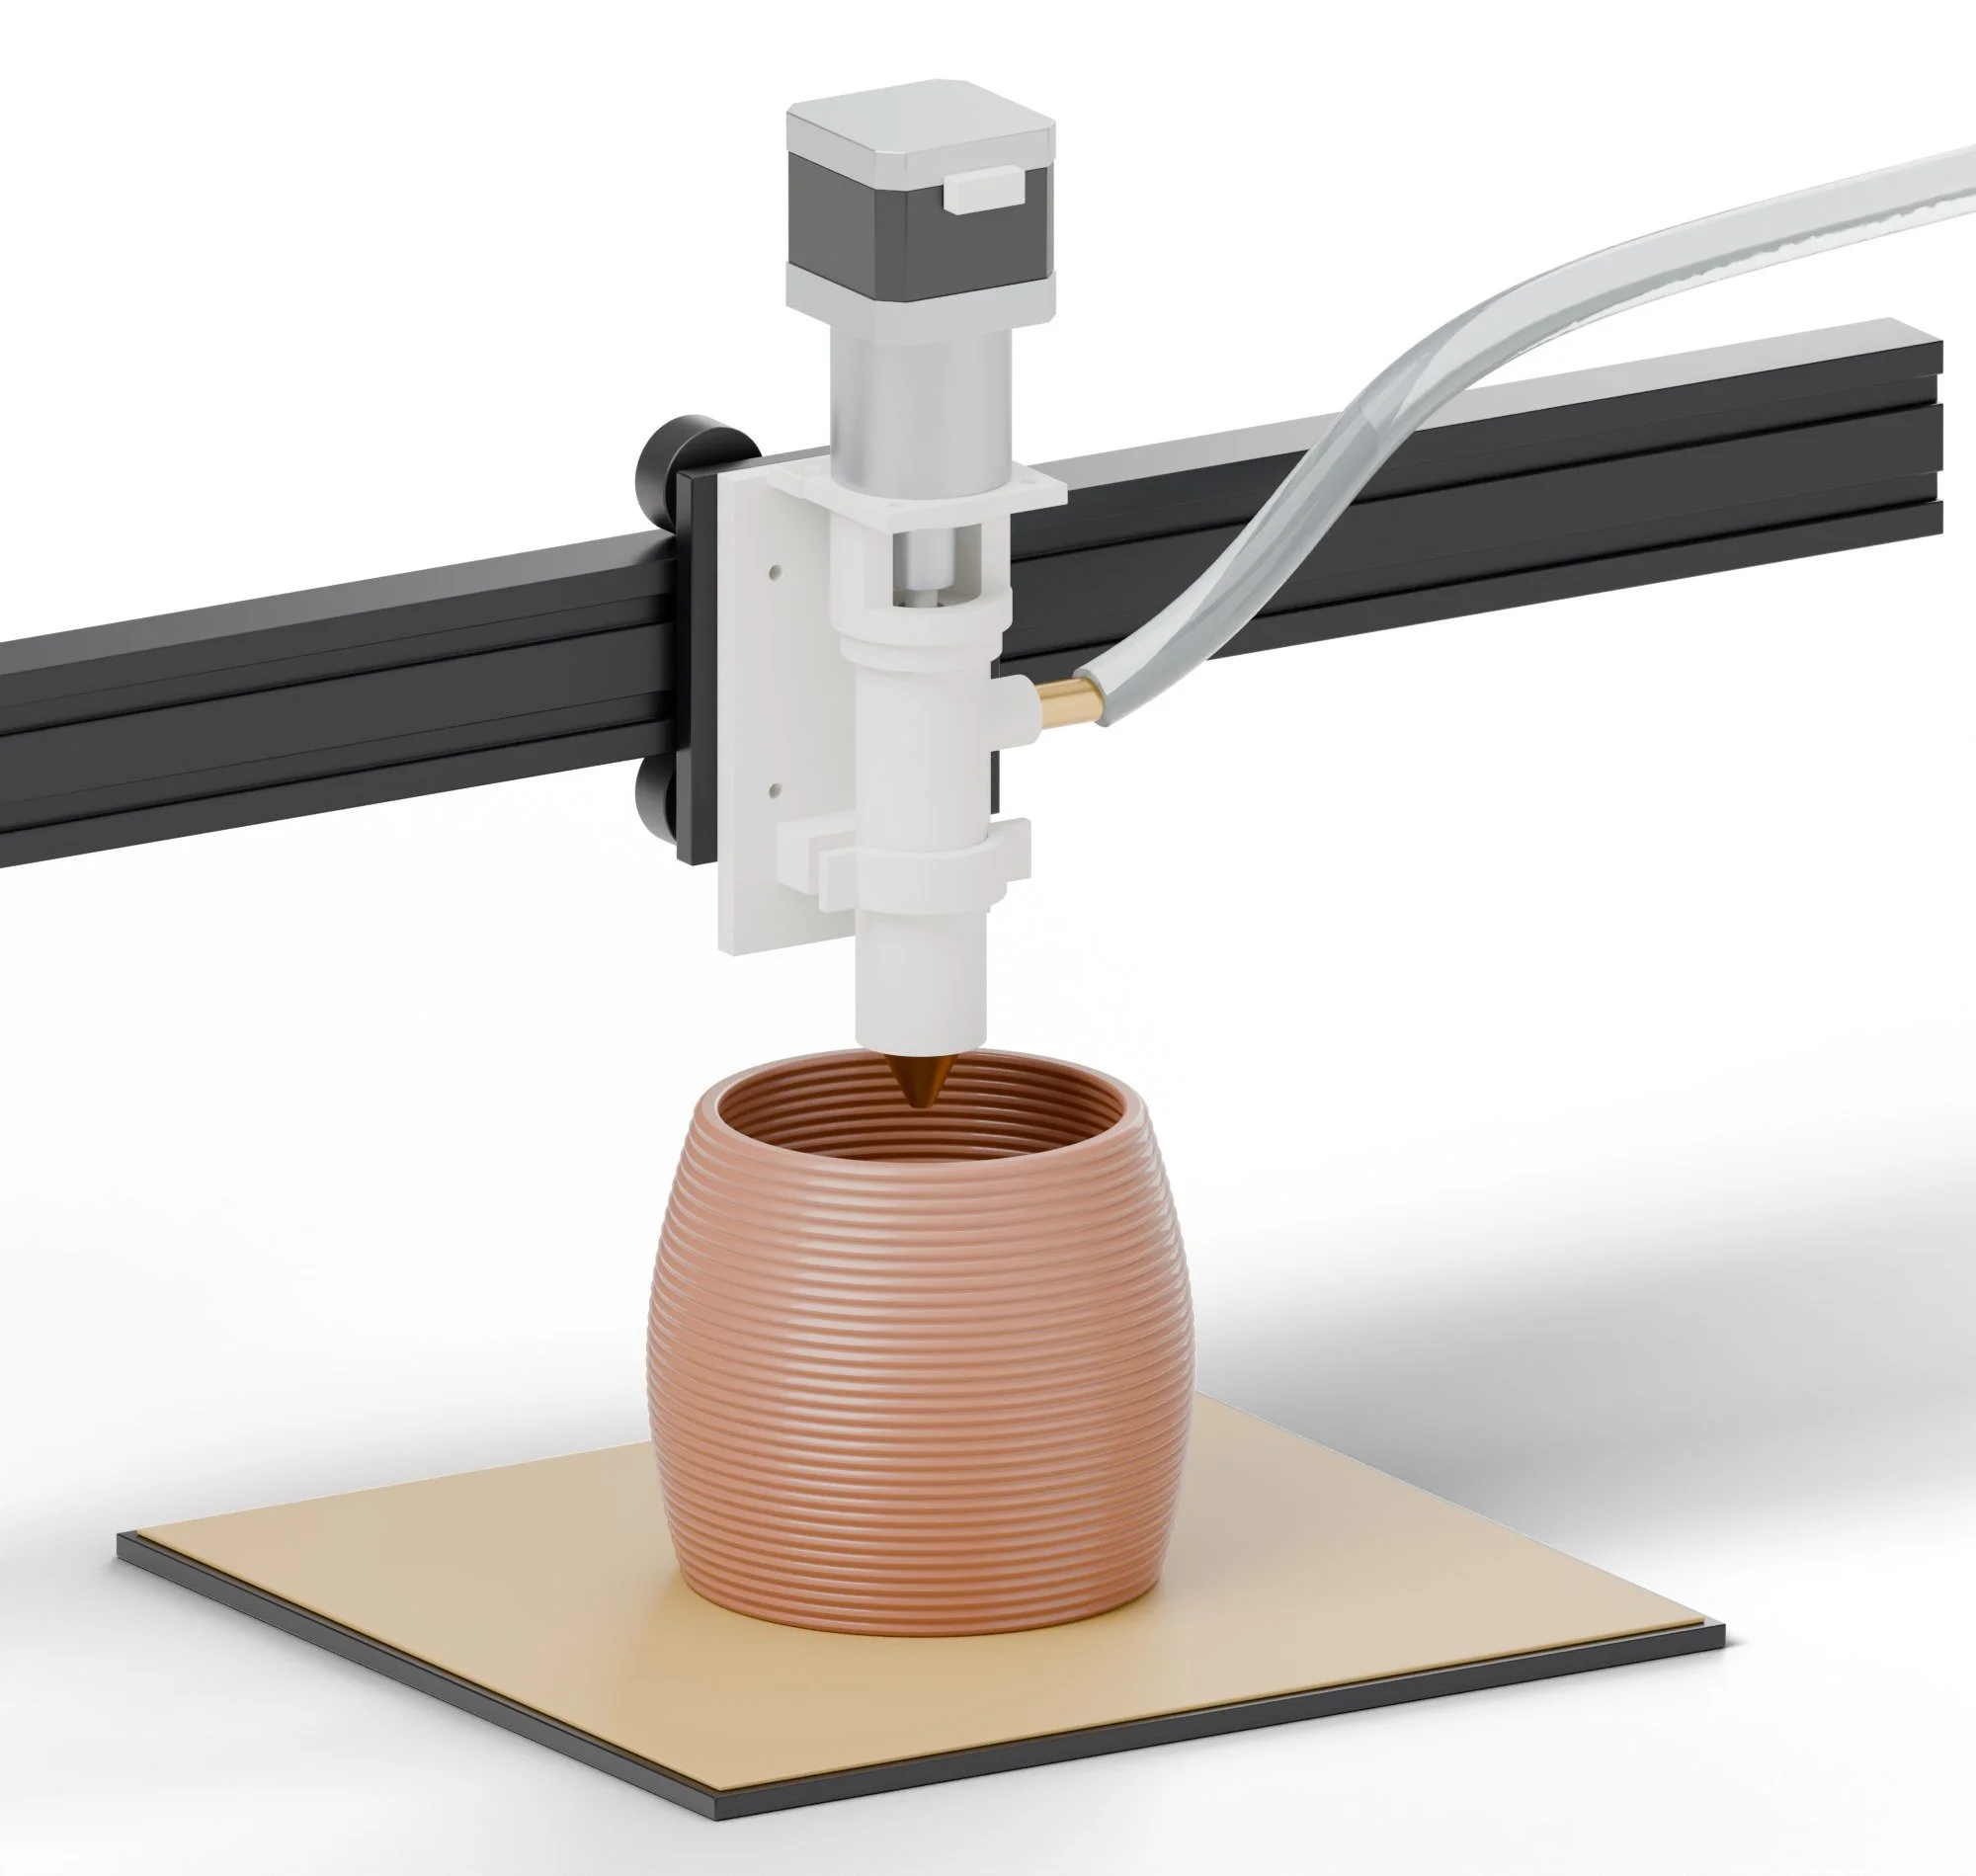 Mud DivaClay and concrete cores
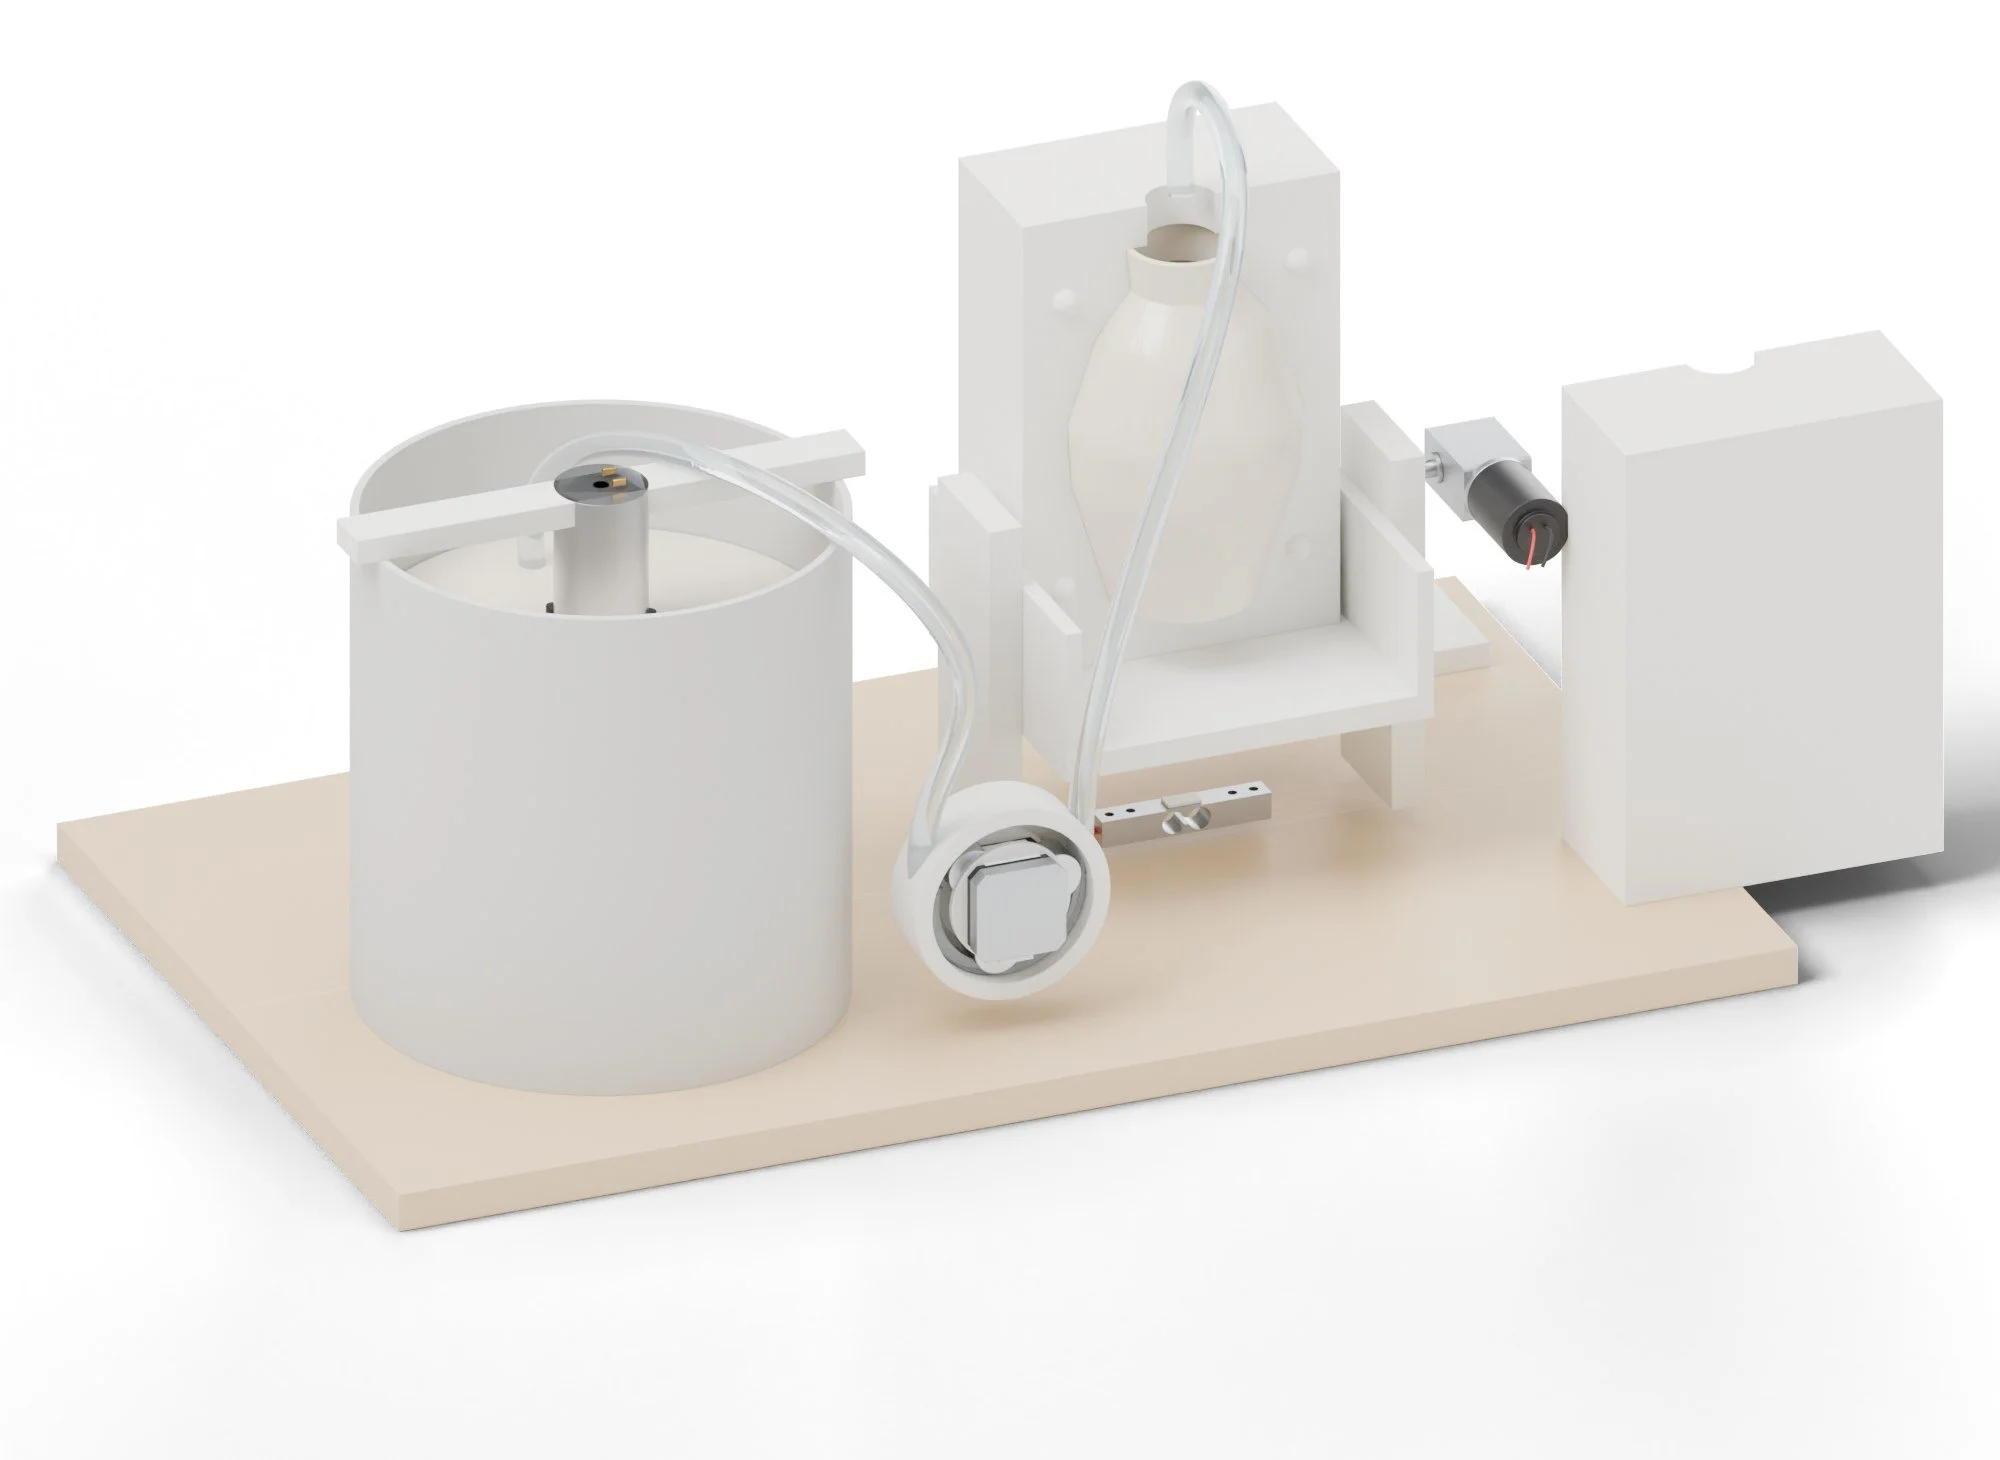 Slip KittenPlaster molds to slip-cast
 Pour DecisionsConcrete and resin pours to settle
 Skin TightVacuum-formed trays and covers
 Cher BendBending forms cut from a curve
 Bog WitchLiving moss panels
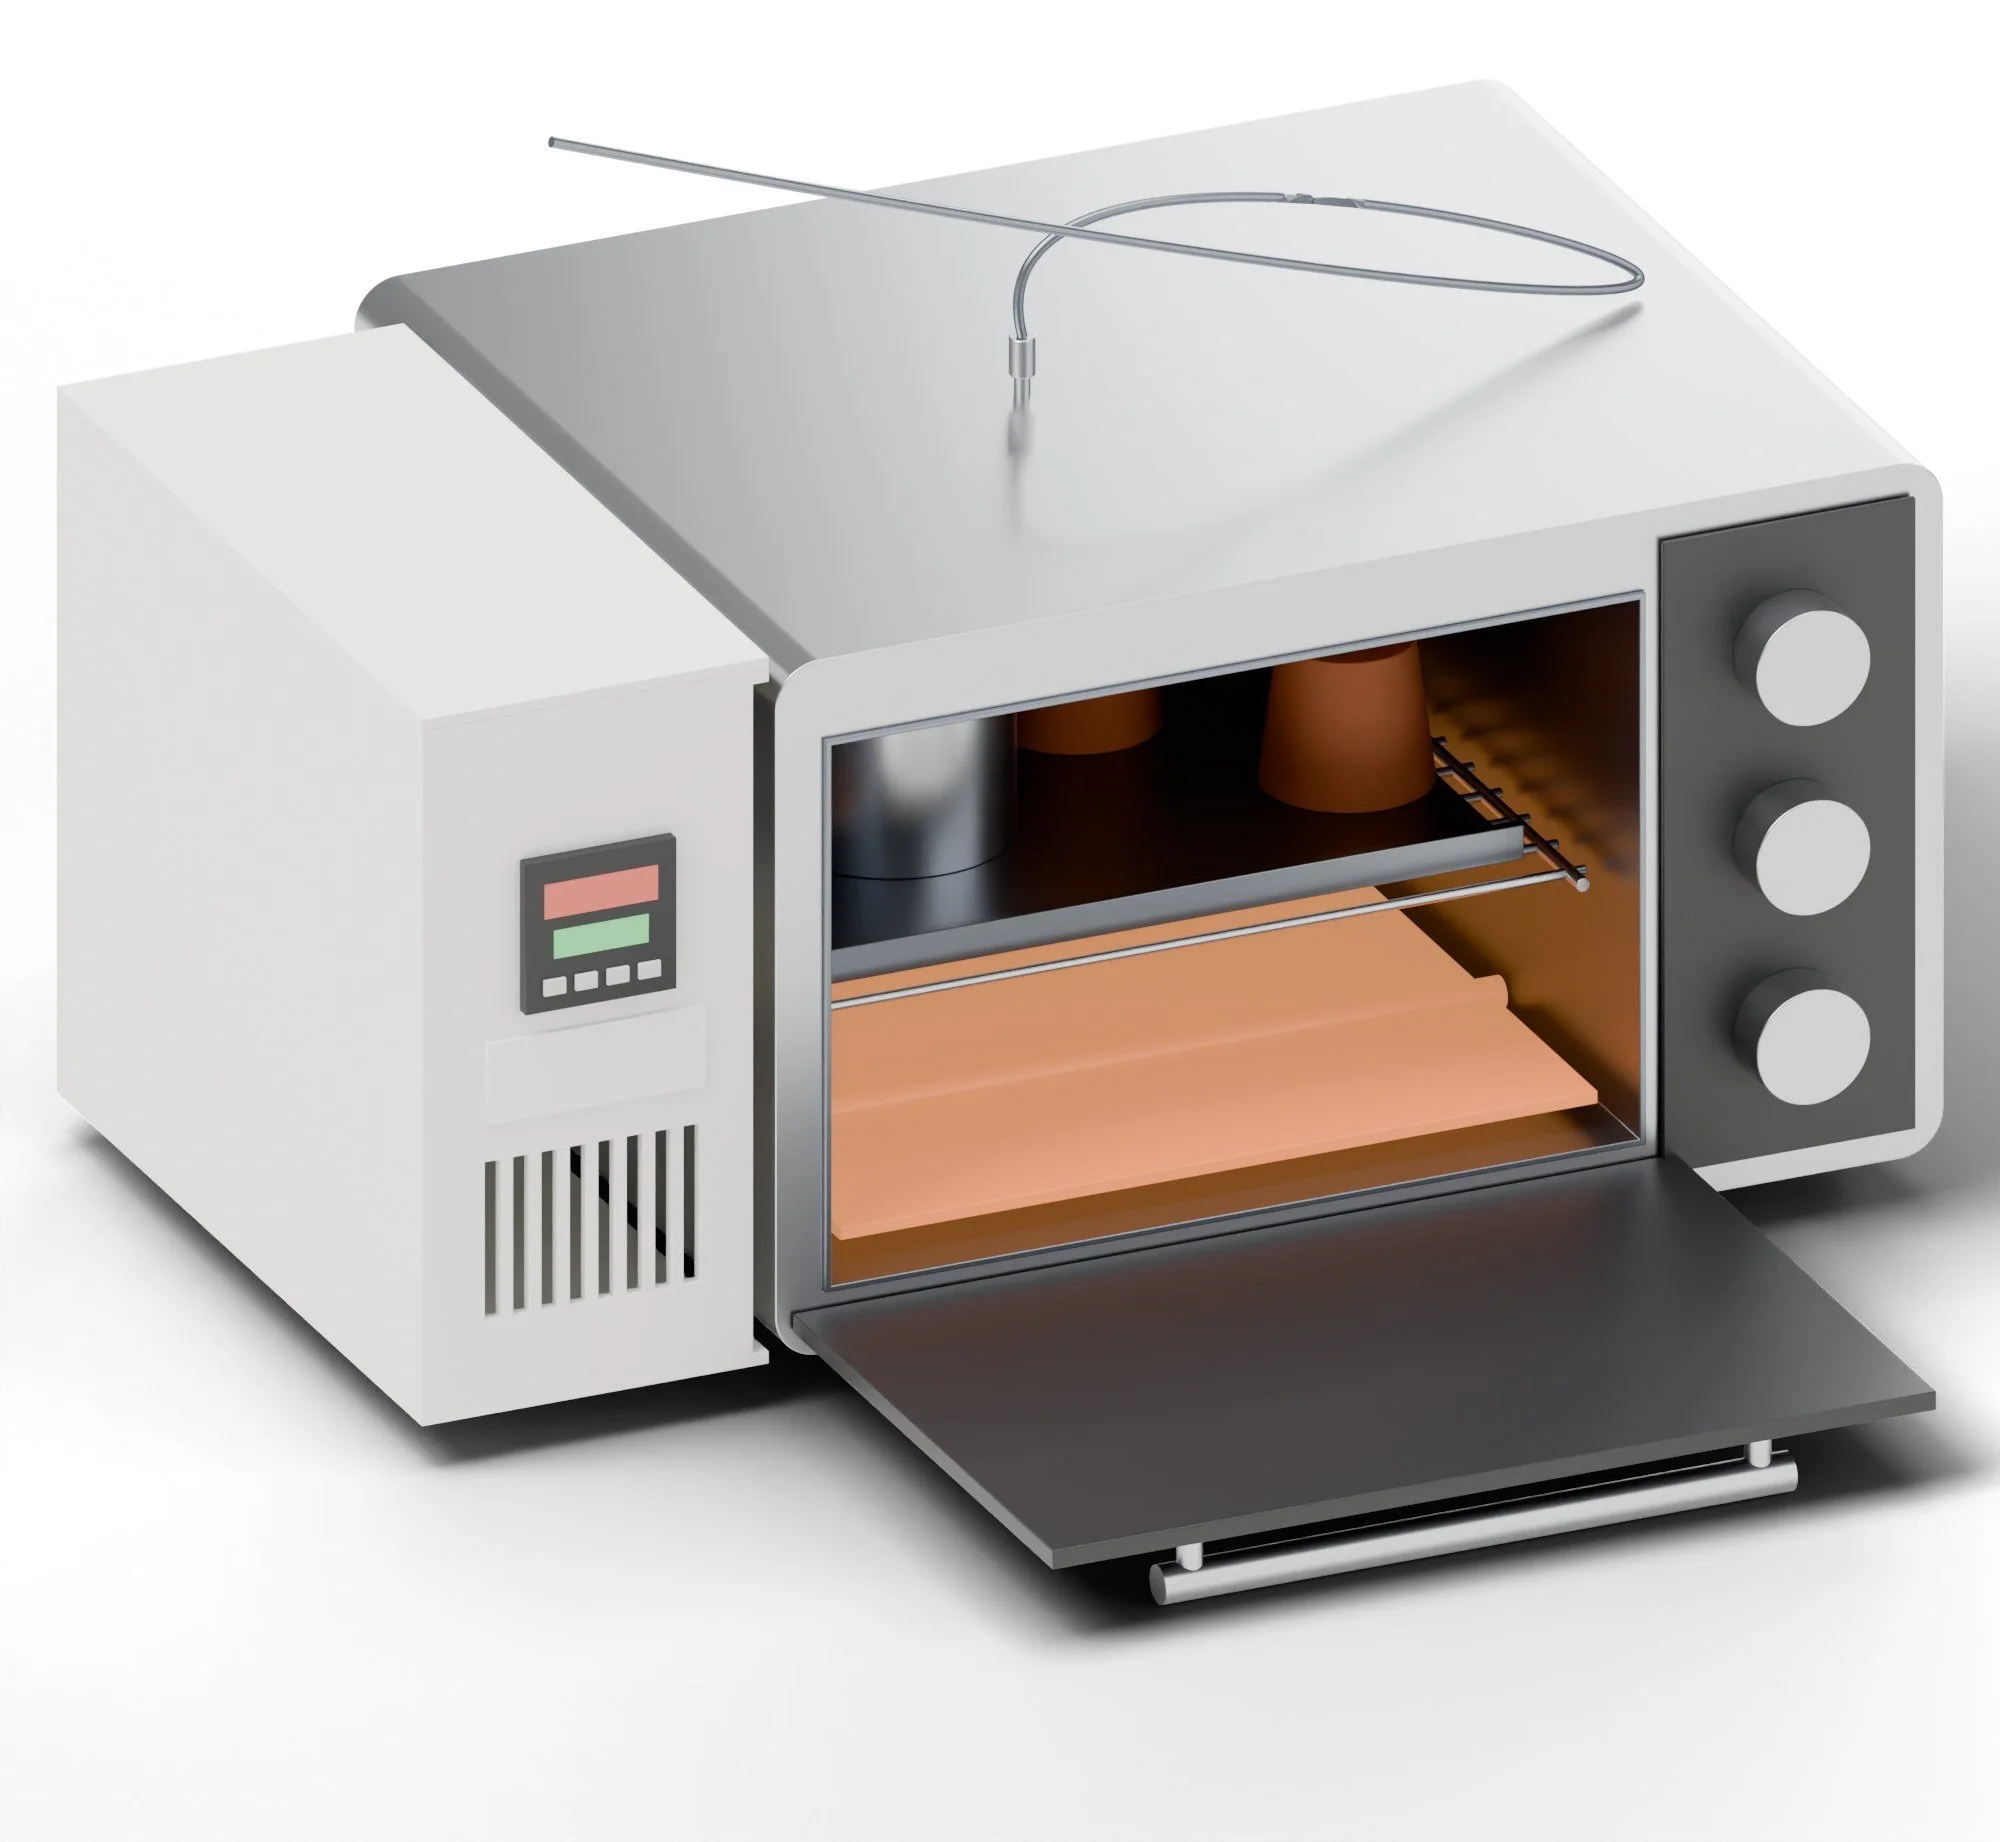 Hot FlashBake, burnout and drying schedules
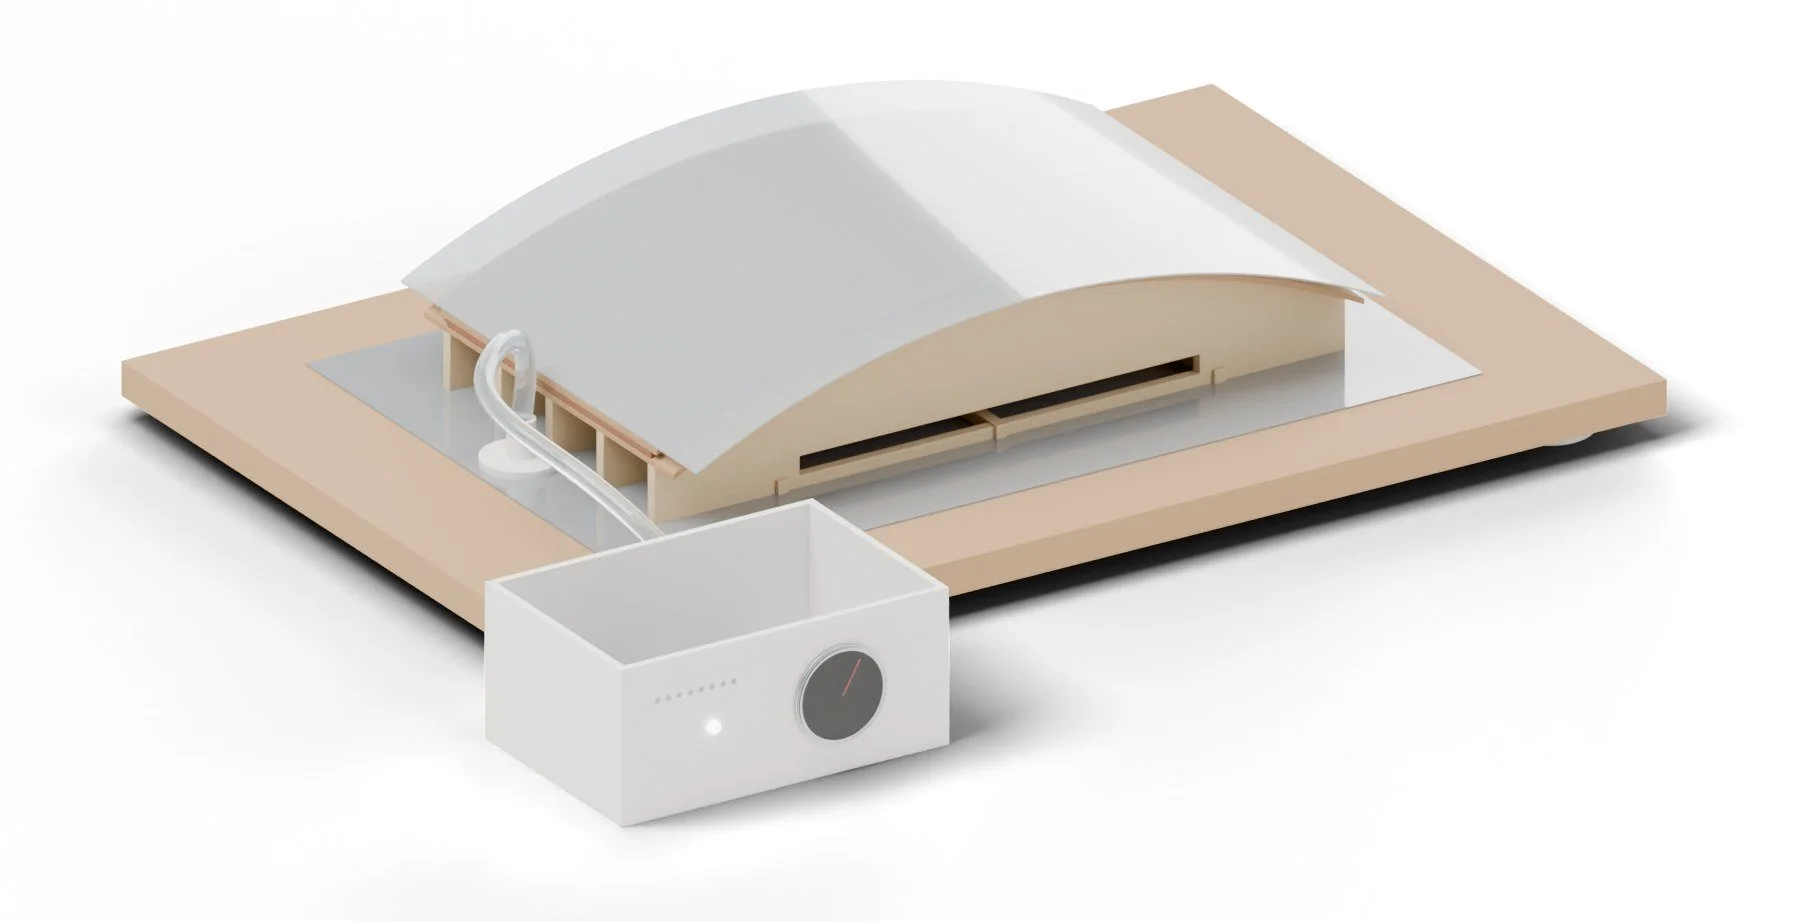 Flex AppealVeneer and bent-lamination presses
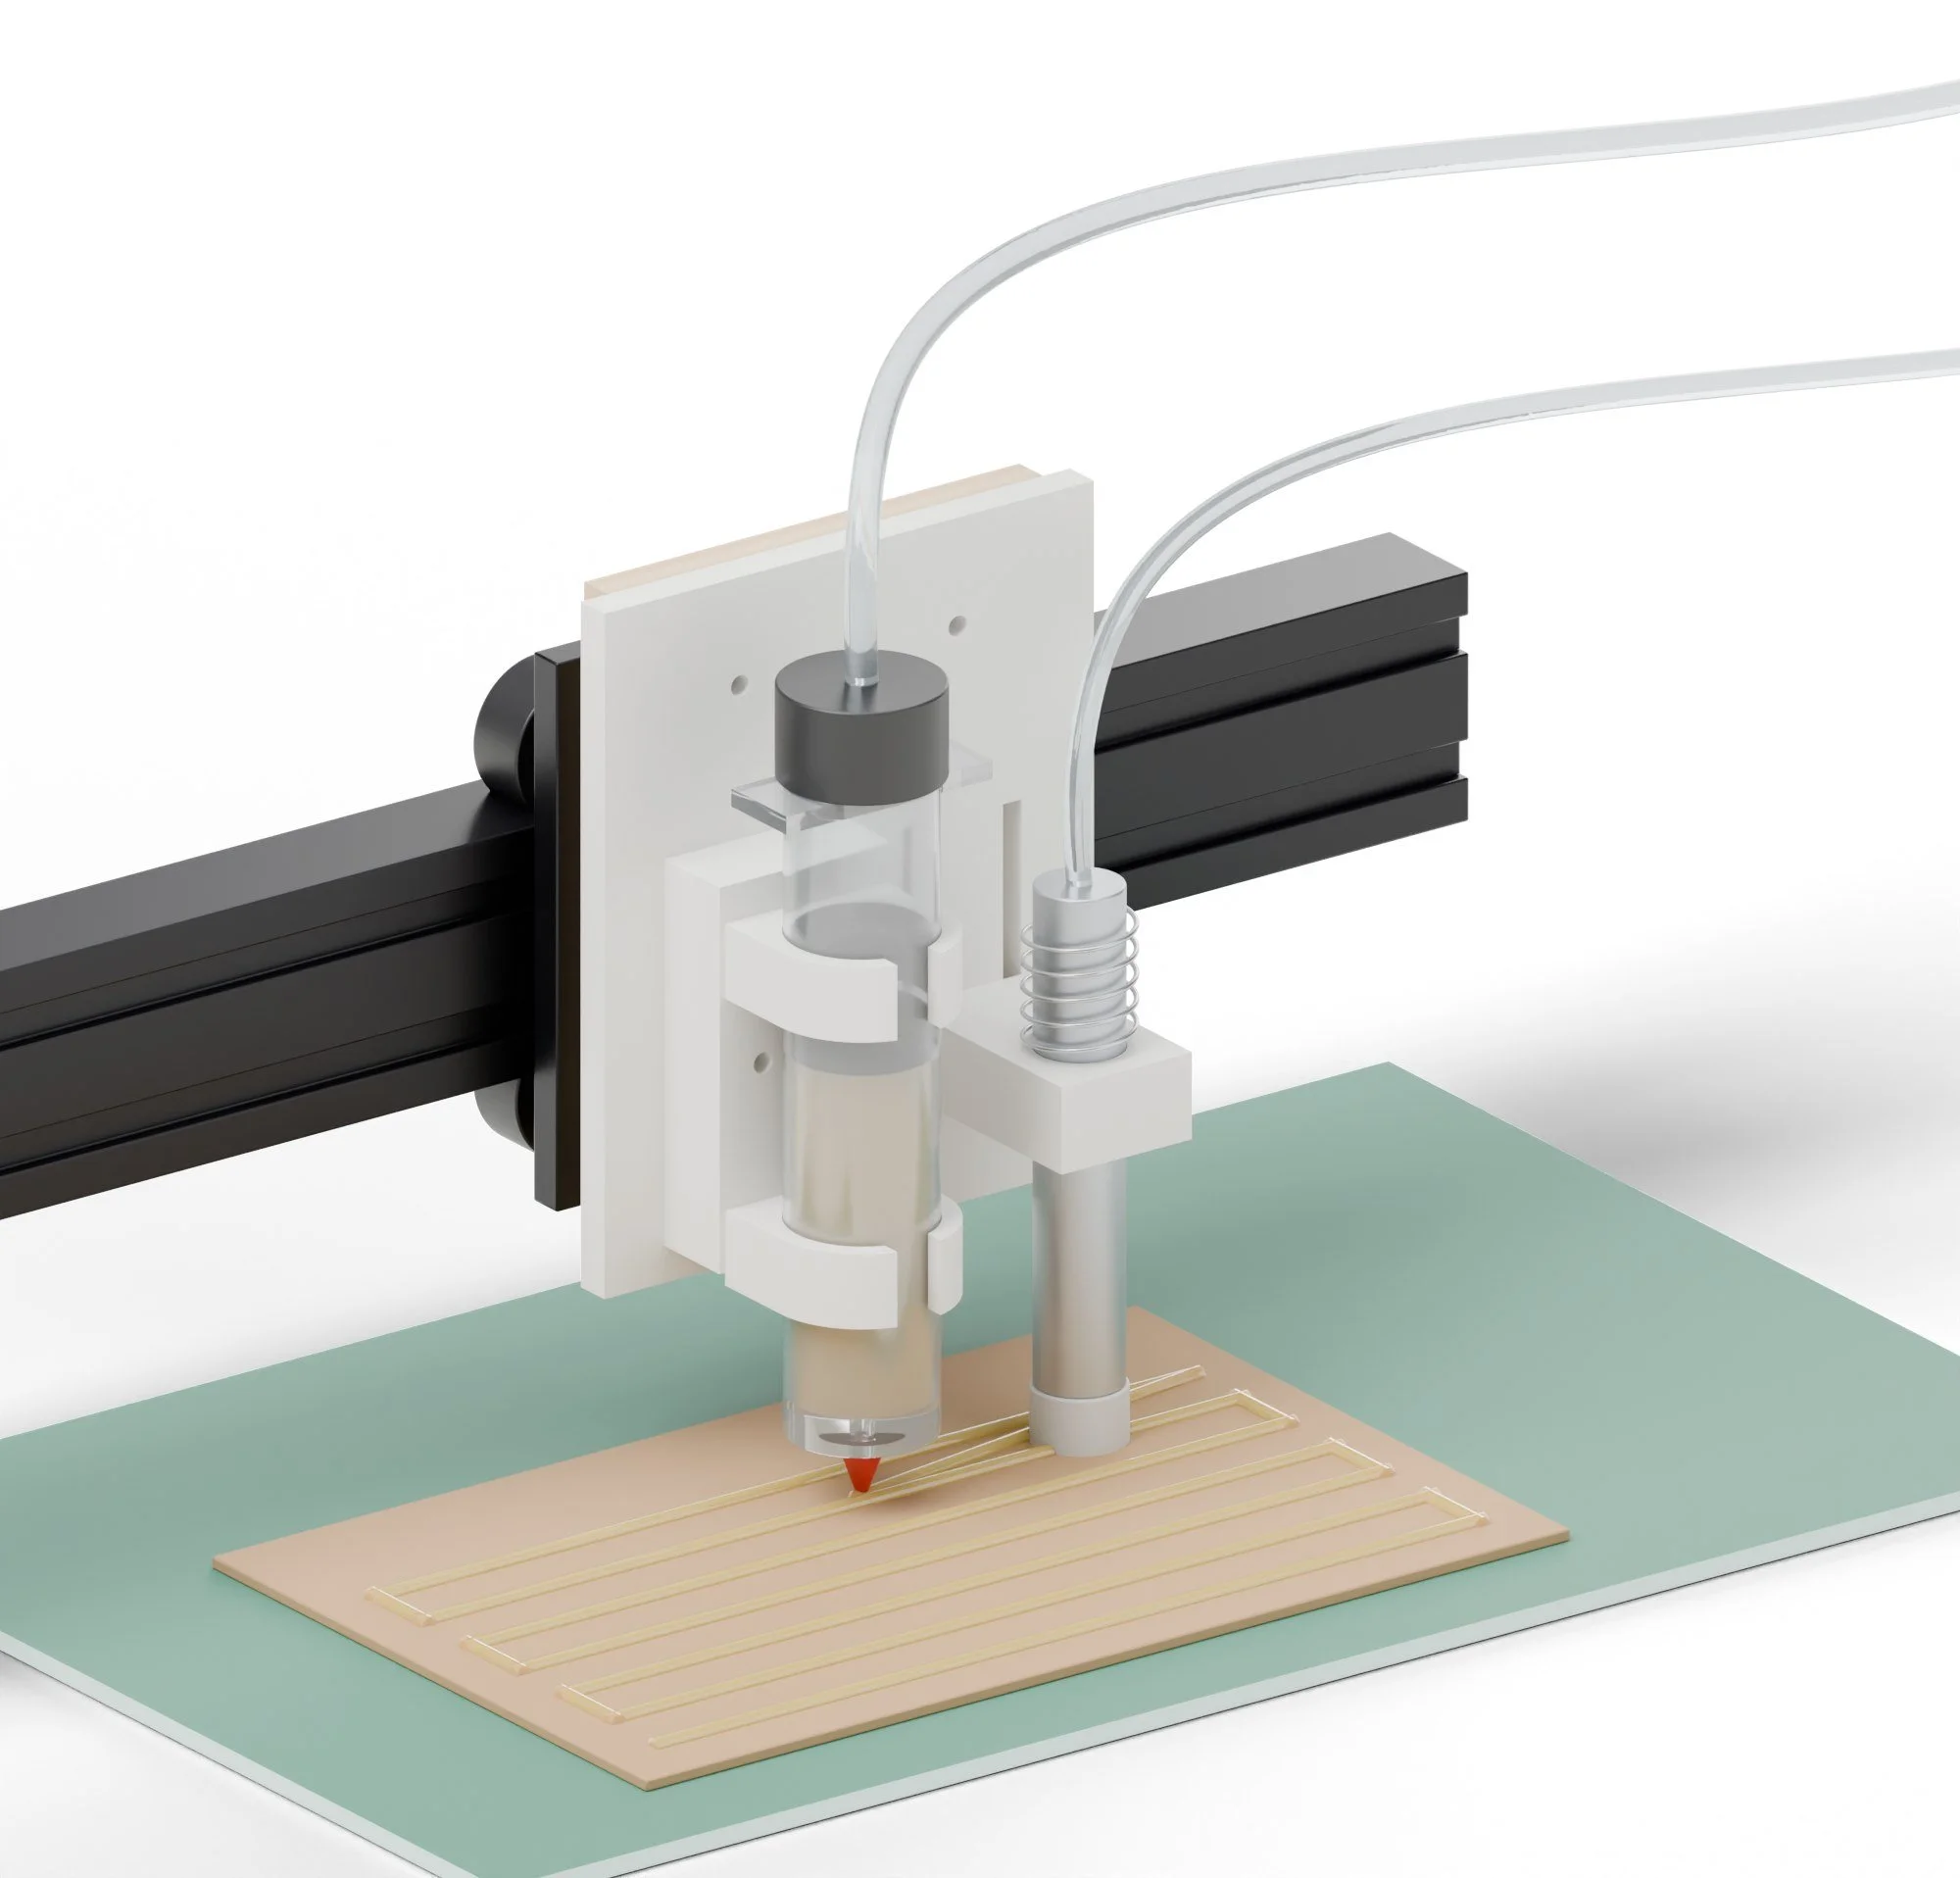 Honey GlazeGlue lines and finish passes
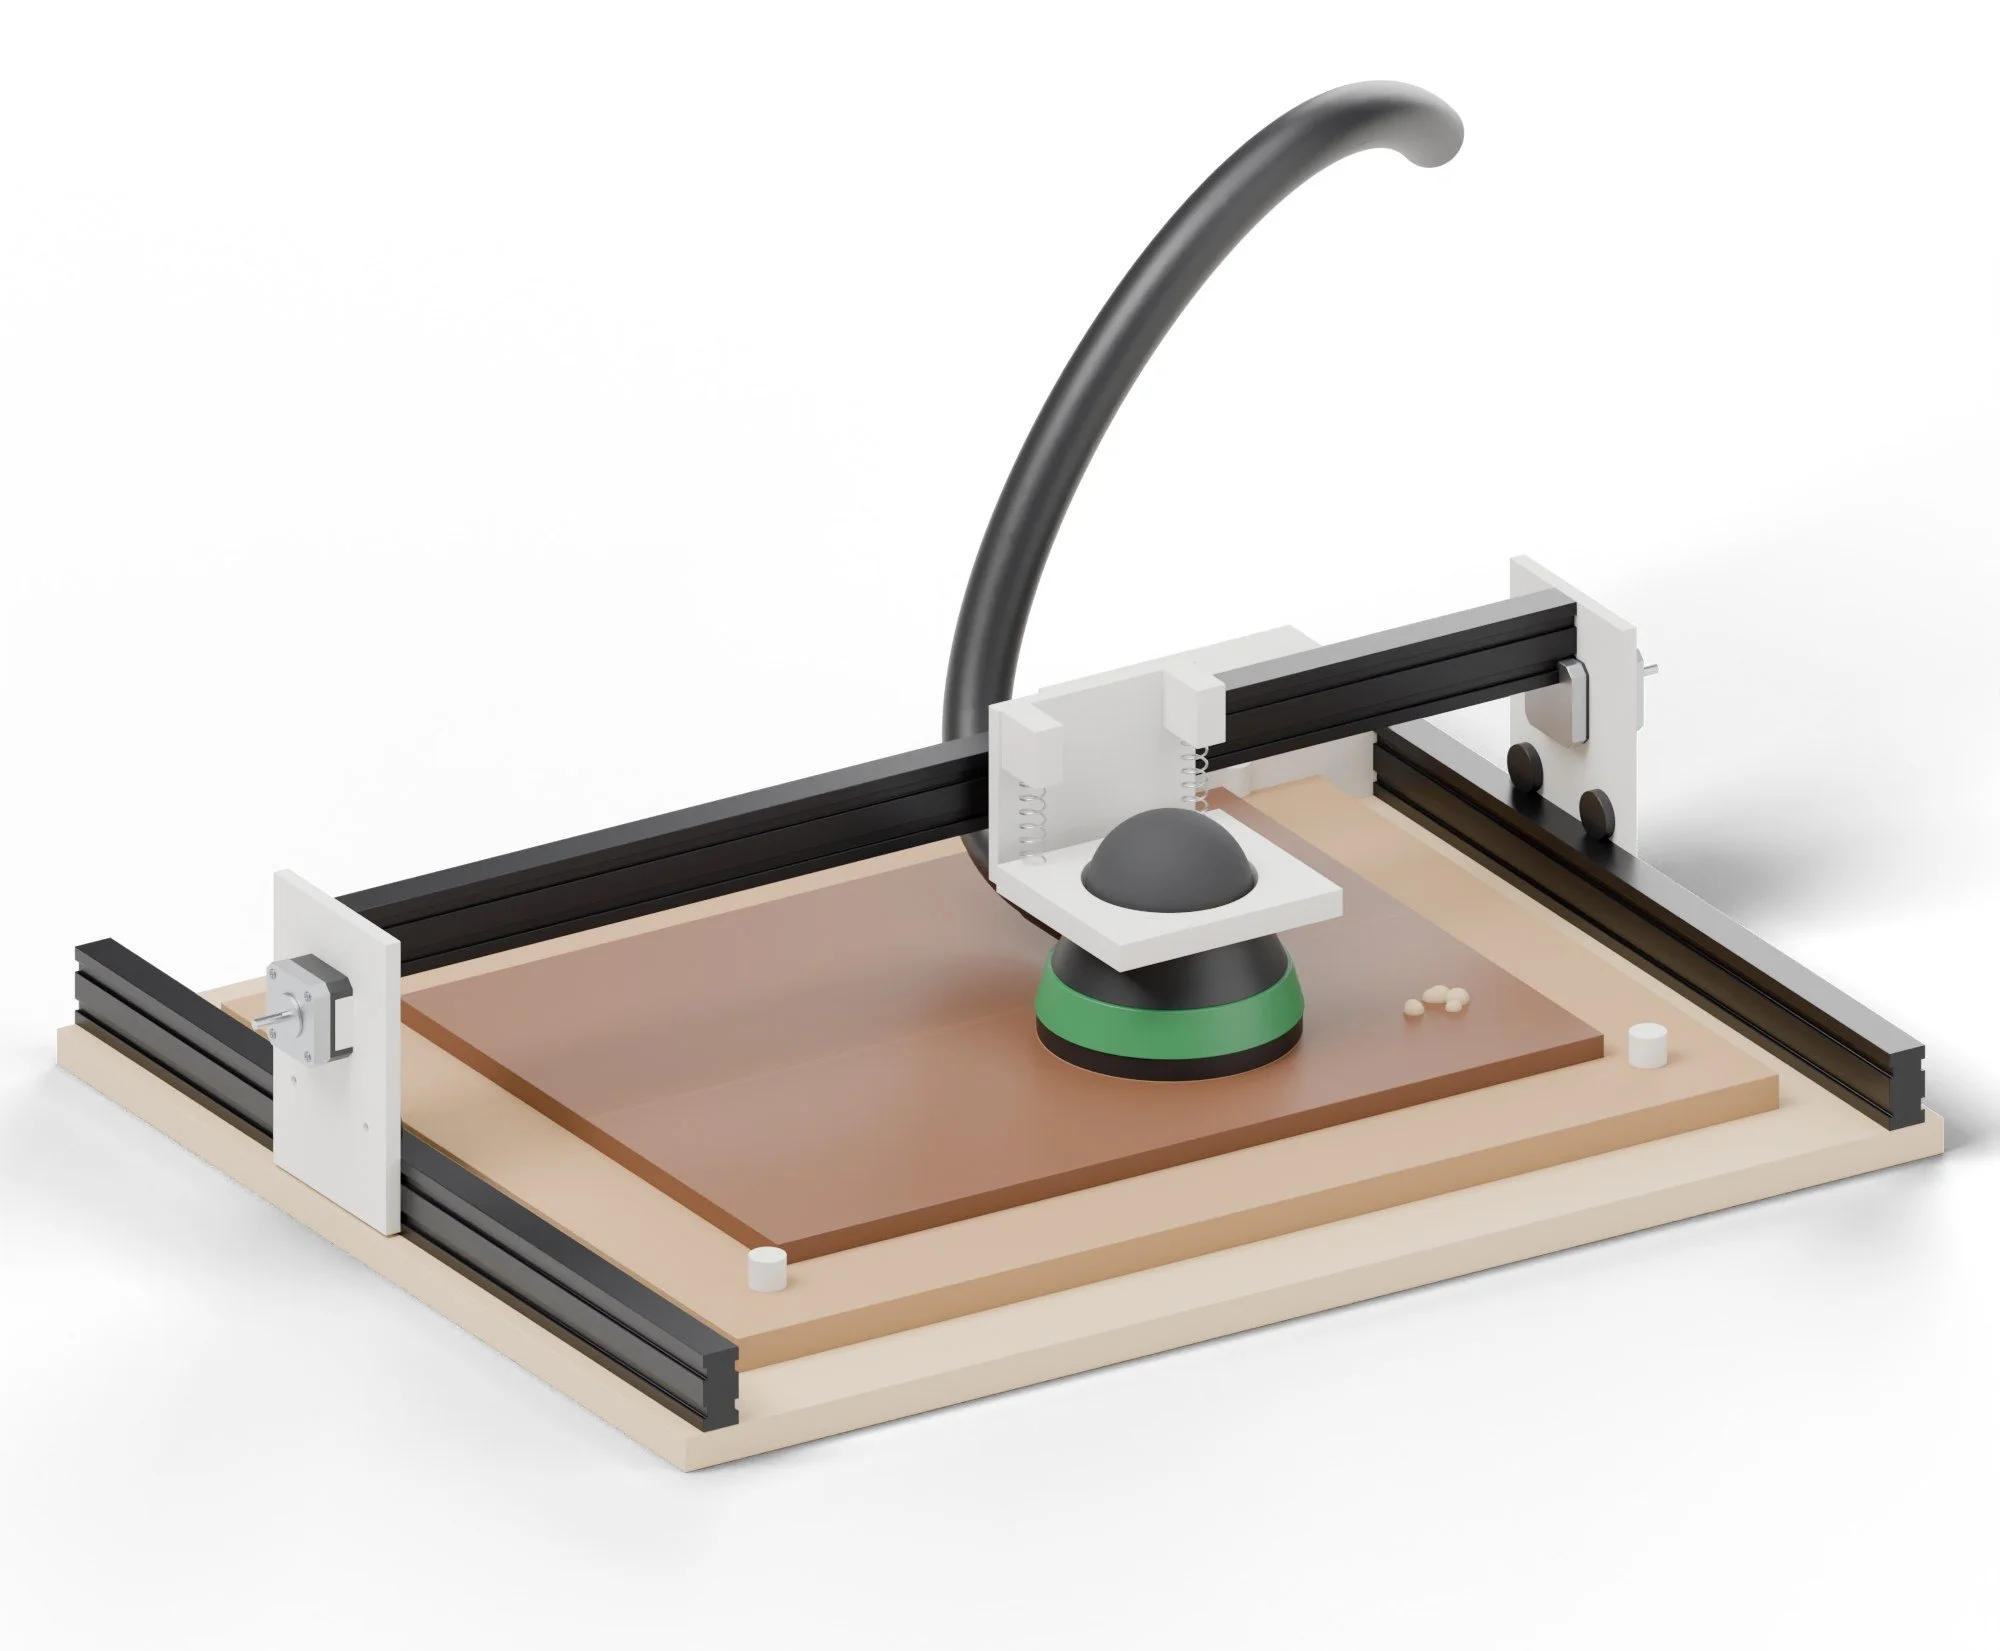 Sandra PaperSanding passes
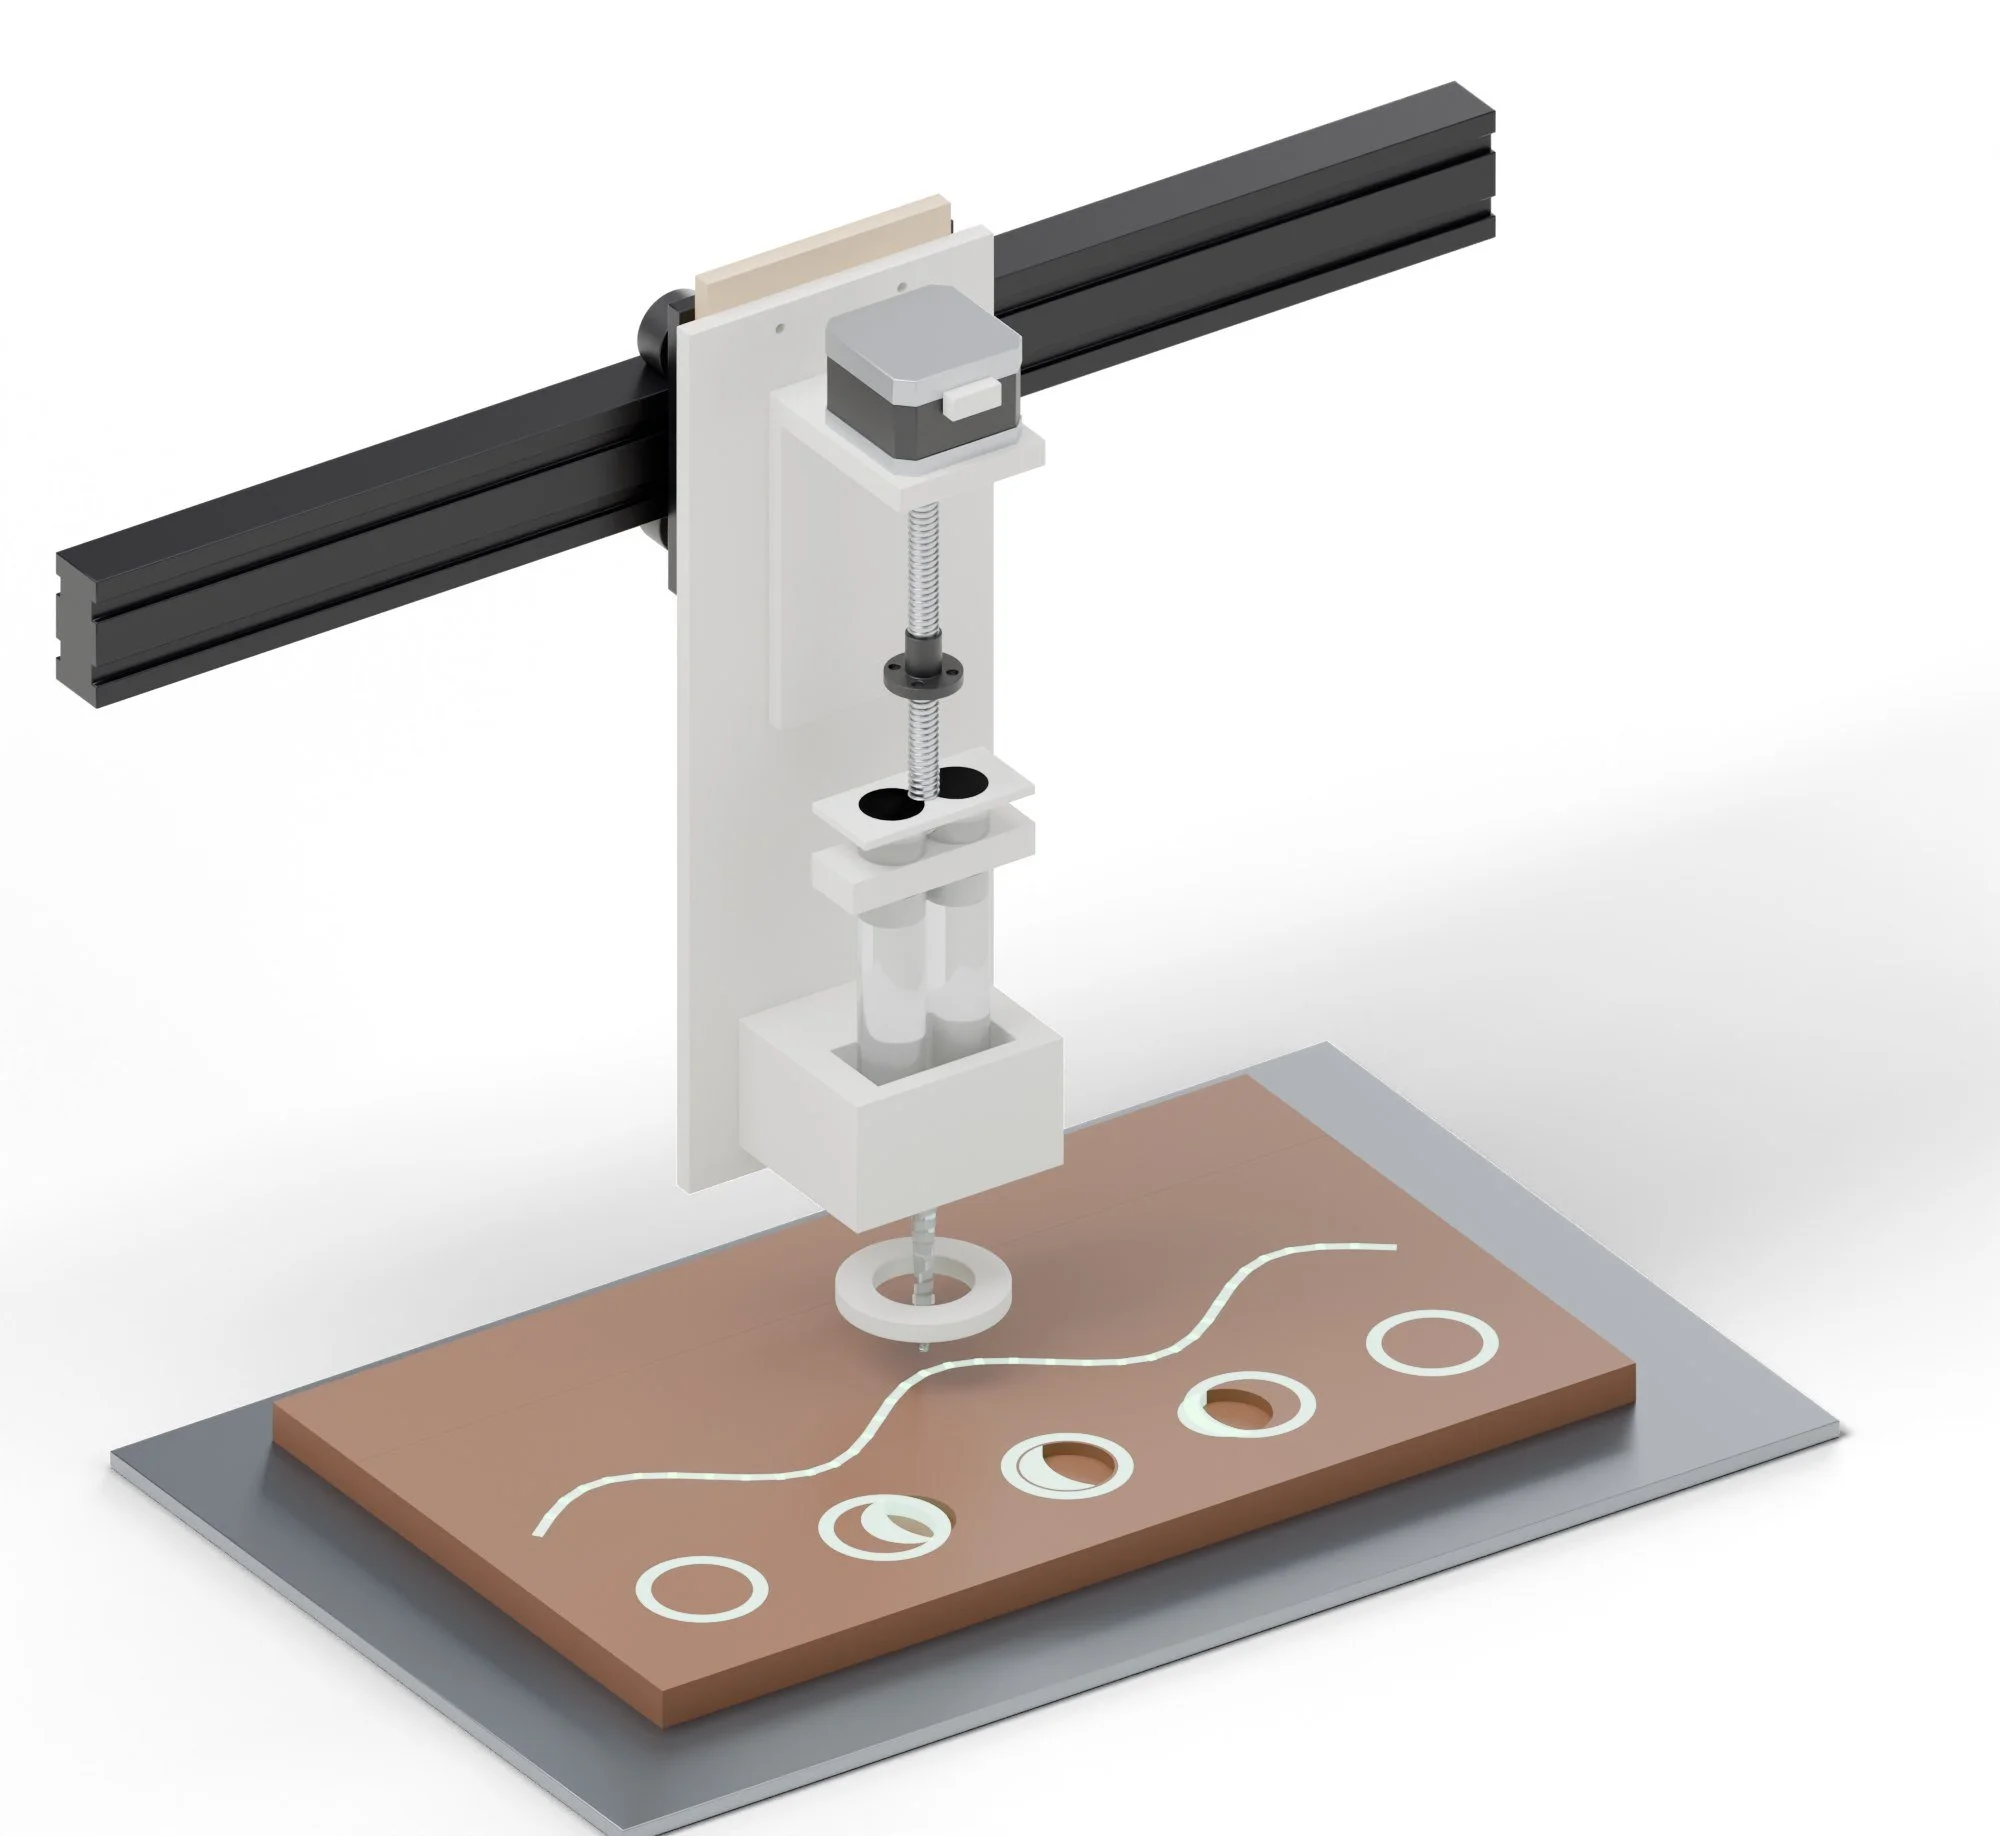 Glow DivaGlow fill paths
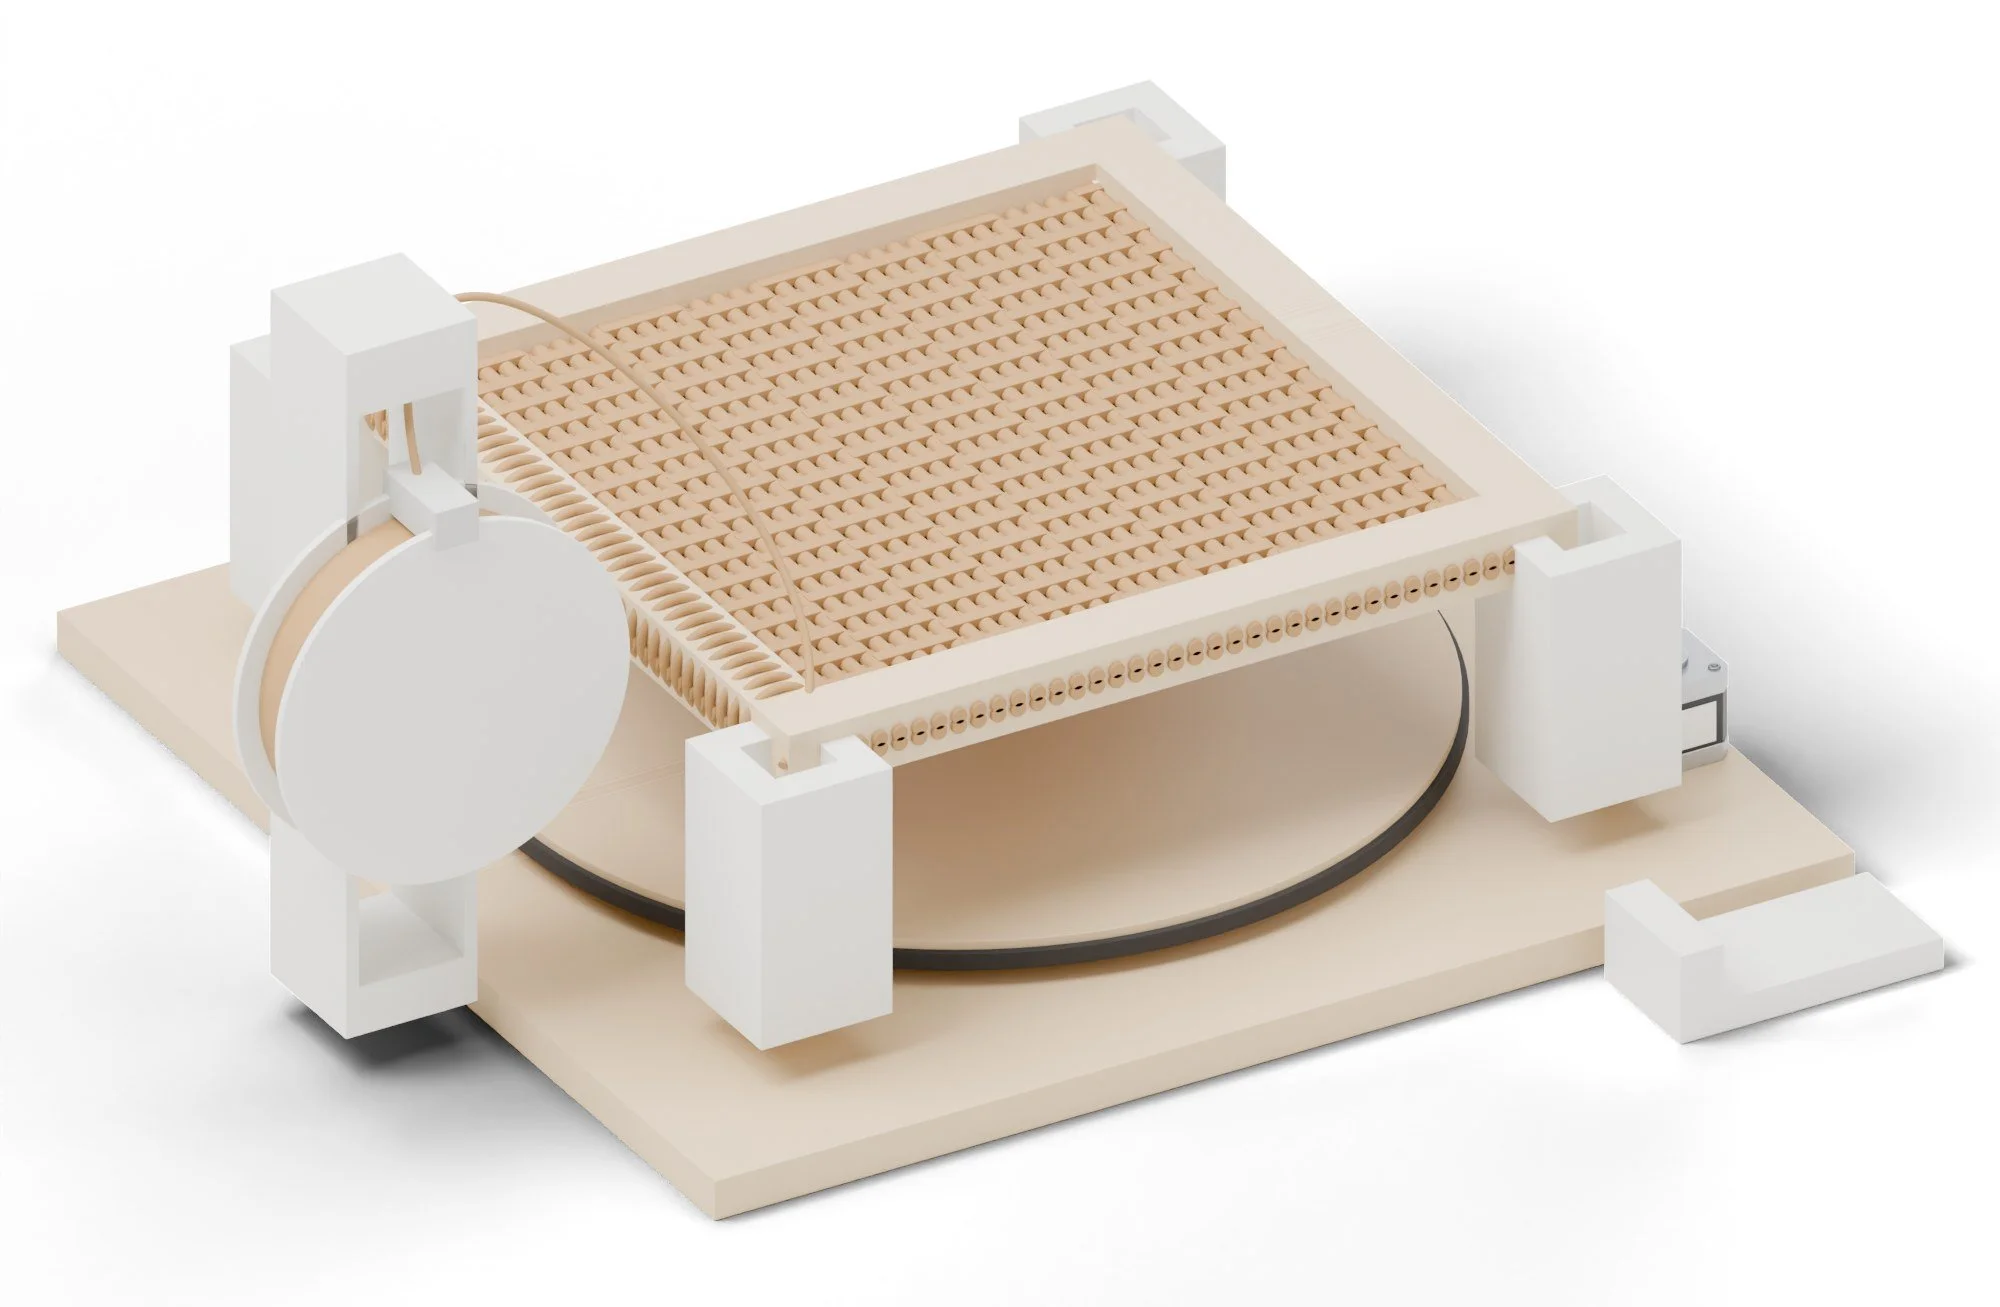 Cane-DaceWeaving patterns
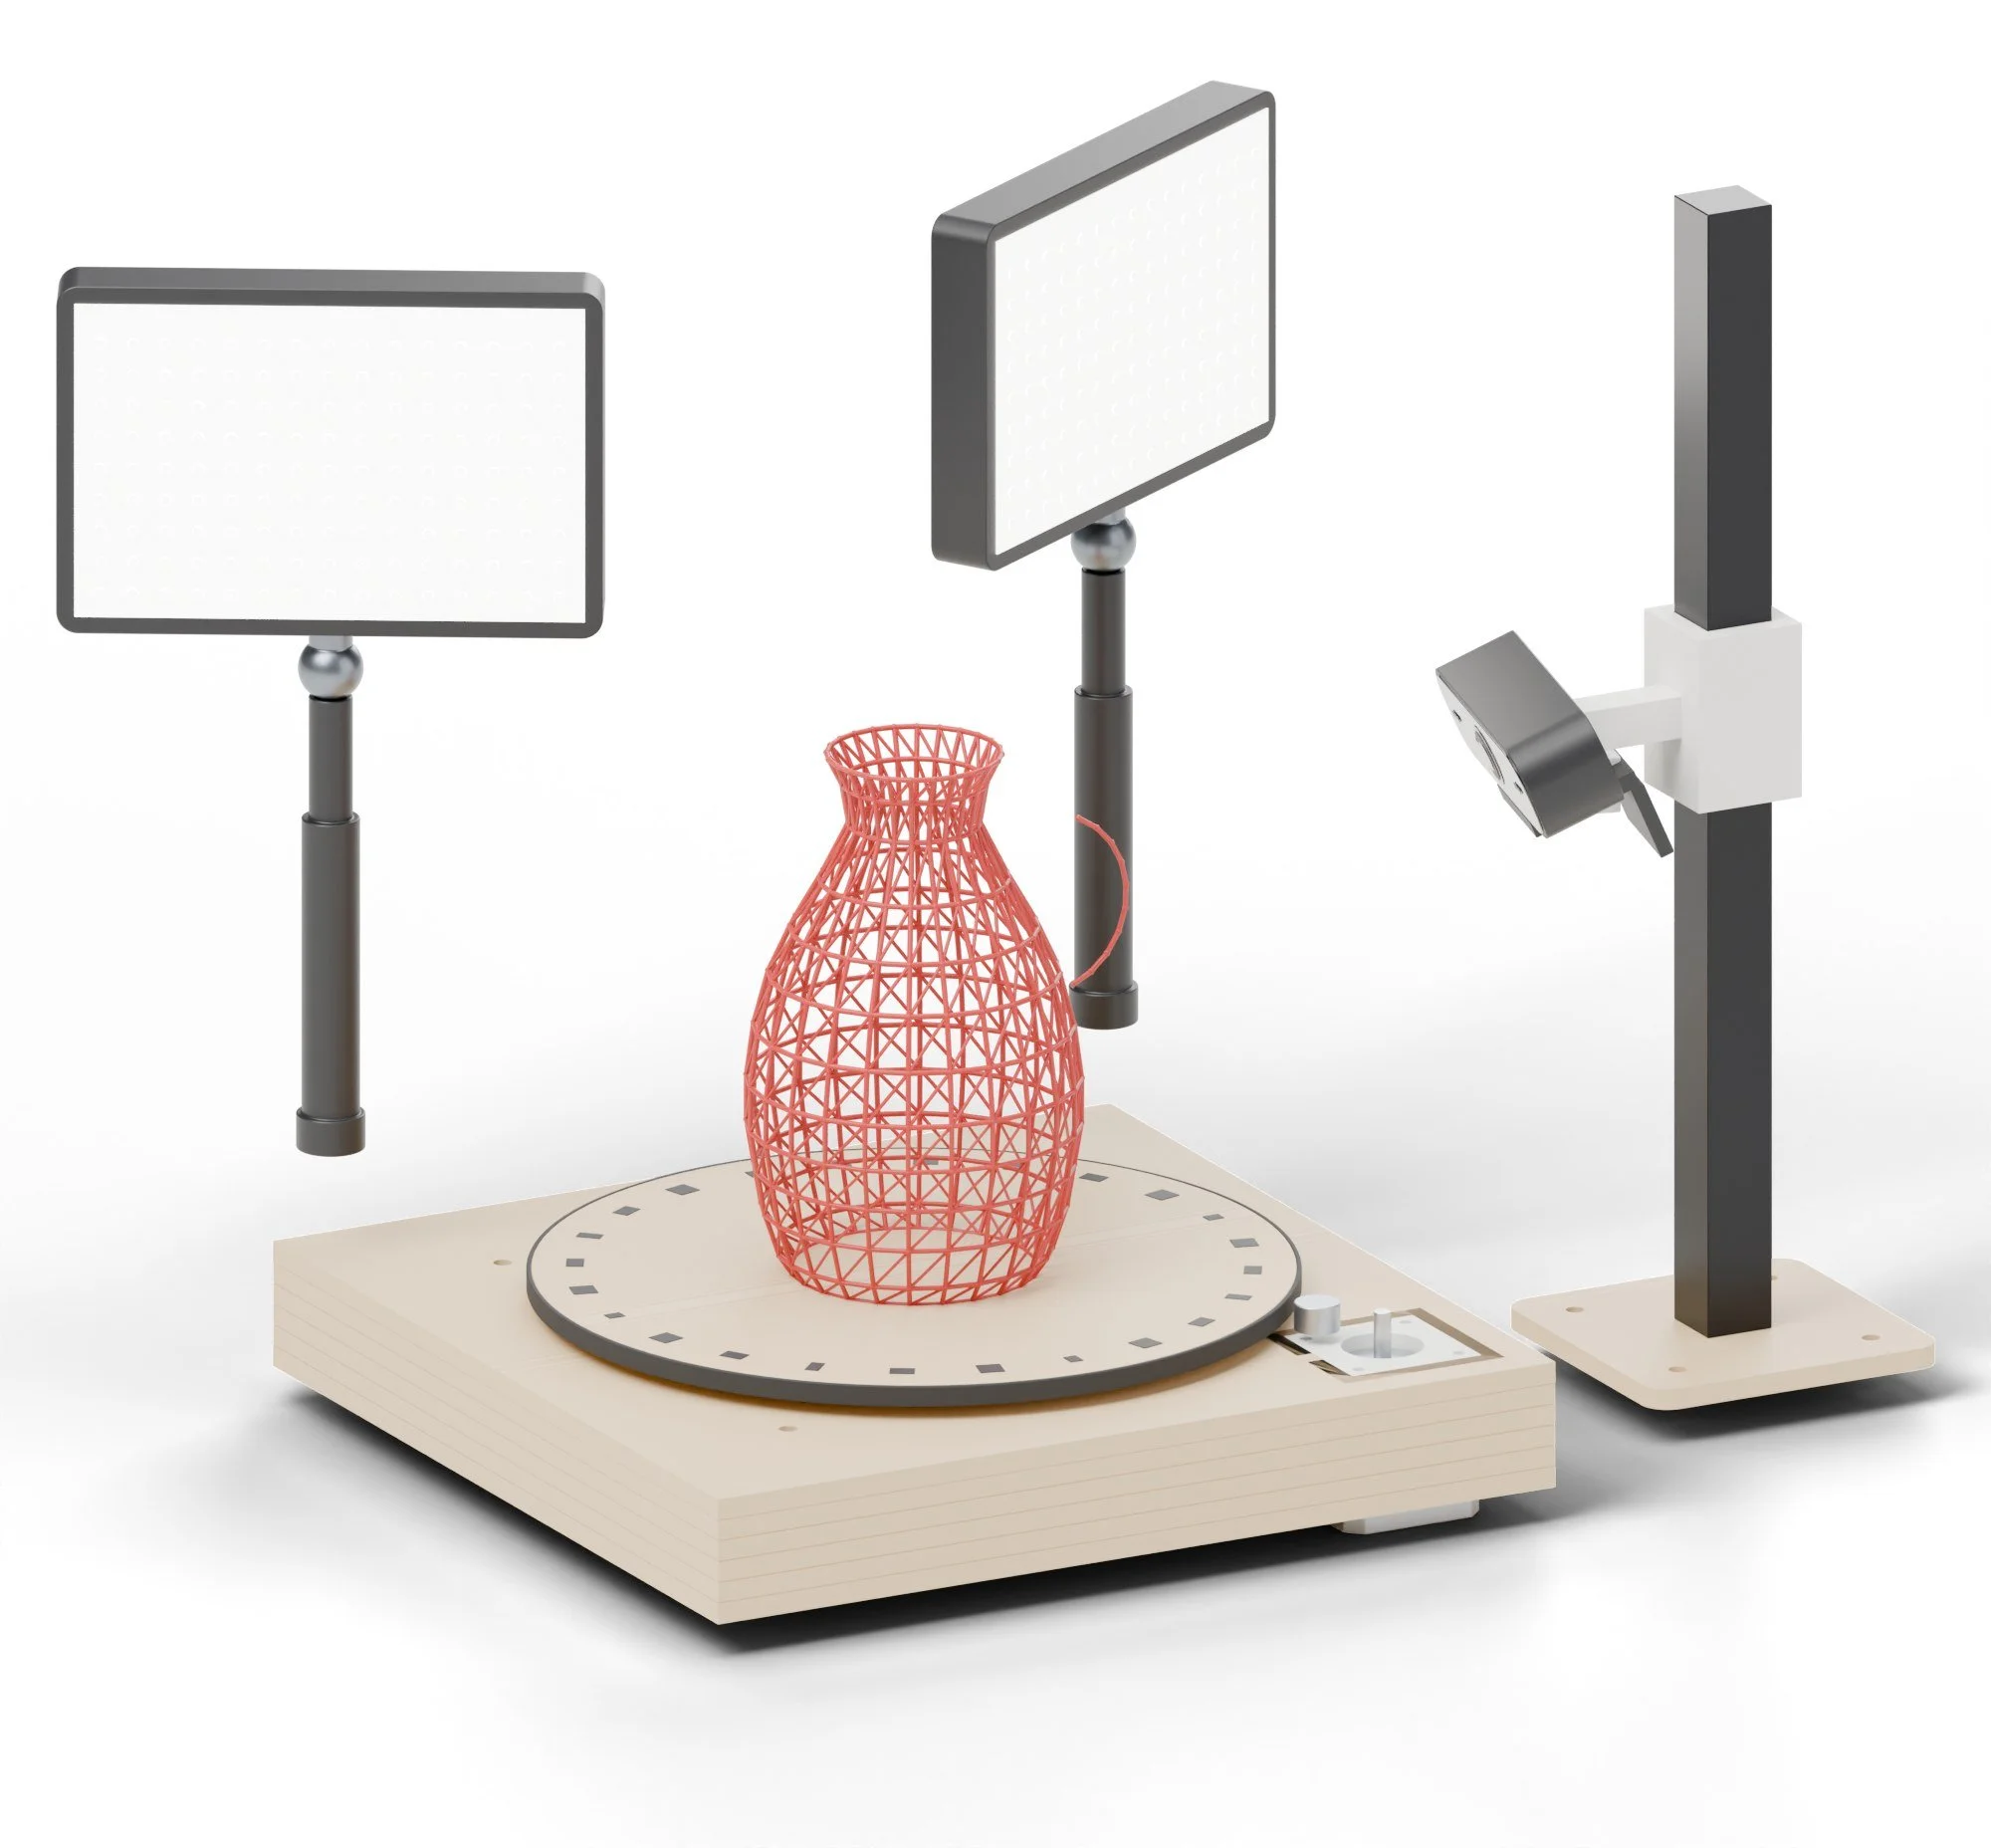 VogueScans of objects, molds and parts
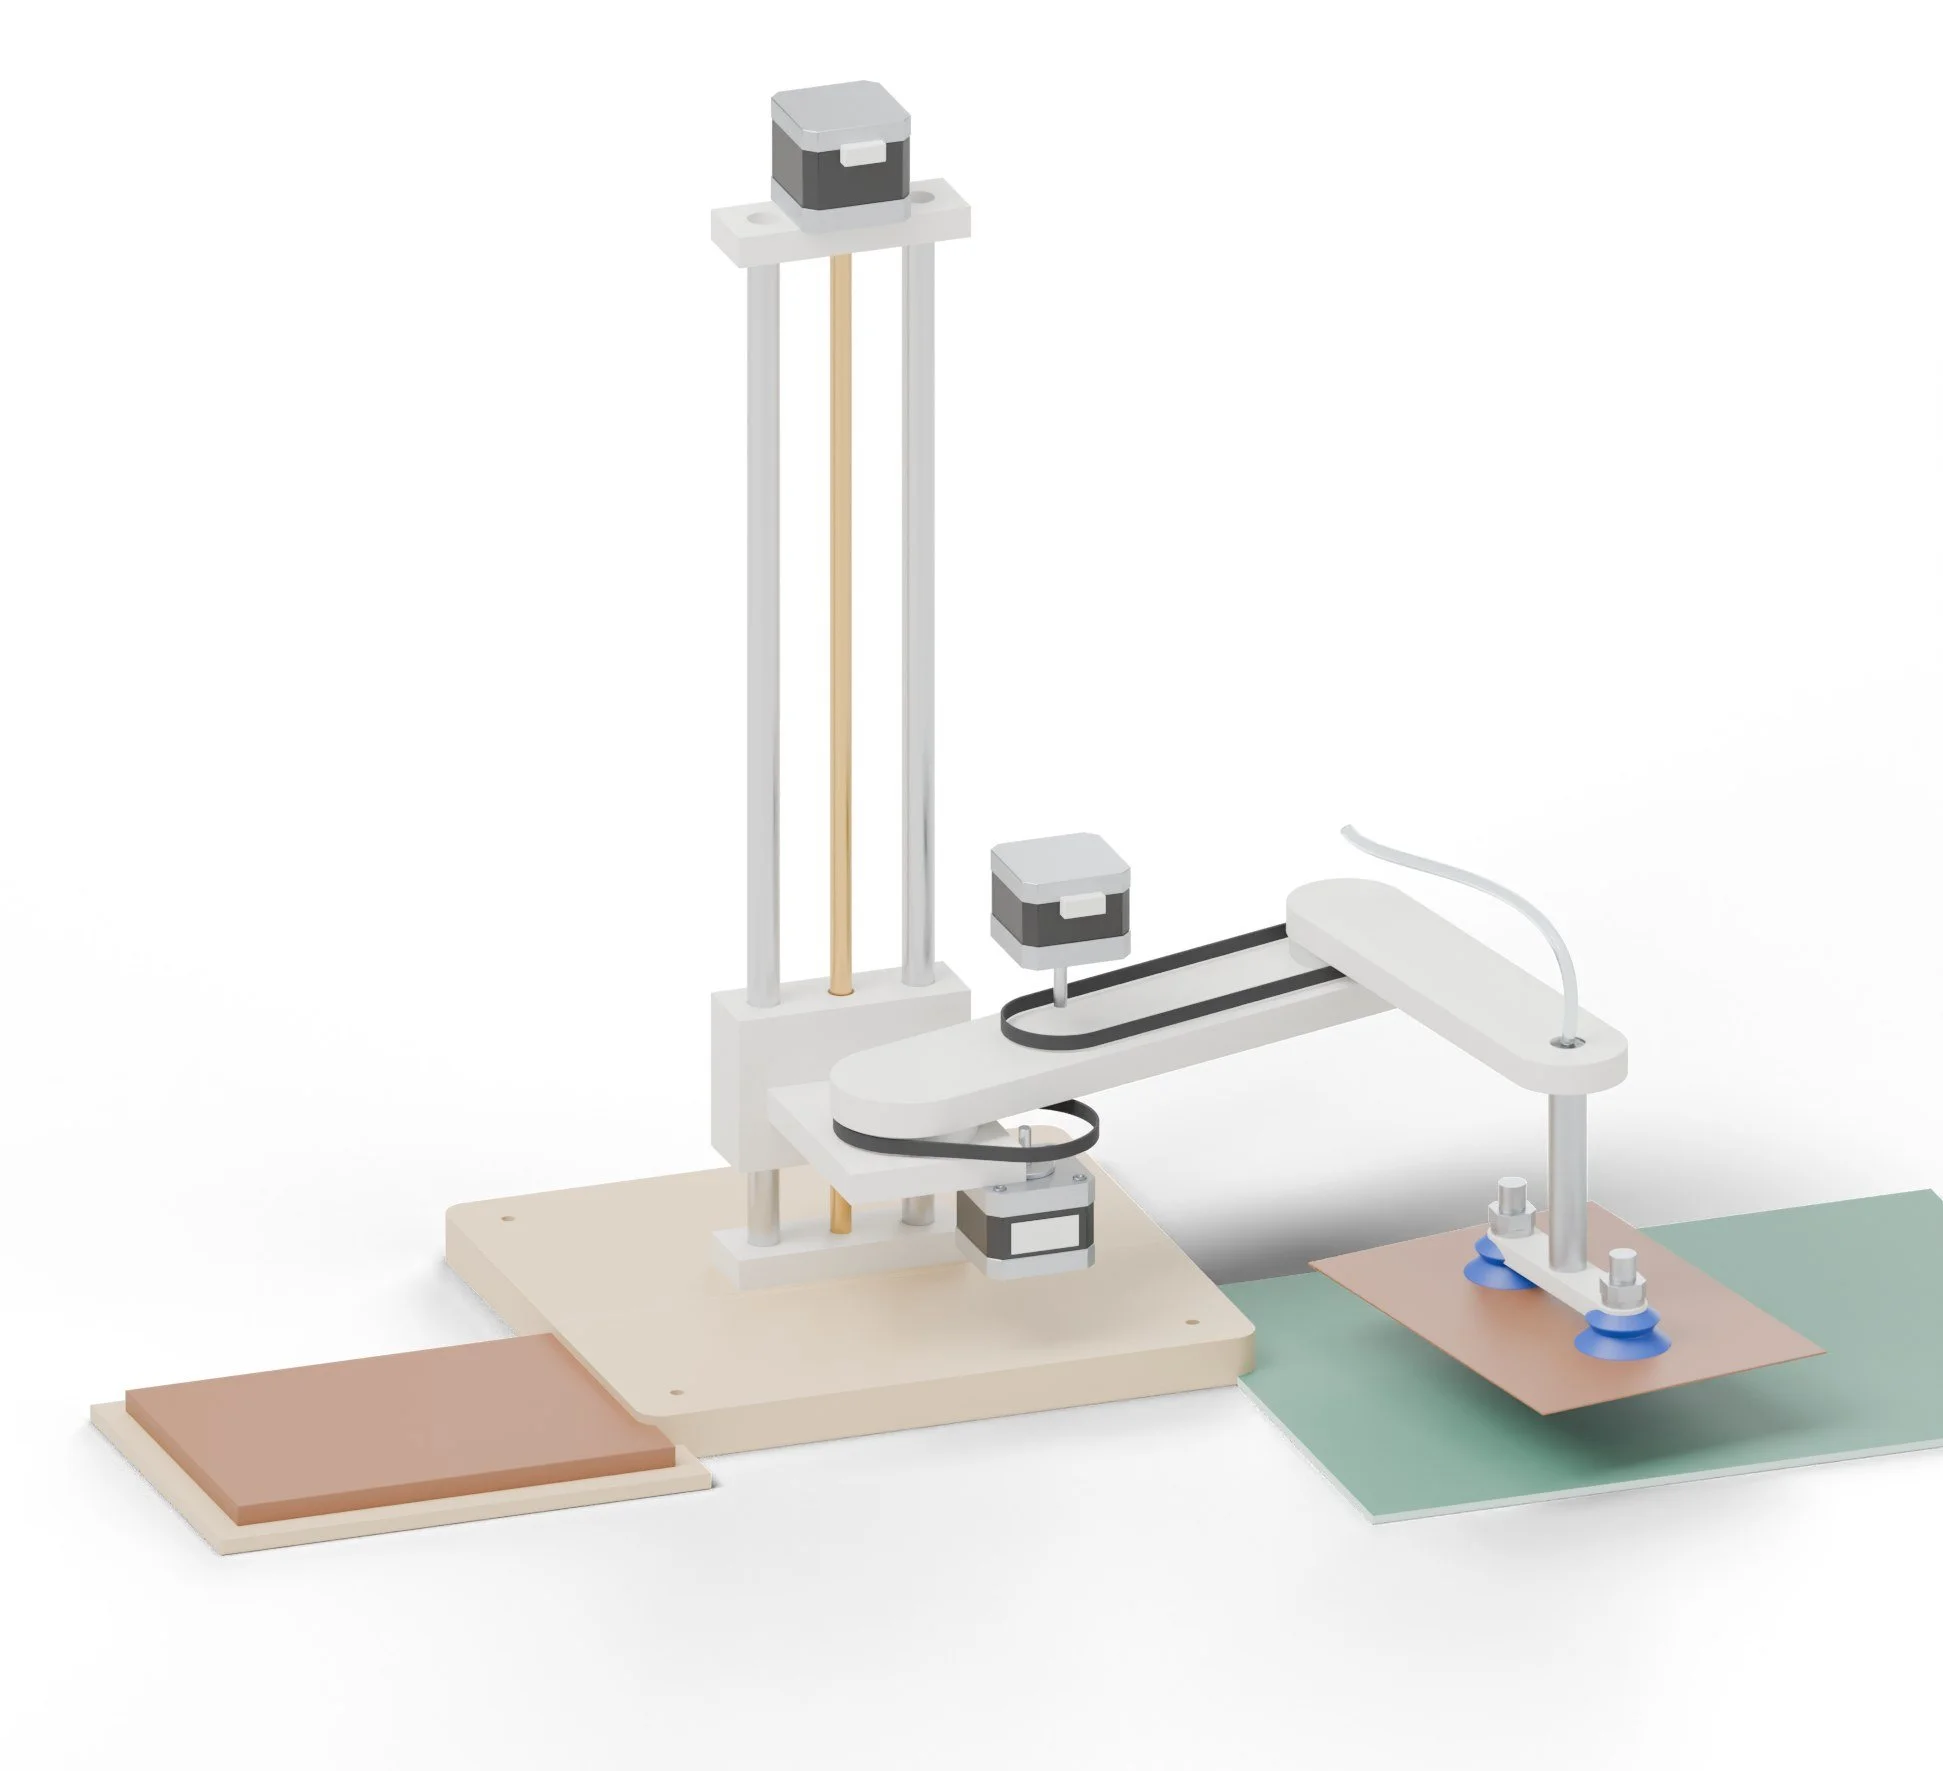 HandmaidenPlate swaps and sheet loading
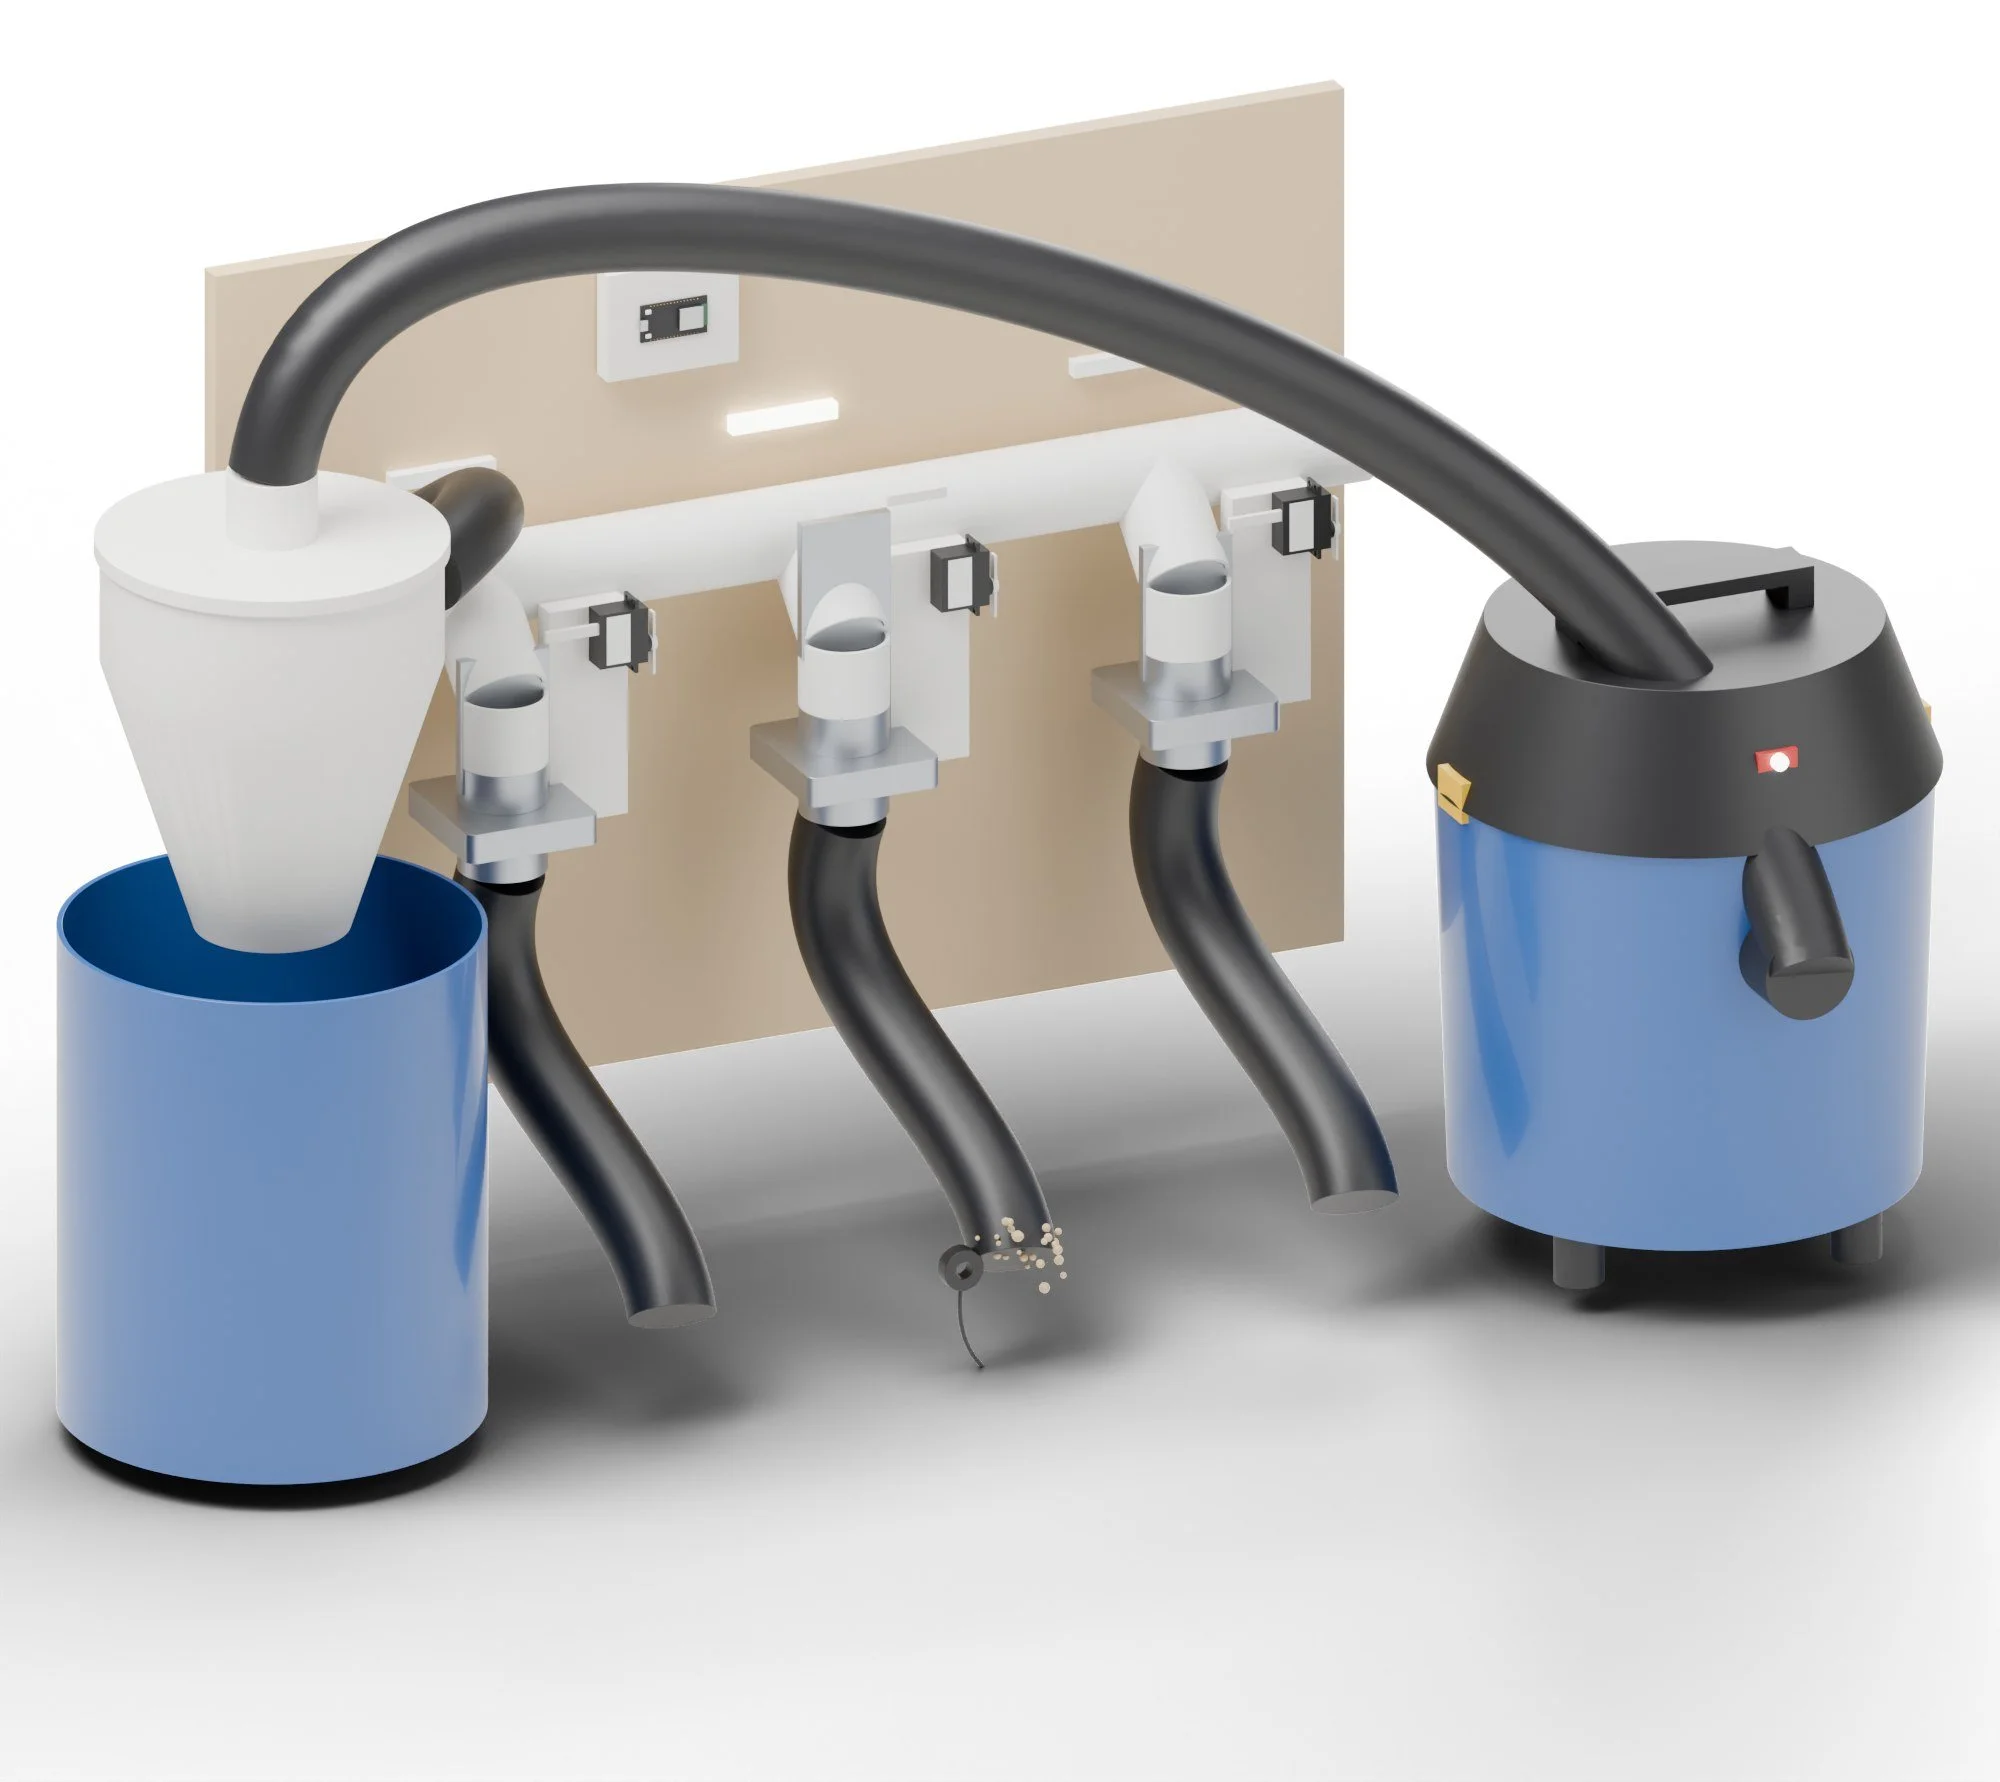 Dusty SpringfieldWhich gates to open
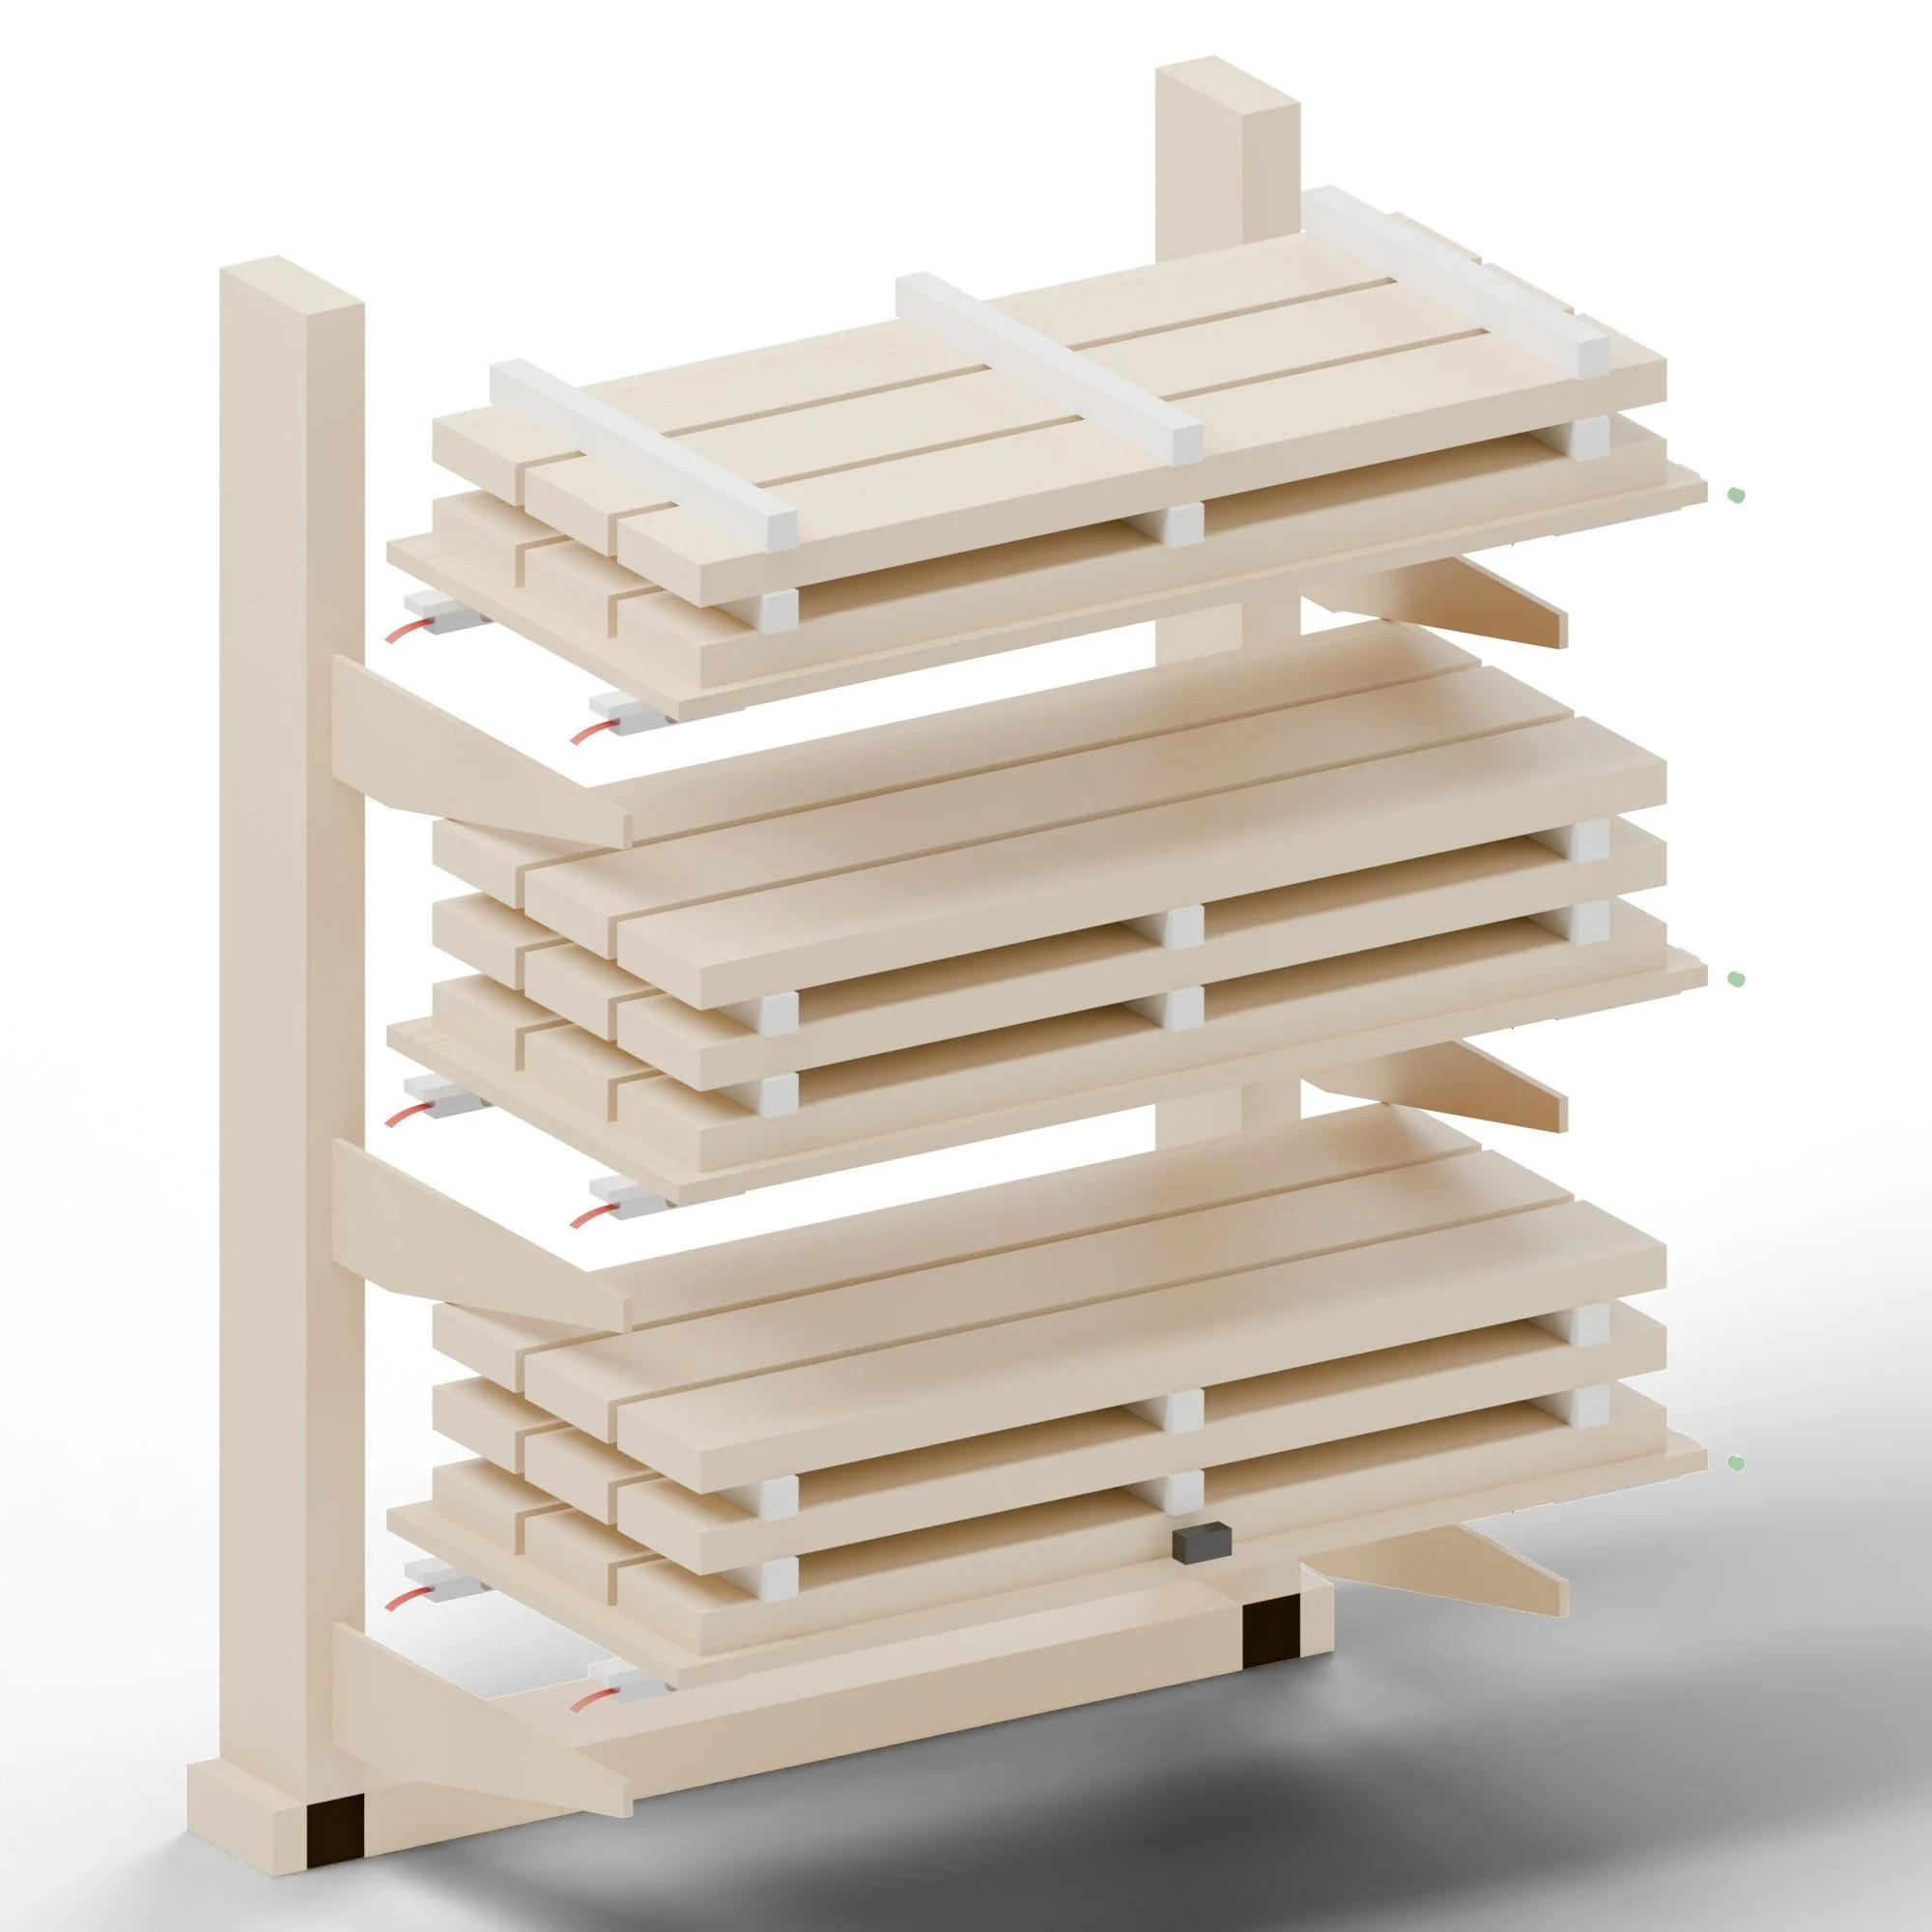 Moisture MadameBoards to dry and weigh
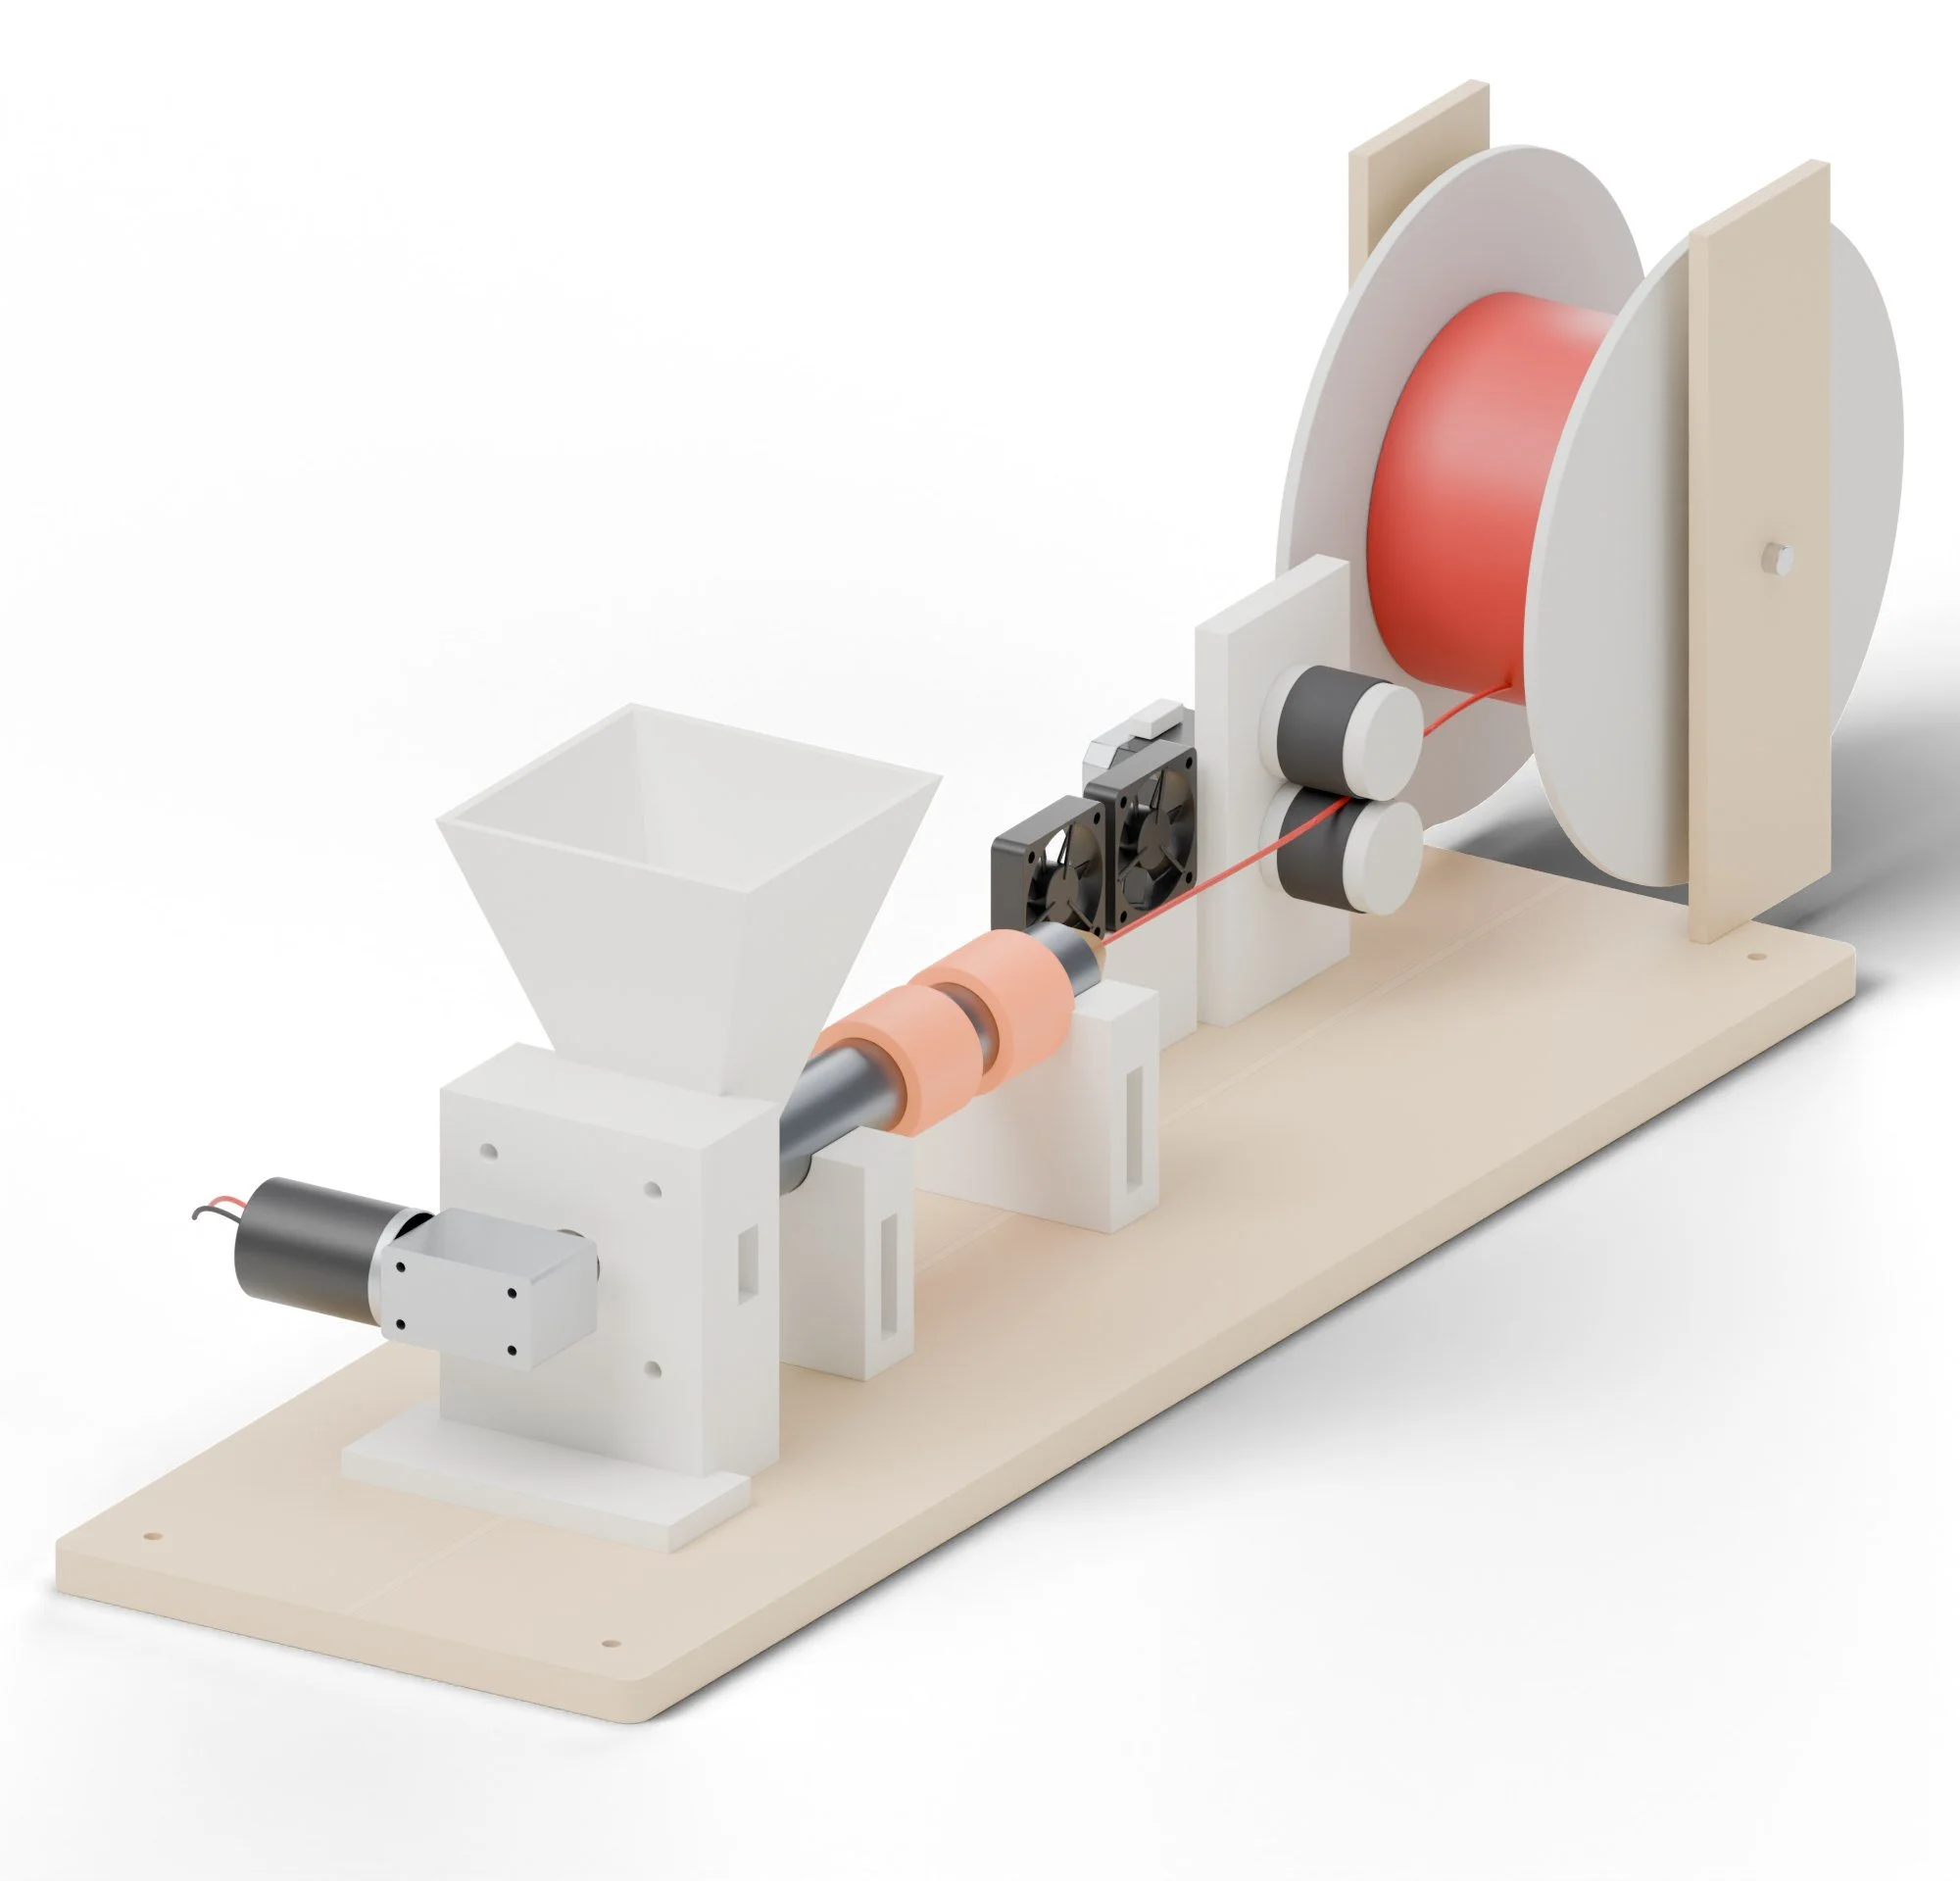 LazarellaFailed prints and wax scraps
Drag Queen
Fairy Ring pipeline / Cut and draw / gets veneer cut files
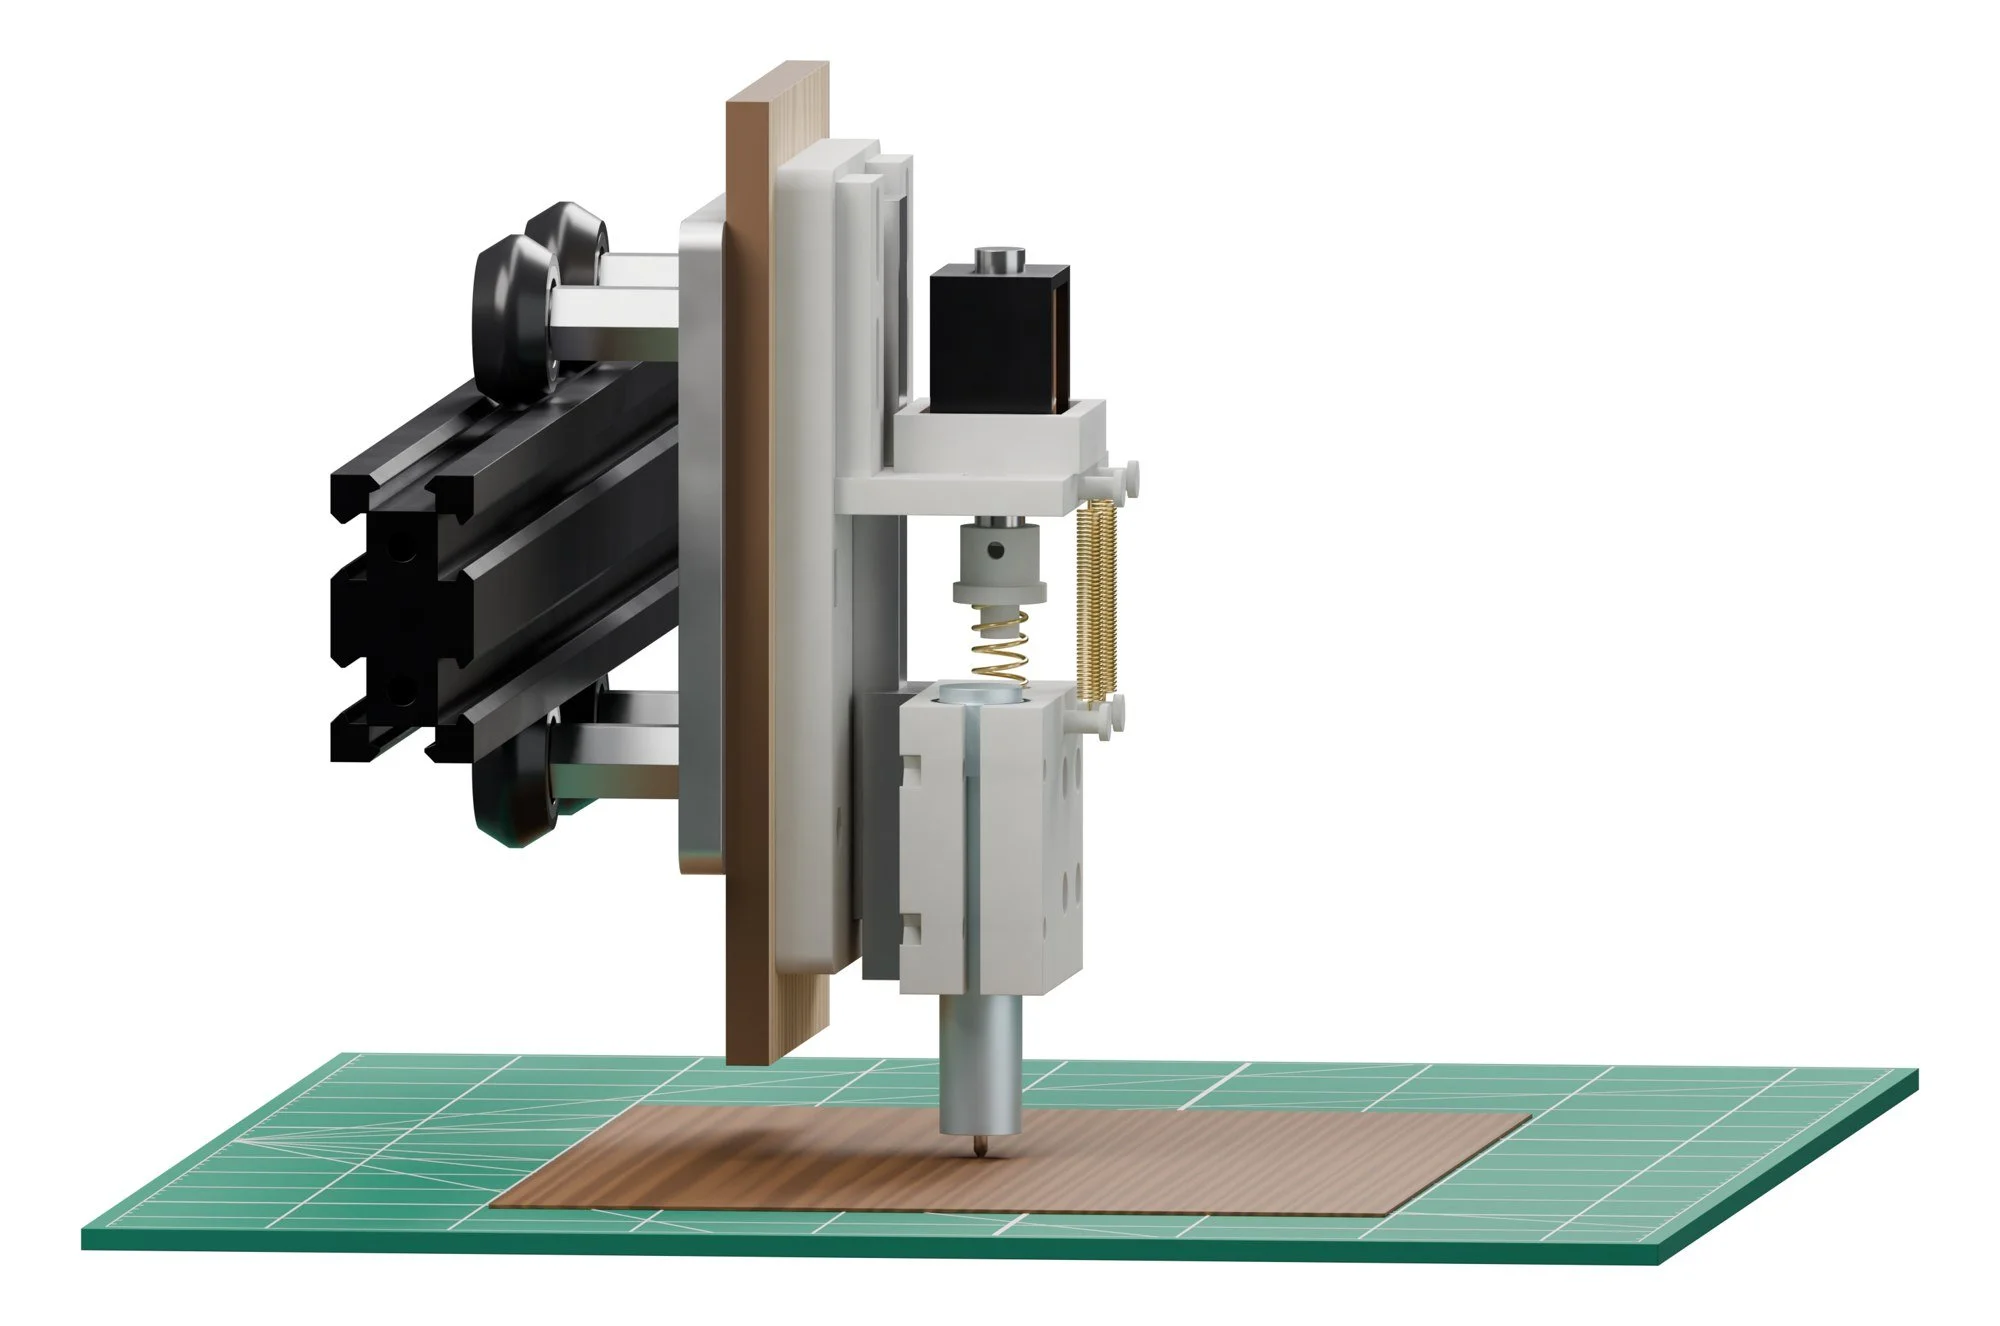
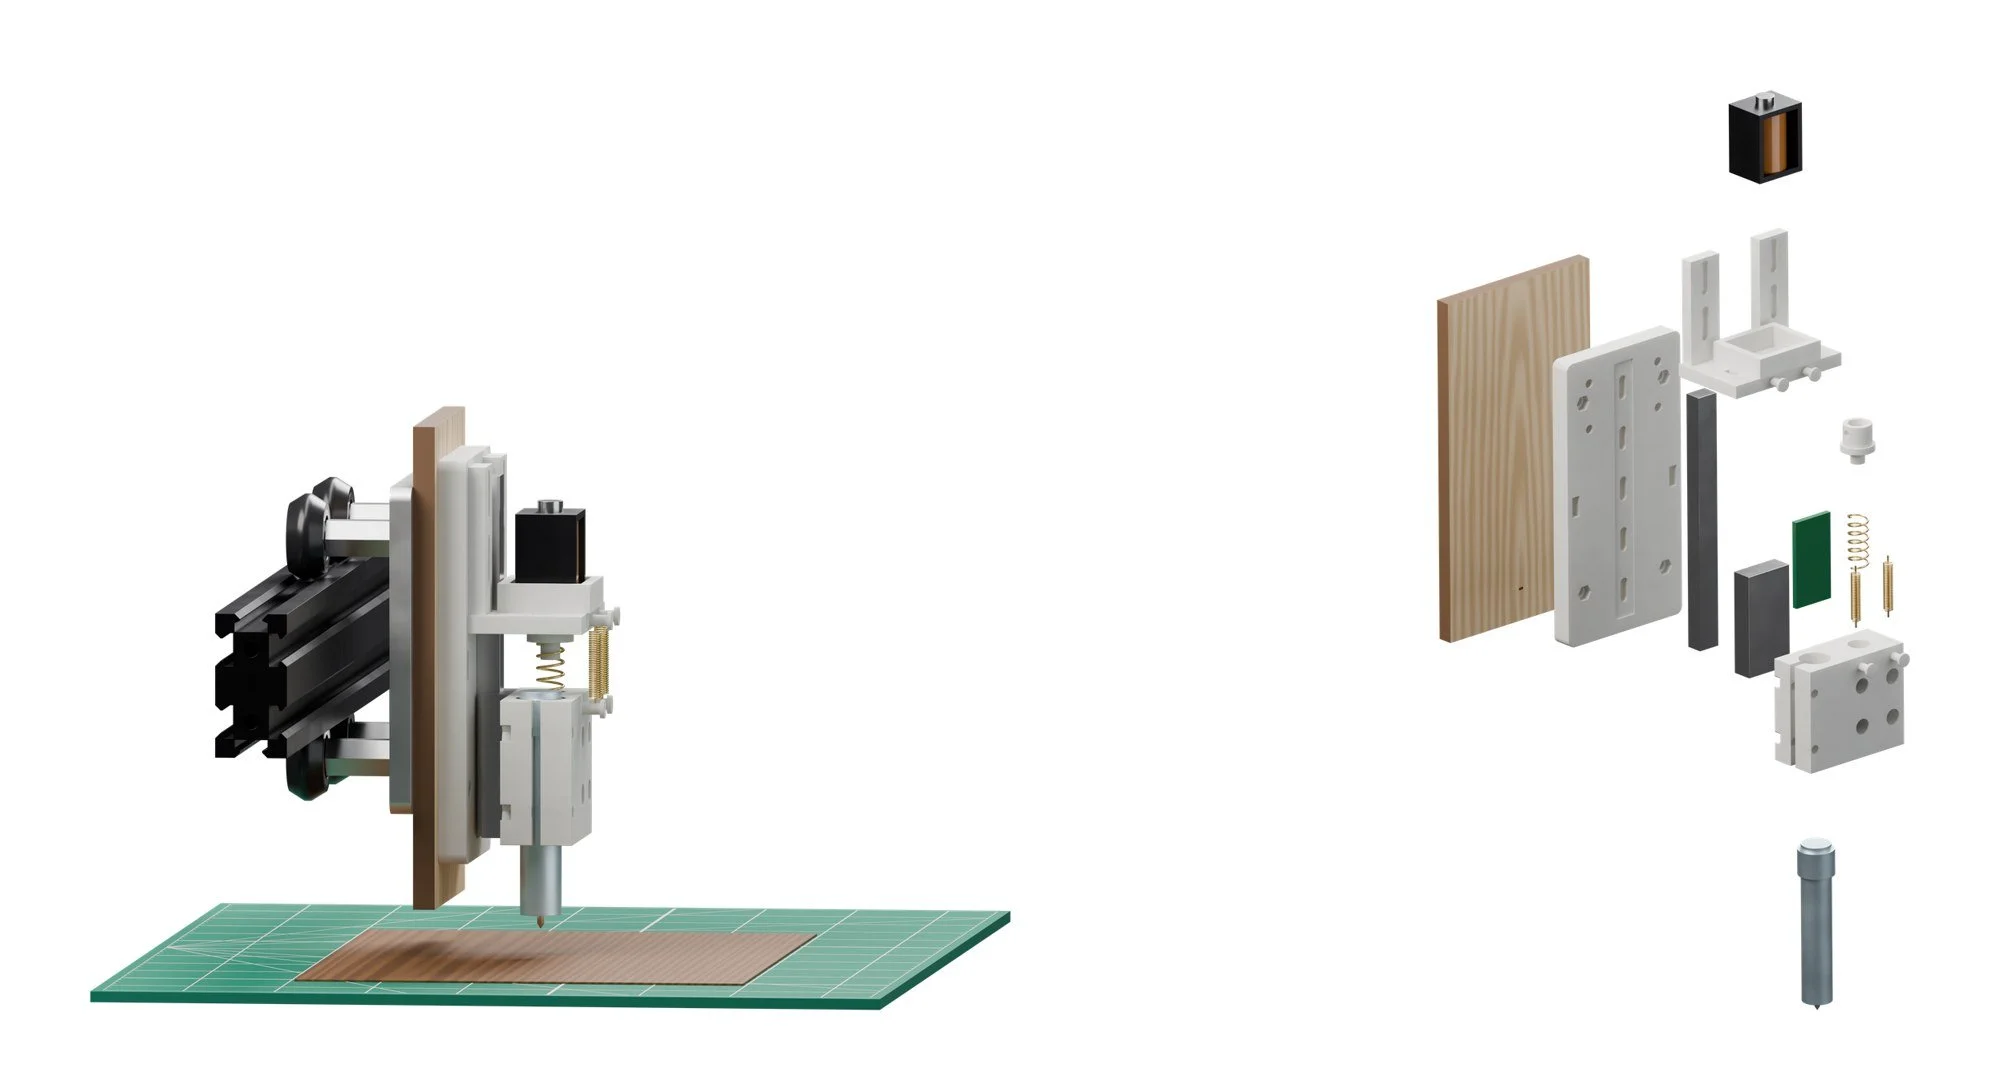
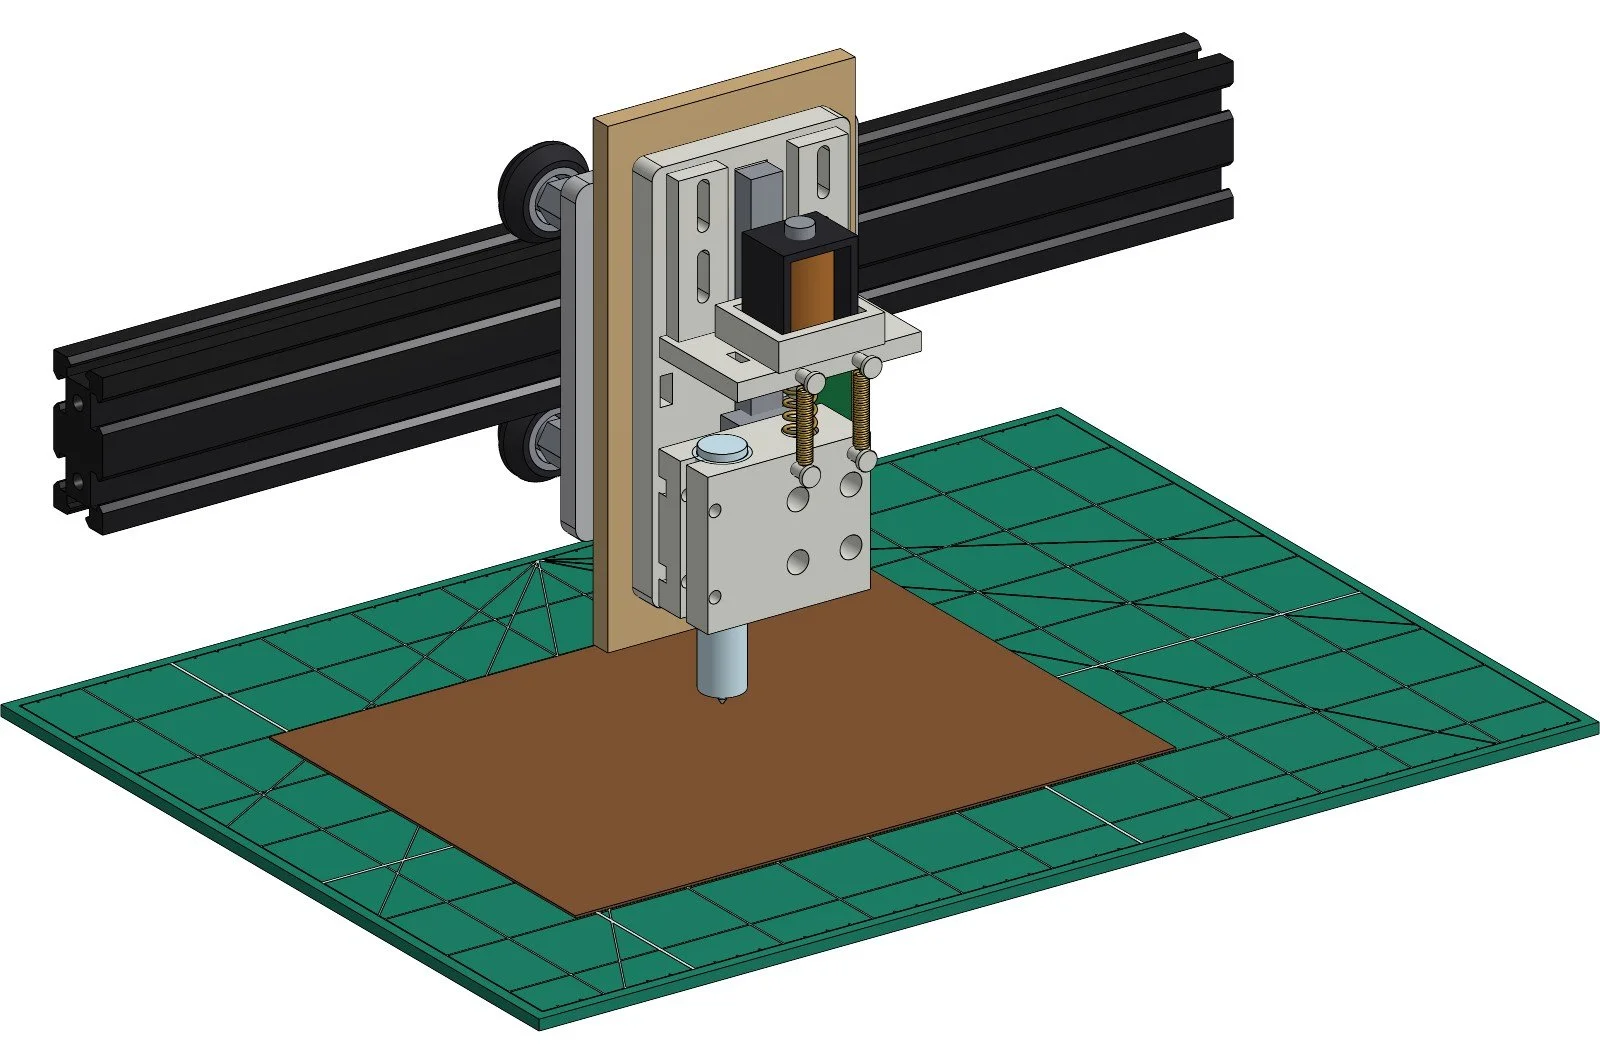
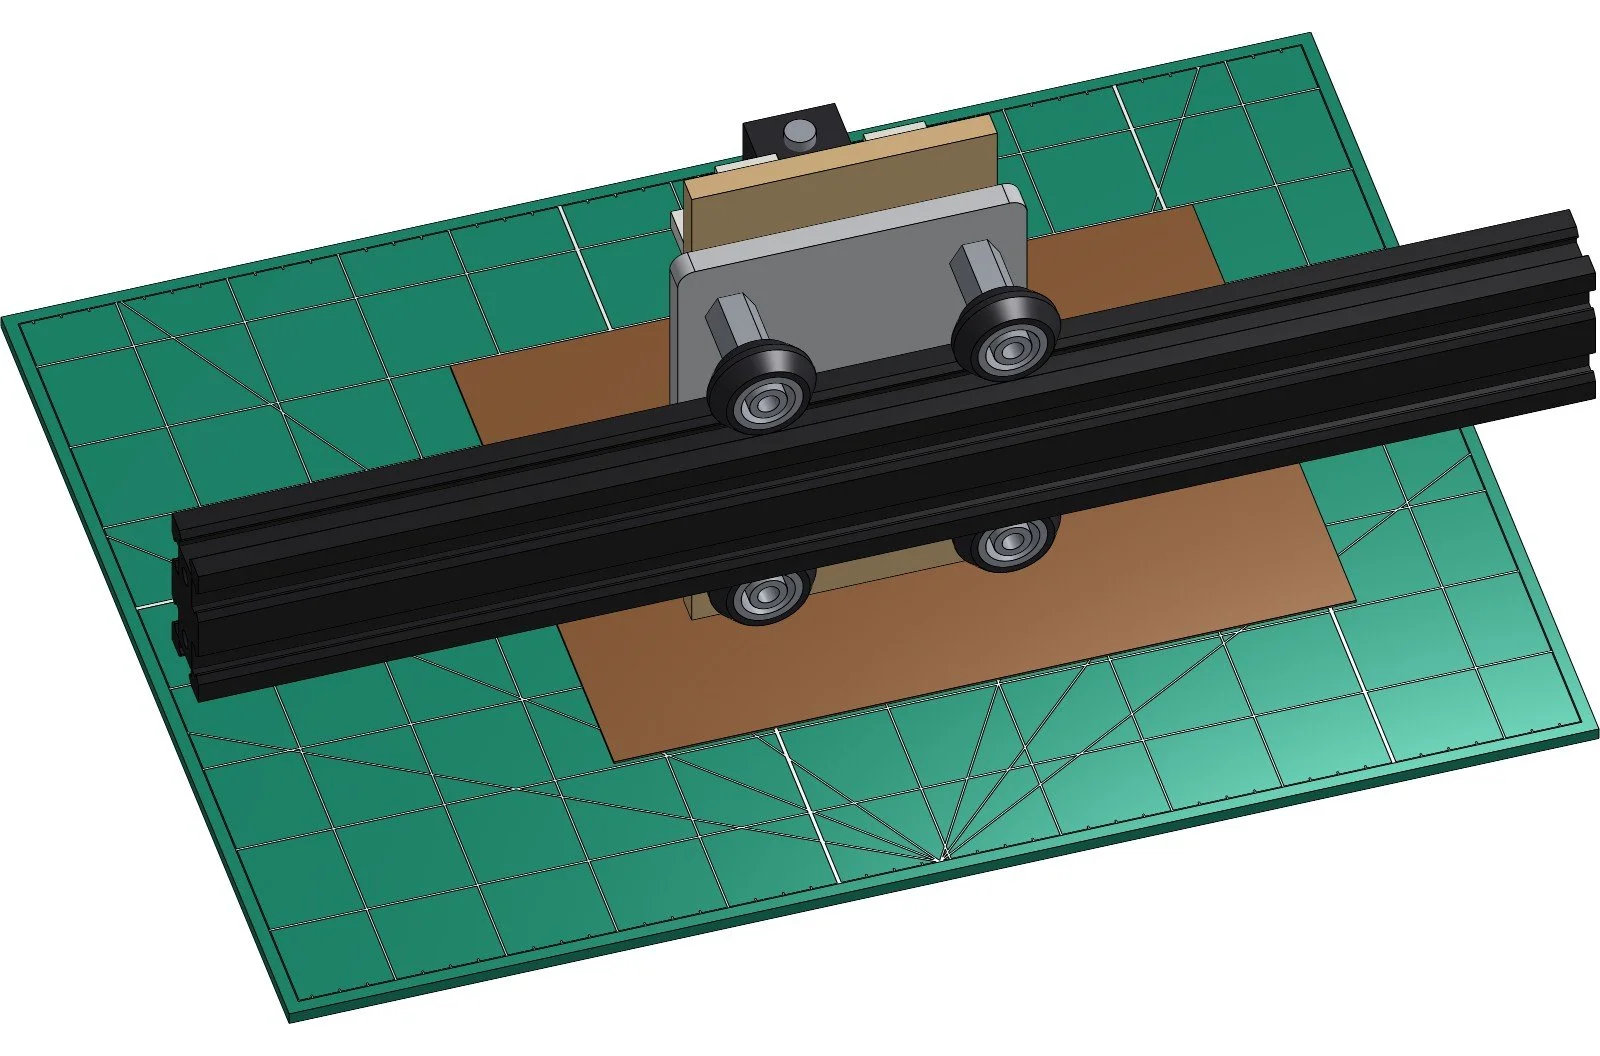
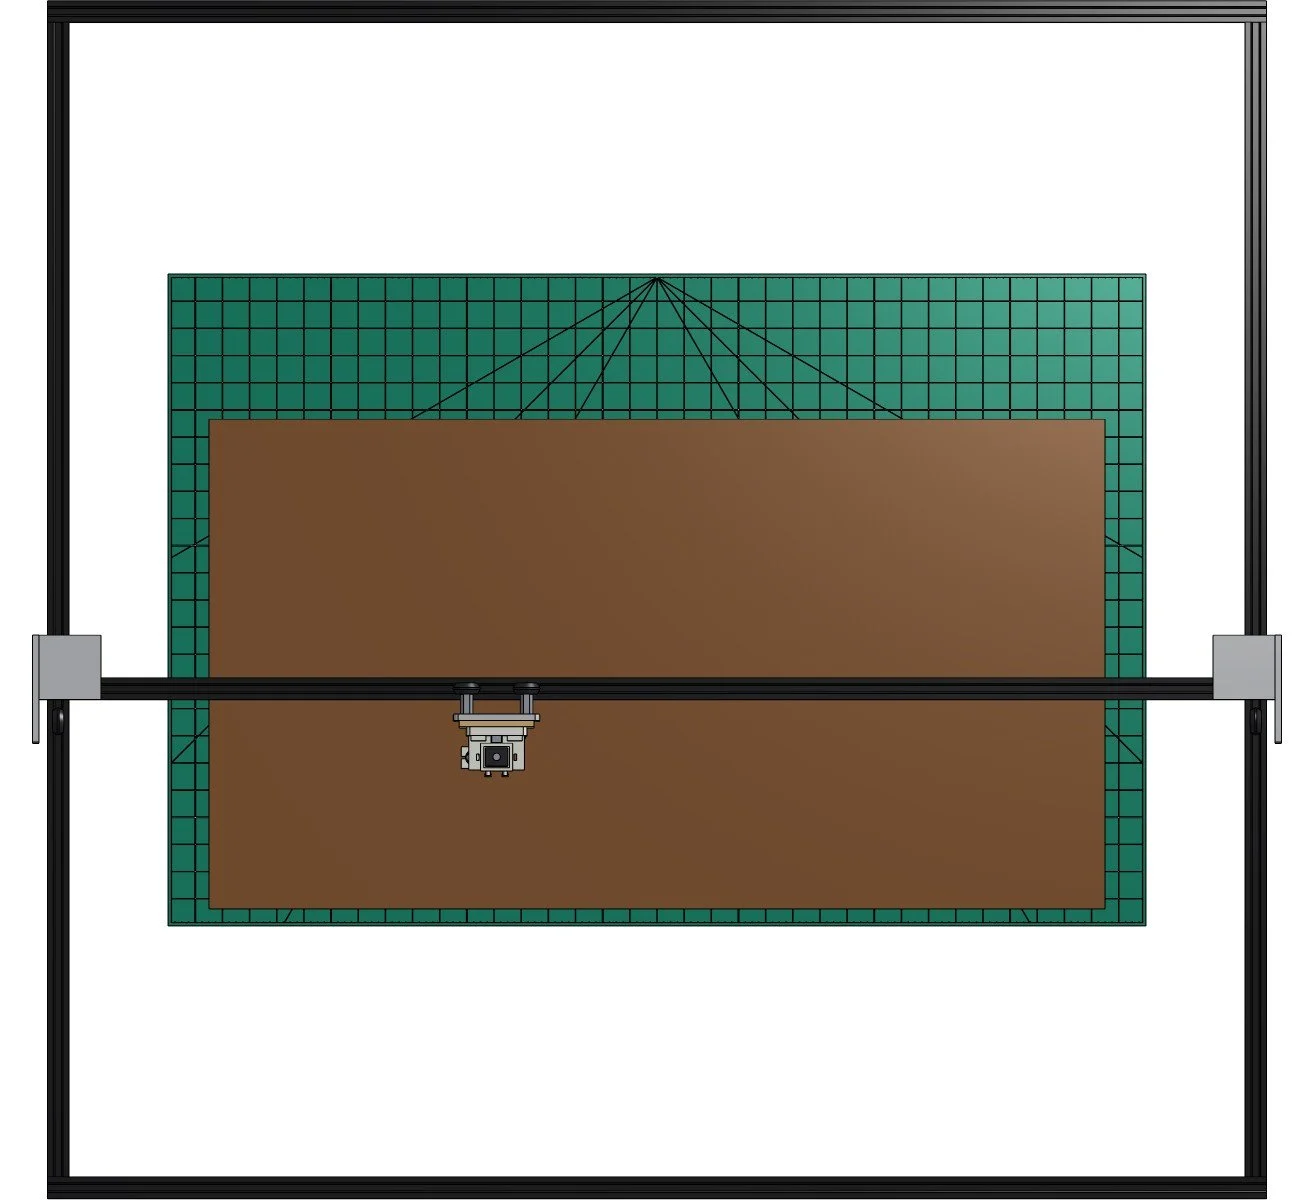
A gantry diode laser already knows how to follow a vector file. Drag Queen swaps the burning for cutting: a 3D-printed head holds a swivel drag knife on a small linear rail, and a 12 V solenoid, switched by the laser’s own signal, pushes the blade down whenever the “laser” turns on. Springs lift it when it turns off. So any laser software cuts veneer straight from an SVG, on a bed that takes a full 36 × 18 in sheet.
How it works
Laser off: blade up / laser on: blade down
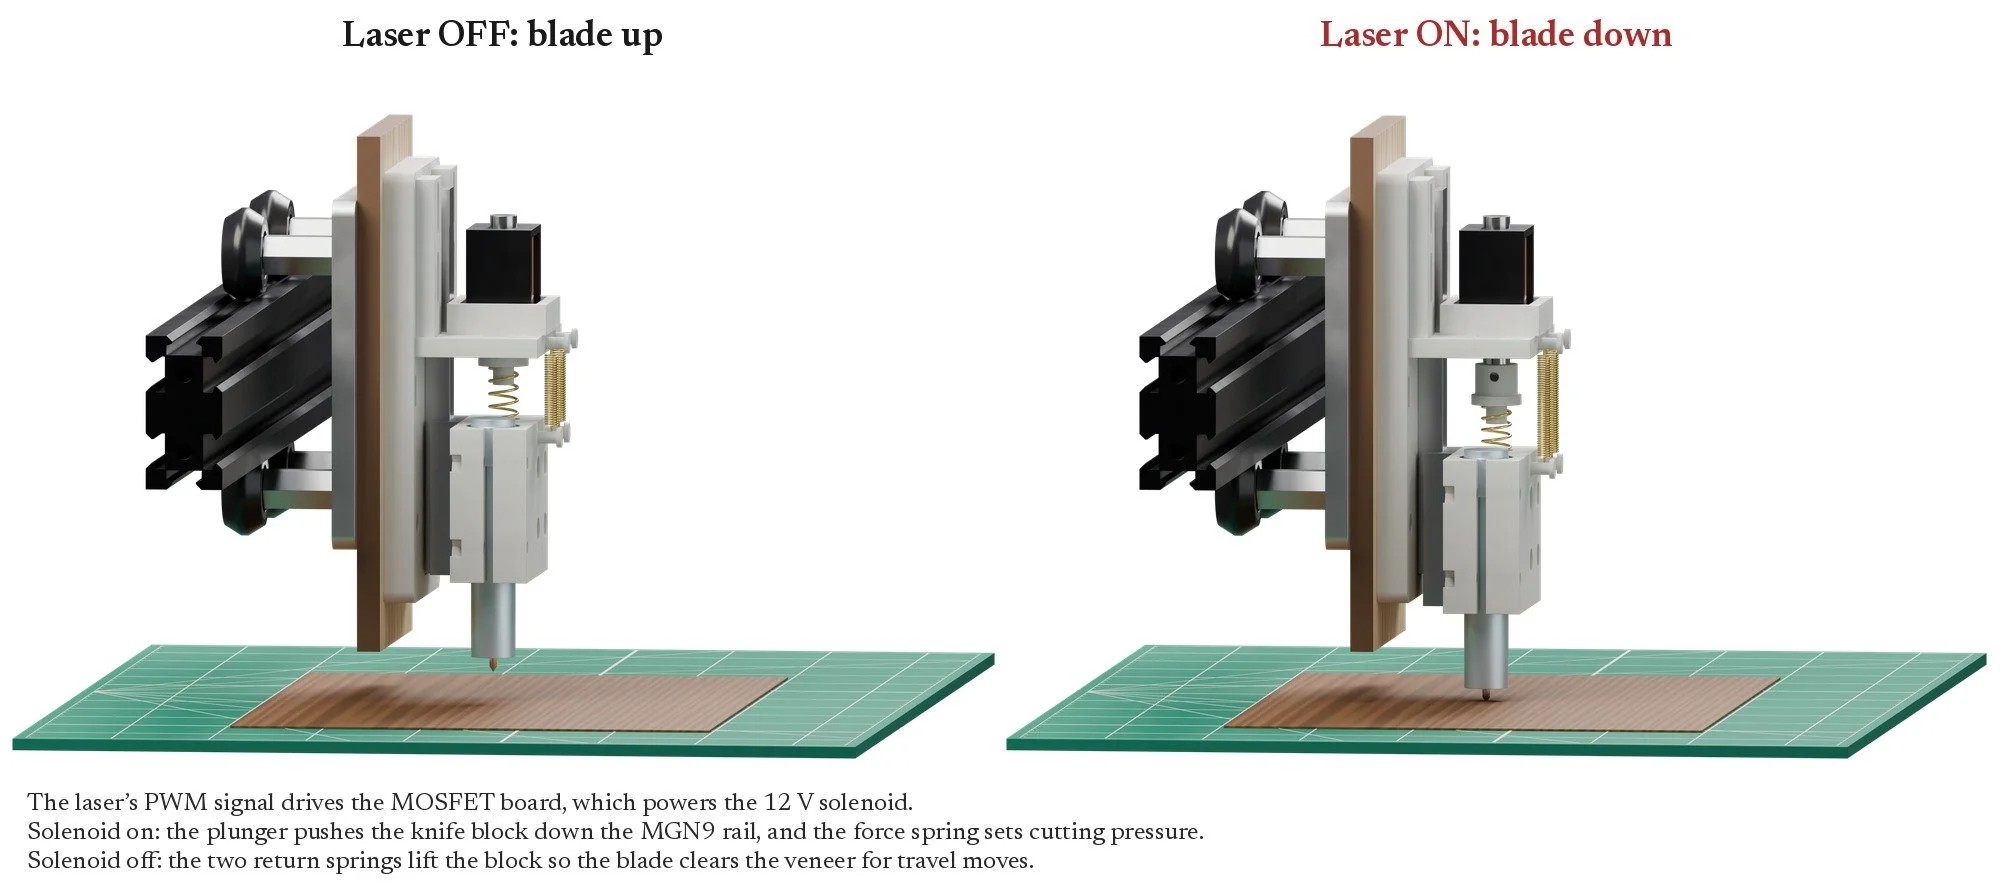
- Laser off. Two return springs hold the knife block up, so the blade clears the veneer on travel moves.
- Laser on. The PWM signal switches the MOSFET board, which powers the solenoid. The plunger drives the knife block down the MGN9 rail.
- Cutting. A compression spring between plunger and block sets the pressure. The swivel blade trails and steers itself; a small script adds the corner swivels and overcut.
What it can make
Products / and less obvious uses
- Marquetry panels
- Every leaf of a pattern cut from one SVG, ready to tape up and glue.
- Inlaid box lids
- Veneer shapes for a lid like the moth doctor's case.
- Lampshades
- Thin veneer cut flat, then rolled into a shade.
- Cork, felt and leather
- Drawer liners and tray pads cut to the exact pocket.
- Stencils
- Card or mylar masks for paint, stain and Honey Glaze.
Tricks worth trying
- Inlay pairs Fairy Ring sends the same outline to Drag Queen (the veneer) and Mortisha (the pocket), offset by the blade, so the two fit without fitting.
- Veneer-faced mycelium Lay a cut veneer face in a Mother mold before packing and the mycelium grows onto its back. A light panel with a wood face. To test.
Recipes
Veneer / laser settings / glue-up
Veneer on the laser
Cut it clean, keep it flatYou need
| Paper-backed veneerEasiest; cuts cleanly and doesn't split | start here |
| Raw veneerFlatten first if it's wavy | spray, press, dry |
| SettingsRun a test grid on each new flitch | power / speed grid |
Method
- Flatten wavy veneer: mist with veneer softener or water, press between paper and boards overnight.
- Tape the sheet down with low-tack tape so air assist can't lift it.
- Cut a test grid first. Use the lowest power that cuts through on one pass.
- Mask the face with transfer tape if the smoke stains it.
- Lay the pieces on the backer, glue with Honey Glaze, press in Flex Appeal.
If it goes wrong
- Scorched edges
- Too much power, too slow. Raise air assist.
- Small pieces fall through
- Add tabs, or cut on a honeycomb with a paper underlay.
Never leave a laser running. Keep a fire extinguisher by it and the lid shut.
What to buy
Eleven parts from Amazon / one of each / prices as carted, November 2026
 01Longer Ray5 10W laser engraver$280.43The motion system: frame, belts, steppers, controller and power supply. Its laser output becomes the blade signal.View on Amazon →
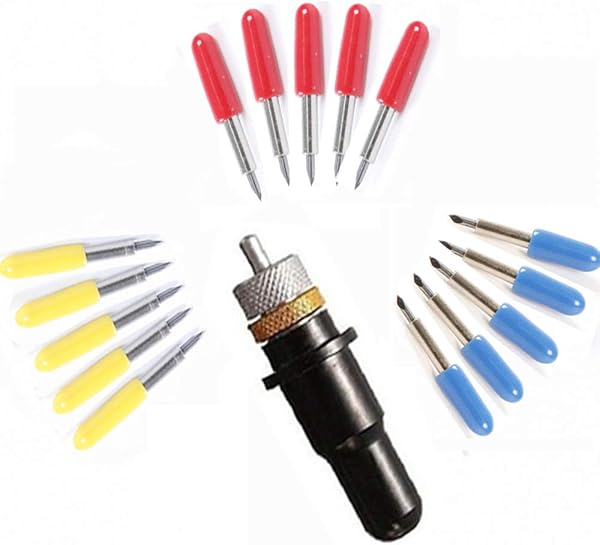 02F.L.S drag-knife holder + 15 blades$16.99The cutter. A Roland-style swivel blade that trails behind the holder and steers itself round curves.View on Amazon →
 03uxcell MGN9 rail + MGN9H carriage$12.79The up-and-down guide the knife block rides on.View on Amazon →
 0412 V push-pull solenoid, 0.39 in stroke$9.99Pushes the blade down whenever the laser is on.View on Amazon →
 05Dual MOSFET trigger boards (5)$7.99Lets the laser’s PWM signal switch 12 V to the solenoid.View on Amazon →
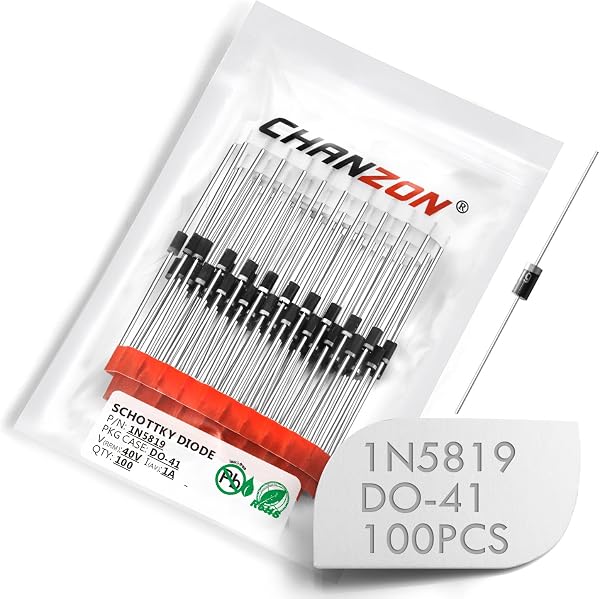 061N5819 Schottky diodes (100)$7.99One goes across the solenoid to soak up the kick when it switches off.View on Amazon →
 07Spring assortment, 400 pcs$16.99Two return springs lift the blade; one compression spring sets cutting pressure.View on Amazon →
 08M3 screw and nut kit, 960 pcs$14.99Holds the whole head together.View on Amazon →
 09WAGO 221 lever nuts (12)$12.45Tool-free wiring splices.View on Amazon →
 10SENTK self-healing mat, 24 × 36 in$27.99The cutting surface. Takes a full 36 × 18 in veneer sheet.View on Amazon →
 11Krylon Easy Tack spray$12.49Repositionable tack that holds veneer flat on the mat.View on Amazon →
What to print
Five parts / SLS Nylon 12, white / Xometry, at list price
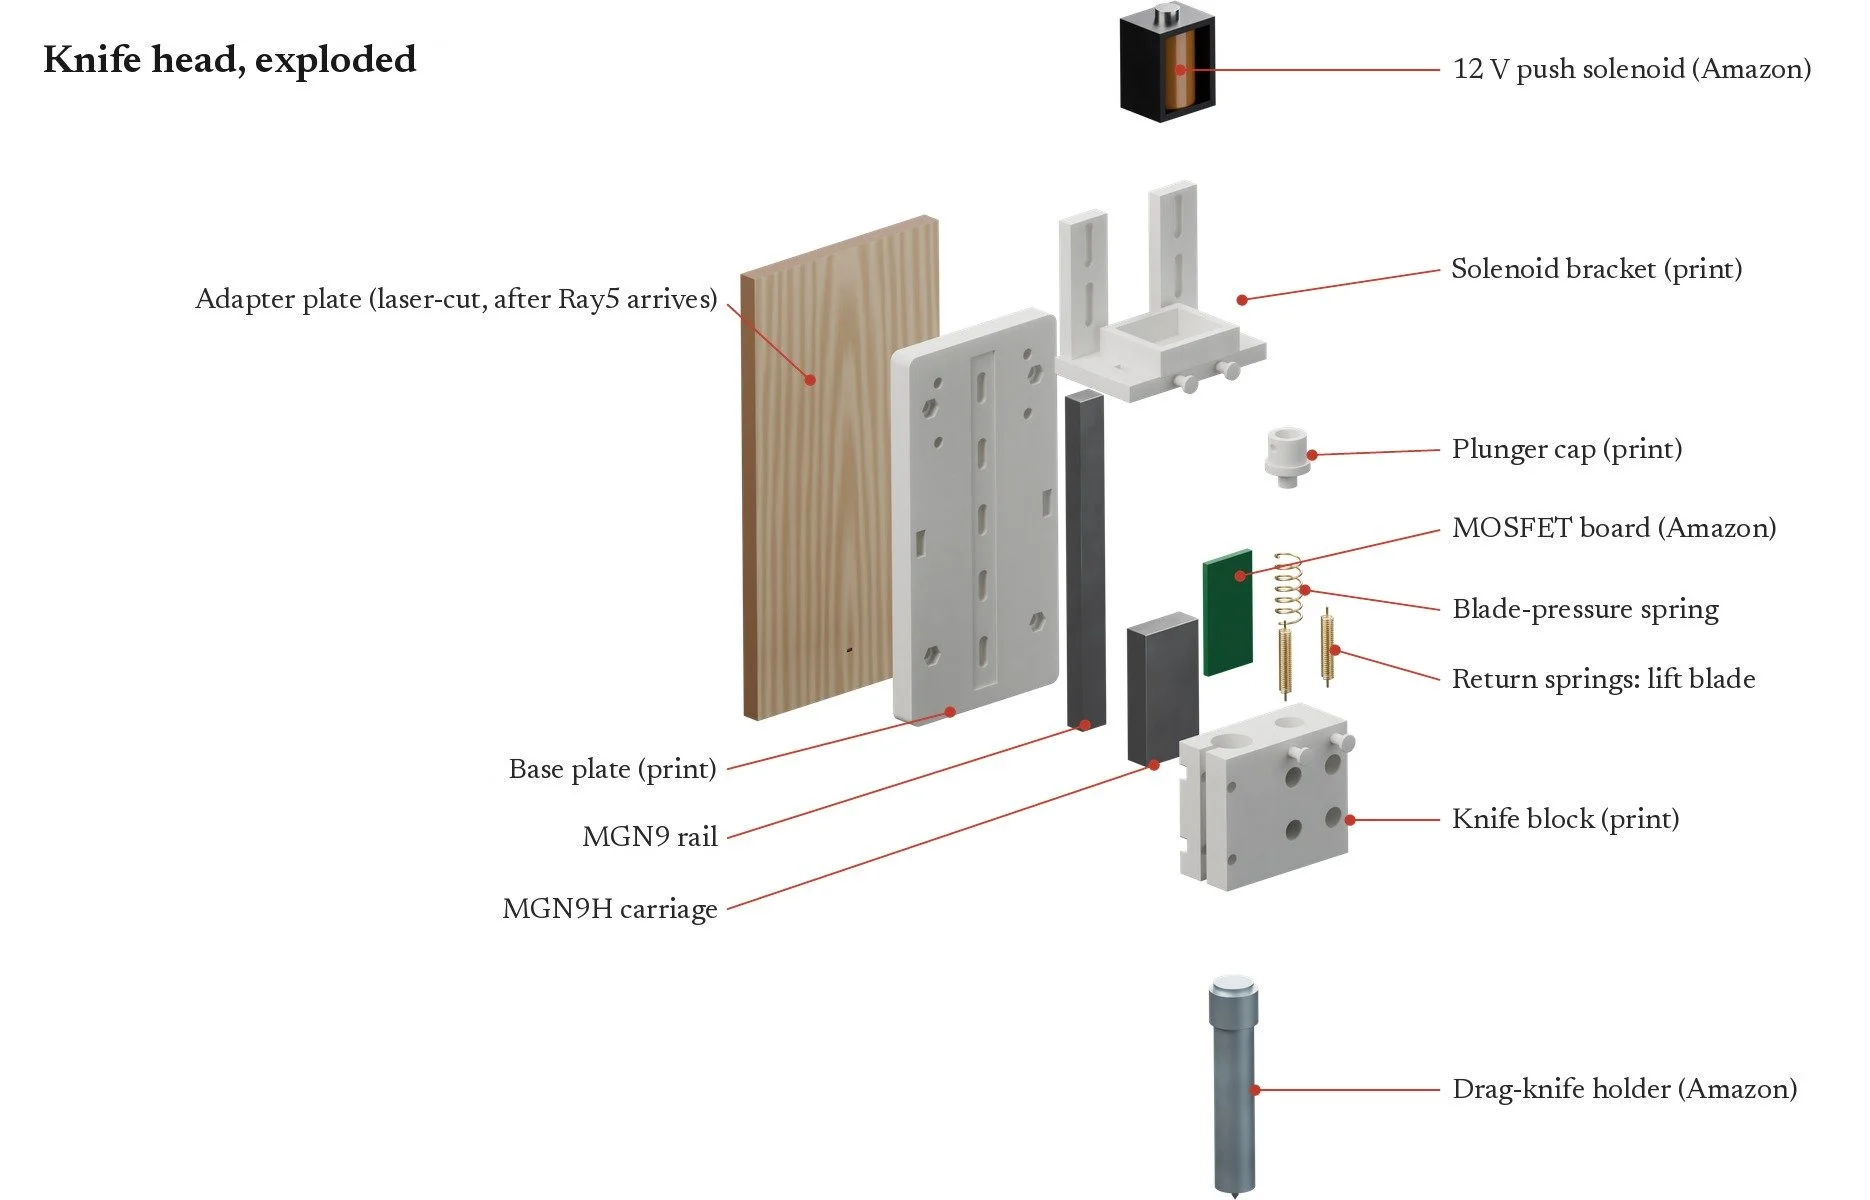
| Base plateCarries the rail and bolts to the gantry | $49.58 |
| Knife blockSplit clamp round the blade holder, rides the carriage | $37.40 |
| Solenoid bracketHolds the solenoid over the block | $29.59 |
| Plunger cap, 0.28 inPresses the pressure spring | $7.84 |
| Plunger cap, 0.12 inSame, for a 0.12 in plunger | $7.89 |
| Printed parts | $132.30 |
Nylon 12 is stiff enough: blade drag on veneer is a few newtons. The one thing to watch is heat at the solenoid, which is why the blade runs at S600–700 instead of full power. The adapter plate that joins the head to the Ray5 is cut on the machine itself, so it costs nothing.
Price breakdown, build steps, settings and the build kit
Price breakdown
$553.39 before tax / prices change, so check the links
| Ray5 gantry | 51% | $280.43 |
| Knife head hardware | 13% | $71.75 |
| Printed parts (list price) | 24% | $132.30 |
| Mat and tack | 7% | $40.48 |
| Electronics | 5% | $28.43 |
| Amazon subtotal | $421.09 | |
| Total | $553.39 |
Build it
Nine steps / an afternoon once the parts are in
- Build the Ray5 from its manual and check it moves and lasers normally in LightBurn or LaserGRBL.
- Bolt the MGN9 rail to the printed base plate. The holes are slotted so you can square it. Slide the carriage on.
- Clamp the blade holder in the knife block with an M3 screw across the split, then bolt the block to the carriage.
- Zip-tie the solenoid into its bracket, press the plunger cap on, and screw the bracket to the top of the base plate.
- Fit the compression spring between cap and block (blade pressure), and hook the two return springs from block to bracket (blade lift).
- Wire the laser’s PWM output to the MOSFET trigger, 12 V through the MOSFET to the solenoid, and the 1N5819 across the solenoid, stripe to +. Splice with WAGOs.
- Cut the adapter plate on the Ray5 itself while the laser head is still on, then mount the knife head beside it or in its place.
- Lay the mat on the bed, tack the veneer down, and set the blade so the tip clears one veneer thickness plus a hair.
- Draw cut lines in red, run svg2dragknife.py in.svg out.gcode --power 650, and send the G-code.
Settings
GRBL and G-code / LightBurn or LaserGRBL
- $32=0
- Laser mode off while cutting, so the solenoid stays on through moves. $32=1 to laser again.
- M3 S650
- Blade down at 60–70 % power: enough to pull the solenoid in without cooking it. M5 lifts.
- G4 P0.15
- Short dwell after M3 (and 0.12 s after M5) so the blade fully drops or lifts before moving.
- F1500
- About 0.98 in/s to start. Two light passes beat one heavy one on figured veneer.
- 0.25 / 0.059 in
- Blade offset for a 45° blade, and overcut to close shapes (script defaults).
Build kit
STL and STEP files, CAD source, the G-code script, GRBL settings and full build instructions / 4.2 MB zip
Queen Bee
Prints beeswax from a heated syringe
Fairy Ring pipeline / Form / gets wax prints for casting
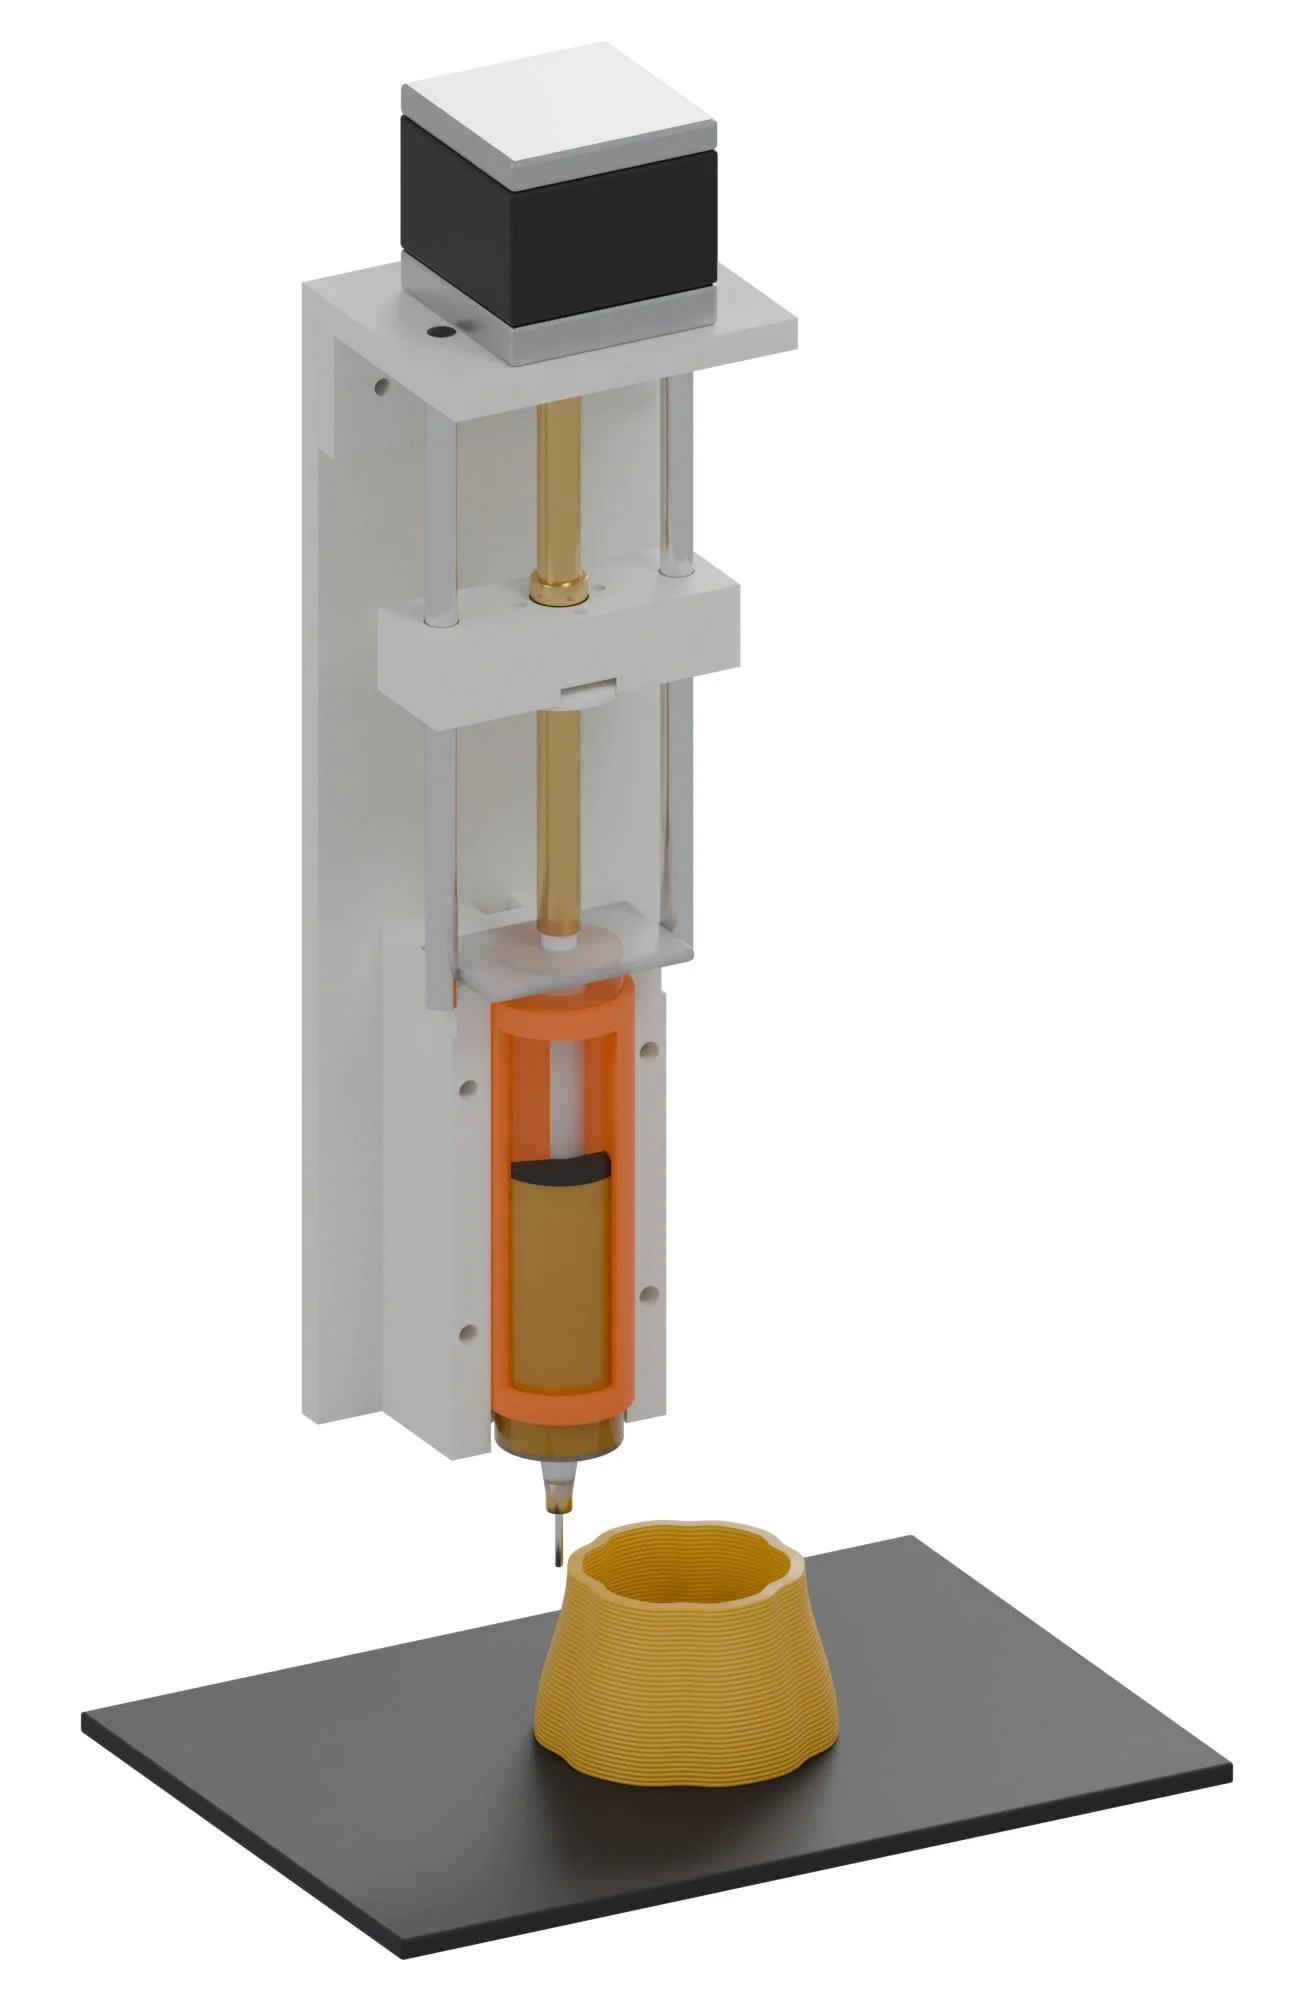
A 30 mL syringe in a heated jacket, pushed by a lead-screw stepper, on a cheap Ender-3 V3 SE. It prints beeswax or jeweler's injection wax as a soft paste at 136 to 149 °F, and the printer runs it like any hotend. A failed print goes back in the syringe, or through Lazarella.
How it works
Jacket cold / Jacket at 144 °F
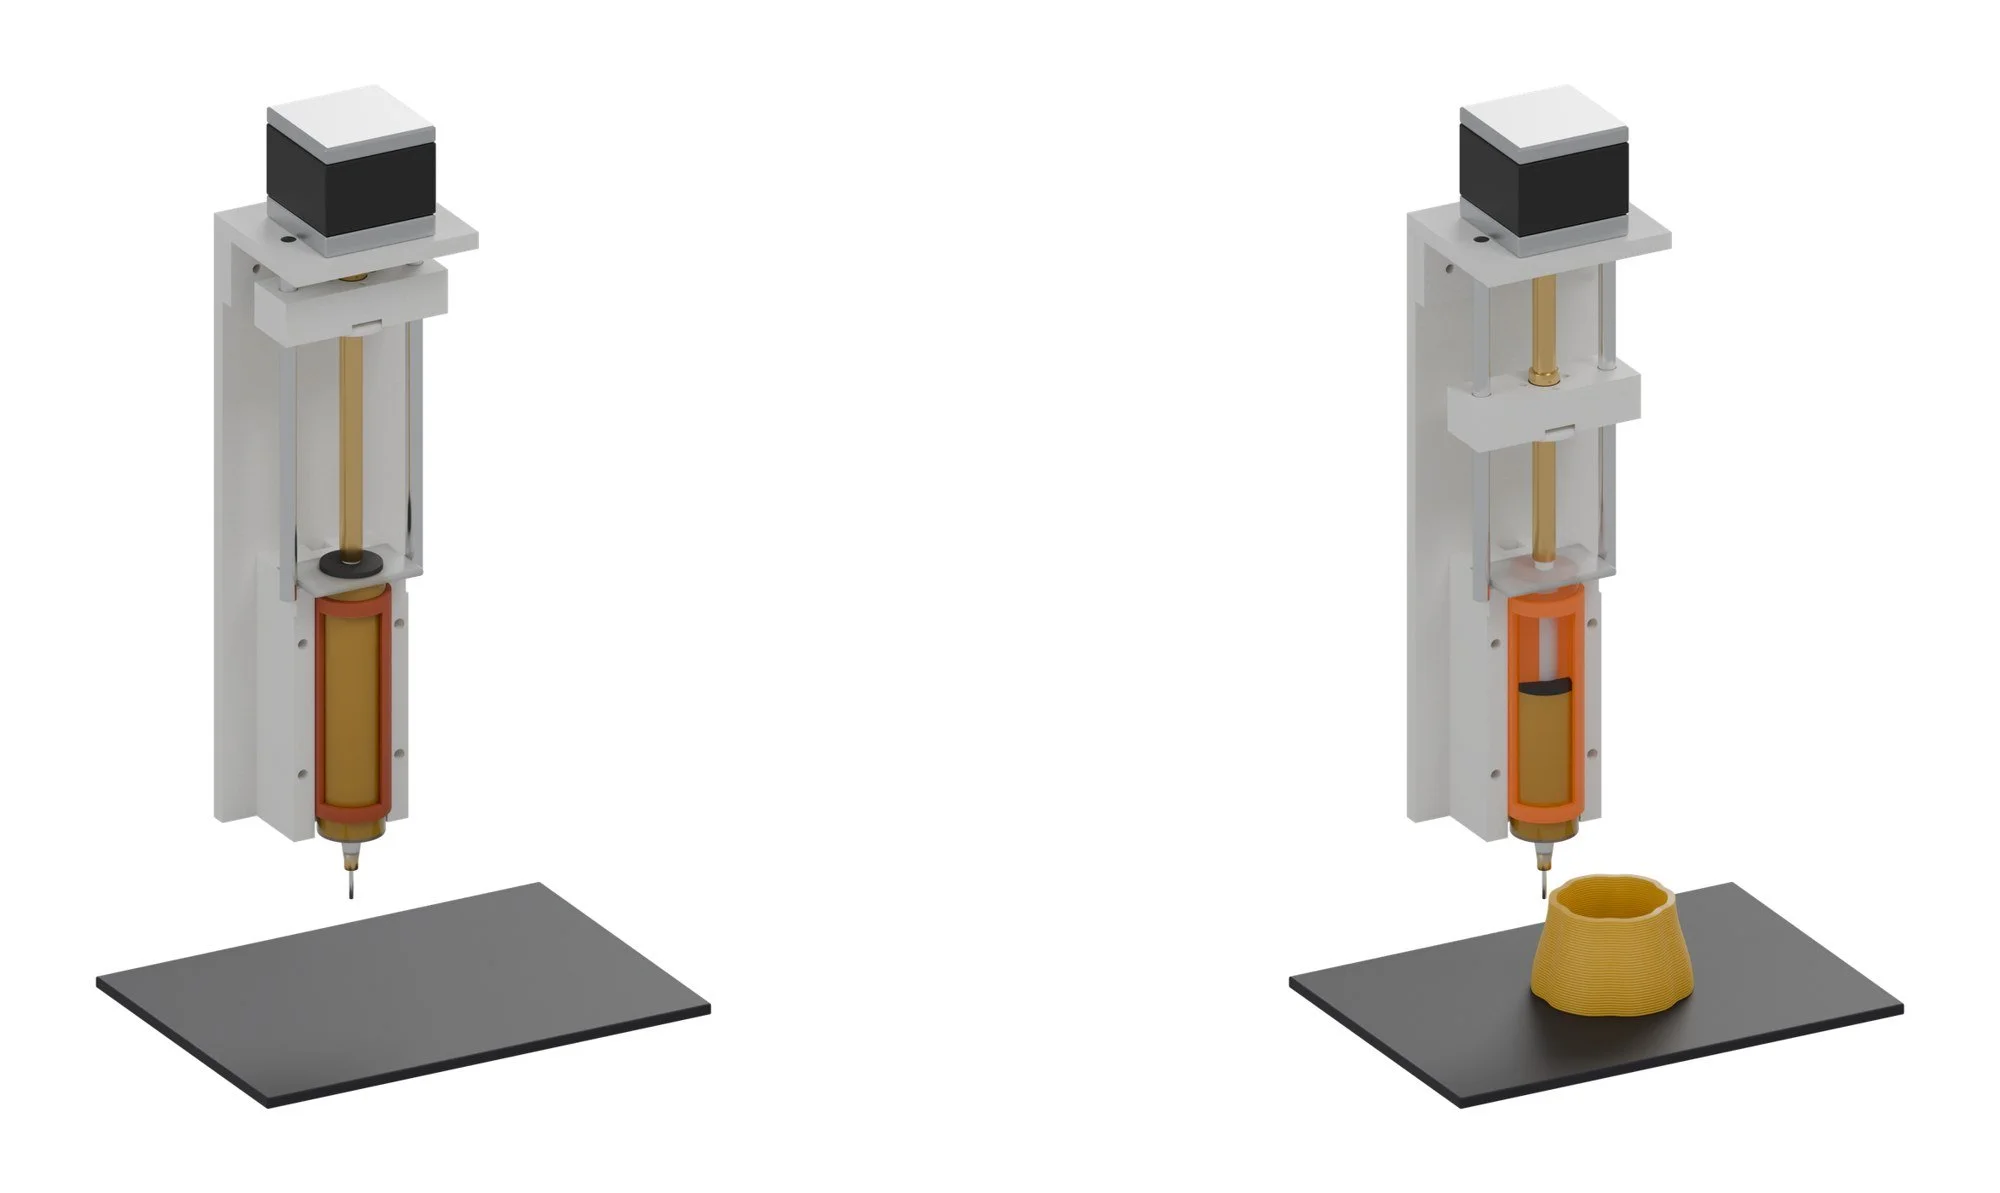
- Load. Melt wax at 158 to 167 °F, draw it into the syringe, let it cool to a paste in the heated cradle.
- Print. Filament diameter set to the bore, 0.854 in, and 400 E-steps: one mm of E is one mm of plunger, so the slicer's volume math just works.
- Cast or keep. Beeswax as the object, or a wax for a foundry. Fine jewelry goes to castable resin instead.
What it can make
Products / and less obvious uses
- Threaded jars and caps
- Cosmetic and balm jars with a screw lid, printed body and cap alike.
- Jewelry cases
- A small wax box with a threaded or friction lid, or a pattern for one cast in metal.
- Lost-wax patterns
- Pendants, pulls and small sculpture for a foundry or a jeweler.
- Lighting
- Wax shades and diffusers that glow when lit from inside.
- Candles with structure
- Lattice and hollow forms a mold can't make.
Threads in wax
Tricks worth trying
- Threads in beeswax Beeswax holds a thread well enough to screw a cap on. Printing both halves, rather than casting them, keeps the cap and body lined up.
- Lost-wax channels in concrete Print a wax core, set it inside a Mud Diva or K pour, melt it out, and you're left with clean internal channels for lamp wiring or a drain. To test.
- Waxed mycelium Dip a finished Mother piece in the Queen Bee pot to seal it against moisture. To test.
- Remelt everything Failures and supports go back into the syringe, or through Lazarella.
Recipes
Waxes / temperatures / what happens after the print
Pure beeswax
For the object itself: jars, lids, threads, lamp shadesBeeswax prints best as a soft paste just below its melting point, not as a liquid. Filtered cosmetic-grade pellets are the easy start; raw comb wax works once it is strained.
You need
| Beeswax pelletsYellow or white, cosmetic grade, filtered | about 30 g per syringe |
| MeltWater bath or a wax pot on its thermostat | 158 to 167 °F |
| Print jacketHeld in the heated cradle | 136 to 149 °F |
| Layer / lineStart here and tune | 0.024 in / 0.039 in |
| Speed / fanSlow, and fan full on so each layer sets | 0.31 to 0.59 in/s / 100% |
Method
- Melt the wax to 158 to 167 °F and pull it into the syringe with the plunger out of the module.
- Seat it in the cradle and let it fall to the jacket set point. Wait until a test push gives a bead that holds its round shape.
- Slice with filament diameter 0.854 in so one mm of E pushes one mm of plunger.
- Print onto painter's tape or a cold glass plate. Leave the first layer slow.
- Let the part cool on the bed for ten minutes before you lift it. Warm beeswax bends.
If it goes wrong
- Bead slumps and spreads
- Jacket too hot. Drop 36 °F at a time.
- Bead cracks or tears
- Jacket too cold, or the paste has air in it. Raise 34 °F, and remelt the syringe slowly.
- Layers don't stick
- Fan too strong for a big part, or the previous layer has gone fully cold. Slow down less, or print two parts at once so each layer waits less.
- Bloom (white haze) a day later
- Normal for beeswax. Buff with a soft cloth or a few seconds of warm air.
Melt wax in a water bath or on a thermostat, never over an open flame. Wax smokes well before it burns: if it smokes, it is too hot. Never put water on a wax fire; cover it.
Casting blend
Beeswax and injection wax, 80 / 20Pure beeswax is soft and sticky for a foundry. A fifth of jeweler's injection wax makes it stiffer, cleaner to handle and sharper on edges, while it still prints at nearly the same temperature.
You need
| BeeswaxFiltered | 80% by weight |
| Injection waxAny jeweler's injection or carving wax, pellets | 20% by weight |
| Melt and stirUntil fully clear, then hold | 167 °F |
| Print jacketA few degrees above pure beeswax | 140 to 151 °F |
Method
- Weigh both waxes cold. Melt the injection wax first, then add the beeswax.
- Stir for two minutes after it goes clear, and pour a thin test disk to cool.
- If the disk is greasy, add 5% more injection wax. If it chips, add 5% more beeswax.
- Pour the batch into a silicone ice tray. Label the cubes with the ratio and date.
- Fill syringes from the cubes. Every batch gets the same temperature sweep as pure wax.
If it goes wrong
- Blend separates in the syringe
- It was not hot or stirred long enough. Remelt to 167 °F and stir.
- Wax tears off the sprue
- Too much beeswax for the job. Go to 70 / 30.
After the print: three ways to metal
Hand-off lanes A / B / CYou need
| A: wax paste, this machineBig, soft-edged parts. Pulls, knobs, hooks, ornaments. | foundry |
| B: PolyCast filamentPrinted on any FDM printer. Smooth, burns out clean. | foundry |
| C: castable resinFine jewelry and thin detail, on a resin printer. | caster |
Method
- Print, then fix tiny defects with a warm needle or a hot-air pen.
- Attach a wax sprue at the thickest point. Fairy Ring marks where.
- Weigh the wax. The metal will weigh about the wax times the metal's density over wax's, roughly ×10 for bronze and ×11 for silver.
- Send it to a casting service or a local foundry with the weight and the metal named.
- Every failed print goes back in the syringe, or to Lazarella.
If it goes wrong
- Foundry says it's too thin
- Walls under about 0.039 in in wax rarely fill. Thicken in Fairy Ring and reprint.
The remelt loop
Nothing wax gets thrown outMethod
- Keep a lidded tin by the printer for brims, strings and failed prints.
- Remelt in the water bath, pour through a coffee filter or fine cloth to take out tape and dust.
- Cast into labeled cubes by type: pure, 80 / 20, mixed.
- Mixed scrap is for candles, firelighters and wood paste wax, not for casting.
Wax on a hot plate or in a microwave can overheat in one spot and flash. Water bath, every time.
What to buy
11 parts / $413.39 before tax / estimates, check the links
 0330 mL Luer-lock syringes, 10-pack$10.00The wax barrel (BD 30 mL, 0.854 in ID)View on Amazon →
 04Brostown stainless blunt tips, 12-pack (includes 1/4 in 14 and 18 ga)$8.00Qty 1 pack · NozzlesView on Amazon →
 0524 V 30 W polyimide film heater, 1 3/4 x 3 15/16 in (6-pack): wrap one round the barrel, with the head's 100k NTC taped under it$12.00Heated jacket on the barrel, runs off the hotend portView on Amazon →
 060.24 in x 11 13/16 in chrome-plated linear rods, 2-pack$20.00Qty 2 · Pusher guidesView on Amazon →3DJake07ruthex M3 heat-set inserts (100) plus M3 screws$14.00Holds the printed parts togetherView on 3DJake →Polymaker08Polymaker ASA 0.069 in, 1 kg$22.99For the two parts that touch the heated jacketView on Polymaker →
 09Stakich white beeswax pellets, cosmetic grade, 2 lb$24.95Print stockView on Amazon →Jets Inc10Ferris Magna-Ject injection wax beads, 1 lb$18.00Jeweler's wax testView on Jets Inc →Ultimate 3D Printing Store11Polymaker PolyCast 0.069 in, 750 g$50.00Lost-wax parts on the existing printers, for the jeweler round tripView on Ultimate 3D Printing Store →
4 optional extras
What to make
Printed on the printers you have / cut on the xTool or sent out
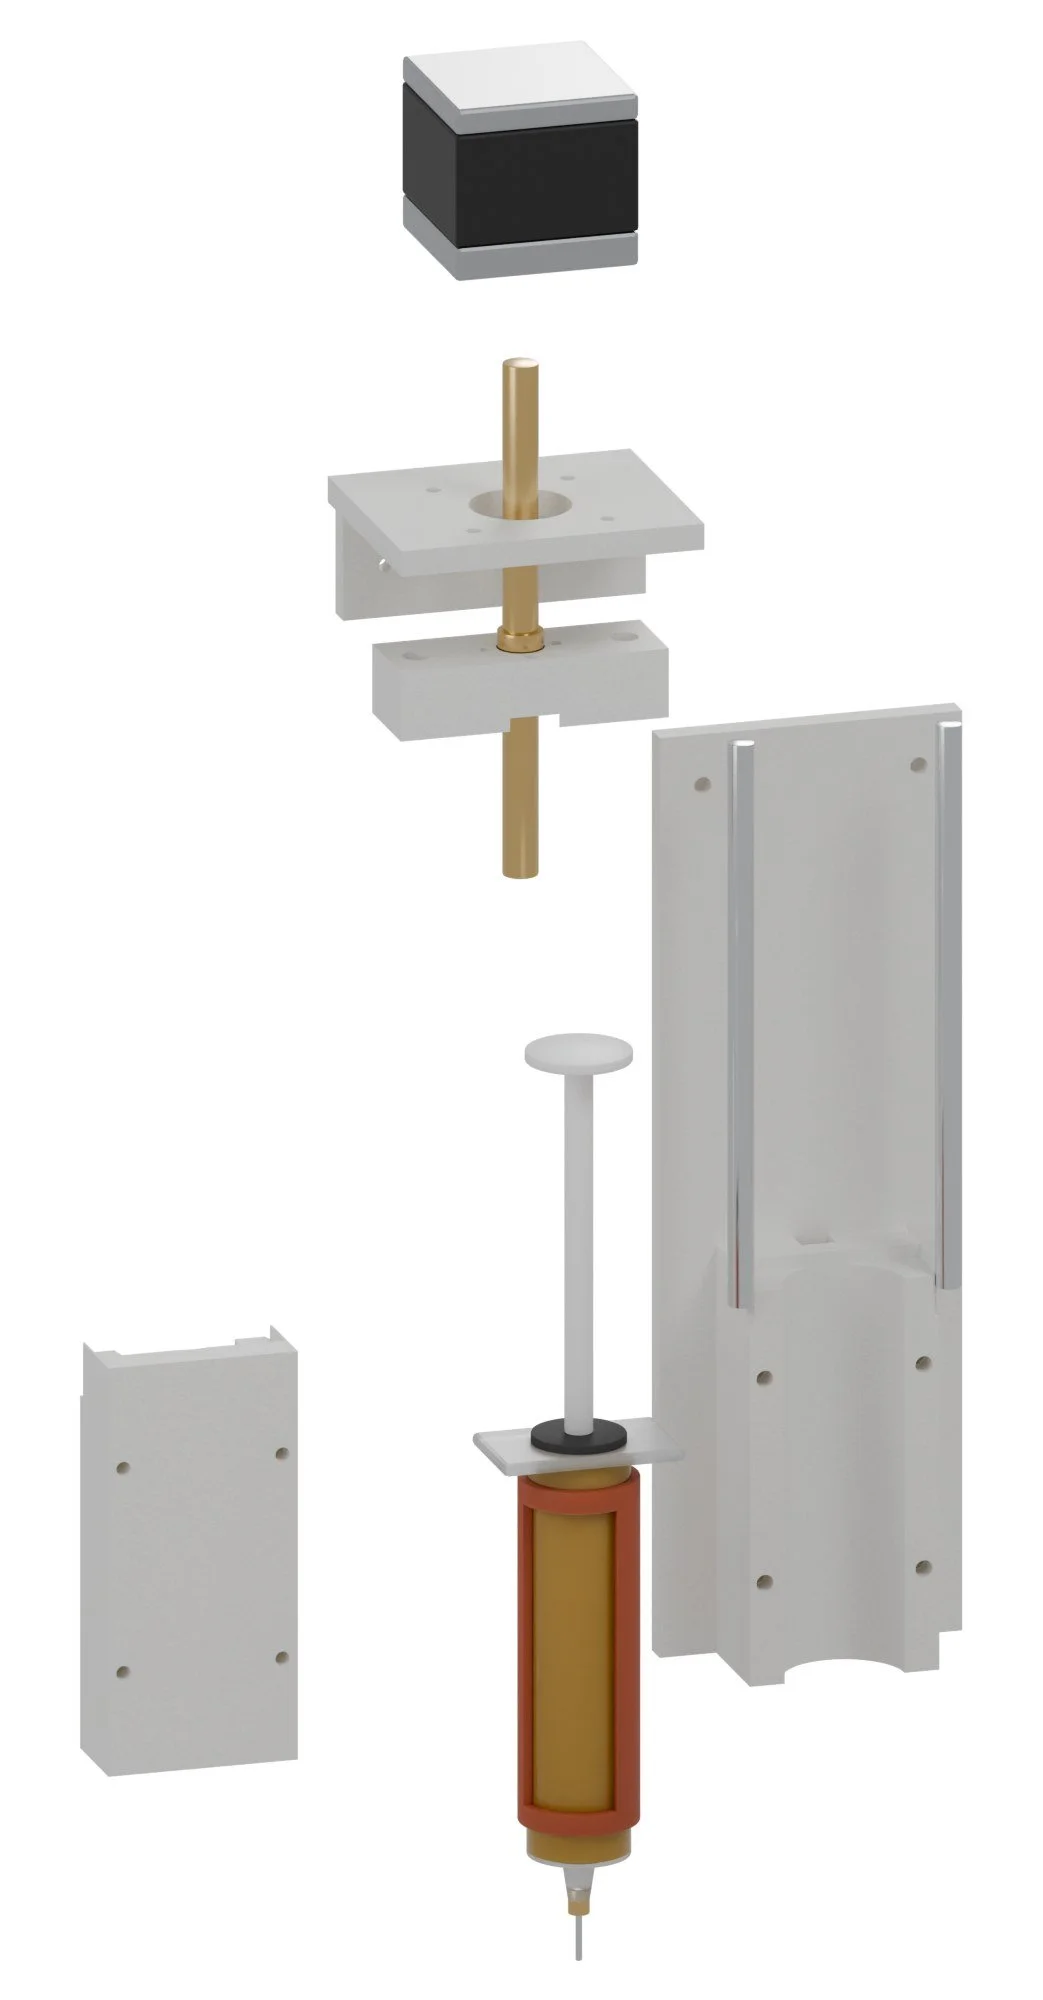
| Backplate cradleASA or PC, 4 walls, 40% gyroid. Touches the heated jacket. | 9.88 in³ |
| Clamp strapASA or PC. 4 x M3 x 30 into heat-set inserts. | 3.7 in³ |
| Motor bracketPETG or ASA. | 1.9 in³ |
| PusherPETG. T8 nut bolts on top, plunger pad sits in the cup. | 1.09 in³ |
Build steps
- Print the cradle and strap in ASA, the motor bracket and pusher in PETG; press in heat-set inserts.
- Cut the 0.24 in rods to 5 1/4 in, slide the pusher on, bolt the T8 nut to it.
- Wrap the barrel in the heater pad and aluminium tape and clamp it in the cradle.
- Measure the Ender's head plate, bolt the module on, plug heater and thermistor into the hotend ports and the motor into the extruder port.
- Send M92 E400, M302 S0 and M303 E0 S62, then M500.
- Sweep the jacket from 133 to 147 °F until a bead holds its shape under the fan.
- Print a 0.79 in hollow cylinder, then a threaded jar.
Mother
Grows mycelium in printed molds, in any shape you design
Fairy Ring pipeline / Form / gets grow molds
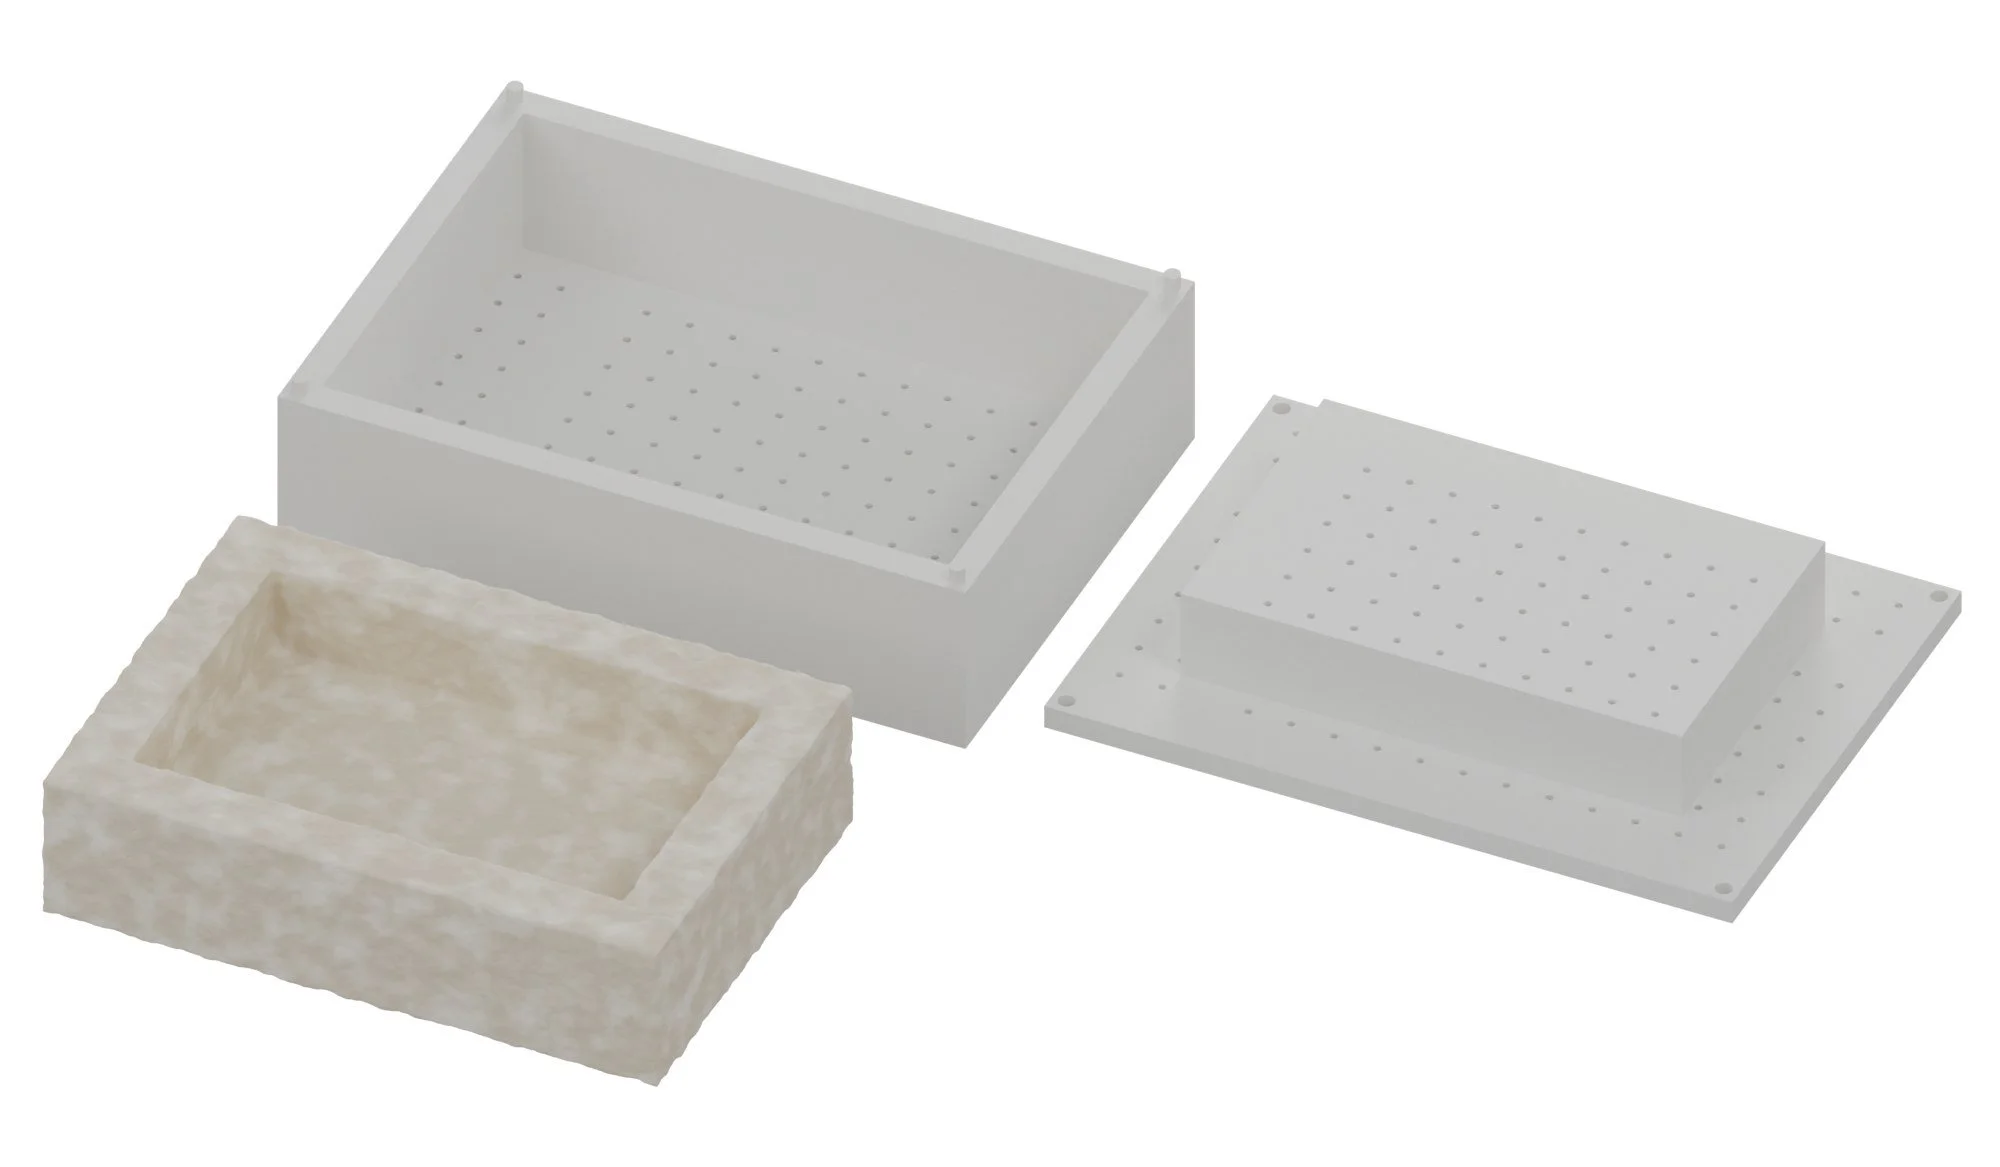
Not just tubes. Anything designed in Fairy Ring, a tray, a bowl, a lidded box, a stool, becomes a two-part PETG grow mold: Fairy Ring picks the pull direction so nothing undercuts, and turns a tray's inside into a press plug. The tray above was designed in Fairy Ring. Pack it with mycelium by weight, keep it warm in a tote, and the camera wall tells you when it has gone fully white. Demold, let it skin over, bake it dry.
How it works
Day 0 / Day 9
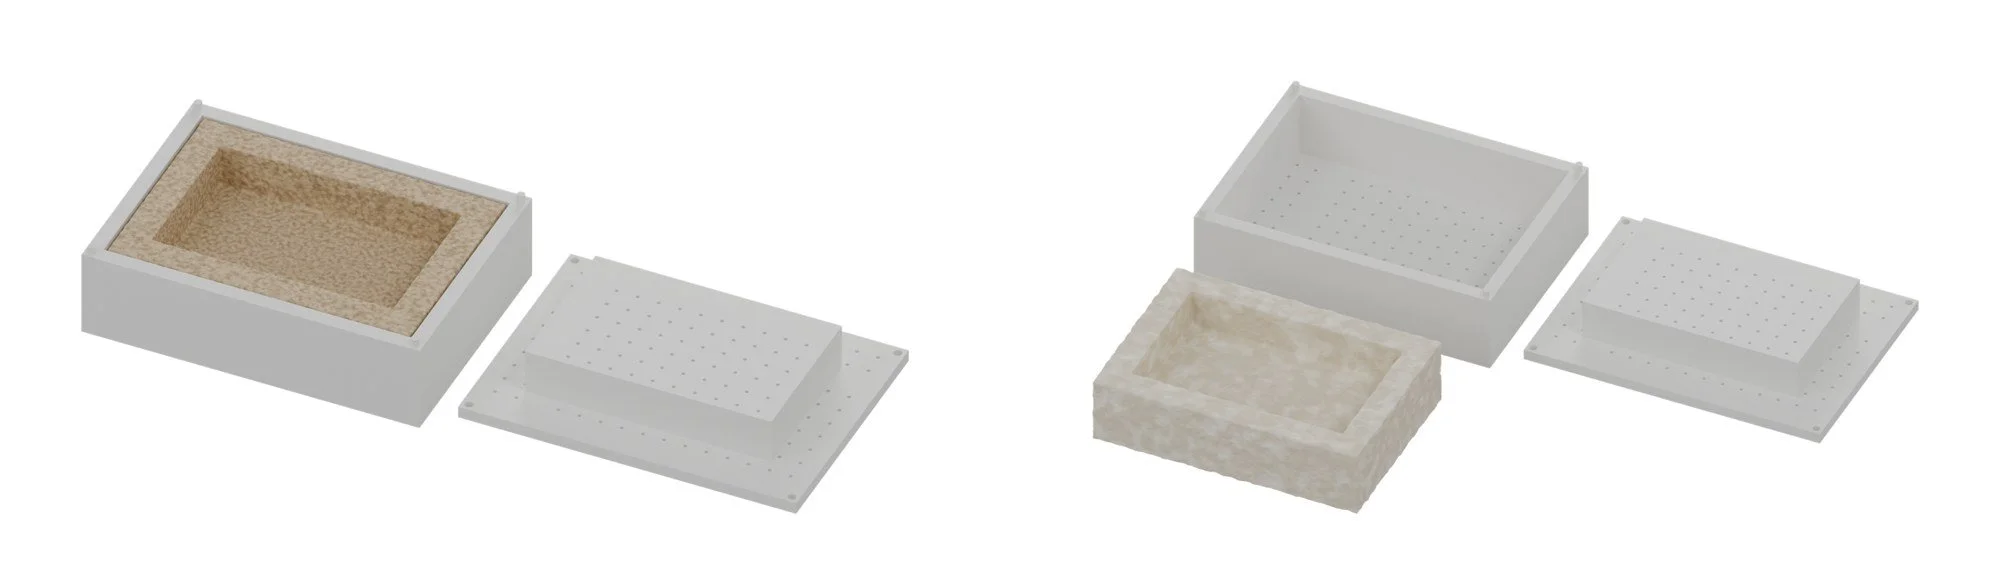
- Pack by weight. Every mold gets a target gram figure from Fairy Ring and a tamper levels it. Too dense and it starves.
- Grow. 4 to 5 days at 72 to 75 °F in a tote on an Inkbird and a heat mat, vents taped. The webcam scores how white each mold is.
- Dry. Demold, a day or two for skin, then bake and weigh until steady. Dowel holes grow in 0.012 in undersize so they grip.
What it can make
Products / and less obvious uses
- Trays and bowls
- A Fairy Ring-designed tray, like the one above: the lower half is packed, a press plug forms the inside.
- Lidded boxes and jewelry cases
- A lidded box gets two molds, one for the base and one for the lid.
- Stools and seats
- Thick sections grown at 0.79 in walls, light and strong in compression.
- Packaging inserts
- A grown nest that fits a Queen Bee jar or a tool exactly.
- Tube kits
- Grown elbows, straights and Y pieces joined by dowels.
Tricks worth trying
- Grown-in hardware Set dowels, threaded inserts or magnets in the mold and the mycelium grips them as it grows. To test.
- Embossed surfaces Press a Mortisha-carved plug in to texture the grown face.
- Sealed with wax A dip in Queen Bee's wax pot for pieces that will meet moisture. To test.
Recipes
The grow / day by day / and how to dry it
The grow, day by day
From bag to finished part in about two weeksMycelium is the root network of a fungus. Fed on hemp hurd or other ag waste inside a mold, it knits the loose fibre into one solid piece. Kill it with heat and it stops growing and stays that shape. The grow kits (GIY material) come pre-inoculated, so the shop never handles spores.
Calendar
Pack mix
For every Mother moldYou need
| Grown GIY materialFully white, broken to pea size with clean gloved hands | Fairy Ring's gram figure |
| Plain white flourFresh food for the regrow after the break-up | 1 tbsp per 1 lb (450 g) |
| MoldsPETG halves, wiped with 70% isopropyl alcohol | two halves and a plug |
| ToteLidded, a heat mat underneath on an Inkbird | 72 to 75 °F |
Method
- Wipe the bench, the tamper and the molds with isopropyl and let them dry.
- Weigh each half to its target. Fairy Ring sets it from the mold's volume.
- Press with the tamper until it's level with the rim, firm but not crushed. Corners first.
- Close on the pins, tape the vents with micropore tape so it breathes but stays clean.
- Into the tote. Don't open it for the first three days.
If it goes wrong
- Too loose, crumbly part
- Pack more grams, or tamp the corners harder.
- Too dense, slow, brown middle
- It starved for air. Fewer grams, and check the vents are open under the tape.
- Patchy, white only in spots
- The material dried. Mist the bag before packing next time and keep the tote lid on.
Drying it dead
Two schedules, test bothDrying does two things: it stops the fungus for good and it takes out the water that makes it soft. A part that is still growing will keep fuzzing, and a damp one will mold.
You need
| Low and slowOven or Hot Flash | 180 °F for 4 to 8 h |
| Air then hotAir dry 1 to 2 days, then | 200 °F for 30 min |
| Done whenWeight stops falling between two checks an hour apart | steady |
Method
- Weigh the part straight out of the mold and write it on tape on the part.
- Bake, then weigh every hour. A typical part loses well over half its weight.
- When two weighings match, it's dry. Let it cool on a rack.
- Seal if it will see water: shellac, beeswax paste, or Honey Glaze's oil pass.
If it goes wrong
- Soft after baking
- Not dry yet. Back in for an hour.
- Cracked
- Dried too fast. Air dry longer first, or drop to 160 °F.
- Warped
- Bake it on a flat rack, or back in its open mold half.
What to watch for
Clean grows, and when to bin itIf it goes wrong
- Green, blue, black or pink spots
- Contamination (mold). Bag it and bin it outside. Don't open it indoors. Clean the tote with isopropyl.
- Small mushrooms on the surface
- It's happy and too wet or bright. Pull them off and dry it sooner.
- Yellow liquid beads
- Normal stress. Leave it.
- Sour smell
- Bacteria. Usually too wet or too warm. Bin it.
- Slow white
- Under 70 °F. Check the Inkbird probe sits in the tote, not on the mat.
Wear a dust mask when breaking up dry material and when sanding finished parts. People with mold allergies or weak immune systems should not handle open grows.
What to buy
8 parts / $178.98 before tax / estimates, check the links
 063M Micropore paper tape 1 in x 10 yd, box of 12$7.00Covers the mold ventsView on Amazon →
 07Digital scale 3 kg x 0.1 g$12.00Pack each mold by weight, not feelView on Amazon →
 08Hardwood dowels 3/8 x 12 in, 25-pack$10.00Qty 1 pack · Joins the grown tube piecesView on Amazon →
What to make
Printed on the printers you have / cut on the xTool or sent out
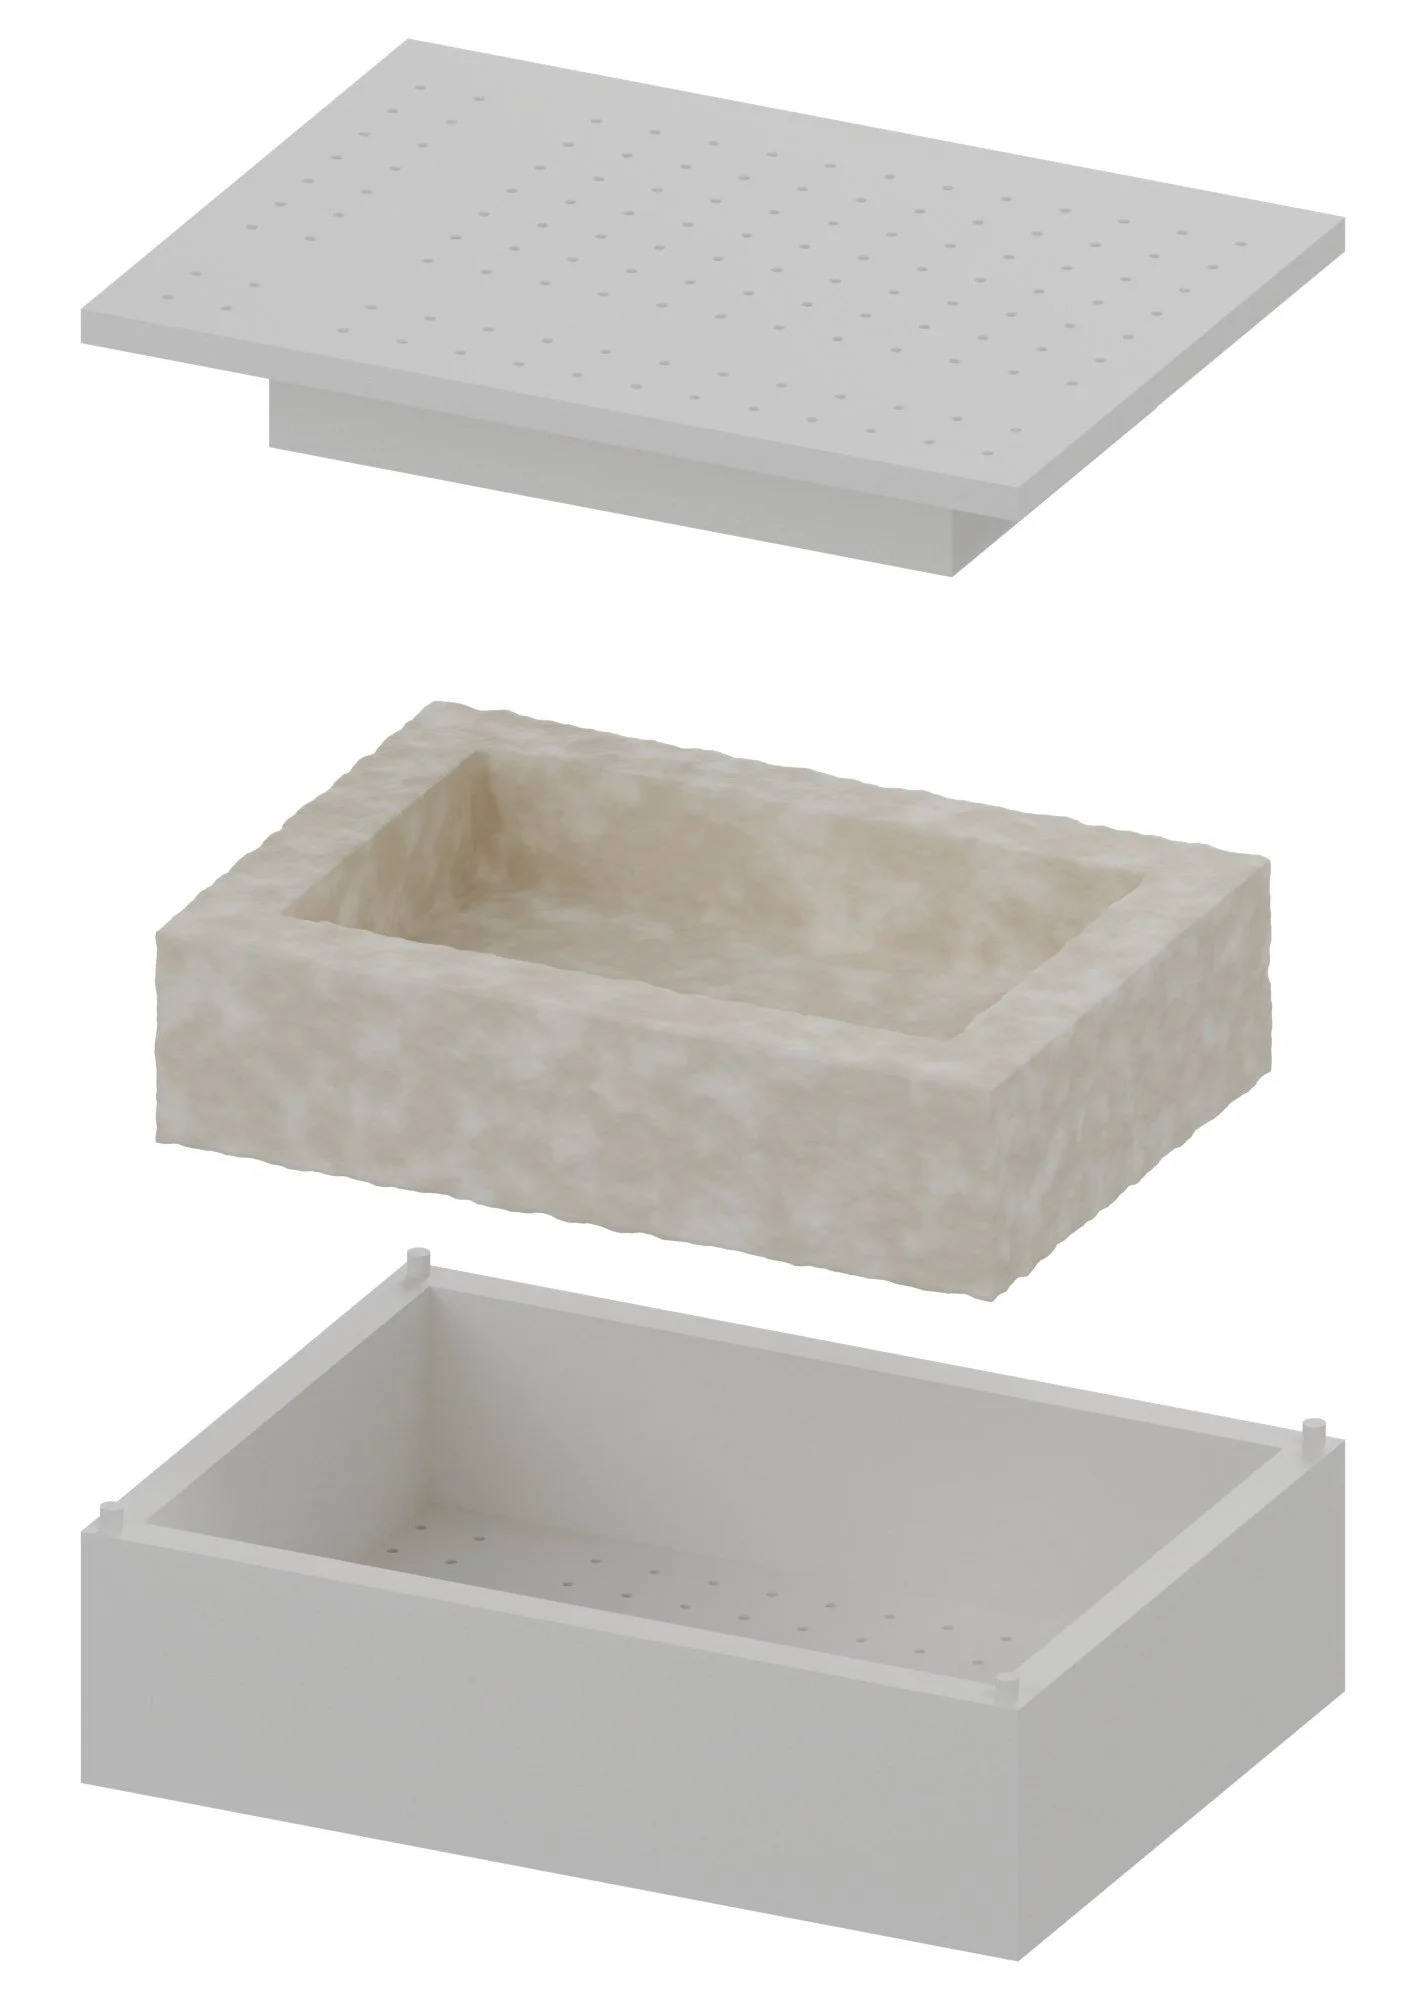
| Any shape you designSay “make the mother mold” on any Fairy Ring model: it writes both halves, the press plug, pins and vents, and the grams to pack. The tube molds below are the starter set. | Fairy Ring |
| Elbow: lowerPETG, 3 walls. Print parting face down. | 5.86 in³ |
| Elbow: upperPETG, 3 walls. Print parting face down. | 5.83 in³ |
| Elbow: core pinPETG, print 2 per mold. Flange outside the end wall. | 0.2 in³ |
| Elbow: tamperPLA or PETG. | 1.54 in³ |
| Straight: lowerPETG, 3 walls. Print parting face down. | 7.57 in³ |
| Straight: upperPETG, 3 walls. Print parting face down. | 7.55 in³ |
| Straight: core pinPETG, print 2 per mold. Flange outside the end wall. | 0.2 in³ |
| Straight: tamperPLA or PETG. | 1.54 in³ |
Build steps
- Hydrate the GIY material and grow it in its bag at 72 to 75 °F until fully white, 3 to 4 days.
- Break it up, add flour, pack each half to its target grams, level with the tamper.
- Close the halves on their pins, tape the vents, 4 to 5 days in the tote.
- Demold when the webcam says fully white.
- Leave it uncovered 1 to 2 days to grow a skin.
- Bake: test 180 °F for 6 h against 200 °F for 30 min after air drying. Weigh until steady.
- Fit the dowels and check holes, walls and weight.
Lady Liner
Pen + scribe plotter head for a diode-laser gantry (layout, templates, veneer marking).
Fairy Ring pipeline / Cut and draw / gets layout lines and templates
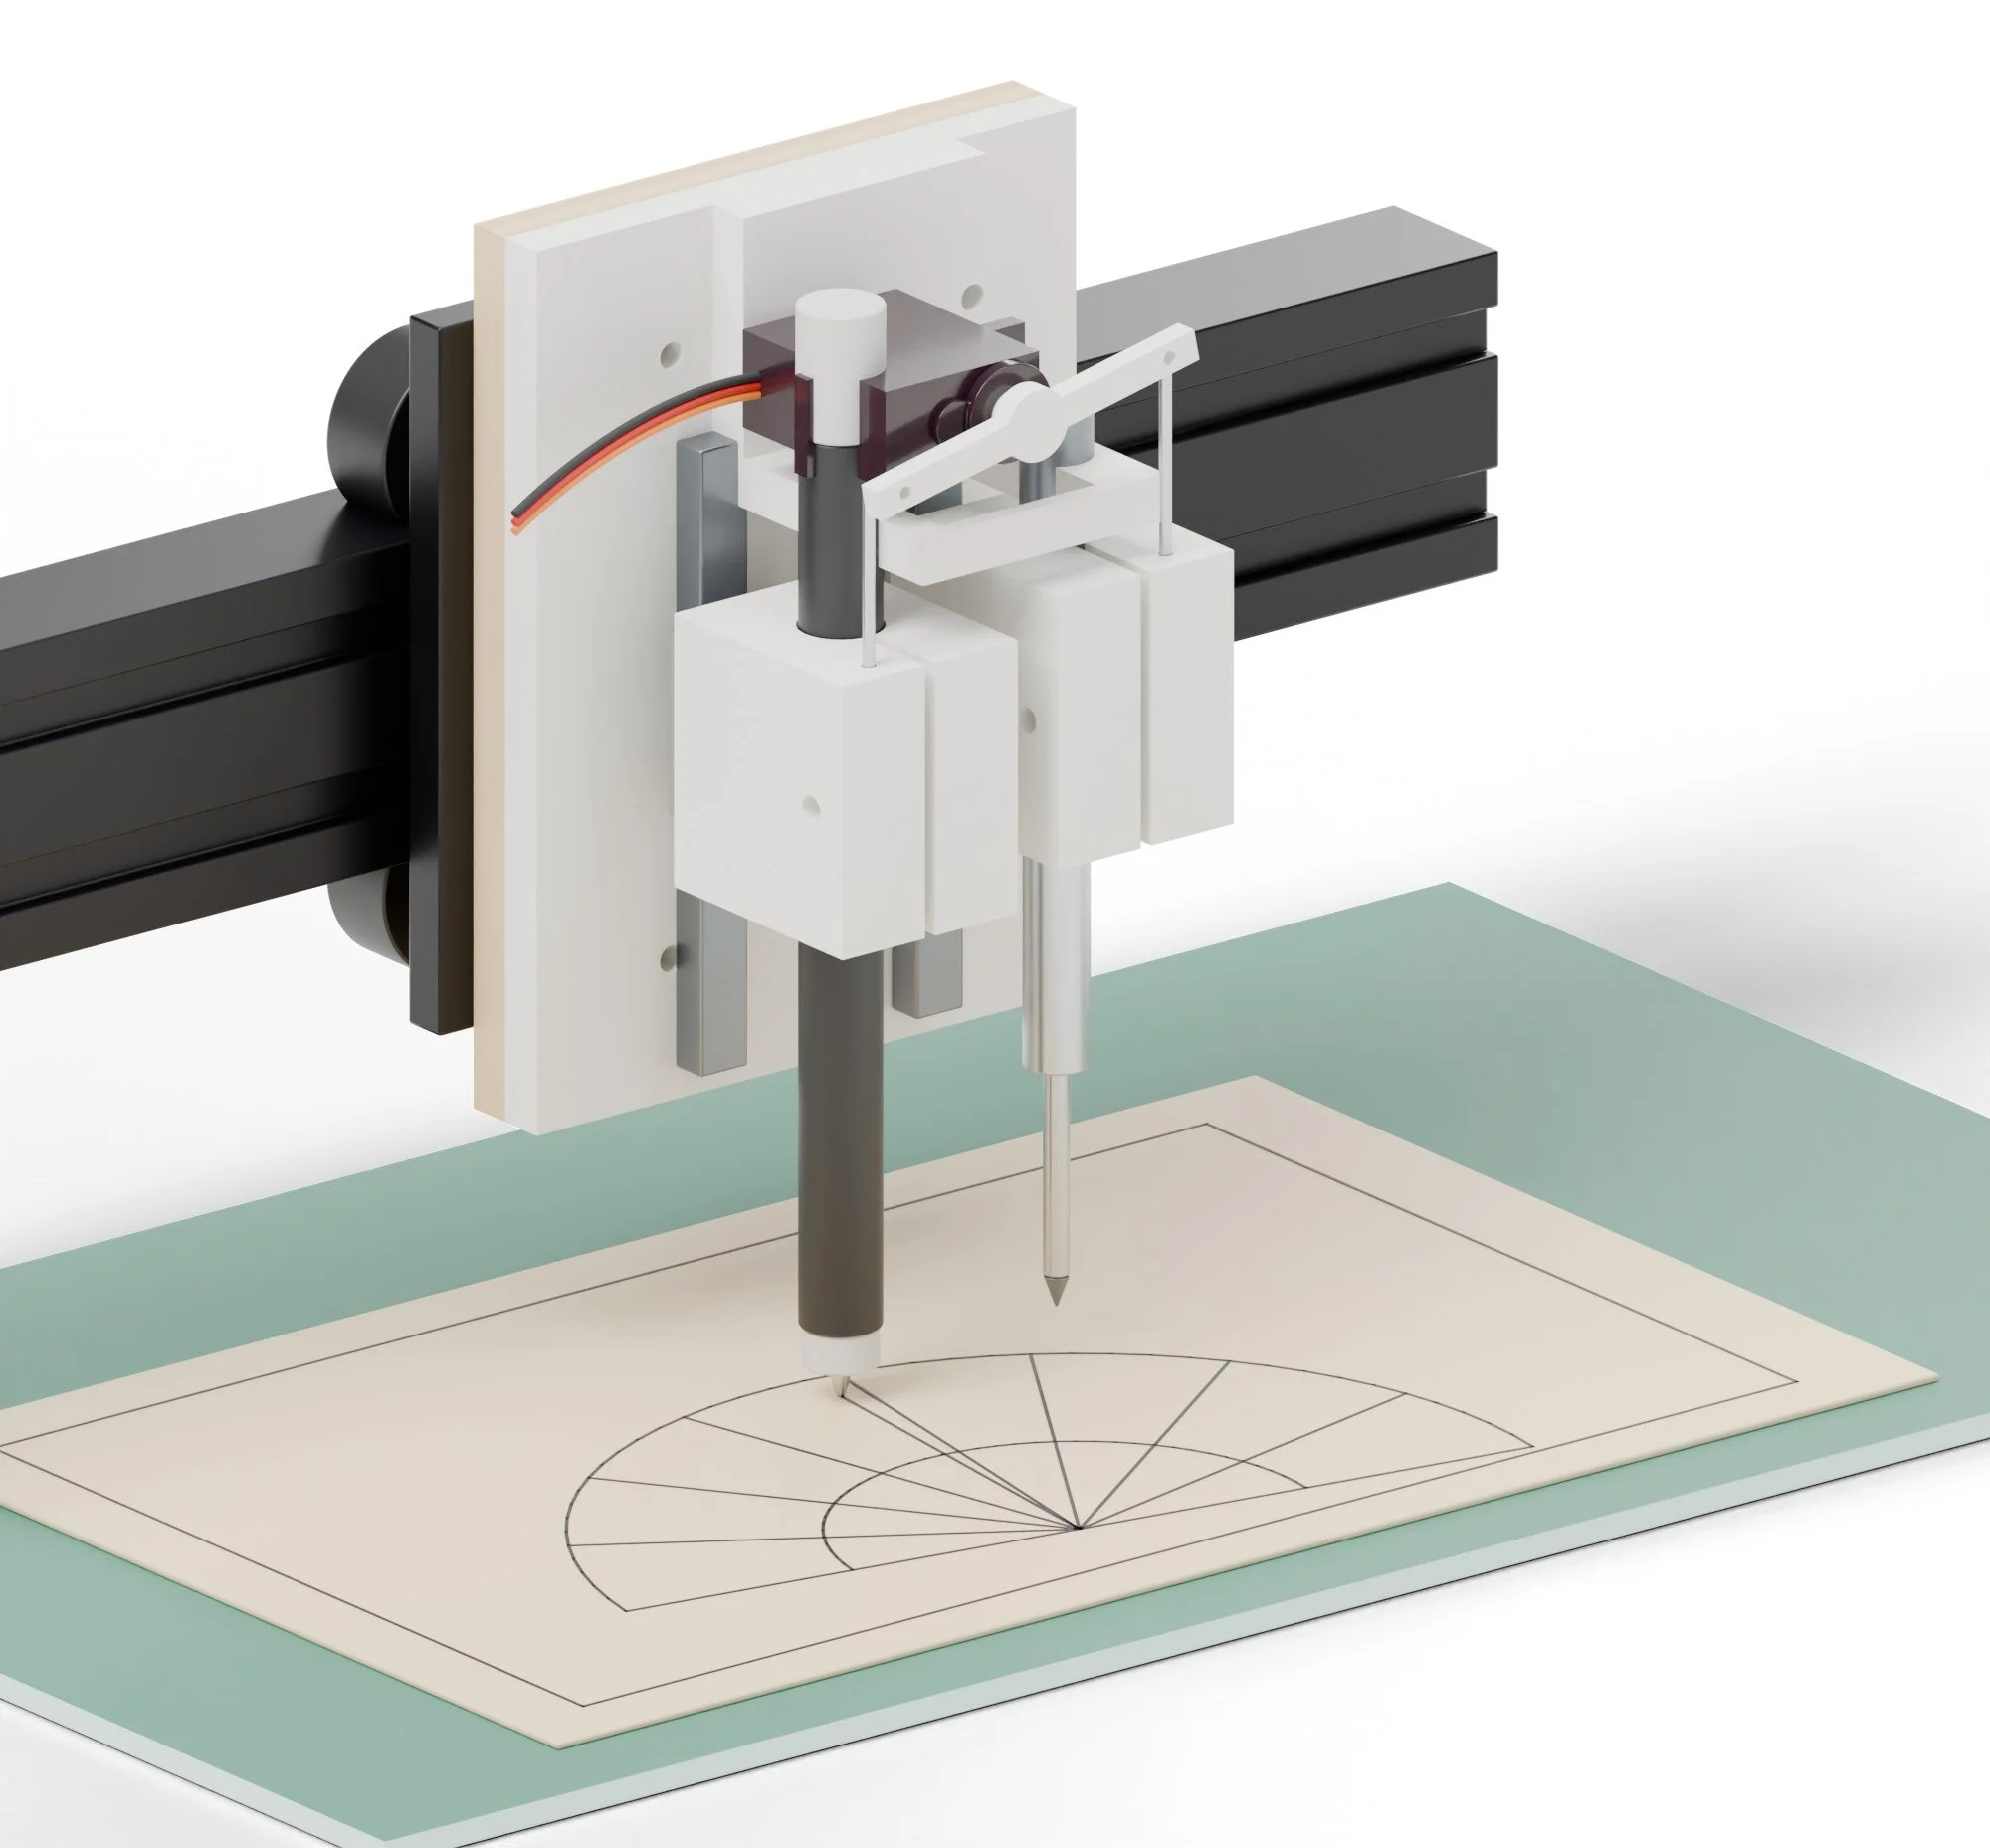
Lady Liner turns a hobby diode laser into a pen plotter and layout scribe. Where the laser would fire, a pen (or a carbide scribe) drops onto the work and draws. It marks marquetry layouts on veneer, draws full-size templates on hardboard or ply, and scribes cut lines and reference marks on stock, all from the same SVG or LightBurn files used for cutting.
How it works
Pen up / Pen down
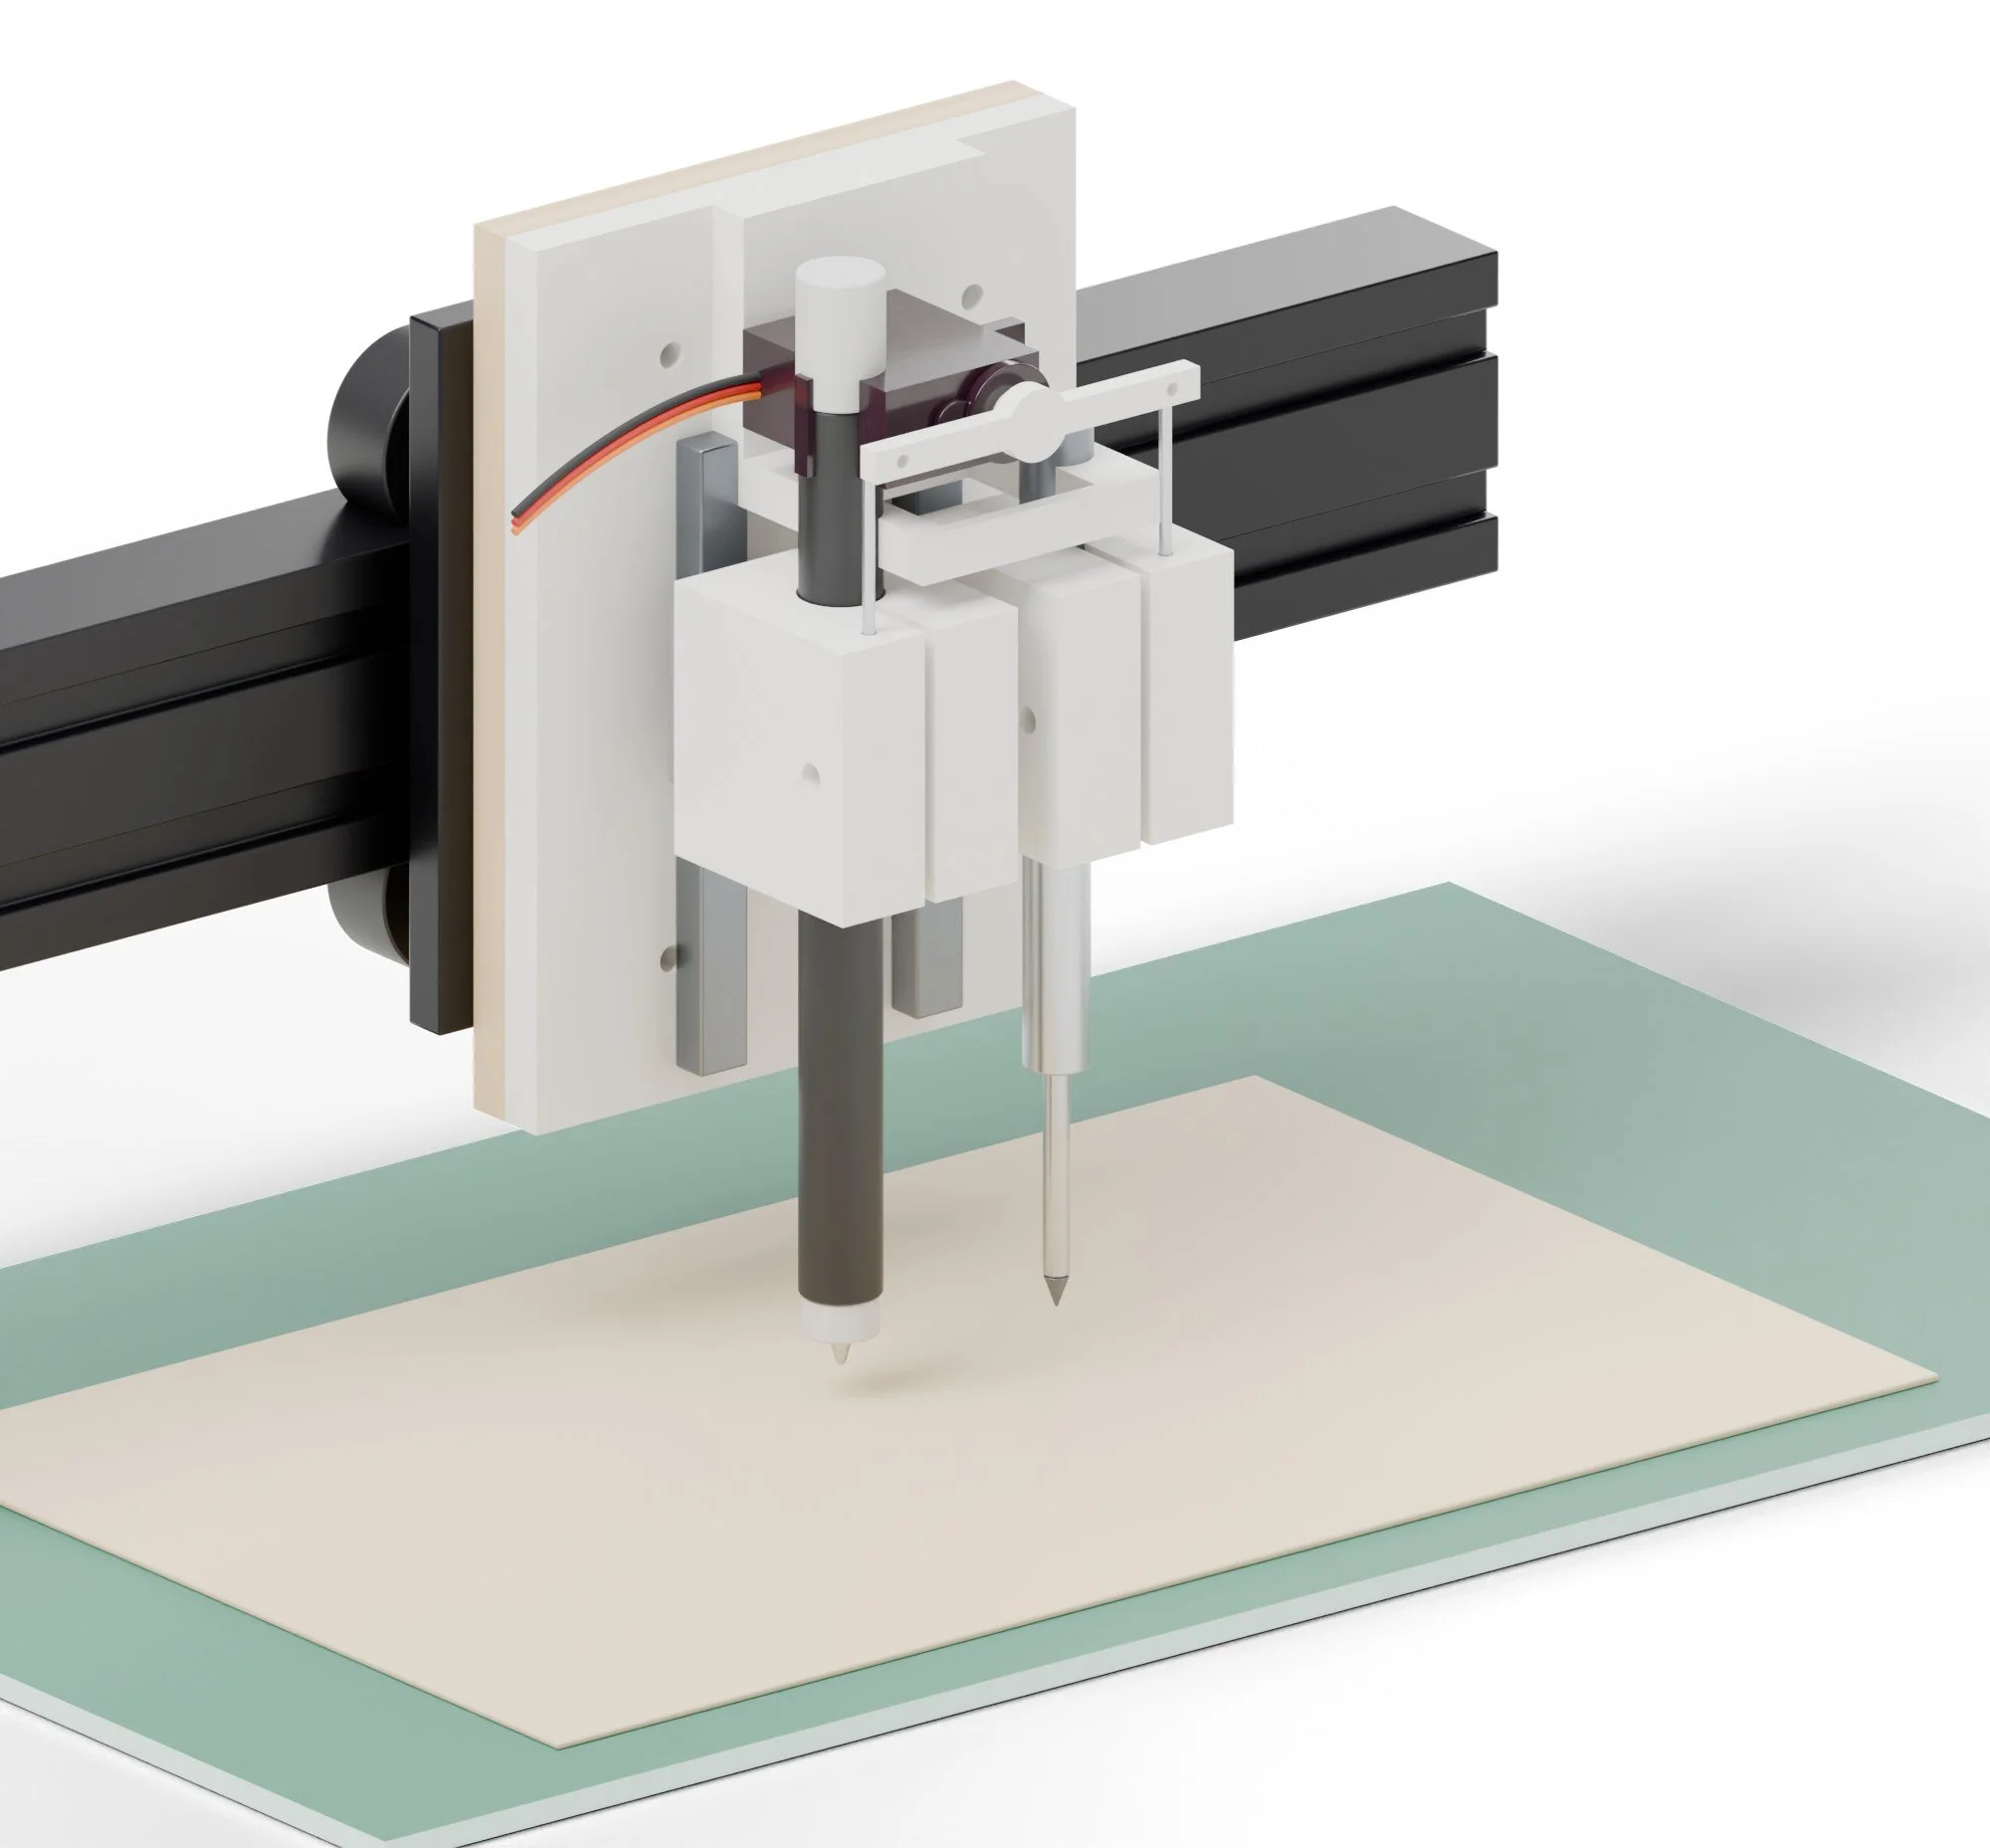
- A tiny Arduino reads the laser's PWM signal and turns it into a servo angle: off lifts both tools, low power drops the pen, high power drops the scribe.
- Each tool rides its own MGN7 rail and lands under its own weight, like a pen plotter, so pressure stays even on warped veneer.
- The head bolts on with Drag Queen's 1 9/16 x 2 15/16 in swap plate, so the same laser frame can cut, draw or glue.
What it can make
Products / and less obvious uses
- Marquetry layouts
- The full pattern drawn on the backing sheet before a single cut.
- Furniture templates
- Full-size legs, curves and joinery on hardboard, from the Fairy Ring model.
- Knife lines on stock
- The scribe marks dovetails and shoulders far more accurately than a pencil.
- Drawings and signage
- Technical-pen drawings and labels on paper, ply or finished veneer.
Tricks worth trying
- Etched brass plates Draw a resist ink onto brass or copper sheet, etch it in ferric chloride, and you get a maker's plate or a hinge plate with your drawing sunk into the metal. To test.
- Paint masks Scribe through masking tape on a panel, peel the pieces you want painted, and the edges come out as crisp as the scribe line.
Recipes
Pens / scribes / what draws on what
Use it for: Layout lines on veneer, full-size templates on hardboard, scribed cut lines on stock.
Materials
- Sakura Pigma Micron 01 to 08 for veneer and paper
- 0.02 in mechanical pencil in a 0.39 in sleeve for anything that will be finished
- Carbide scribe for cut lines on hardwood
- Low-tack tape to hold veneer flat
Settings
| Setting | Value |
|---|---|
| Pen speed | 2,000 to 3,0 in/min (Pigma), 1,19.7 in/min on raw veneer |
| Scribe speed | 800 to 1,7.87 in/min, two passes |
| Laser power value | S300 = pen down, S800 = scribe down, S0 = both up |
| Pen pressure | Gravity only, about 20 g; no springs |
| Dwell | 150 ms after a tool drops, set as a G4 P0.15 in LightBurn's start-of-cut |
Steps
- Tape the veneer to a flat sheet of MDF on the laser bed, grain running along X.
- Load the pen, cap off, and zero the frame at the work's corner.
- In LightBurn, put pen lines on one layer at S300 and scribe lines on another at S800, both in Line mode.
- Run a 2 in test square in a corner; check the line is solid and the corners meet.
- Run the job. Pens first, scribe last, so the scribe never drags ink.
- Lift the tape slowly, away from the drawn lines.
Troubleshooting
| Problem | Fix |
|---|---|
| Dotted or skipping lines | Slow down 30% or add the dwell; veneer fibres catch the tip at speed. |
| Pen drags between shapes | The servo is slow to lift: raise the travel-move delay to 200 ms. |
| Ink bleeds into the grain | Use a pencil on open-grain species (oak, ash) or seal with a light shellac coat first. |
| Scribe tears veneer | Use the pen on veneer; save the scribe for solid stock. |
Safety
- Laser OFF: the servo uses the laser's PWM, so keep the diode module unplugged while Lady Liner is on.
- Keep fingers clear of the carriage during jogs.
Numbers are starting points. Run one test piece on every new batch of material.
What draws on what
Pens and scribesYou need
| Pigma or fine-linerVeneer and paper. Doesn't bleed. | pen |
| 0.02 in pencilLayout on wood you'll sand. | pen |
| Carbide scribeHard, crisp cut lines on stock and metal. | scribe |
Method
- Zero the pen on the surface with a sheet of paper under it.
- Test on scrap: S300 should touch, not press.
- Run at 78.7 to 118.1 in/min for pens, slower for the scribe.
What to buy
7 parts / $99.00 before tax / estimates, check the links
 01Beffkkip MG90S metal-gear micro servo, 2-pack$18.00Qty 2 · One in use, one spareView on Amazon →
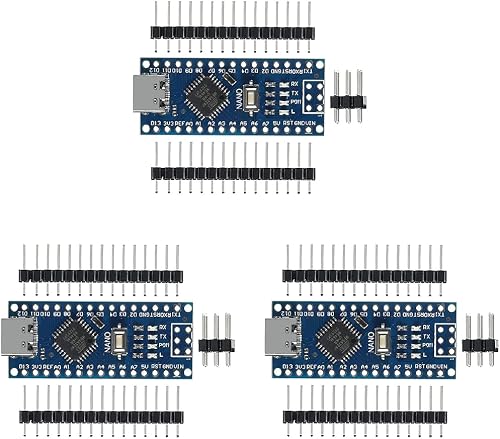 02HiLetgo Nano V3.0 USB-C, 3-pack$16.00Reads laser PWM, drives the servoView on Amazon →
 03LM2596S buck converter with voltmeter, 4-pack$9.0024 V to 5 V for the Nano and servoView on Amazon →
 04uxcell MGN7 rail 3 15/16 in + MGN7H carriage$24.00Qty 2 · One per toolView on Amazon →Amazon05Spring-steel (music) wire assortment 0.012 to 0.118 in, 15 3/4 in lengths (use the 0.059 in)$7.00PushrodsView on Amazon →
 06Sakura Pigma Micron, black, assorted points, 6-pack$15.00Layout pensView on Amazon →
 07General Tools 88CM carbide scribe$10.005/16 in shank or trimmed to fitView on Amazon →
What to make
Printed on the printers you have / cut on the xTool or sent out
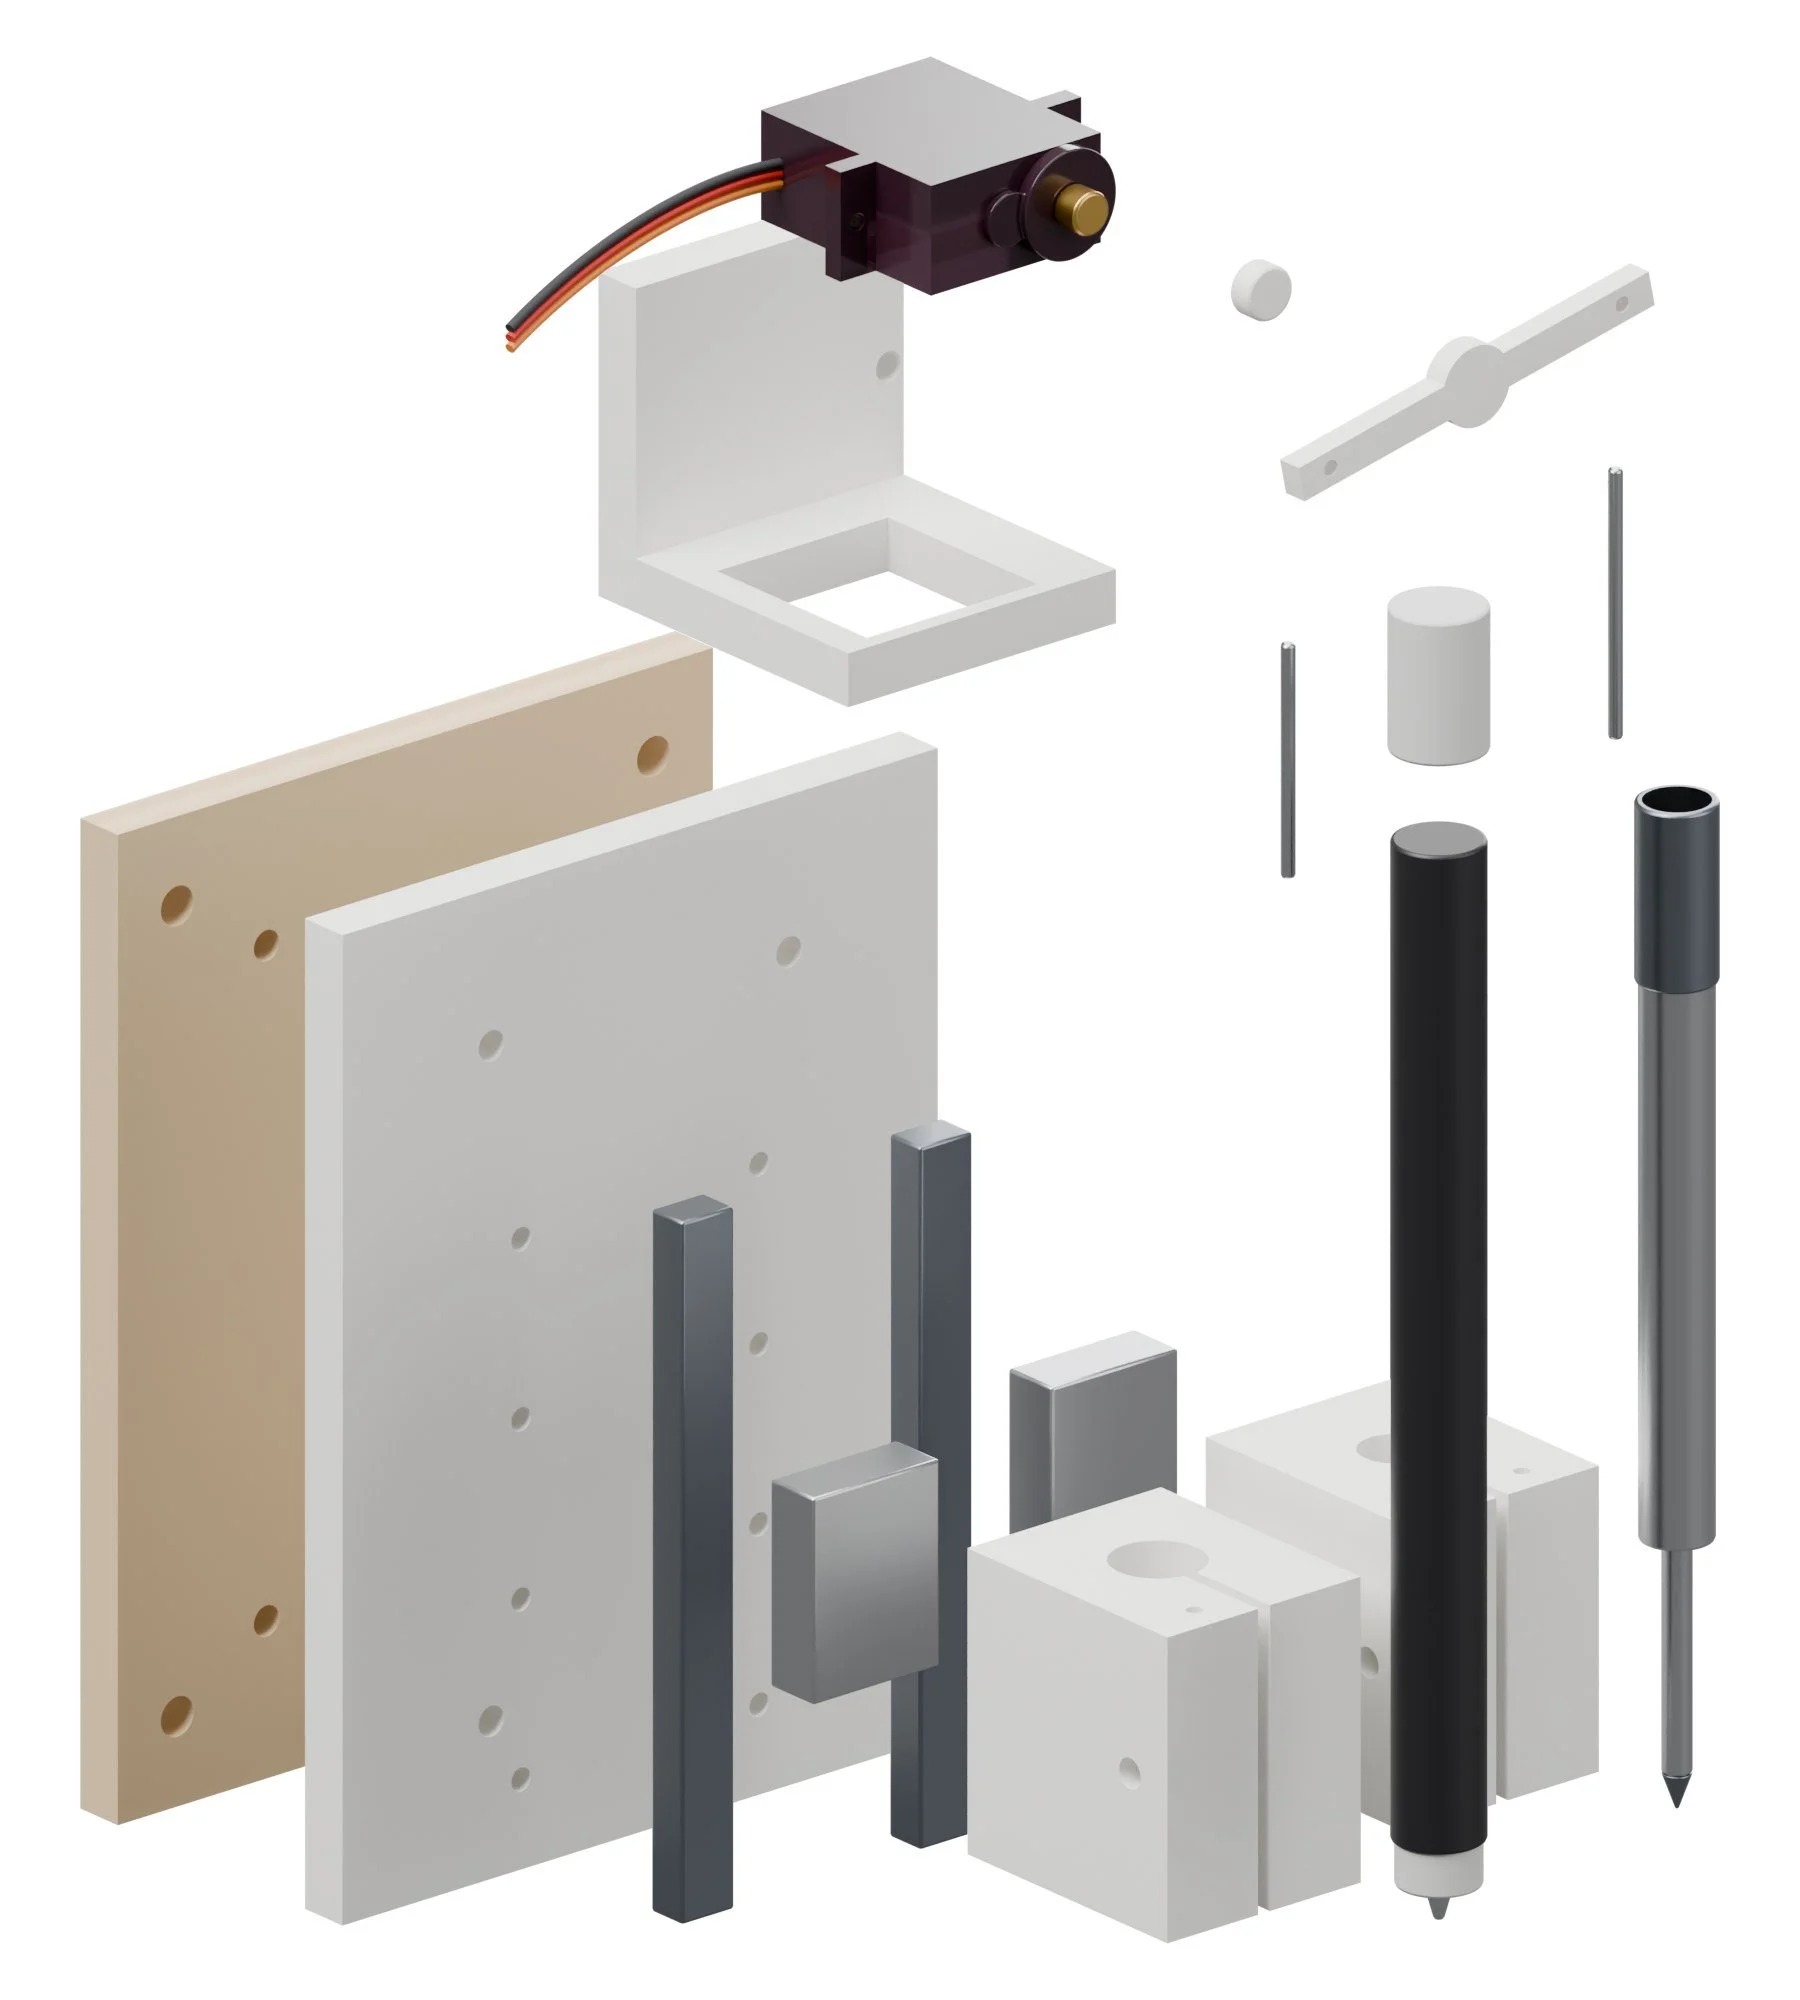
| Adapter plate0.24 in birch ply or acrylic. Carriage holes are placeholders: MEASURE the laser's head plate. | cut |
| Base platePETG/ASA, flat on its back, 4 walls | |
| Pen carriagePrint upright, slit vertical. Pen bore 0.413 in (fine-liners, Pigma, 0.5 mech pencil in a sleeve). | |
| Scribe carriagePrint upright. Bore 0.323 in for a carbide scribe / 5/16 in pin vise. | |
| Servo bracketPrint on its back. Screws to the base plate top. | |
| RockerPETG. Press onto the servo's single-arm horn. |
Build guide
Tools / parts / every step, start to finish
Open the full build guide
Time: 3 to 4 hours plus printing Skill: Easy: printing, a little soldering
Tools
- 0.098 in hex key
- Soldering iron
- Multimeter
- Small pliers for the music wire
Parts
Bought (full list with links in the README and buy_list.csv):
- 1 x Diode laser frame to carry the head (already owned)
- 1 x Second laser frame (optional, so Drag Queen stays a cutter) (optional)
- 2 x MG90S metal-gear micro servo
- 1 x Arduino Nano (USB-C clone)
- 1 x LM2596 buck converter
- 2 x MGN7 rail 3 15/16 in + MGN7H carriage
- 1 x Music wire 0.059 in
- 1 x Sakura Pigma Micron set
- 1 x Carbide scribe
- 1 x M2/M3 screws and nuts (already owned)
Made:
laser/adapter_plate_6mm.dxf(laser)stl/ll_base_plate.stl(printed)stl/ll_pen_carriage.stl(printed)stl/ll_scribe_carriage.stl(printed)stl/ll_servo_bracket.stl(printed)stl/ll_rocker.stl(printed)
Steps
1. Print and cut
Print every STL in stl/ (PETG unless the part note says otherwise, 0.008 in layers, 4 walls, 30 to 40% gyroid). Cut every file in laser/ on Drag Queen. Check every MEASURE note in the README against your actual parts before printing the parts they touch.
2. Adapter
Drill the laser-side holes in the ply adapter to match your laser carriage (MEASURE first), then bolt it on.
3. Rails
Screw the two MGN7 rails to the base plate with M2 screws and a drop of threadlocker; slide the carriages on.
4. Tool holders
Clamp the pen in the left carriage and the scribe in the right. Each should drop freely under its own weight.
5. Servo and rocker
Press the MG90S into its bracket, centre it at 90 degrees with the Nano, then press the printed rocker onto the horn level. Bend two 0.059 in music-wire pushrods with Z-bends at both ends.
6. Mount
Bolt the head to the adapter on Drag Queen's 1 9/16 x 2 15/16 in swap pattern.
Wiring
- Laser PWM out to Nano D2 (through a 1k resistor) and ground to ground.
- Laser 24 V to the LM2596 in; set it to 5.1 V before connecting anything.
- Buck 5 V to Nano 5V and the servo red; servo signal to D9.
Firmware
- Flash
lady_liner.ino(reads PWM duty with pulseIn on D2; below 10% = up, 20 to 50% = pen, above 60% = scribe). - In LightBurn set the laser's max S to 1000 and enable 'Constant power' for the pen layers.
First test
- Jog to a scrap, send S300 M3: the pen drops. S800: the scribe drops. M5: both lift.
- Draw a 3 15/16 in square and measure it: within 0.012 in means the frame is square.
Mortisha
A laser-frame style router gantry for joinery (mortises, box joints, dados, small tenons).
Fairy Ring pipeline / Cut and draw / gets joinery toolpaths
Mortisha is a small router built like the open diode-laser frames, then given teeth. She cuts mortises, box joints, dados and small tenons in hardwood with a 300 W spindle, using the same GRBL controller and LightBurn workflow as the lasers. A front end-clamp holds boards upright so she can cut into their ends.
How it works
Spindle off / Spindle on
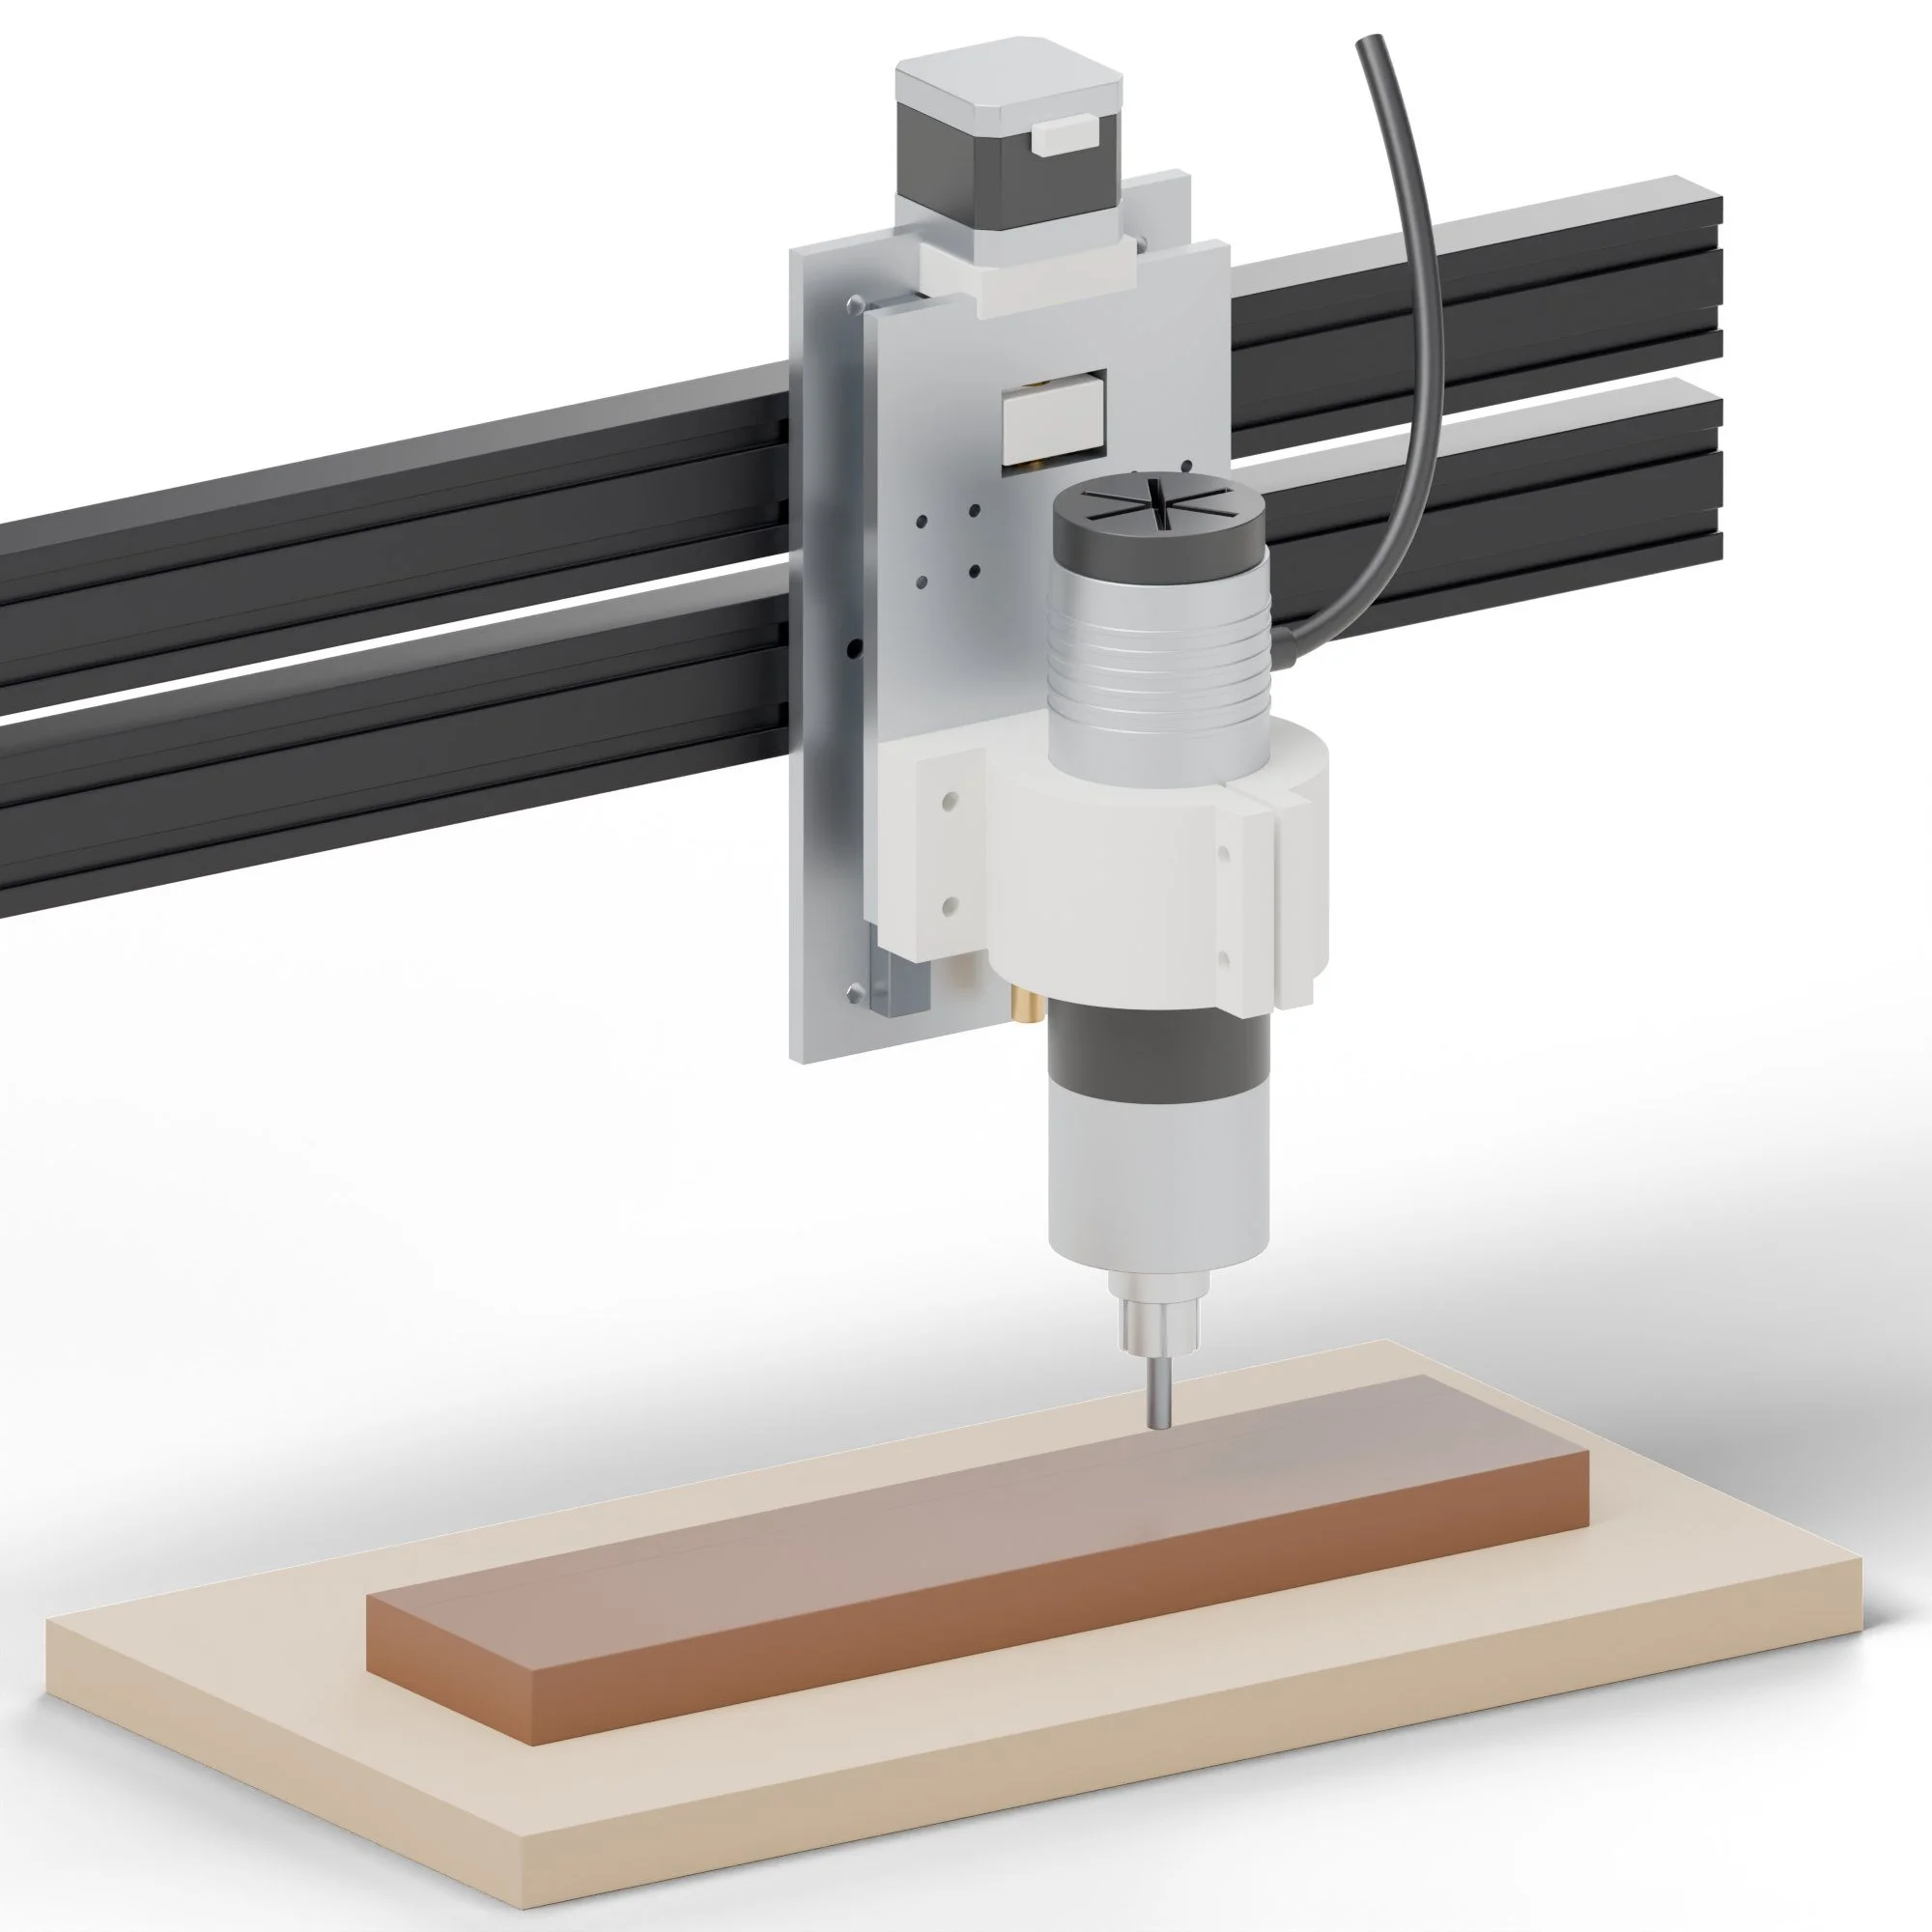
- A doubled 2040 beam rides V-wheels on two Y rails; a laser-cut aluminium Z plate carries MGN12 rails, a T8 lead screw and a 2 1/16 in ER11 spindle.
- Boards lie on the spoilboard for mortises and dados, or hang in the front clamp for box-joint fingers and tenon cheeks.
- The Fairy Ring CAD engine (or LightBurn for 2D) writes the G-code; the joint sizes come from the drawing, so the parts fit.
What it can make
Products / and less obvious uses
- Box joints
- Fingers cut into board ends held in the front clamp.
- Mortises and small tenons
- For frames, stools and the pm case.
- Dados and grooves
- Shelves, drawer bottoms and floating panels.
- Inlay pockets
- Recesses for Drag Queen's veneer and for hardware like hinges.
- Carved relief
- Textured panels and drawer fronts from a height map.
Tricks worth trying
- Bucks for Skin Tight Carve an MDF relief, then vacuum-form over it: a tray that matches a carved lid.
- Texture plugs for Mother A carved plug pressed into the mold embosses the grown surface.
Recipes
Bits / feeds / joints that fit
Use it for: Mortises, box joints, dados and small tenons in hardwood; end-grain cuts with the board in the front clamp.
Materials
- 1/8 in and 1/4 in 2-flute upcut carbide end mills (Whiteside RU1600 and RU2100)
- Hardwood: maple, cherry, walnut, white oak
- MDF spoilboard, surfaced flat on the machine
Settings
| Setting | Value |
|---|---|
| Spindle speed | 12,000 rpm (300 W spindle at full speed) |
| 1/8 in upcut | 23.6 to 31.5 in/min feed, 0.039 in depth per pass, 0.02 in plunge |
| 1/4 in upcut | 900 to 1,7.87 in/min, 0.079 in per pass |
| Stepover (pockets) | 40% of diameter |
| Finishing pass | 0.008 in on walls for a glue-line fit |
| Fit allowance | Mortise +0.004 in per side over the tenon |
Steps
- Surface the spoilboard with the 1/4 in bit, 0.012 in deep, 50% stepover.
- Clamp the work: flat on the spoilboard with the printed dogs, or upright in the end clamp for box joints.
- Zero X/Y on the corner and Z on the top with a paper feeler.
- Load the job from Fairy Ring (it exports joinery as G-code with ramps).
- Cut with the vac on; pause and clear chips every 0.2 in of depth in deep mortises.
- Square the corners with a chisel or round the tenons to match.
Troubleshooting
| Problem | Fix |
|---|---|
| Burn marks | Feed too slow or bit dull; raise feed 20% or replace the bit. |
| Chatter | Tighten the V-wheel eccentrics and the spindle clamp; reduce depth per pass. |
| Loose joints | Measure the actual bit (they run 0.001 to 0.002 in small) and set it in the tool table. |
| Lost steps on Y | Belt tension or too much acceleration; set 19 11/16 in/s2. |
Safety
- Eye and ear protection, every cut.
- Never reach in while the spindle turns; use the e-stop.
- Clamp everything; a loose part becomes a projectile.
Numbers are starting points. Run one test piece on every new batch of material.
Bits and feeds
Light cuts, many passesYou need
| 1/8 in upcutBox joints and small mortises | 0.02 in per pass |
| 1/4 in upcutWider mortises and dados | 0.039 in per pass |
| FeedStart slow and listen | 19.7 to 31.5 in/min |
Method
- Clamp the stock in the end clamp or to the spoilboard.
- Zero on the top face with a paper feeler.
- Cut one test joint in scrap of the same wood.
- Adjust the fit in Fairy Ring (it widens slots in 0.002 in steps) and cut the real ones.
Eye and hearing protection. Never reach in while the spindle turns.
What to buy
12 parts / $475.99 before tax / estimates, check the links
 012040 V-slot extrusion, black, 0.16 x 39.4 in: cut 500 + 450 from two bars and 600 from the other two$55.00Frame and doubled X beamView on Amazon →
 02POM V-slot wheel kits with eccentric spacers, 10-pack$24.00Qty 16 · Gantry and X carriageView on Amazon →StepperOnline03NEMA17 17HS19-2004S1$48.00Qty 4 · X, dual Y, ZView on StepperOnline →Kingroon04Makerbase MKS DLC32 controller$28.00GRBL/FluidNC, same family as the lasersView on Kingroon →
 05BIGTREETECH TMC2209 V1.3 drivers, 4-pack$16.00Quiet, cool driversView on Amazon →SainSmart06Genmitsu 300 W ER11 spindle with supply$99.992 1/16 in, 0 to 48 VView on SainSmart →
 07MGN12H rail 11 13/16 in + carriage$40.00Qty 2 · Z axisView on Amazon →
 08T8 lead screw 11 13/16 in set with anti-backlash nut and coupler$12.00Z driveView on Amazon →
 09GT2 0.35 in belt + 20T pulleys$18.00X and YView on Amazon →SendCutSend10Laser-cut 0.24 in 6061 plates (Z, X carriage, 2 Y sides)$70.00From the DXFs hereView on SendCutSend →
 11Whiteside RU1600 1/8 in upcut (pair with RU2100 1/4 in)$25.00Joinery bitsView on Amazon →
 12Mean Well LRS-350-24 supply, limit switches, e-stop$40.00View on Amazon →
What to make
Printed on the printers you have / cut on the xTool or sent out
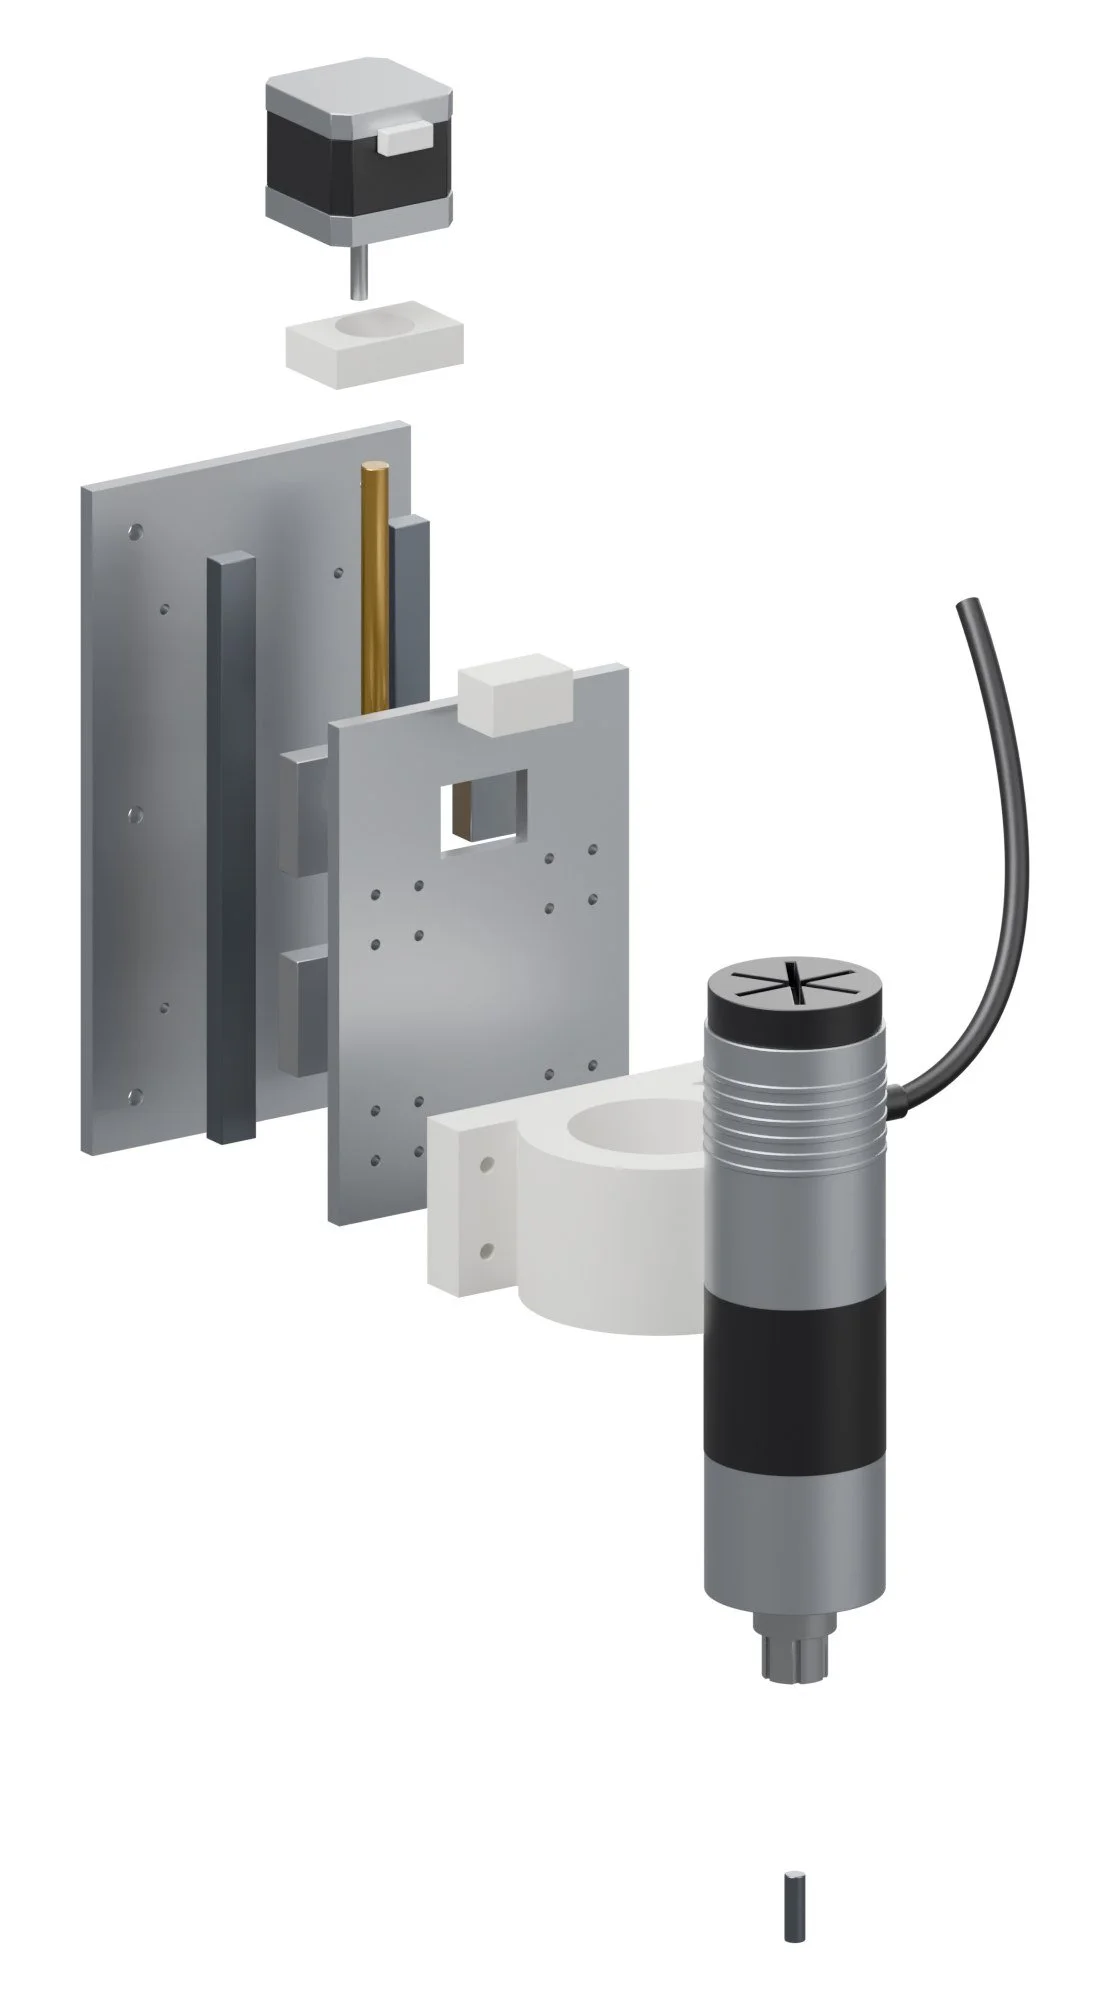
| X carriage plate0.24 in 6061 aluminium (SendCutSend or similar), or 0.47 in Baltic birch for the first build. | cut |
| Motor mountPETG. Bolts to the X carriage plate top edge. | |
| Z plate0.24 in 6061 aluminium. | cut |
| Nut blockPETG, 6 walls. Holds the T8 anti-backlash nut. | |
| Spindle clampASA or PC-CF, 8 walls, 60% infill, slit vertical. Fits a 2 1/16 in spindle; 2 x M5 pinch bolts. | |
| Corner bracketPETG, 8 needed, 100% infill or 6 walls. M5 T-nuts. | |
| Y side platex2, 0.24 in aluminium. Carries 4 V-wheels each and the Y NEMA17 (dual Y). | cut |
| End clamp jawx6, 0.24 in ply, glue 3 into an 11/16 in jaw (2 jaws). Front vertical clamp for box joints and tenons. | cut |
Build guide
Tools / parts / every step, start to finish
Open the full build guide
Time: 10 to 14 hours plus printing Skill: Medium: frame alignment, GRBL setup
Tools
- Hex keys
- Square
- Dial indicator (optional)
- Crimp tool for JST and Dupont
Parts
Bought (full list with links in the README and buy_list.csv):
- 1 x 2040 V-slot extrusion, 6 lengths (2 x 500, 2 x 600, 2 x 450)
- 16 x V-wheel kits (wheel, bearings, spacers)
- 4 x NEMA17 17HS19-2004S1
- 1 x Makerbase MKS DLC32 controller
- 1 x TMC2209 drivers, 4 pack
- 1 x Genmitsu 300 W ER11 spindle with supply
- 2 x MGN12H rail 11 13/16 in + carriage
- 1 x T8 lead screw 11 13/16 in + anti-backlash nut + coupler
- 1 x GT2 0.35 in belt 16.4 ft + 20T pulleys + idlers
- 1 x Laser-cut 0.24 in 6061 plates (Z, X carriage, 2 Y sides)
- 1 x Upcut end mills 1/8 and 1/4 in
- 1 x 24 V 10 A supply, limit switches, e-stop
- 1 x Baltic birch 11/16 in (spoilboard) and 0.24 in (jaws) (already owned)
Made:
laser/mt_x_carriage_plate_6mm.dxf(laser)stl/mt_motor_mount.stl(printed)laser/mt_z_plate_6mm.dxf(laser)stl/mt_nut_block.stl(printed)stl/mt_spindle_clamp.stl(printed)stl/mt_corner_bracket.stl(printed)laser/mt_y_side_plate_6mm.dxf(laser)laser/mt_end_clamp_jaw_6mm.dxf(laser)
Steps
1. Print and cut
Print every STL in stl/ (PETG unless the part note says otherwise, 0.008 in layers, 4 walls, 30 to 40% gyroid). Cut every file in laser/ on Drag Queen. The aluminium Z plate goes to a SendCutSend-style service or is cut from 0.24 in ply on Drag Queen for a first version. Check every MEASURE note in the README against your actual parts before printing the parts they touch.
2. Frame
Bolt the 2040 Y rails to the base, square to each other within 0.02 in over the diagonal.
3. Gantry
Mount the doubled X beam on the printed gantry plates; adjust the eccentric V-wheels until there's no play but they still turn by hand.
4. Z axis
Screw the MGN12 rails to the Z plate, fit the nut block and T8 lead screw, then the spindle clamp.
5. Spindle
Clamp the 2 1/16 in spindle with its nose 1 3/16 in below the clamp; tighten the two pinch bolts evenly.
6. Belts and motors
Fit GT2 0.35 in belts on X and Y, tension to a low twang.
Wiring
- MKS DLC32: X, Y, Z drivers; limit switches to the endstop inputs; e-stop in series with the spindle supply and on the controller's e-stop input.
- Spindle on its own 48 V supply with PWM from the DLC32's spindle output.
Firmware
- GRBL: $100/$101 = 80 steps/mm (GT2 20T, 16 microsteps), $102 = 400 (T8x2... 800 for T8x2 at 16 microsteps; check your screw).
- $110/$111 = 3000, $112 = 600, $120/$121 = 500, $130/$131/$132 = 400/300/60.
First test
- Draw a 7 7/8 in square with a pen in the collet: diagonals equal within 0.012 in.
- Cut a 0.39 in mortise in pine and fit a test tenon before any hardwood.
Lathe Minnelli
Small CNC wood lathe for legs, pulls, knobs and dowels.
Fairy Ring pipeline / Cut and draw / gets turning profiles
Lathe Minnelli turns. A printed headstock on two 2040 rails spins a 3-jaw chuck through a belt from a 775 motor, and a two-axis carriage brings a carbide tool in along a profile Fairy Ring draws as a half-section. Legs for the cabinets, pulls, knobs, finials and dowels come out matching every time.
How it works
Blank / Turned
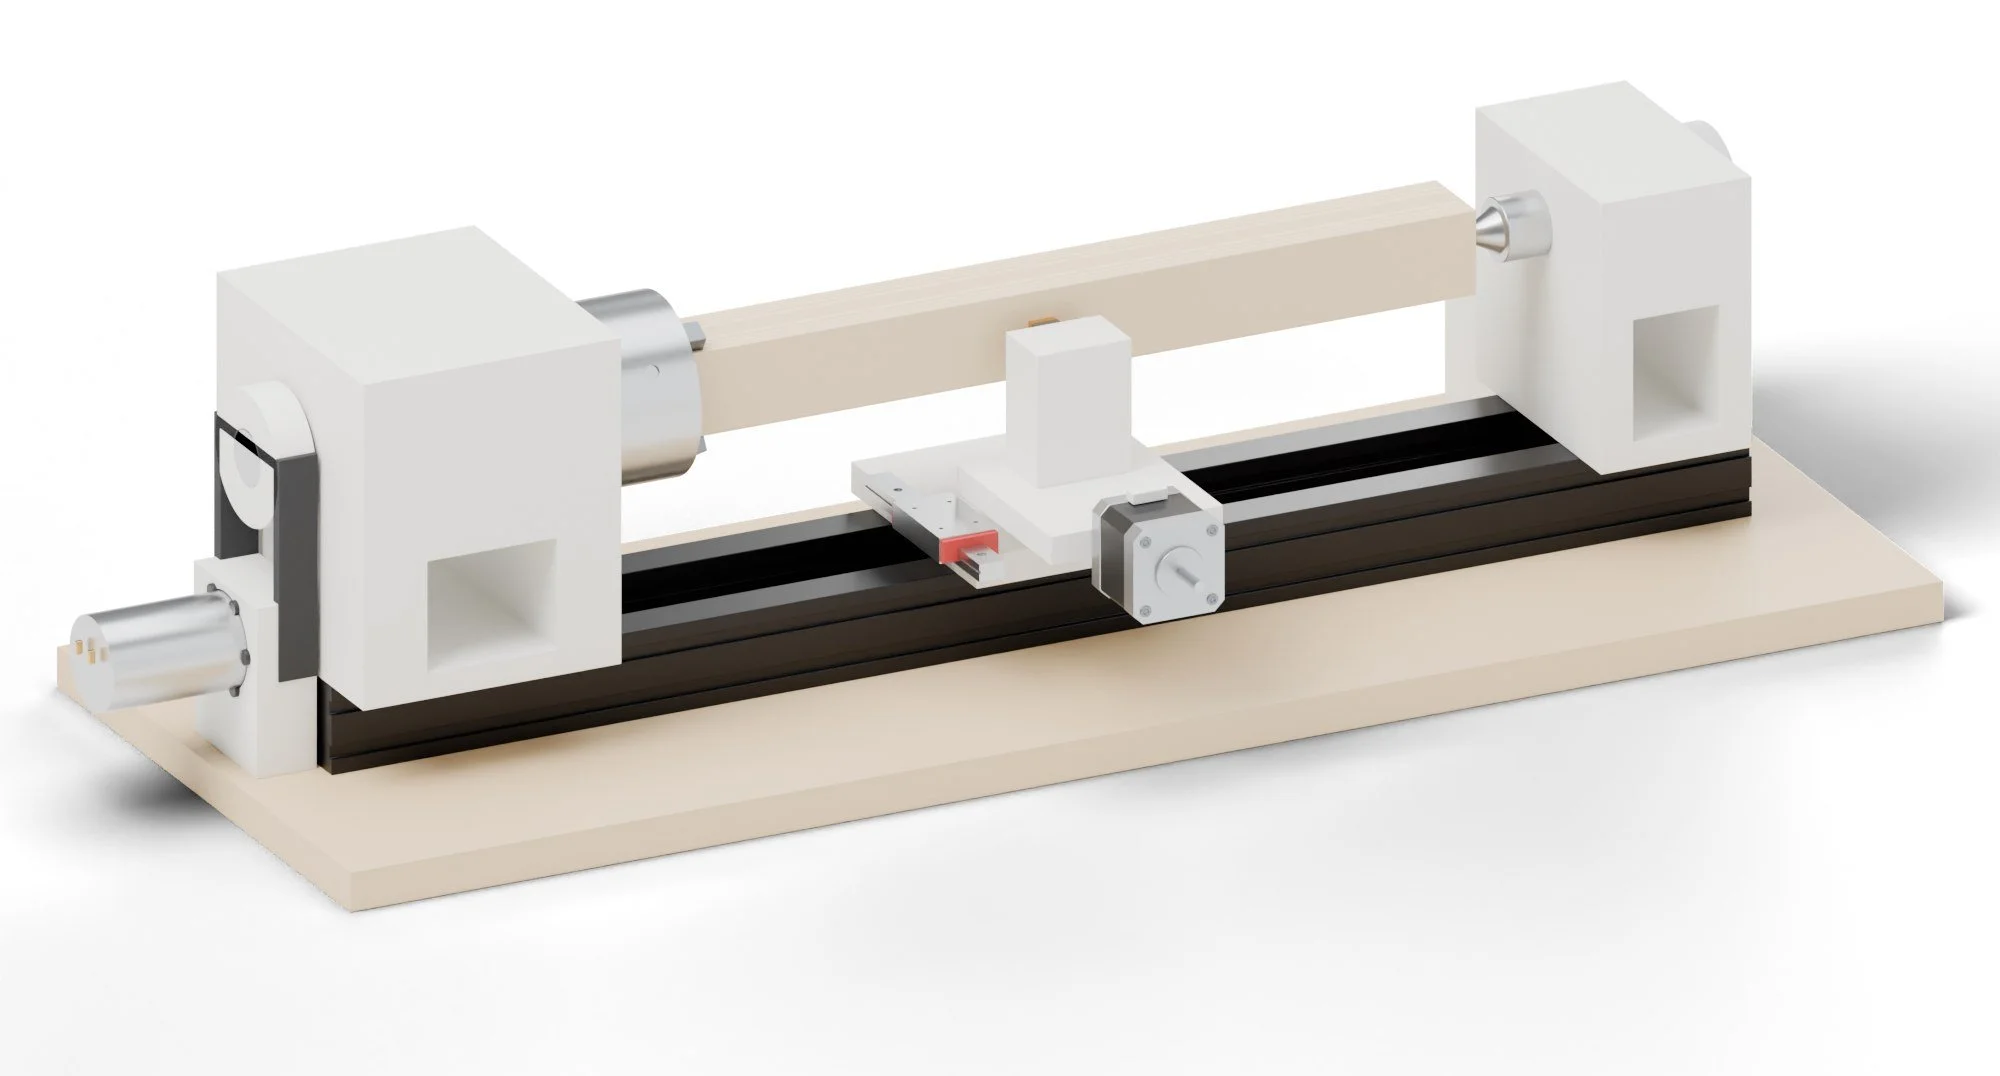
In these renders: Lathe chuck model by takeboncog, CC BY 4.0 via Sketchfab.
- Mount a square blank (up to 2 in) in the chuck and bring up the tailstock's live centre.
- Start the spindle (about 1,500 rpm for 1 9/16 in stock) and run the roughing passes, 0.039 in at a time, then a 0.008 in finish pass.
- Sand it while it spins, part it off, and move on. The same file makes the next one identical.
Recipes
Materials / settings / what to do when it goes wrong
Use it for: Legs, pulls, knobs, finials, dowels and tool handles.
Materials
- Maple, cherry, walnut, ash; straight grain, dry (under 10% MC)
- Blanks squared to 1 9/16 to 2 in, 2 in longer than the part for chucking and parting
Settings
| Setting | Value |
|---|---|
| Spindle speed | 2 in stock: 1,200 to 1,500 rpm; 0.98 in: 2,000 rpm; slow down if it vibrates |
| Roughing | 0.039 in depth per pass, 15.7 to 23.6 in/min |
| Finishing | 0.008 in, 7.87 in/min |
| Tool | 0.47 in square carbide insert, centre height exactly on the axis |
| Tailstock | Always on parts longer than 2 x diameter |
Steps
- Mark the blank's centre on both ends; knock the corners off with a plane for blanks over 1 9/16 in.
- Chuck one end, bring up the live centre and lock it.
- Zero X on the blank's surface (touch off) and Z on its end.
- Run the roughing passes, then the finish pass.
- Sand 150 to 320 while spinning at low speed; apply oil or shellac friction finish.
- Part off with a thin tool or saw off and finish the end by hand.
Troubleshooting
| Problem | Fix |
|---|---|
| Chatter marks | Too fast or tool above centre; check tool height, slow down. |
| Tear-out on end grain | Sharp insert, lighter final cut, sand. |
| Blank flies out | Chuck jaws too shallow; chuck at least 0.98 in and use the tailstock. |
| Steps not to size | Check X steps per mm with a test cylinder. |
Safety
- Face shield, not just glasses.
- Stand out of the line of the spinning blank when starting.
- No gloves, loose sleeves or long hair near the chuck.
- Check the blank for cracks and knots before turning.
Numbers are starting points. Run one test piece on every new batch of material.
What to buy
15 parts / $348.00 before tax / estimates, check the links
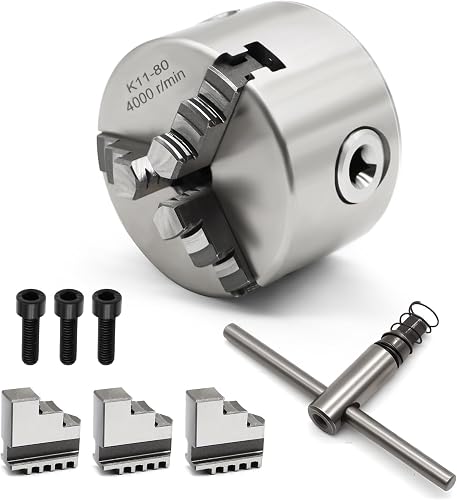 01K11-80 3-jaw chuck, 3 1/8 in$45.00Holds the blankView on Amazon →
 02775 DC motor 24 V + PWM speed controller$25.00Spindle driveView on Amazon →
 036205-2RS bearings, 2-pack$10.00SpindleView on Amazon →
 040.98 in steel shaft 7 7/8 in$15.00Spindle (have it threaded for the chuck)View on Amazon →
 05HTD-5M belt 13 3/4 in, 0.59 in wide$9.00Spindle beltView on Amazon →
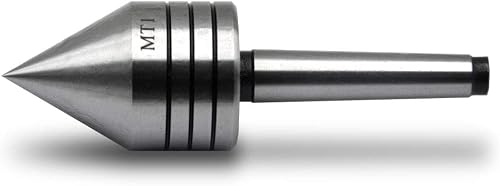 06MT1 live centre$18.00TailstockView on Amazon →
 070.47 in carbide insert turning tool$20.00CutterView on Amazon →
 08T8 lead screw 11 13/16 in + nut + coupler, 2 sets$22.00X and ZView on Amazon →
 09MGN12H rail 5 7/8 in + carriage$15.00Cross slideView on Amazon →
 10NEMA17 stepper, 1 9/16 in$24.00Qty 2 · X and ZView on Amazon →
 11MKS DLC32 V2.1 controller$45.00GRBL/FluidNC, same family as the lasersView on Amazon →1224 V 10 A supply (Mean Well LRS-250-24)$30.00Motors and controllerView on Amazon →132040 V-slot, black, cut to length$28.00Qty 2 · FrameView on Amazon →14V-wheel kits, 20-pack$22.00CarriagesView on Amazon →
 15PETG filament 1 kg$20.00Printed partsView on Amazon →
What to make
Printed on the printers you have / cut on the xTool or sent out
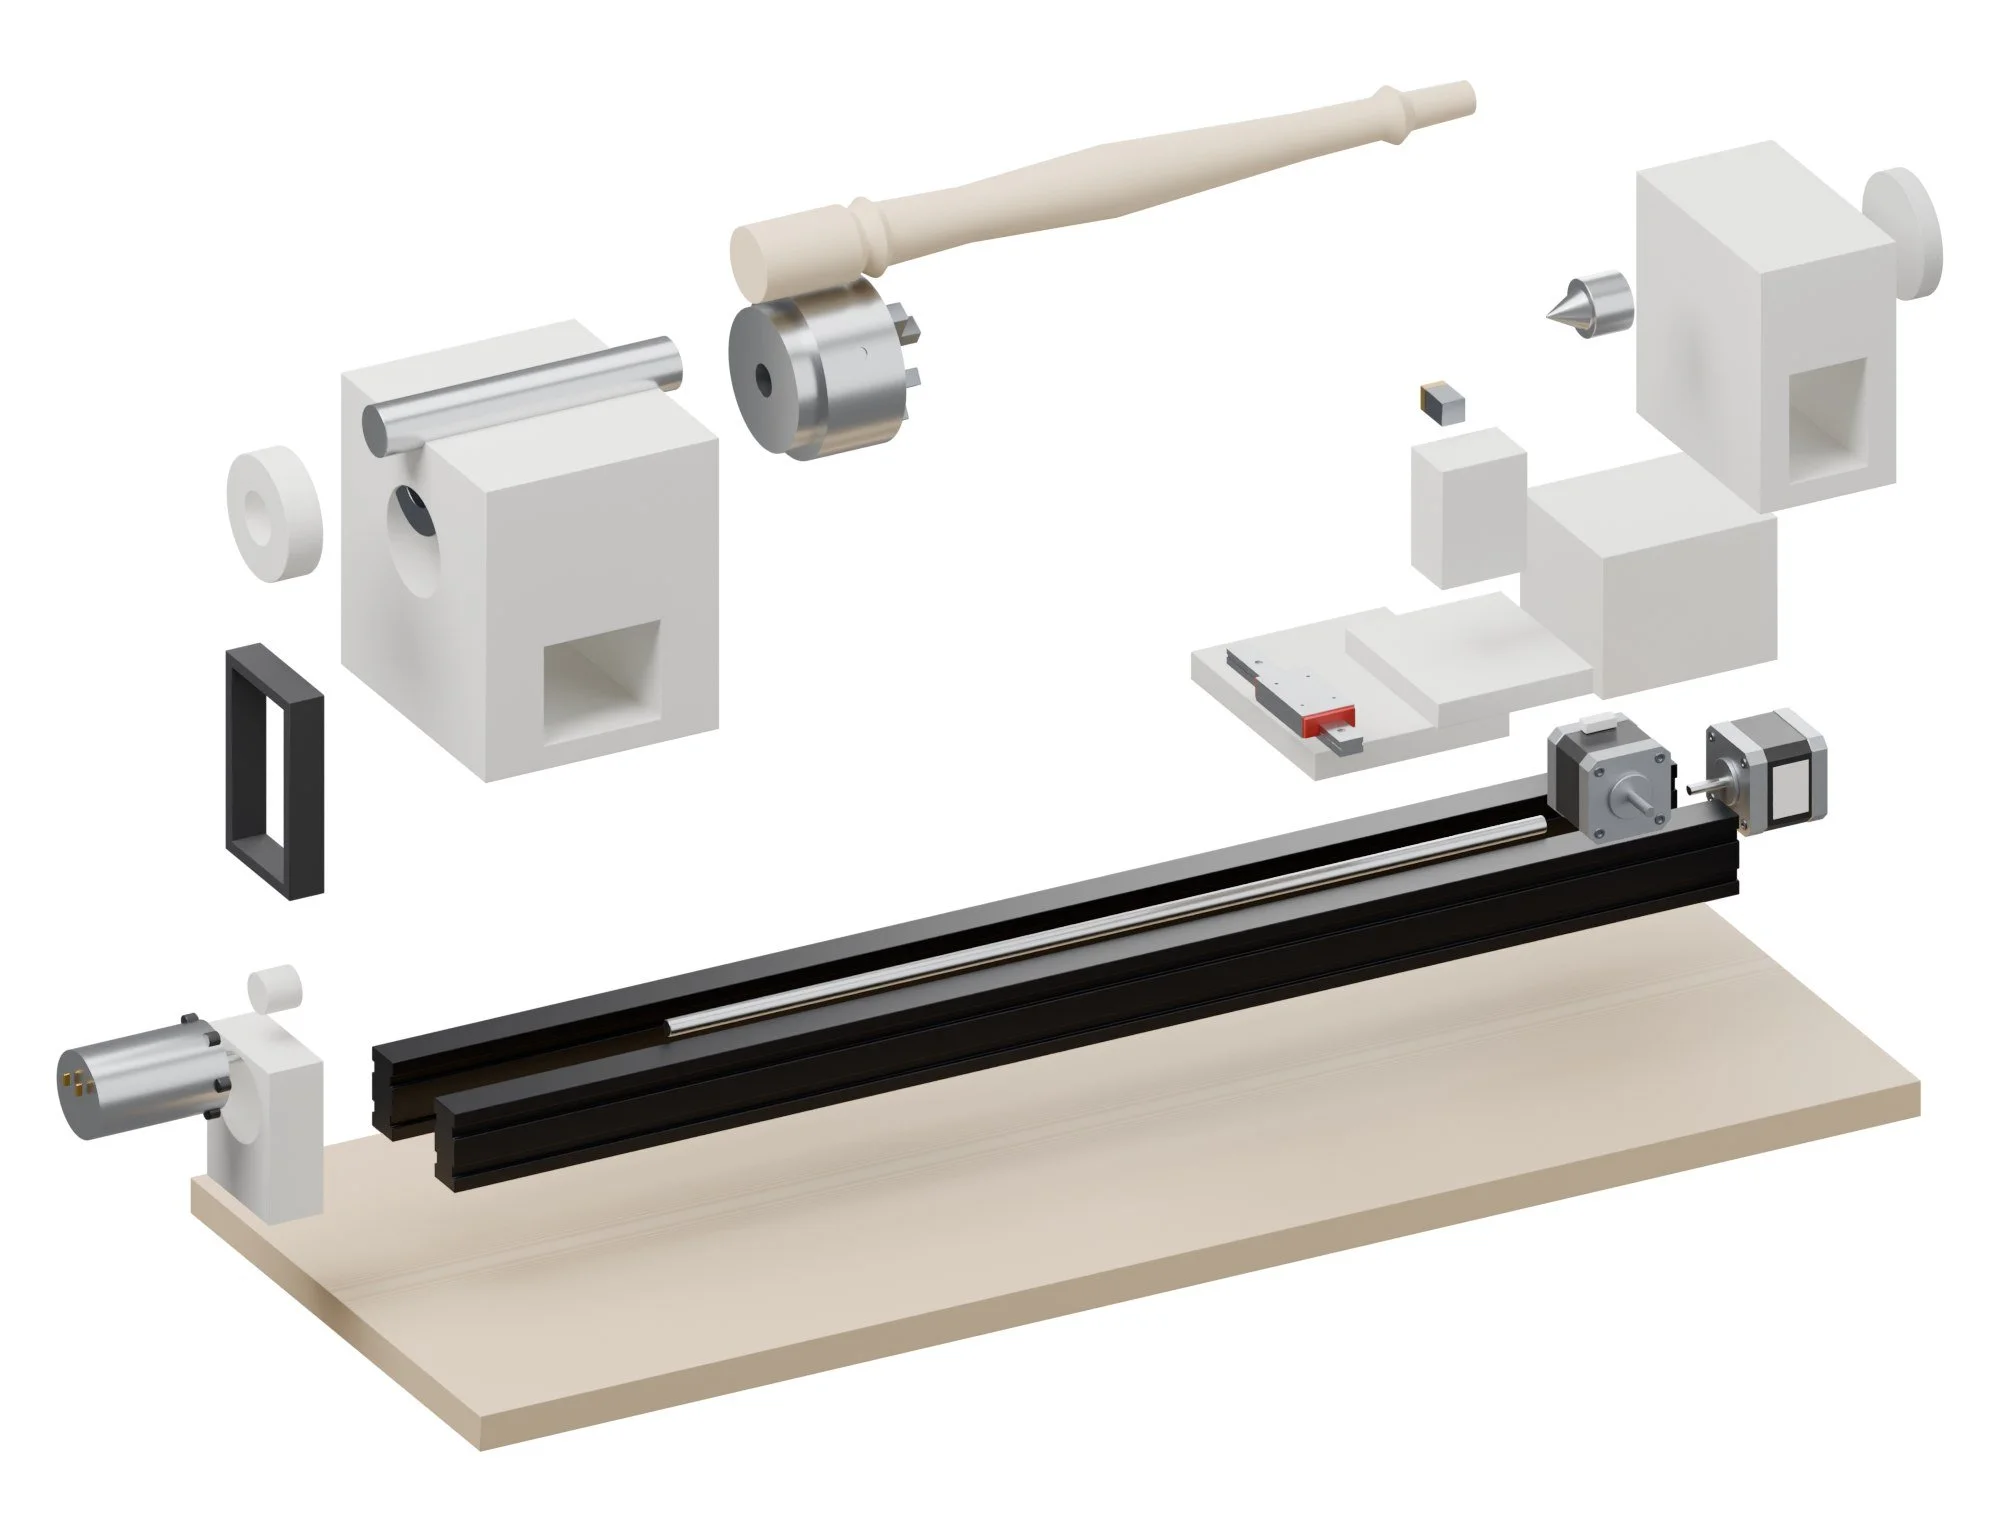
| HeadstockPETG-CF, 6 walls, 40% infill. Bearing seats for 6205-2RS at both ends. | |
| Spindle pulleyPETG-CF HTD-5M 36T pulley, keyed to the spindle. | |
| Motor pulley12T, press-fit on the 0.2 in shaft. | |
| Motor mount | |
| TailstockPETG-CF. Quill bore for a MT1 live centre adapter; printed cam lock below. | |
| Tail handwheel | |
| CarriagePETG-CF on four V-wheels; T8 nut pocket underneath. | |
| Cross slide | |
| Tool postPETG-CF; two M8 set screws clamp a 0.47 in tool. | |
| Controller box |
Build guide
Tools / parts / every step, start to finish
Open the full build guide
Time: 12 to 16 hours plus printing Skill: Medium to hard: the spindle needs a machinist for the chuck thread
Tools
- Hex keys
- Bearing press or vice
- Reamer for 2 1/16 in seats (or careful sanding)
- Dial indicator
Parts
Bought (full list with links in the README and buy_list.csv):
- 1 x K11-80 3-jaw chuck, 3 1/8 in
- 1 x 775 DC motor 24 V + PWM speed controller
- 1 x 6205-2RS bearings, 2-pack
- 0.039 x 0.98 in steel shaft 7 7/8 in
- 1 x HTD-5M belt 13 3/4 in, 0.59 in wide
- 1 x MT1 live centre
- 0.039 x 0.47 in carbide insert turning tool
- 1 x T8 lead screw 11 13/16 in + nut + coupler, 2 sets
- 1 x MGN12H rail 5 7/8 in + carriage
- 2 x NEMA17 stepper, 1 9/16 in
- 1 x MKS DLC32 V2.1 controller
- 1 x 24 V 10 A supply (Mean Well LRS-250-24)
- 2 x 2040 V-slot, black, cut to length
- 1 x V-wheel kits, 20-pack
- 1 x PETG filament 1 kg
- 1 x M3/M4/M5 screws, nuts and inserts (already owned)
Made:
stl/lm_headstock.stl(printed)stl/lm_spindle_pulley.stl(printed)stl/lm_motor_pulley.stl(printed)stl/lm_motor_mount.stl(printed)stl/lm_tailstock.stl(printed)stl/tail handwheel.stl(printed)stl/lm_carriage.stl(printed)stl/lm_cross_slide.stl(printed)stl/lm_tool_post.stl(printed)stl/lm_controller_box.stl(printed)
Steps
1. Print
Print every STL in stl/ (PETG unless the part note says otherwise, 0.008 in layers, 4 walls, 30 to 40% gyroid). Cut every file in laser/ on Drag Queen. Print the headstock in PETG-CF, 6 walls, 40% infill. Check every MEASURE note in the README against your actual parts before printing the parts they touch.
2. Spindle
Have the 0.98 in shaft threaded to the chuck's back plate (or fit a back plate with a set-screw collar). Press the two 6205 bearings into the headstock.
3. Bed
Bolt the two 2040 rails to the base, parallel within 0.008 in (dial indicator).
4. Drive
Mount the 775 motor under the headstock; fit the printed pulleys and HTD belt; tension to 0.2 in deflection.
5. Carriage and cross slide
V-wheel carriage on the rails with the T8 nut; MGN12 cross slide on top; tool post on the cross slide.
6. Tailstock
Slide it on, fit the live centre and check it meets the chuck centre within 0.008 in.
Wiring
- MKS DLC32: Z (along the bed) and X (cross slide) steppers, limit switches.
- 775 motor on its PWM board; PWM from the DLC32 spindle output.
- E-stop on motor power.
Firmware
- GRBL in lathe mode ($32 = 0); X in diameter mode in Fairy Ring's post-processor.
- $100 = 400 (T8 at 0.079 in lead... 1,600 at 16 microsteps for 0.079 in lead; check your screw).
- Spindle max 3,000 rpm mapped to S1000.
First test
- Turn a 1 3/16 in test cylinder and measure it at both ends: within 0.004 in means the tailstock is aligned.
Mud Diva
Clay and concrete paste extruder for mold cores and vessel blanks.
Fairy Ring pipeline / Form / gets clay and concrete cores
Mud Diva is a paste printer for clay and fine cement. A ram keeps a printed auger fed through a hose, and the auger lays down the bead, so starts and stops stay crisp. It prints clay cores and blanks for concrete pieces like K, lost cores, and vessels straight onto the bed.
How it works
Layer 1 / Layer 32
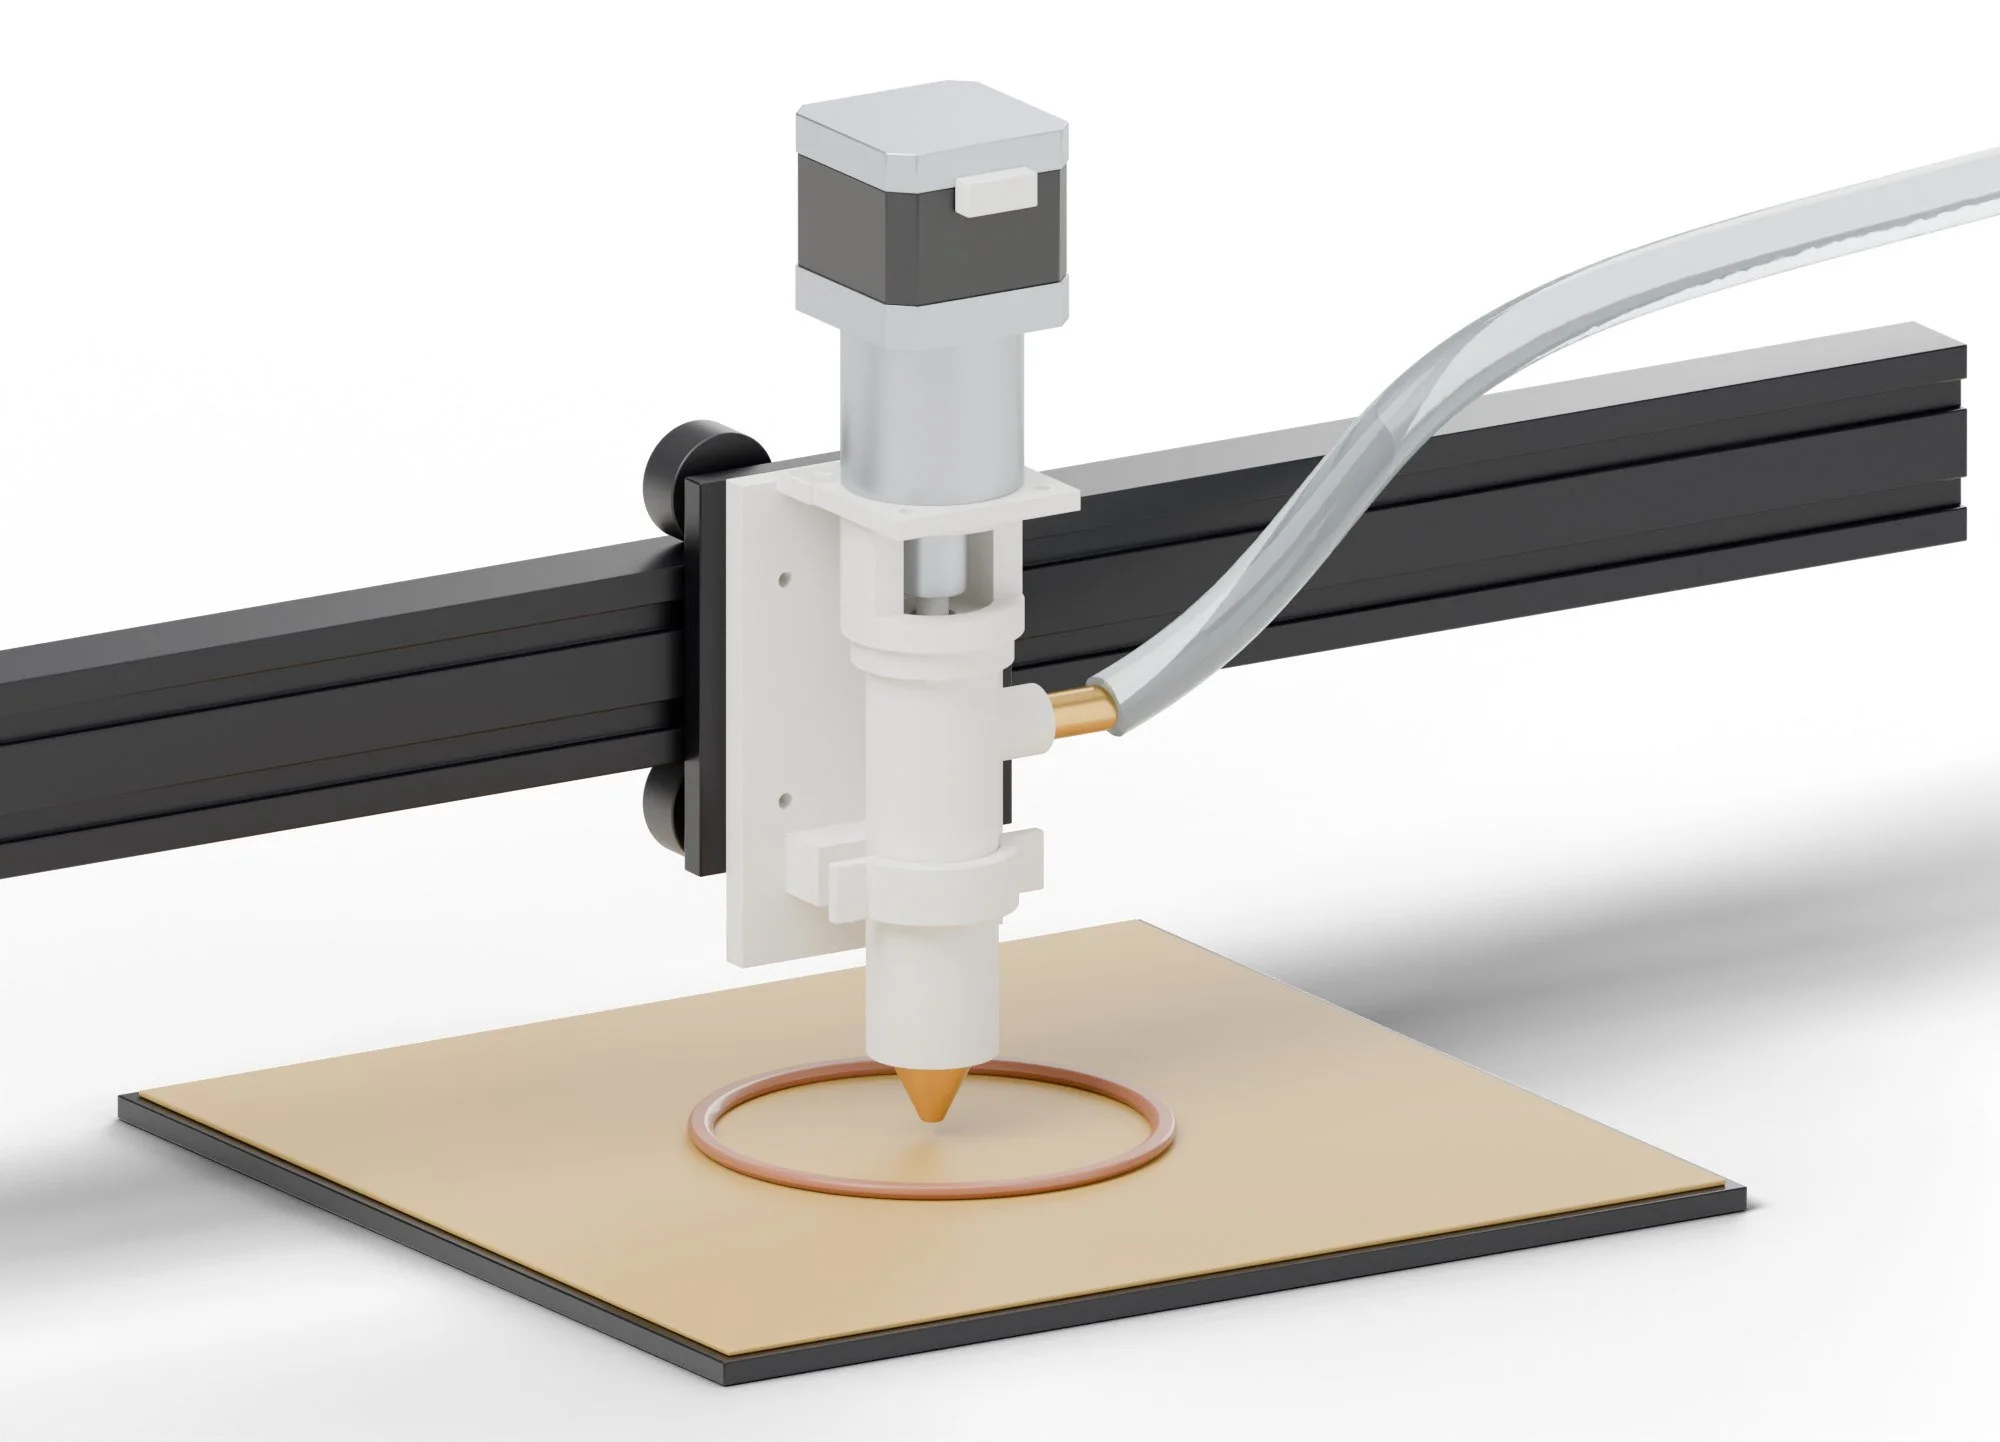
- Stiff clay (or a retarded, fine cement paste) goes into a 2 in aluminium cartridge; a stepper ram keeps it under light pressure.
- A hose carries it to a small printed auger head on the printer, driven by the printer's own extruder output through a 5:1 gearbox.
- The printer lays 0.12 in layers of a 0.2 in bead, up to 11 13/16 x 11 13/16 x 13 in, and the core dries or sets on the bed.
What it can make
Products / and less obvious uses
- Vessels and planters
- Coiled clay pots and vases straight from the Fairy Ring model.
- Mold cores for concrete
- A printed clay core for a K-style pour, scraped out after.
- Tiles
- Relief tiles in clay, fired or cast from.
- Lamp bases
- Heavy, stable bases for the Queen Bee shades.
Tricks worth trying
- Clay around wax Print clay around a Queen Bee wax insert; the wax burns out in the kiln and leaves a clean void. To test.
- Paste concrete A fine, retarded cement paste in place of clay for small stacked concrete pieces. To test.
Recipes
Clay paste / concrete paste / curing
Use it for: Clay cores and blanks, lost cores for concrete pieces, and vessels printed straight onto the bed.
Materials
- Low-fire clay (Amaco No. 25 white) at 22 to 25% water
- Or fine cement paste: Rapid Set Cement All sieved under 0.039 in, water 0.35 to 0.40 by weight, citric-acid retarder
- Plaster bats or wet canvas on the bed
Settings
| Setting | Value |
|---|---|
| Nozzle | 0.12 in for detail, 0.16 to 0.2 in for speed |
| Layer height | 60% of the nozzle (0.071 in on a 0.12 in nozzle; 0.12 in on 0.2 in) |
| Line width | Nozzle + 30% |
| Speed | 0.39 to 0.79 in/s |
| Retraction | None; the auger reverses a quarter turn |
| Ram pressure | Set so the inlet switch cycles about once per 10 s |
| Cement work time | About 20 min untreated, 45 to 60 min with 0.2% citric acid |
Steps
- Wedge the clay to remove air, then roll it into a 1 13/16 in log and load the cartridge.
- Prime: run the ram until clay reaches the barrel, then turn the auger by hand until it extrudes.
- Calibrate: command 3 15/16 in of E and weigh the clay out; set E-steps so 0.039 in of E = the slicer's volume.
- Print a 2 3/8 in calibration cylinder. Walls should be even and stack without slumping.
- Print the part. For tall pieces, pause every 2 3/8 in and let a fan or heat gun firm the base.
- Cut it off the bed with a wire. Dry slowly under plastic for clay; mist and cover cement for 3 days.
Troubleshooting
| Problem | Fix |
|---|---|
| Slumping | Clay too wet: wedge in 1% dry clay, or slow down and add a fan. |
| Gaps and stringy bead | Ram pressure too low or air in the cartridge; re-wedge and reload. |
| Auger stalls | Clay too stiff or grit in it; add water to 24% and sieve grog out. |
| Cement sets in the barrel | Use the retarder, keep batches under 400 mL and rinse straight after. |
Safety
- Wear nitrile gloves with cement; it burns skin.
- Mix dry cement outdoors or under a dust mask (silica).
- Never leave the ram pushing on a blocked nozzle.
Numbers are starting points. Run one test piece on every new batch of material.
Clay paste
For printed cores, formwork and potsYou need
| Stoneware or earthenware claySmooth body, no grog bigger than 0.039 in | 1 bag (25 lb / 11 kg) |
| WaterWorked in until a ball holds its shape but pipes through the nozzle | 22 to 25% of wet weight |
| Layer / lineStart here | 0.12 in / 0.2 in |
Method
- Weigh a lump of clay, dry a sample overnight, weigh again to find its water.
- Add water a little at a time and wedge it until even. Wrap and rest it overnight.
- Load the cartridge in fist-sized balls, slapping each one down to push air out.
- Print a 3 15/16 in cylinder. If the walls bulge, the clay is too wet; if it breaks up, too dry.
- Dry slowly under loose plastic. Fire if it's a pot; keep it raw and reclaim it if it was formwork.
If it goes wrong
- Walls sag after 30 layers
- Too wet, or too fast. Let a fan set it, or print two parts in turn.
- Stuttering line
- Air in the cartridge. Reload in smaller balls.
Fine concrete paste
For small planters and K-style piecesNot real concrete: the nozzle can't pass gravel, so it is a fine cement and sand paste. It needs a plasticiser to flow and a retarder so it doesn't set in the tube.
You need
| Portland cementType I/II, fresh bag | 1 part by weight |
| Fine sandSieved under 0.039 in | 1 to 1.5 parts |
| WaterStart low | 0.35 to 0.40 × cement |
| SuperplasticiserPolycarboxylate, follow the label dose | label |
| RetarderBuys working time in the cartridge | label |
| Fibres (optional)PVA or polypropylene micro-fibre | label |
Method
- Mix dry first. Add 80% of the water and the plasticiser, mix 3 minutes.
- Add the rest of the water only if it won't flow. Stiff but smooth is right.
- Fill the cartridge, print within the retarder's working time.
- Cover with plastic for 24 h, then keep it damp for 7 days. Slow and wet makes it strong.
- Flush the nozzle and auger with water the moment you stop.
If it goes wrong
- Cracks the next day
- Dried too fast. Cover it and mist it.
- Sets in the tube
- Too little retarder or too slow. Print smaller batches.
Wet cement is caustic and burns skin. Gloves, long sleeves and eye protection. Mix dry cement outdoors or in a mask: the dust is harmful.
Clay as formwork
Print the mold, pour, wash it awayMethod
- Fairy Ring prints the negative of a concrete part in clay.
- Brush the inside with a thin oil or form release.
- Pour the concrete paste by hand, tap and vibrate out the air (or use Pour Decisions).
- After 48 h, soak the whole thing and wash the clay off with a soft brush.
- Slake the clay in a bucket and reuse it. The formwork is never thrown away.
What to buy
10 parts / $569.00 before tax / estimates, check the links
 03NEMA 17 with integrated 11 13/16 in T8 lead screw (check the lead in the listing and set steps/mm to match)$30.00Ram driveView on Amazon →OnlineMetals046061 aluminium tube 2 in OD x 0.065 in wall, 12 in$25.00Clay cartridgeView on OnlineMetals →
 05Ametric M6 stainless threaded rod, 3.3 ft (+ nuts)$12.00Ram tie rodsView on Amazon →
 06AS568-226 nitrile O-rings (2 in ID x 1/8 in)$10.00Piston sealsView on Amazon →
 07Eastman 3/8 in ID clear vinyl tubing, 10 ft (+ brass barbs)$18.00Clay hoseView on Amazon →
 08Arduino Nano + TMC2209 + pressure switch$25.00Ram controllerView on Amazon →
 09Brass 1/8 NPT barb fittings, 5-pack (drill to 0.079-0.24 in nozzles)$15.00Bead sizesView on Amazon →
 10Amaco low-fire clay, White Art No. 25, 25 lb$35.00First testsView on Amazon →

What to make
Printed on the printers you have / cut on the xTool or sent out
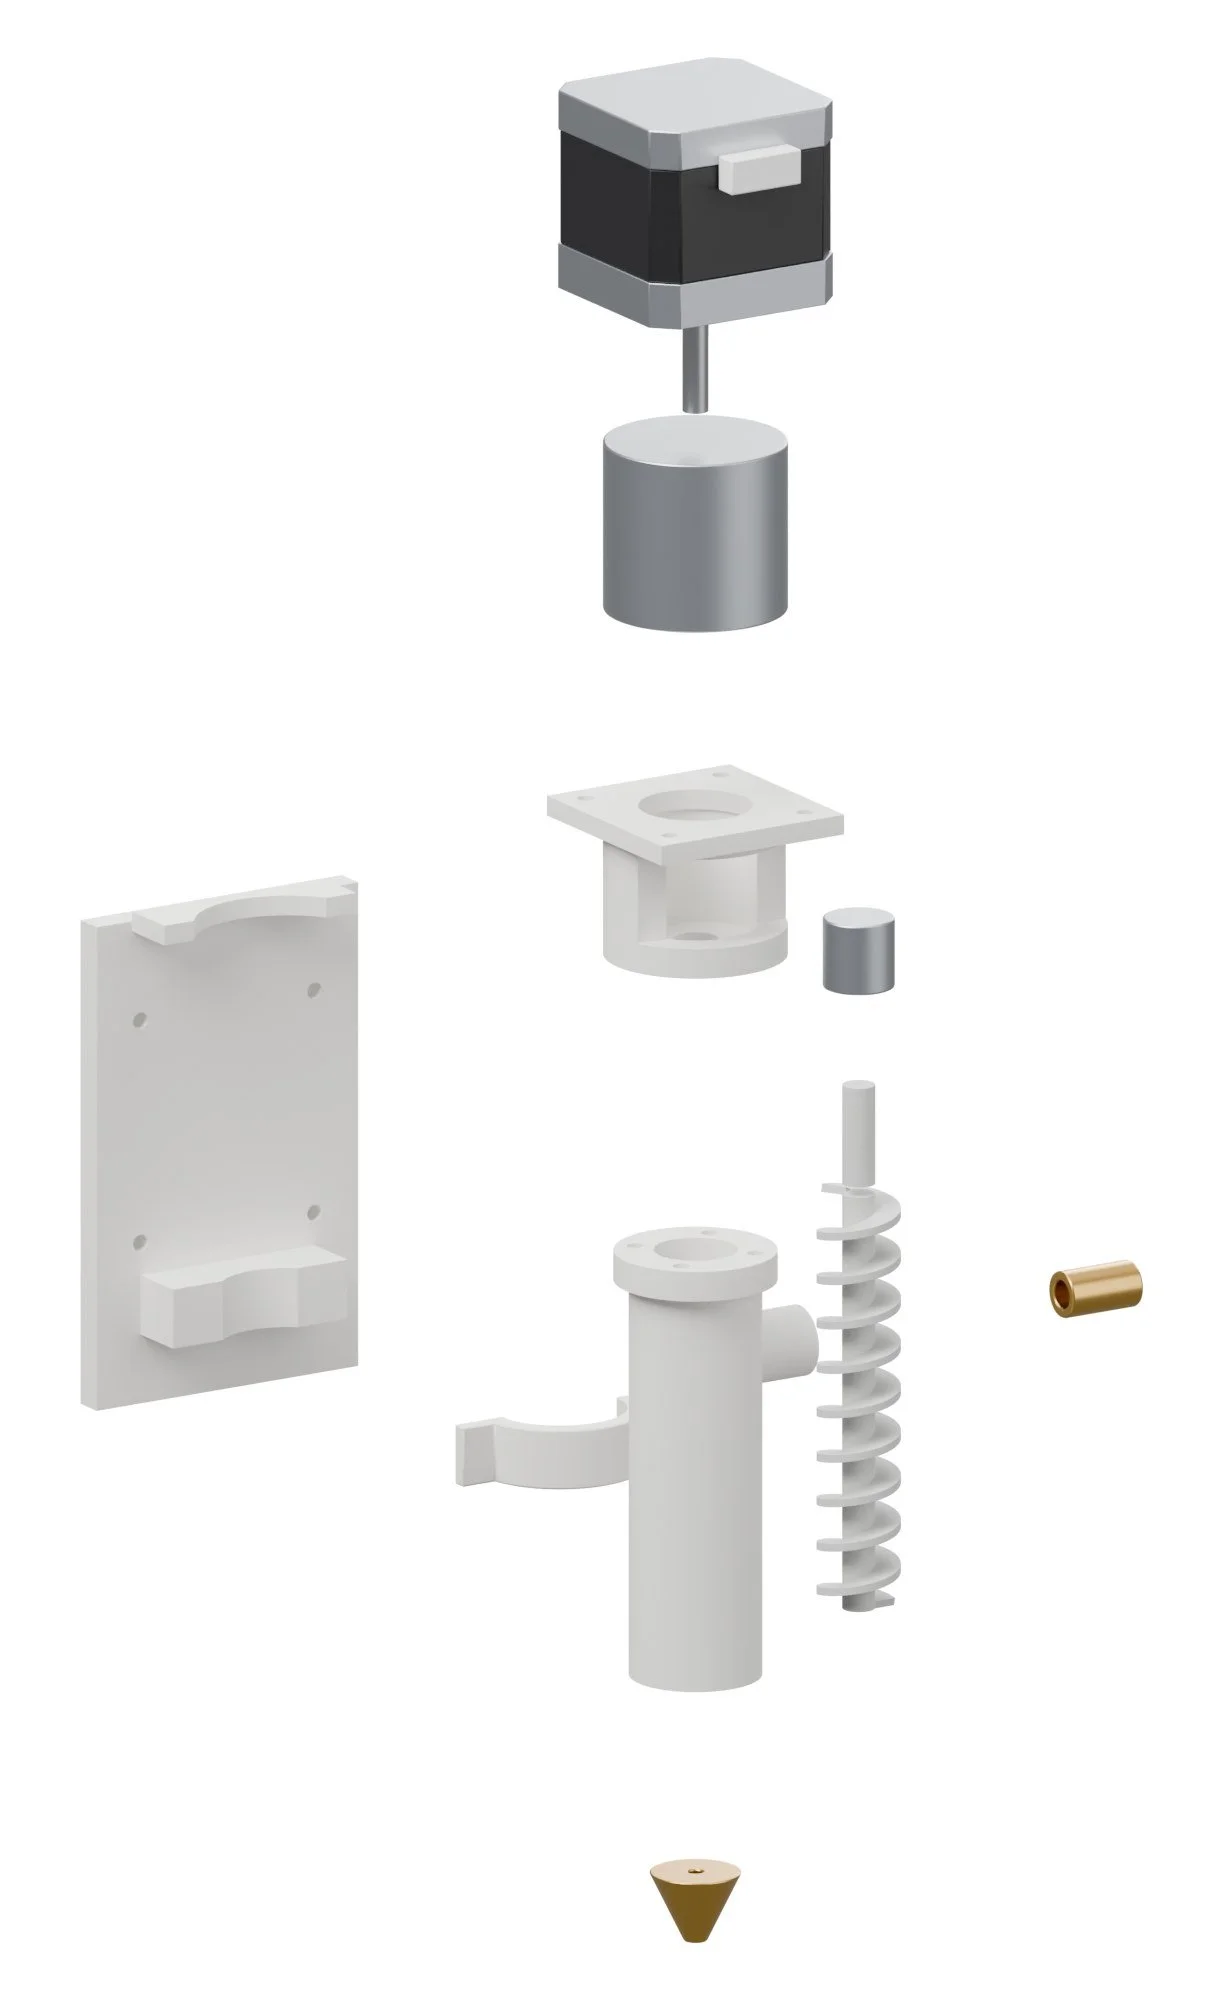
| BarrelPETG or ASA, upright, 100% walls near the bore. Ream the bore to 0.646 in. Side port takes a 3/8 in barb. | |
| AugerPETG, upright, 0.005 in layers, supports off (flight is self-supporting at this pitch). Swap for a 5/8 in wood auger bit cut down if it wears. | |
| Coupler housingPETG. Window lets you watch the coupler and clear a jam. | |
| Mount plateASA or PETG, print on its back. The 4 x M3 holes are placeholders: MEASURE the printer's carriage. | |
| Barrel clampPETG. Two M3 screws into the mount plate's lug. | |
| Ram top capASA, 6 walls, 60% infill. Holds the NEMA17 (T8x2 lead screw motor) and 4 x M6 tie rods. | |
| Ram bottom capASA, 6 walls, 60% infill. Tap the outlet 1/4 NPT for a 3/8 in barb, or glue the barb in with epoxy. | |
| Ram pistonPETG. Two 2 in x 1/8 in O-rings (AS568-2xx) in the grooves; grease with silicone. |
Build guide
Tools / parts / every step, start to finish
Open the full build guide
Time: 6 to 8 hours plus printing Skill: Medium: printer surgery, stepper wiring
Tools
- Hex keys
- Tap set M6
- Hacksaw for the aluminium tube
- Soldering iron
Parts
Bought (full list with links in the README and buy_list.csv):
- 1 x Creality Ender-3 V3 Plus
- 1 x NEMA17 with 5.18:1 planetary gearbox
- 1 x NEMA17 with Tr8x2 lead screw, 11 13/16 in
- 1 x 6061 aluminium tube 2 in OD x 0.065 in wall, 12 in
- 1 x M6 threaded rod 3.3 ft + nuts
- 1 x O-rings, 2 in ID x 1/8 in
- 1 x Clear PVC tube 3/8 in ID, 10 ft + brass barbs
- 1 x Arduino Nano + TMC2209 + pressure switch
- 1 x Brass nozzles 0.079 to 0.24 in (1/8 NPT)
- 1 x Clay, 25 lb (e.g. Amaco No. 11 low-fire)
- 1 x Rapid Set Cement All, 10 lb (optional)
Made:
stl/md_barrel.stl(printed)stl/md_auger.stl(printed)stl/md_coupler_housing.stl(printed)stl/md_mount_plate.stl(printed)stl/md_barrel_clamp.stl(printed)stl/md_ram_top_cap.stl(printed)stl/md_ram_bottom_cap.stl(printed)stl/md_ram_piston.stl(printed)
Steps
1. Print
Print every STL in stl/ (PETG unless the part note says otherwise, 0.008 in layers, 4 walls, 30 to 40% gyroid). Cut every file in laser/ on Drag Queen. Check every MEASURE note in the README against your actual parts before printing the parts they touch.
2. Remove the hotend
Unplug the Ender-3 V3 Plus hotend and bag it with its screws. The printed mount takes its place on the carriage.
3. Auger head
Press the brass nozzle into the printed barrel, slide in the auger, couple it to the 5:1 geared NEMA17 and close the coupler housing.
4. Ram
Cut the 2 in tube to 11 13/16 in and deburr. Assemble the end caps on four M6 tie rods, fit O-rings to the piston and the T8 nut to the piston rod.
5. Hose
Run 3/8 in vinyl from the ram outlet to the head barb with a pressure switch tee near the head.
6. Set up the slicer profile
Add a 'Mud Diva' printer in the slicer with the settings in the recipe card.
Wiring
- Geared NEMA17 to the printer's extruder motor connector (same pinout).
- Ram NEMA17 to a TMC2209 on the Nano; pressure switch to D3 (pull-up).
- Disable the hotend thermistor check: set a fixed 77 °F dummy (100k resistor) on the thermistor input.
Firmware
- Printer: set E-steps for the geared auger (start at 5.18 x 93 = 482, then calibrate).
- Ram Nano:
mud_diva_ram.inopushes 0.008 in while the inlet switch reads low pressure, stops when high.
First test
- Extrude 3 15/16 in in air: smooth bead, no pulses.
- Print the calibration cylinder before any real part.
Slip Kitten
Slip-casting station for plaster molds made from printed masters.
Fairy Ring pipeline / Form / gets plaster molds to slip-cast
Slip Kitten casts ceramics. A printed master gets a plaster mold, and Slip Kitten fills it: a printed peristaltic pump moves stirred casting slip into the pour hole and tops it up as the plaster drinks. A load cell under the cradle watches the weight gain flatten when the wall is thick enough, then a worm gearmotor tilts the mold to drain the excess back to the bucket. It ties Vogue's scans and Mud Diva's clay into finished pieces.
How it works
Empty / Cast
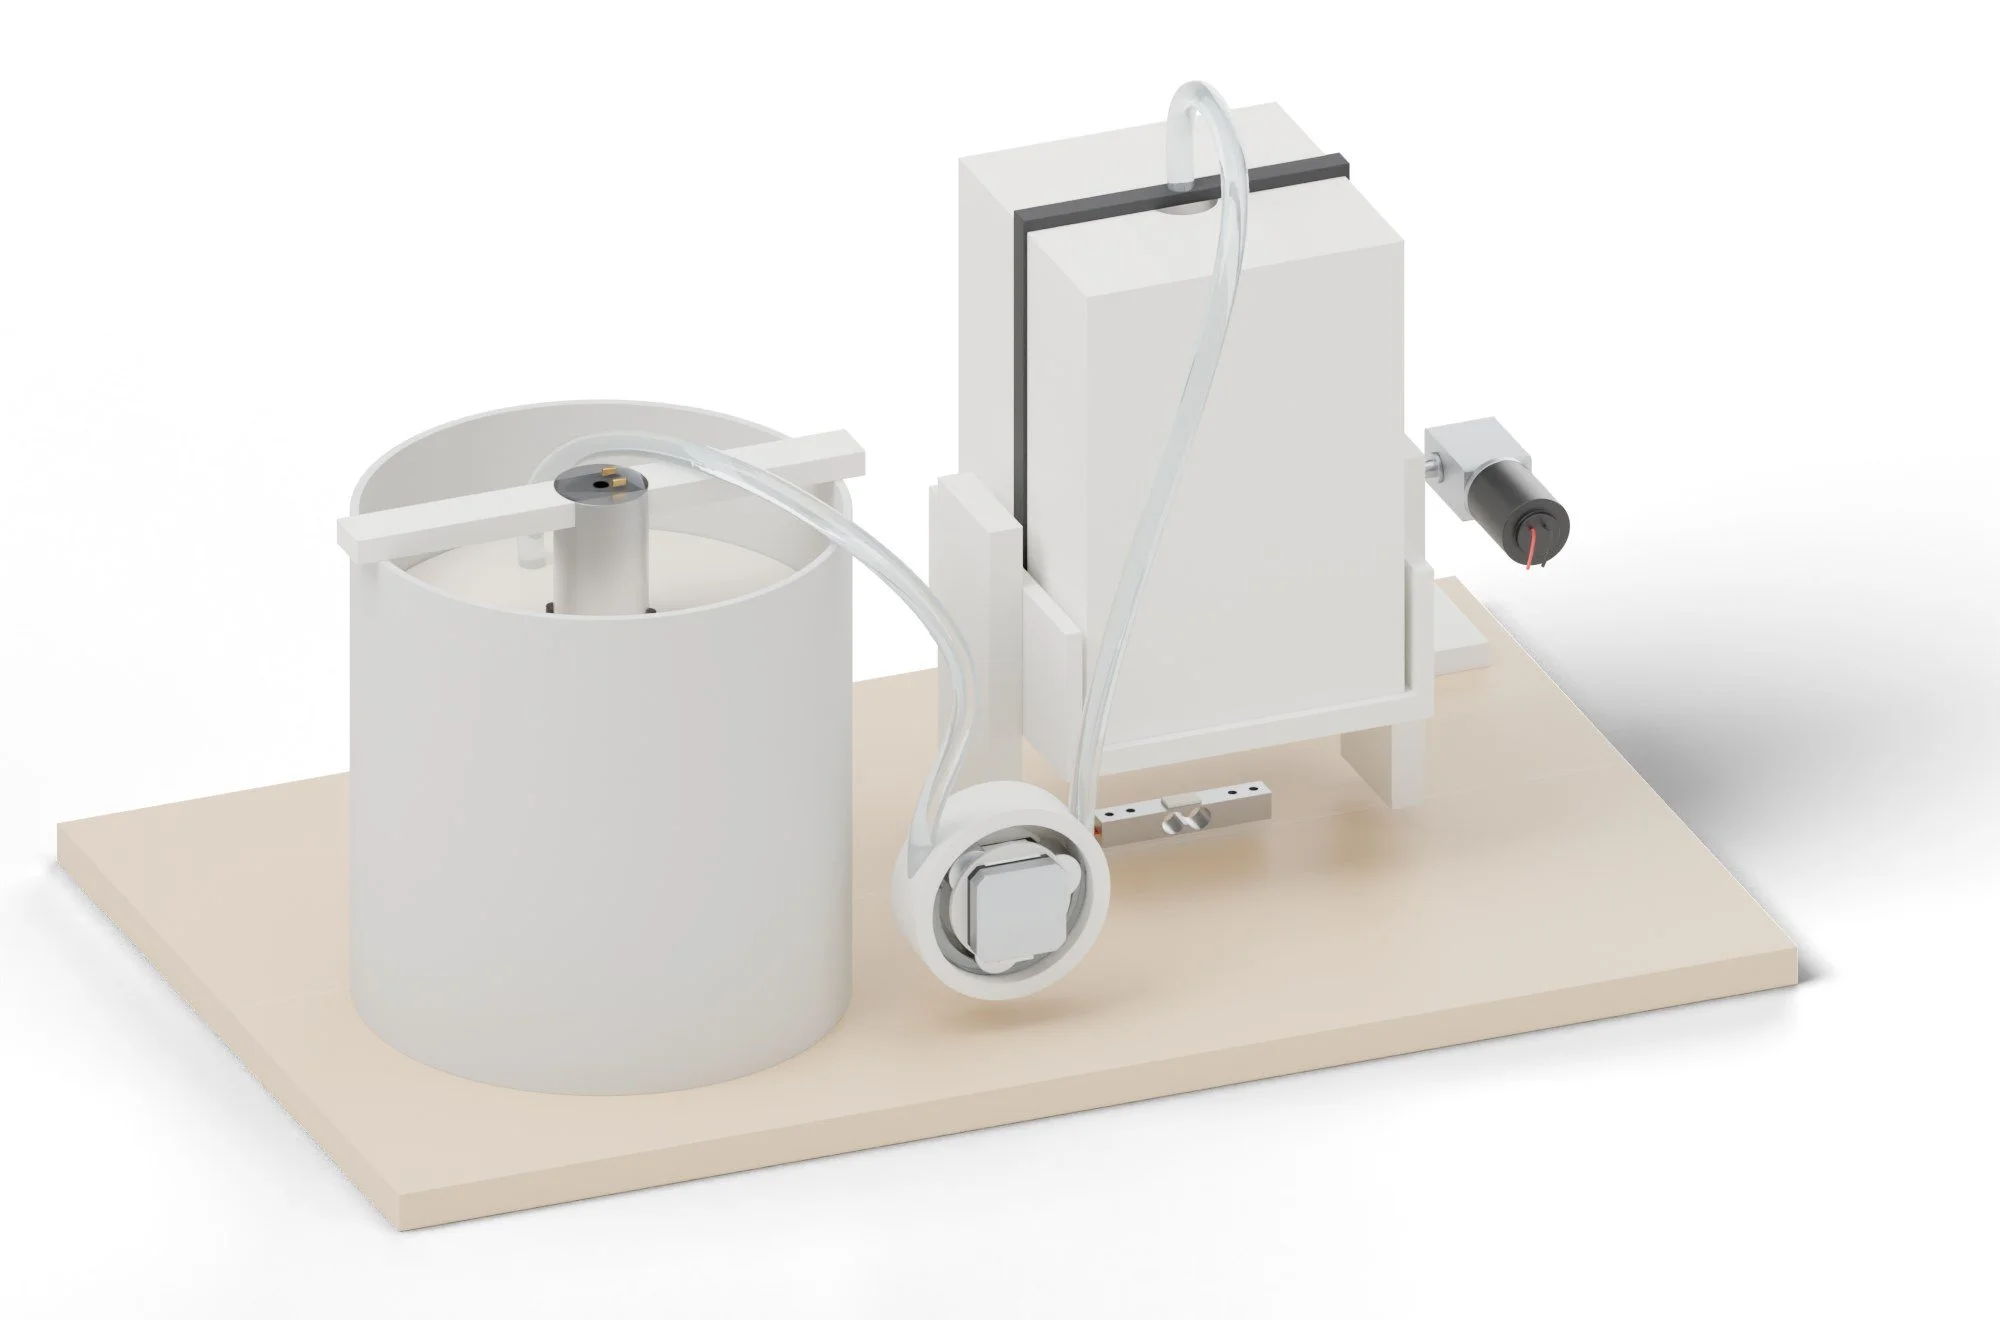
- Stir the slip (about 1.75 specific gravity) and strap the mold into the cradle.
- The pump fills the mold and keeps it topped up. When the weight gain per minute drops to the set point (often 10 to 20 minutes for a 0.16 in wall), it stops.
- The cradle tilts 120 degrees and drains for 20 minutes; leave it until leather-hard, then open the mold.
Recipes
Materials / settings / what to do when it goes wrong
Use it for: Slip-cast vessels, knobs and pulls from plaster molds of printed masters.
Materials
- Casting slip, cone 06 earthenware or cone 6 porcelain, specific gravity 1.75 to 1.80
- No. 1 pottery plaster, 70 parts water to 100 plaster by weight
- Mold soap or Murphy's oil soap as a release on printed masters
Settings
| Setting | Value |
|---|---|
| Slip SG | 1.75 to 1.80; add sodium silicate a drop at a time if it's thick |
| Fill | Pump to the brim; top up as it drops |
| Cast time | 10 to 20 min for a 0.12 to 0.2 in wall (stop when weight gain per minute halves) |
| Drain | Tilt 120 degrees, 20 min |
| Leather-hard | 30 to 60 min in the mold, then open |
| Mold drying | Under 113 °F (plaster weakens above 122 °F); 2 to 3 days in Hot Flash at 104 °F or a week in air |
Steps
- Pour the plaster mold around a soaped printed master in a printed mold box; let it set 1 h, open, dry.
- Stir the slip 10 minutes; check SG with a hydrometer or by weighing 100 mL.
- Strap the mold in the cradle, start the cast.
- The load cell watches the cast; the cradle tilts and drains.
- Open the mold at leather-hard, fettle the seams, dry slowly under plastic.
- Bisque at cone 06 (in a kiln), glaze, fire.
Troubleshooting
| Problem | Fix |
|---|---|
| Pinholes | Air in the slip: stir slower, sieve, rest 1 h. |
| Thin walls | Mold too wet or too short a cast; dry the mold more. |
| Cracks at seams | Opened too soon or dried too fast. |
| Pump tube wears out | Silicone fatigue: shift the tube 1 3/16 in every 20 casts. |
Safety
- Dry clay and plaster dust contains silica: wet-clean, never sweep; mask when mixing plaster.
- Plaster gets hot as it sets; never cast a hand or body part in it.
Numbers are starting points. Run one test piece on every new batch of material.
What to buy
14 parts / $186.00 before tax / estimates, check the links
 02No. 1 pottery plaster, 25 lb$30.00MoldsView on Amazon →
 03Silicone tube 5/16 x 0.47 in, 6.6 ft$10.00Pump tubeView on Amazon →
 04608ZZ bearings, 10-pack$8.00Pump rollersView on Amazon →05NEMA17 stepper, 1 9/16 in$12.00PumpView on Amazon →
 06uxcell 12 V worm gearmotor$17.00Tilts the cradle (same as Lazarella)View on Amazon →
 07775 motor 12 V + PWM speed board$18.00StirrerView on Amazon →
 0820 kg bar load cell + HX711$9.00Weighs the castView on Amazon →09Arduino Nano (USB-C clone)$6.00ControllerView on Amazon →
 105 V relay module, 1-channel$3.00Switches the loadView on Amazon →
 11L298N motor driver$6.00Tilt motorView on Amazon →
 1212 V 5 A supply$14.00MotorsView on Amazon →
 132 gal bucket with lid$8.00SlipView on Amazon →14PETG filament 1 kg$20.00Printed partsView on Amazon →
What to make
Printed on the printers you have / cut on the xTool or sent out
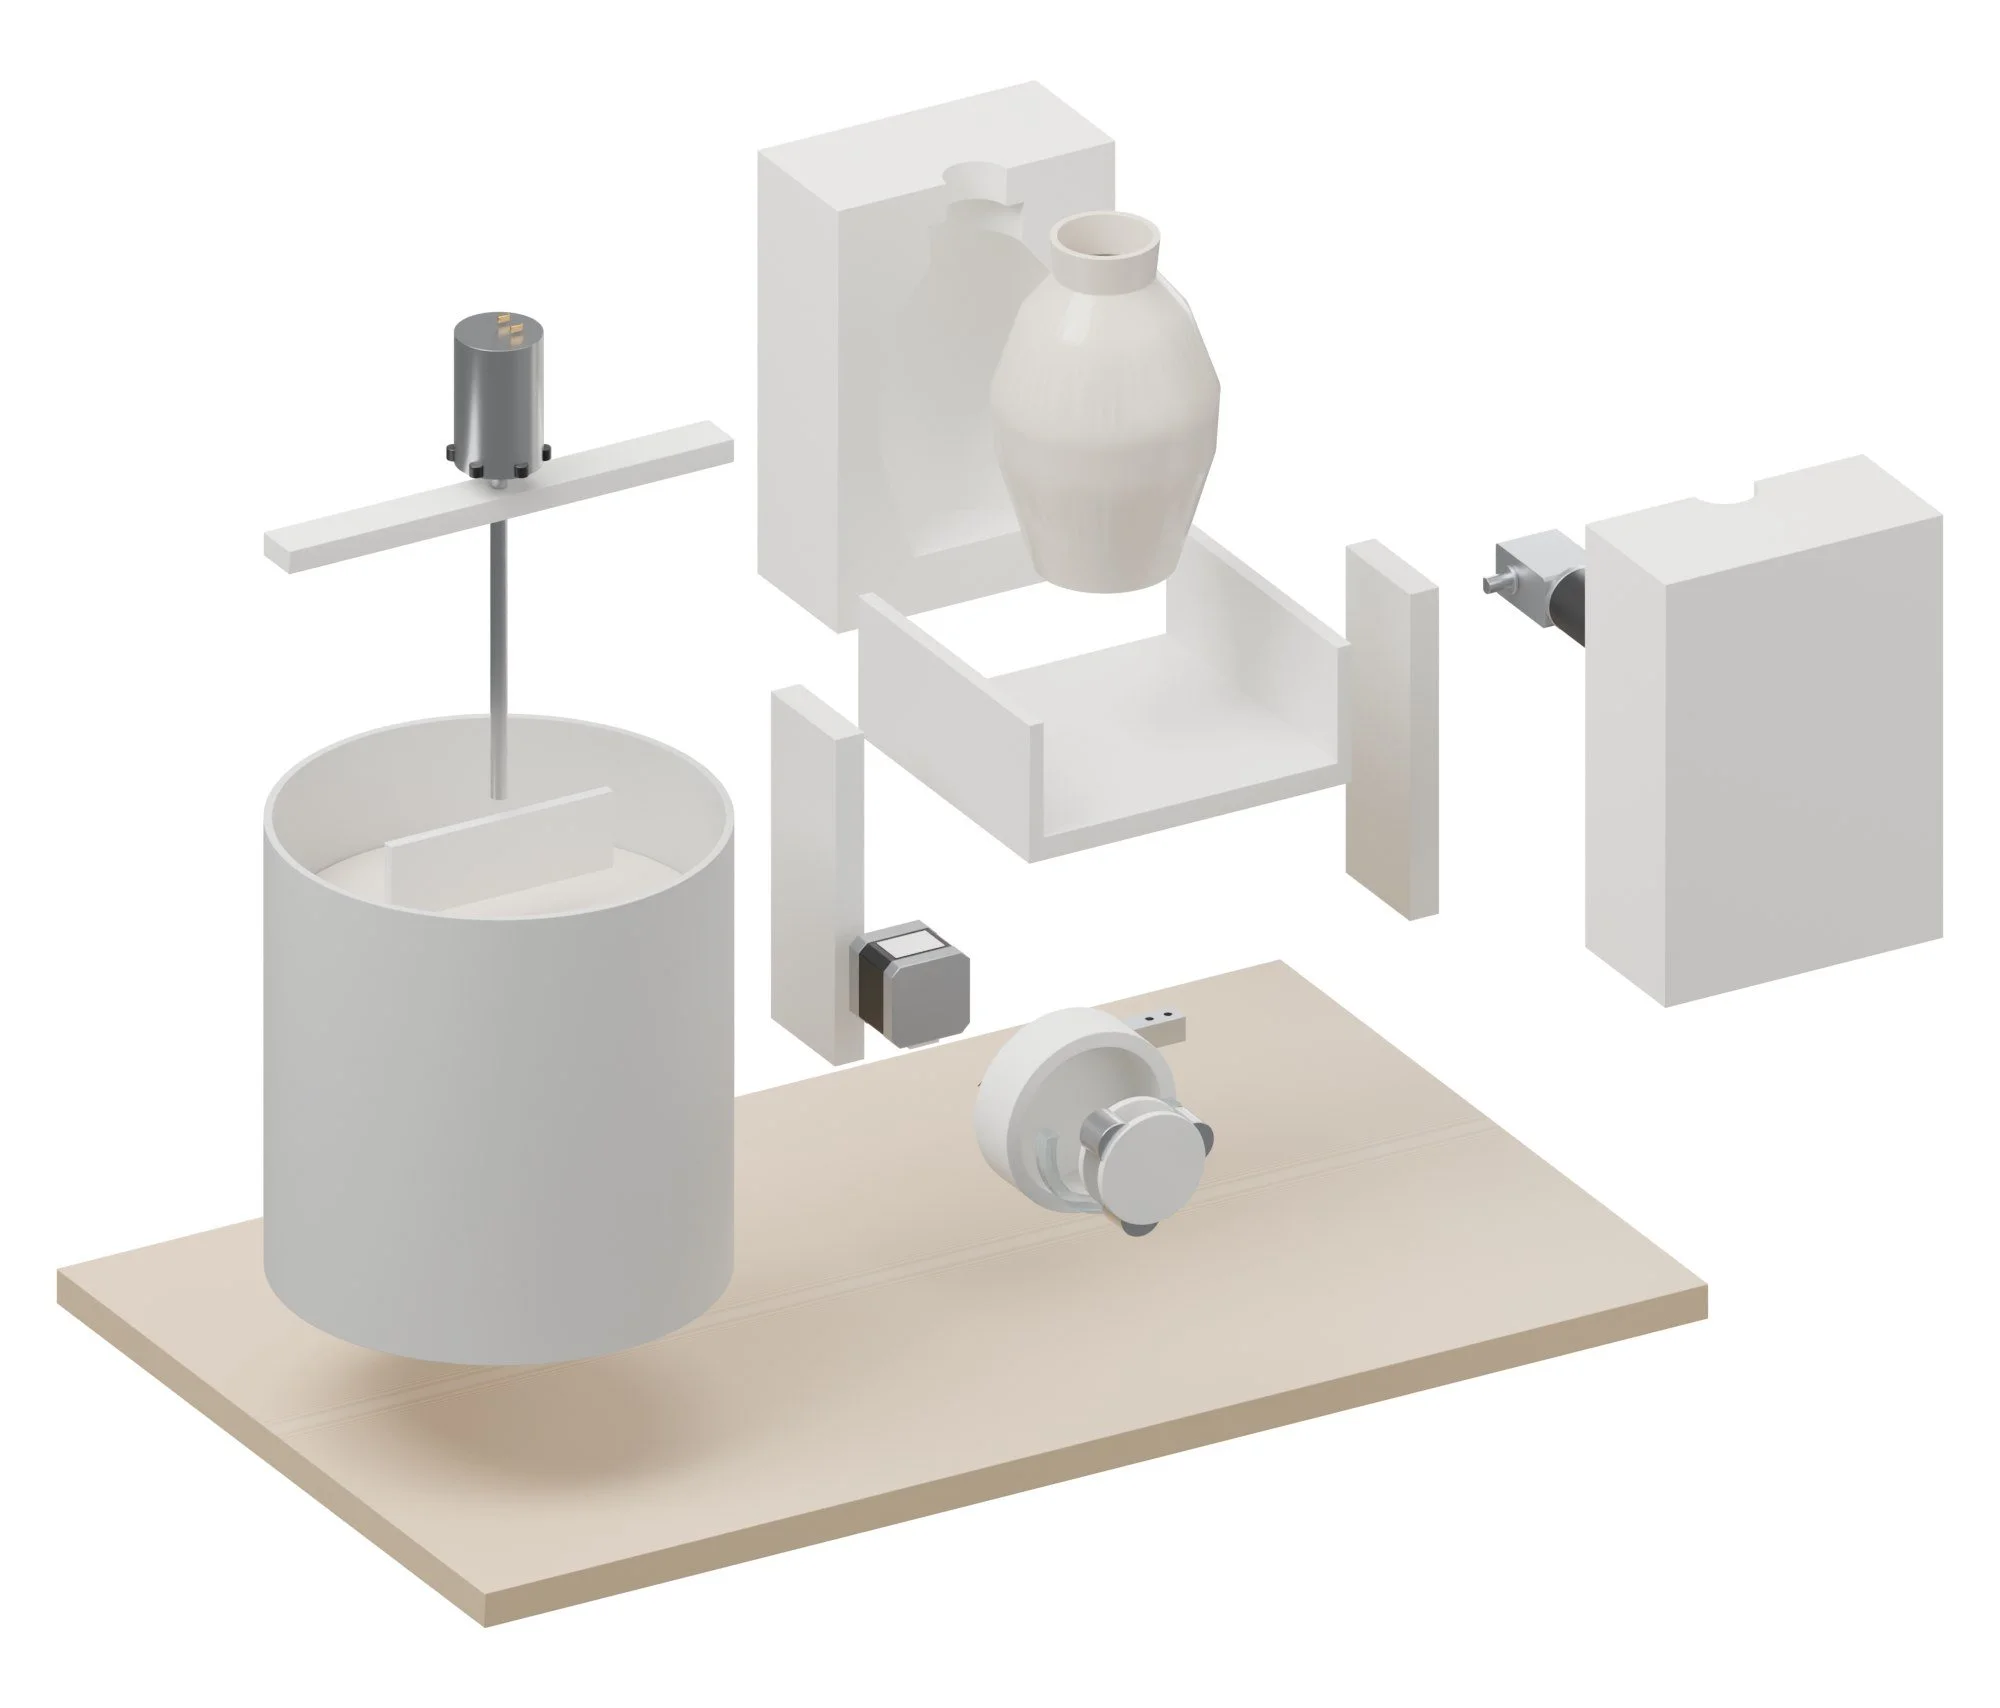
| Cradle earPETG-CF, 2 off; 5/16 in tilt axle through the top. | |
| Cradle earPETG-CF, 2 off; 5/16 in tilt axle through the top. | |
| CradlePETG-CF. Holds a 150 x 150 mold; strap goes over the top. | |
| Stirrer bridge | |
| PaddlePETG, keyed to an 5/16 in shaft. | |
| Pump housingPETG-CF. 3 in track; tube path with two clamp ears. | |
| Rotor | |
| Controller box |
Build guide
Tools / parts / every step, start to finish
Open the full build guide
Time: 6 hours plus printing Skill: Easy to medium
Tools
- Hex keys
- Soldering iron
- Bearing press
Parts
Bought (full list with links in the README and buy_list.csv):
- 1 x Casting slip, 1 gal (cone 06 or cone 6)
- 1 x No. 1 pottery plaster, 25 lb
- 1 x Silicone tube 5/16 x 0.47 in, 6.6 ft
- 1 x 608ZZ bearings, 10-pack
- 1 x NEMA17 stepper, 1 9/16 in
- 1 x uxcell 12 V worm gearmotor
- 1 x 775 motor 12 V + PWM speed board
- 1 x 20 kg bar load cell + HX711
- 1 x Arduino Nano (USB-C clone)
- 1 x 5 V relay module, 1-channel
- 1 x L298N motor driver
- 1 x 12 V 5 A supply
- 1 x 2 gal bucket with lid
- 1 x PETG filament 1 kg
- 1 x M3/M4/M5 screws, nuts and inserts (already owned)
Made:
stl/sk_cradle_ear.stl(printed) x 2stl/sk_cradle.stl(printed)stl/sk_stirrer_bridge.stl(printed)stl/sk_paddle.stl(printed)stl/sk_pump_housing.stl(printed)stl/sk_rotor.stl(printed)stl/sk_controller_box.stl(printed)
Steps
1. Print
Print every STL in stl/ (PETG unless the part note says otherwise, 0.008 in layers, 4 walls, 30 to 40% gyroid). Cut every file in laser/ on Drag Queen. Print the pump rotor and housing in PETG-CF. Check every MEASURE note in the README against your actual parts before printing the parts they touch.
2. Pump
Press 608 bearings onto the rotor pins; lay the silicone tube in the track; fit the NEMA17.
3. Stirrer
Mount the 775 motor on the bridge; couple the shaft to the printed paddle.
4. Cradle
Mount the load cell under the cradle base; ears and axle; worm gearmotor on the axle end.
5. Hoses
Feed hose from the bucket bottom to the pump, fill hose to the mold's pour hole.
6. Controller
Nano, A4988, HX711, relay and L298N in the box.
Wiring
- A4988 (pump) STEP D3, DIR D4; HX711 DOUT D5, SCK D6; stirrer relay D7; L298N IN1/IN2 D9/D10 for the tilt; tilt limit switch D2.
Firmware
slip_kitten.ino: fill, top-up while weight drops, stop when the gain rate halves, tilt and drain, return.
First test
- Pump water: 15 mL per rotor turn (calibrate). Tilt the empty cradle 120 degrees and back.
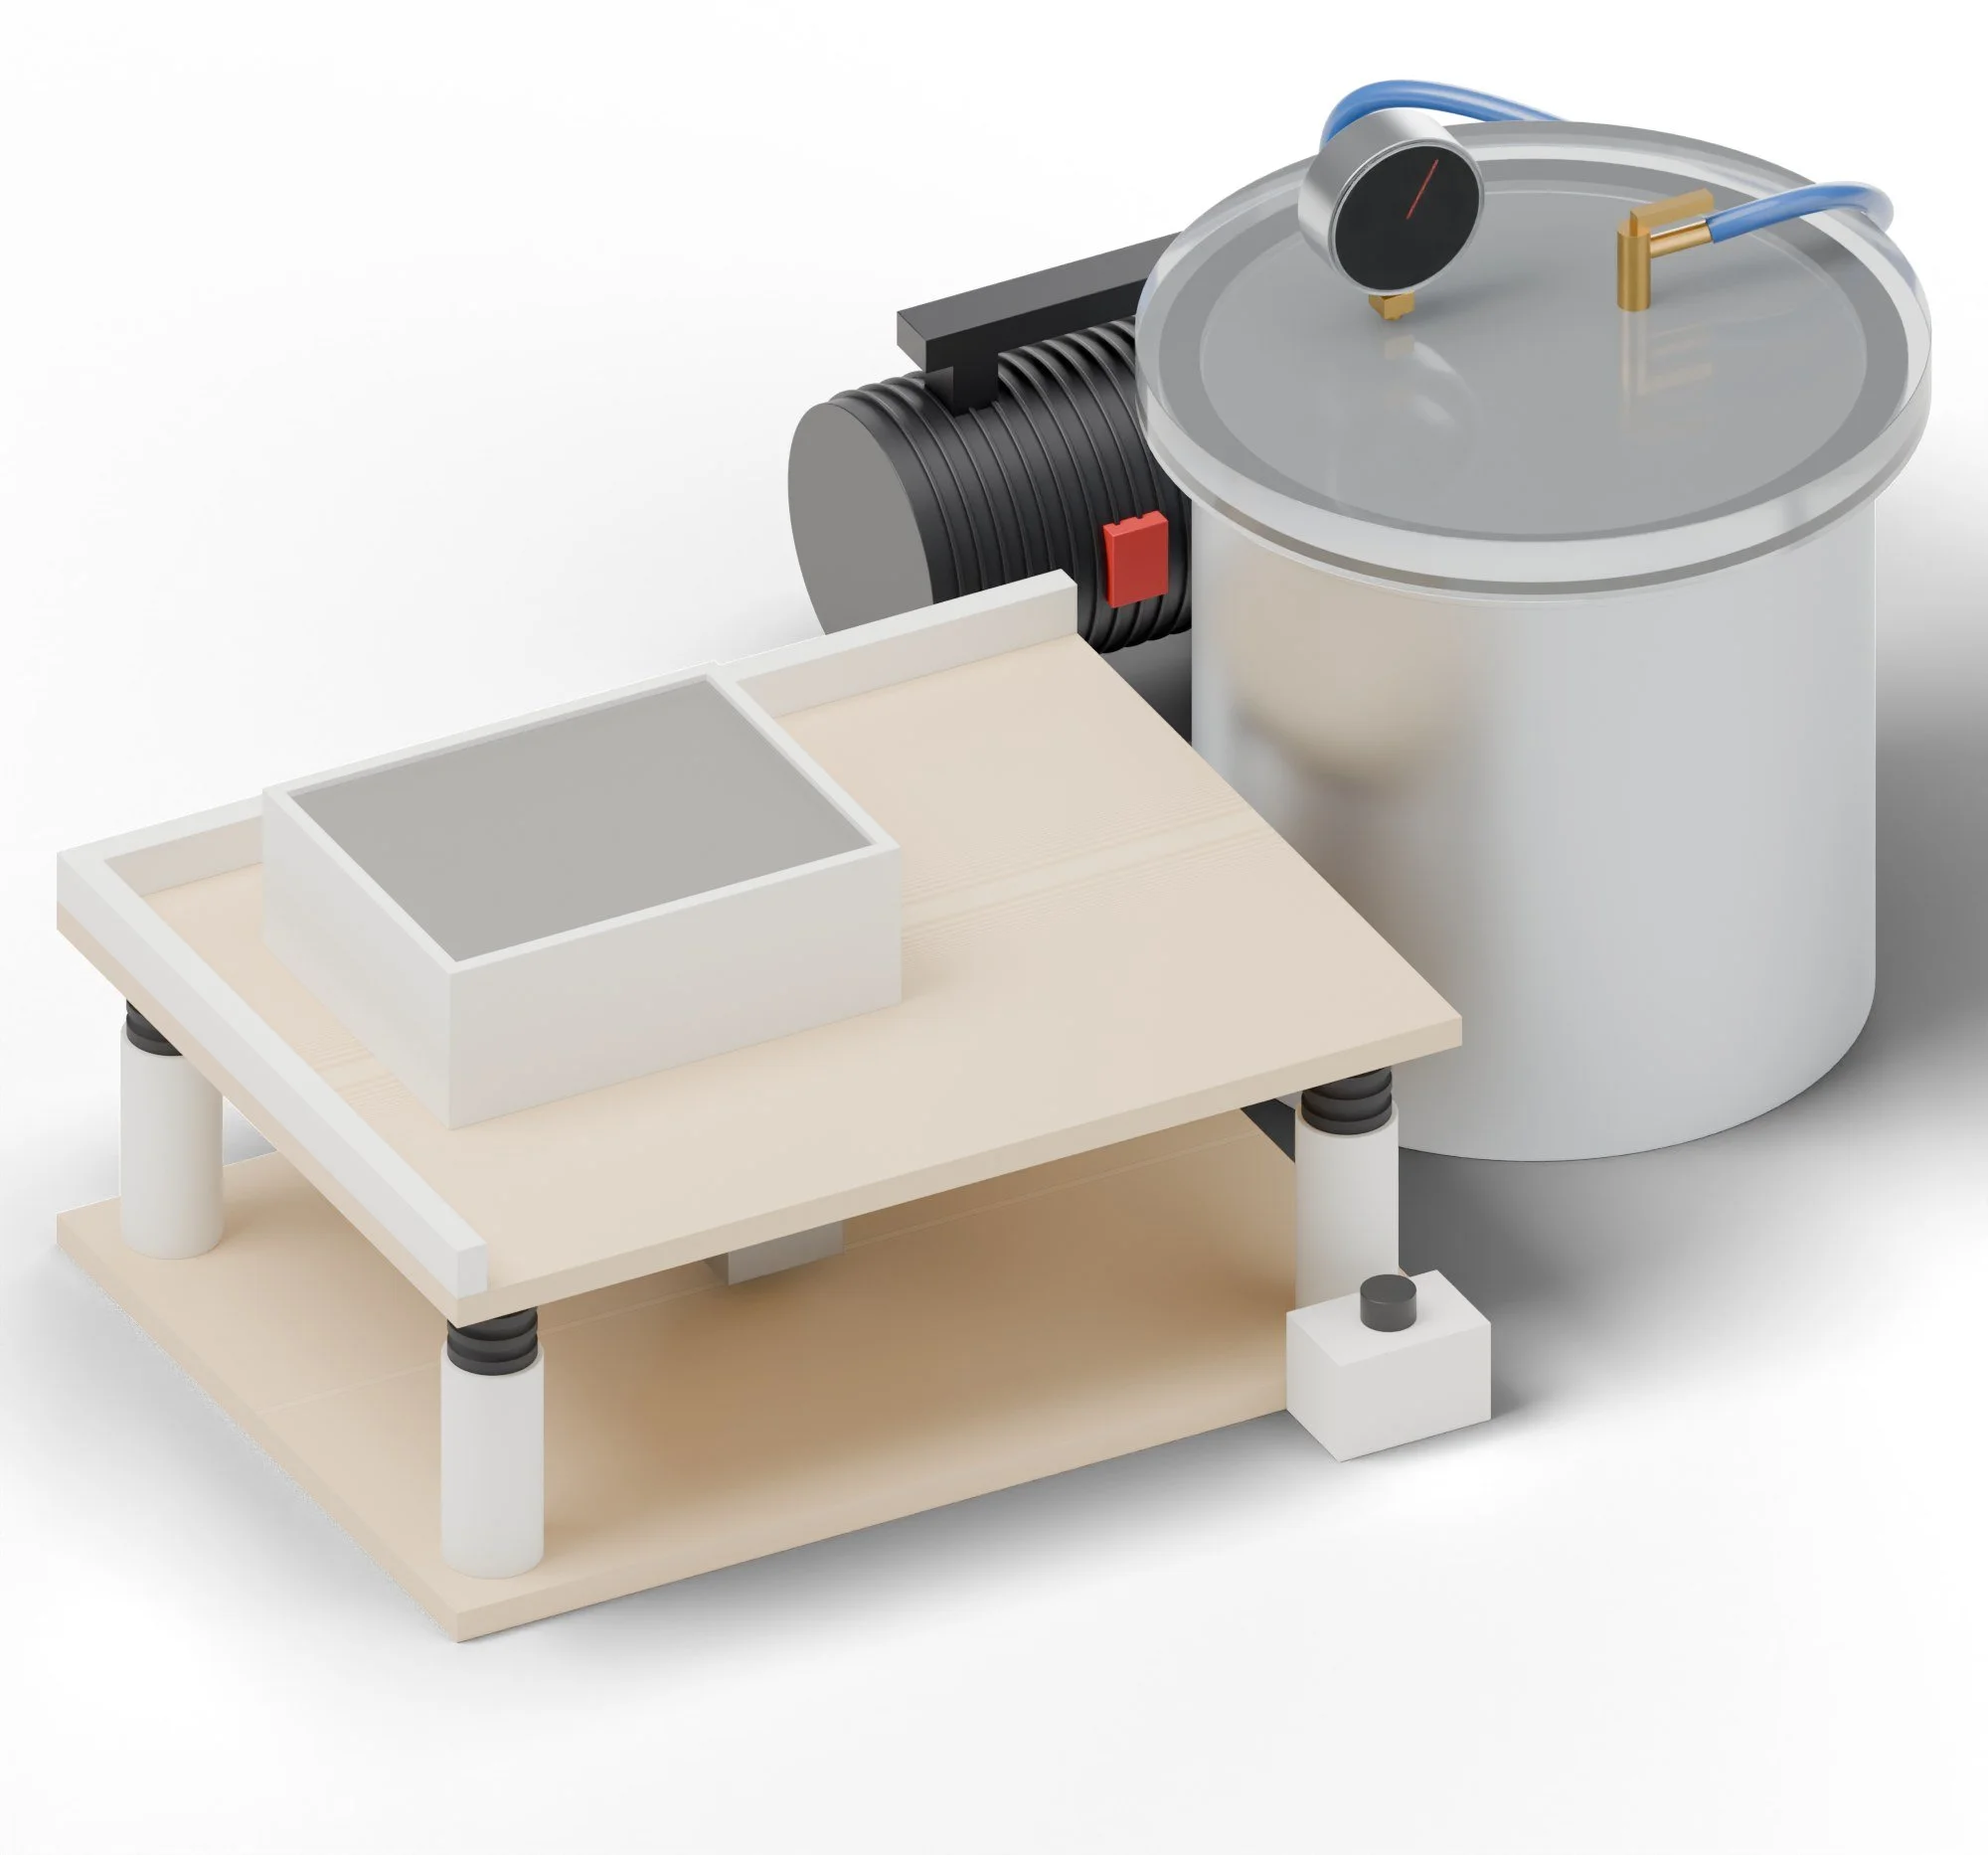
Pour Decisions
Vibration table + vacuum degassing chamber for concrete, plaster and resin.
Fairy Ring pipeline / Form / gets concrete and resin pours to settle
Pour Decisions gets the air out. A small vibration table floats on printed TPU springs and buzzes concrete and plaster pours until the bubbles rise and pop. Beside it, a 3-gallon aluminium chamber and a 3 CFM pump pull resin and silicone down to -29 inHg so they come out clear. Concrete pieces like K get crisp faces and no pinholes.
How it works
Bubbly / Settled
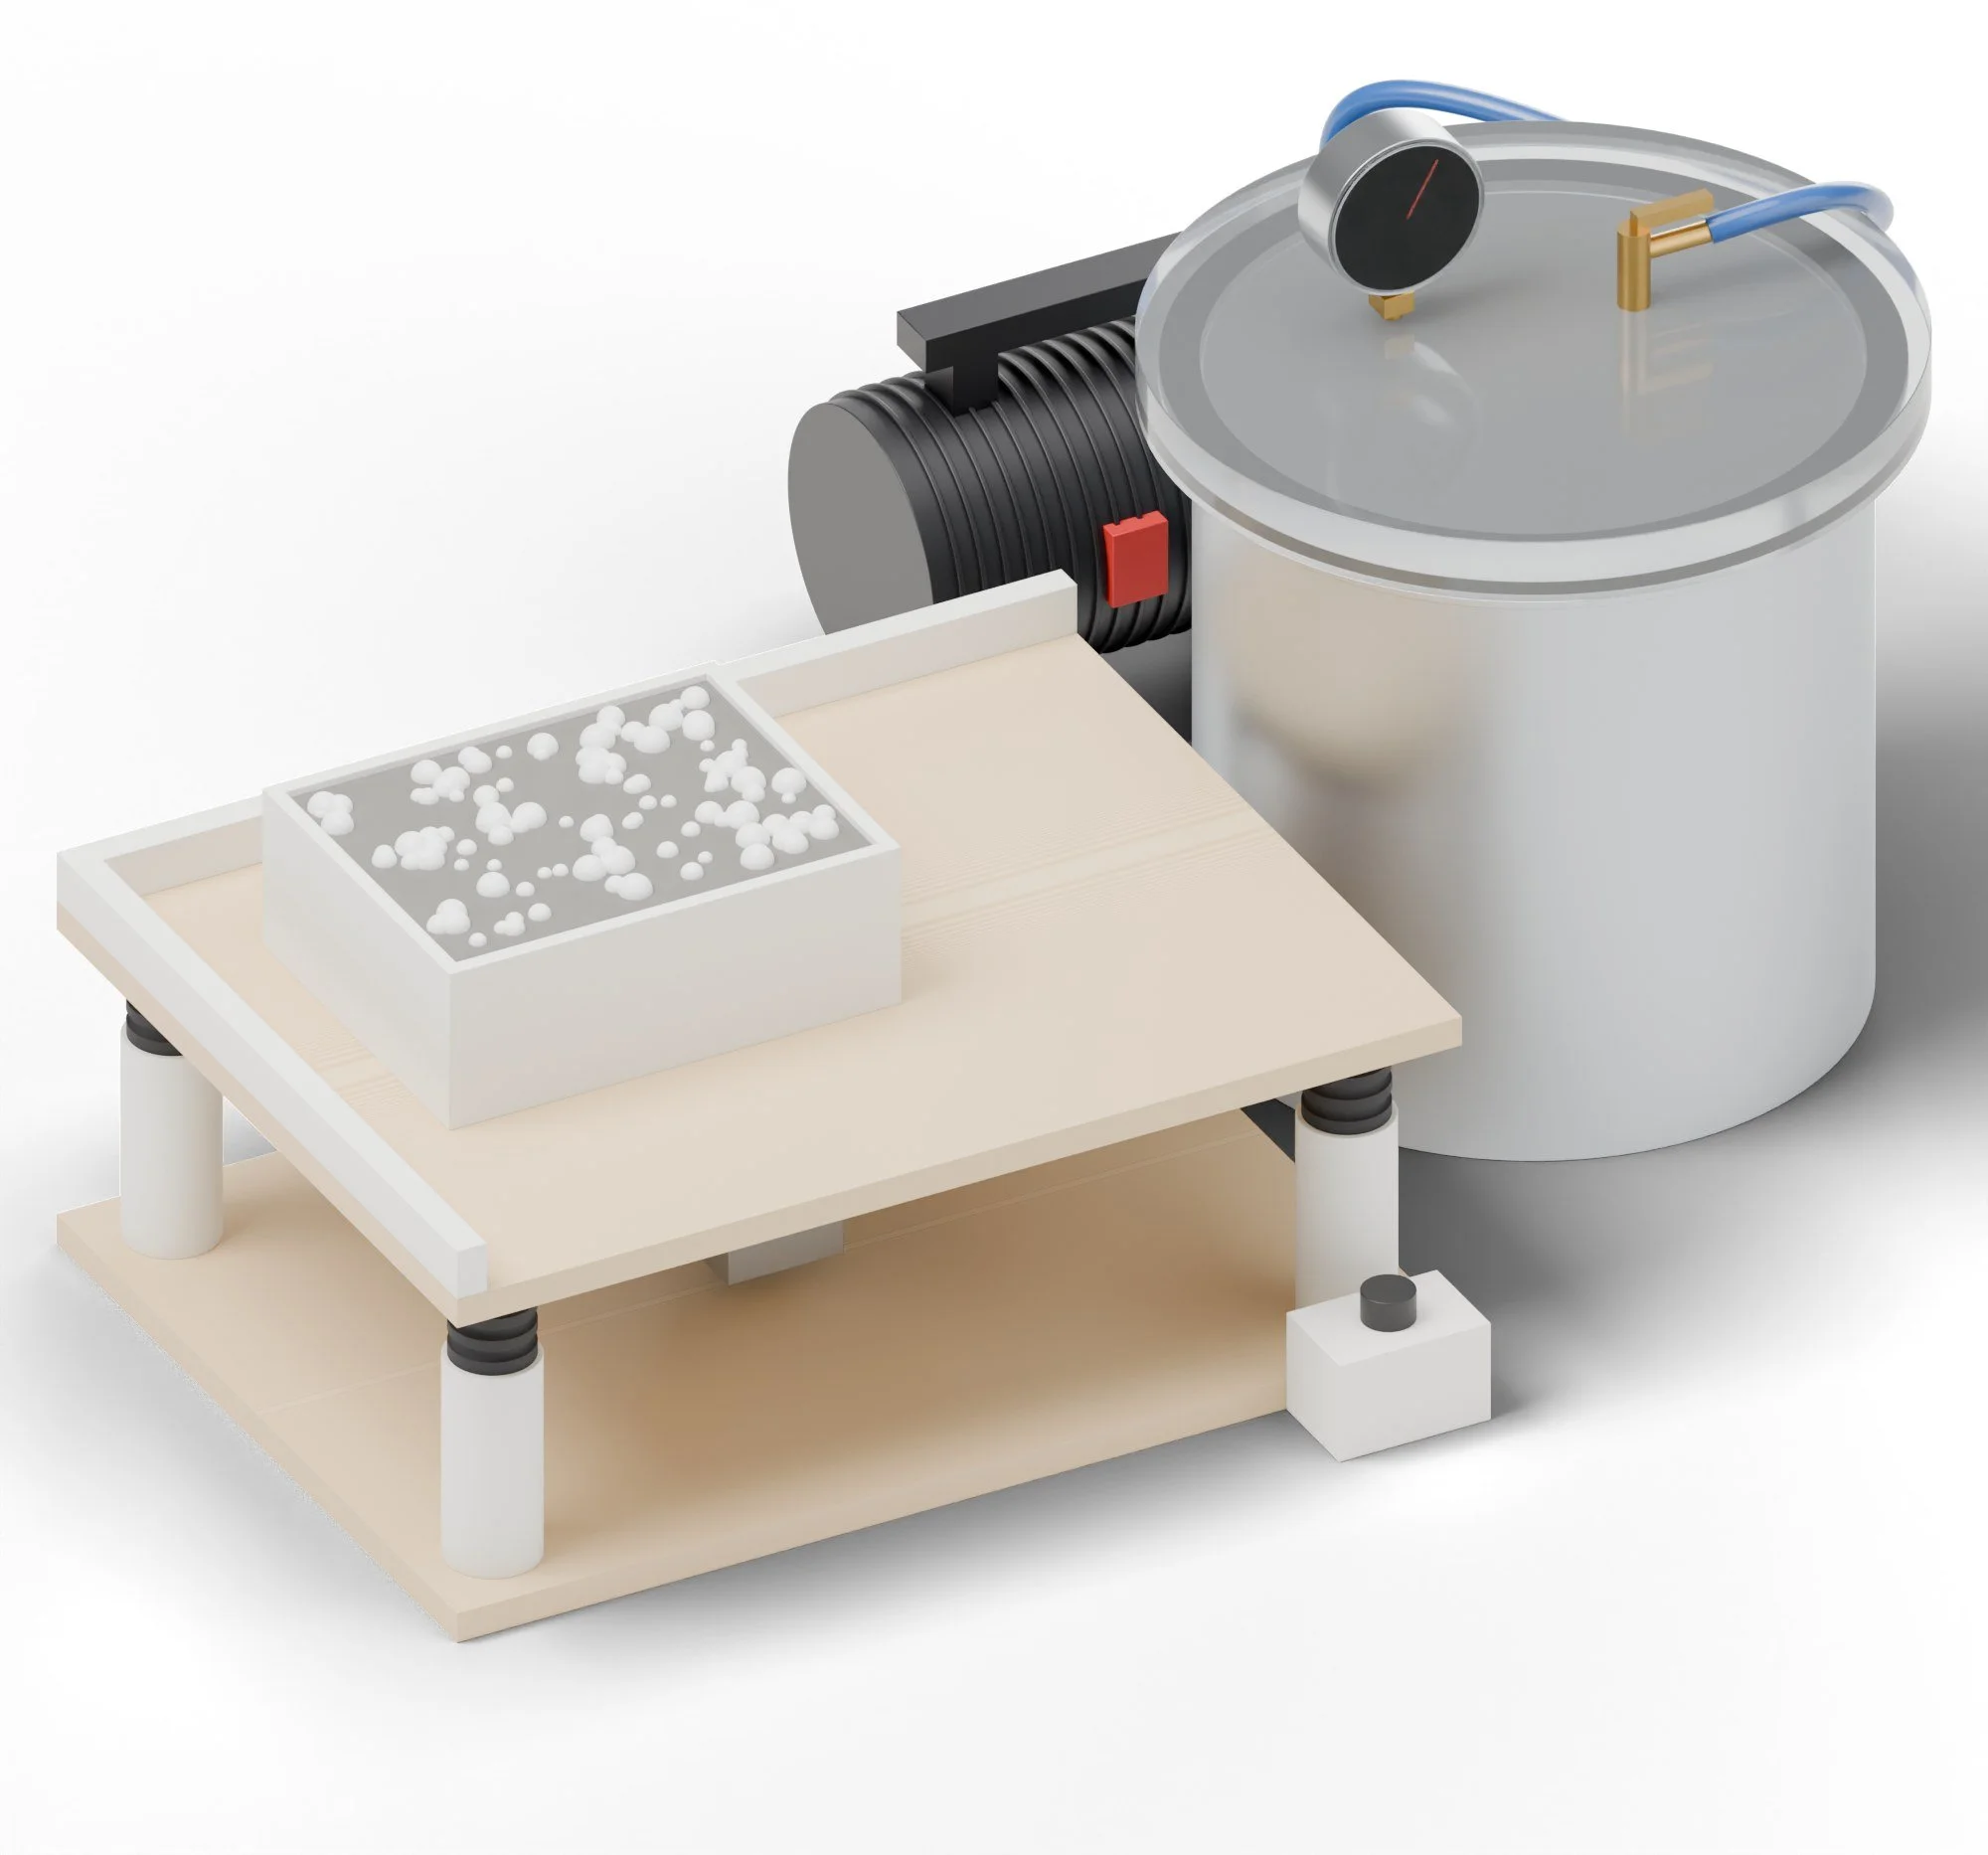
- Pour concrete or plaster into the mold on the table and set the speed knob; 1 to 3 minutes of vibration brings the air up.
- For resin and silicone, set the mixing cup in the chamber, close the lid and open the pump. The mix rises, collapses and goes still in 3 to 5 minutes.
- Vent slowly through the ball valve, then pour. A cup only a third full gives the mix room to rise.
Recipes
Materials / settings / what to do when it goes wrong
Use it for: Bubble-free concrete, plaster and resin pours; degassed silicone for molds.
Materials
- Concrete for thin pieces: Quikrete 5000 or Rapid Set mortar mix, water about 0.40 by weight, optional 0.5% superplasticiser
- Pottery or casting plaster at its consistency (No. 1 pottery plaster: 70 parts water to 100 plaster)
- Resin and silicone per the maker (for example Mold Star 30: 1A:1B by volume)
Settings
| Setting | Value |
|---|---|
| Concrete vibration | Medium speed 60 to 90 s, then low 30 s; stop when bubbles stop rising |
| Plaster | Low speed 20 to 30 s right after pouring |
| Silicone degas | Full vacuum (-29 inHg); it rises, collapses; hold 1 to 2 min after collapse |
| Resin degas | 3 to 5 min at full vacuum, cup no more than 1/3 full |
| Mix temperature | 20 to 77 °F; cold resin holds bubbles |
Steps
- Level the table top with the speed set to zero.
- Mix concrete thoroughly, pour in layers, vibrate each layer.
- For silicone or resin, mix in a cup three times the volume, put it in the chamber, close the valve and run the pump.
- Vent slowly, then pour in a thin stream from a height into the lowest corner of the mold.
- Optionally vibrate the poured mold on low for 20 s.
Troubleshooting
| Problem | Fix |
|---|---|
| Pinholes on concrete faces | More vibration, or a mold release that wets better; tap the mold walls. |
| Silicone overflows the cup | Bigger cup, or crack the valve to let it collapse. |
| Concrete segregates | Too much vibration or too wet; shorten and reduce water. |
| Pump oil mist | Change the oil; never run the pump with the inlet open to resin vapours. |
Safety
- Never vacuum anything above its flash point; no solvents in the chamber.
- Check the acrylic lid for cracks before every use.
- Cement and silica dust: mask and gloves.
Numbers are starting points. Run one test piece on every new batch of material.
What to buy
7 parts / $277.00 before tax / estimates, check the links
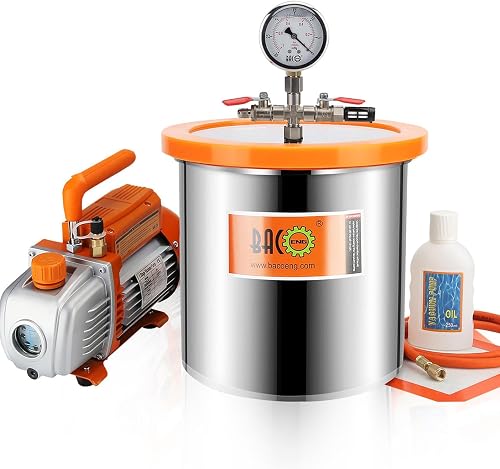 013 gal vacuum chamber kit with 3 CFM single-stage pump$120.00DegassingView on Amazon →
 02Vibration motor 60 W (single-phase) with mounting foot$45.00Shakes the tableView on Amazon →
 03PWM speed controller for AC motor, 2000 W$12.00Sets the buzzView on Amazon →
 04TPU 95A filament 1 kg$25.00SpringsView on Amazon →
 05Vacuum pump oil, 16 oz$10.00PumpView on Amazon →
 060.24 in birch ply, 12 x 24 in, 6-pack$45.00Laser-cut partsView on Amazon →07PETG filament 1 kg$20.00Printed partsView on Amazon →
What to make
Printed on the printers you have / cut on the xTool or sent out
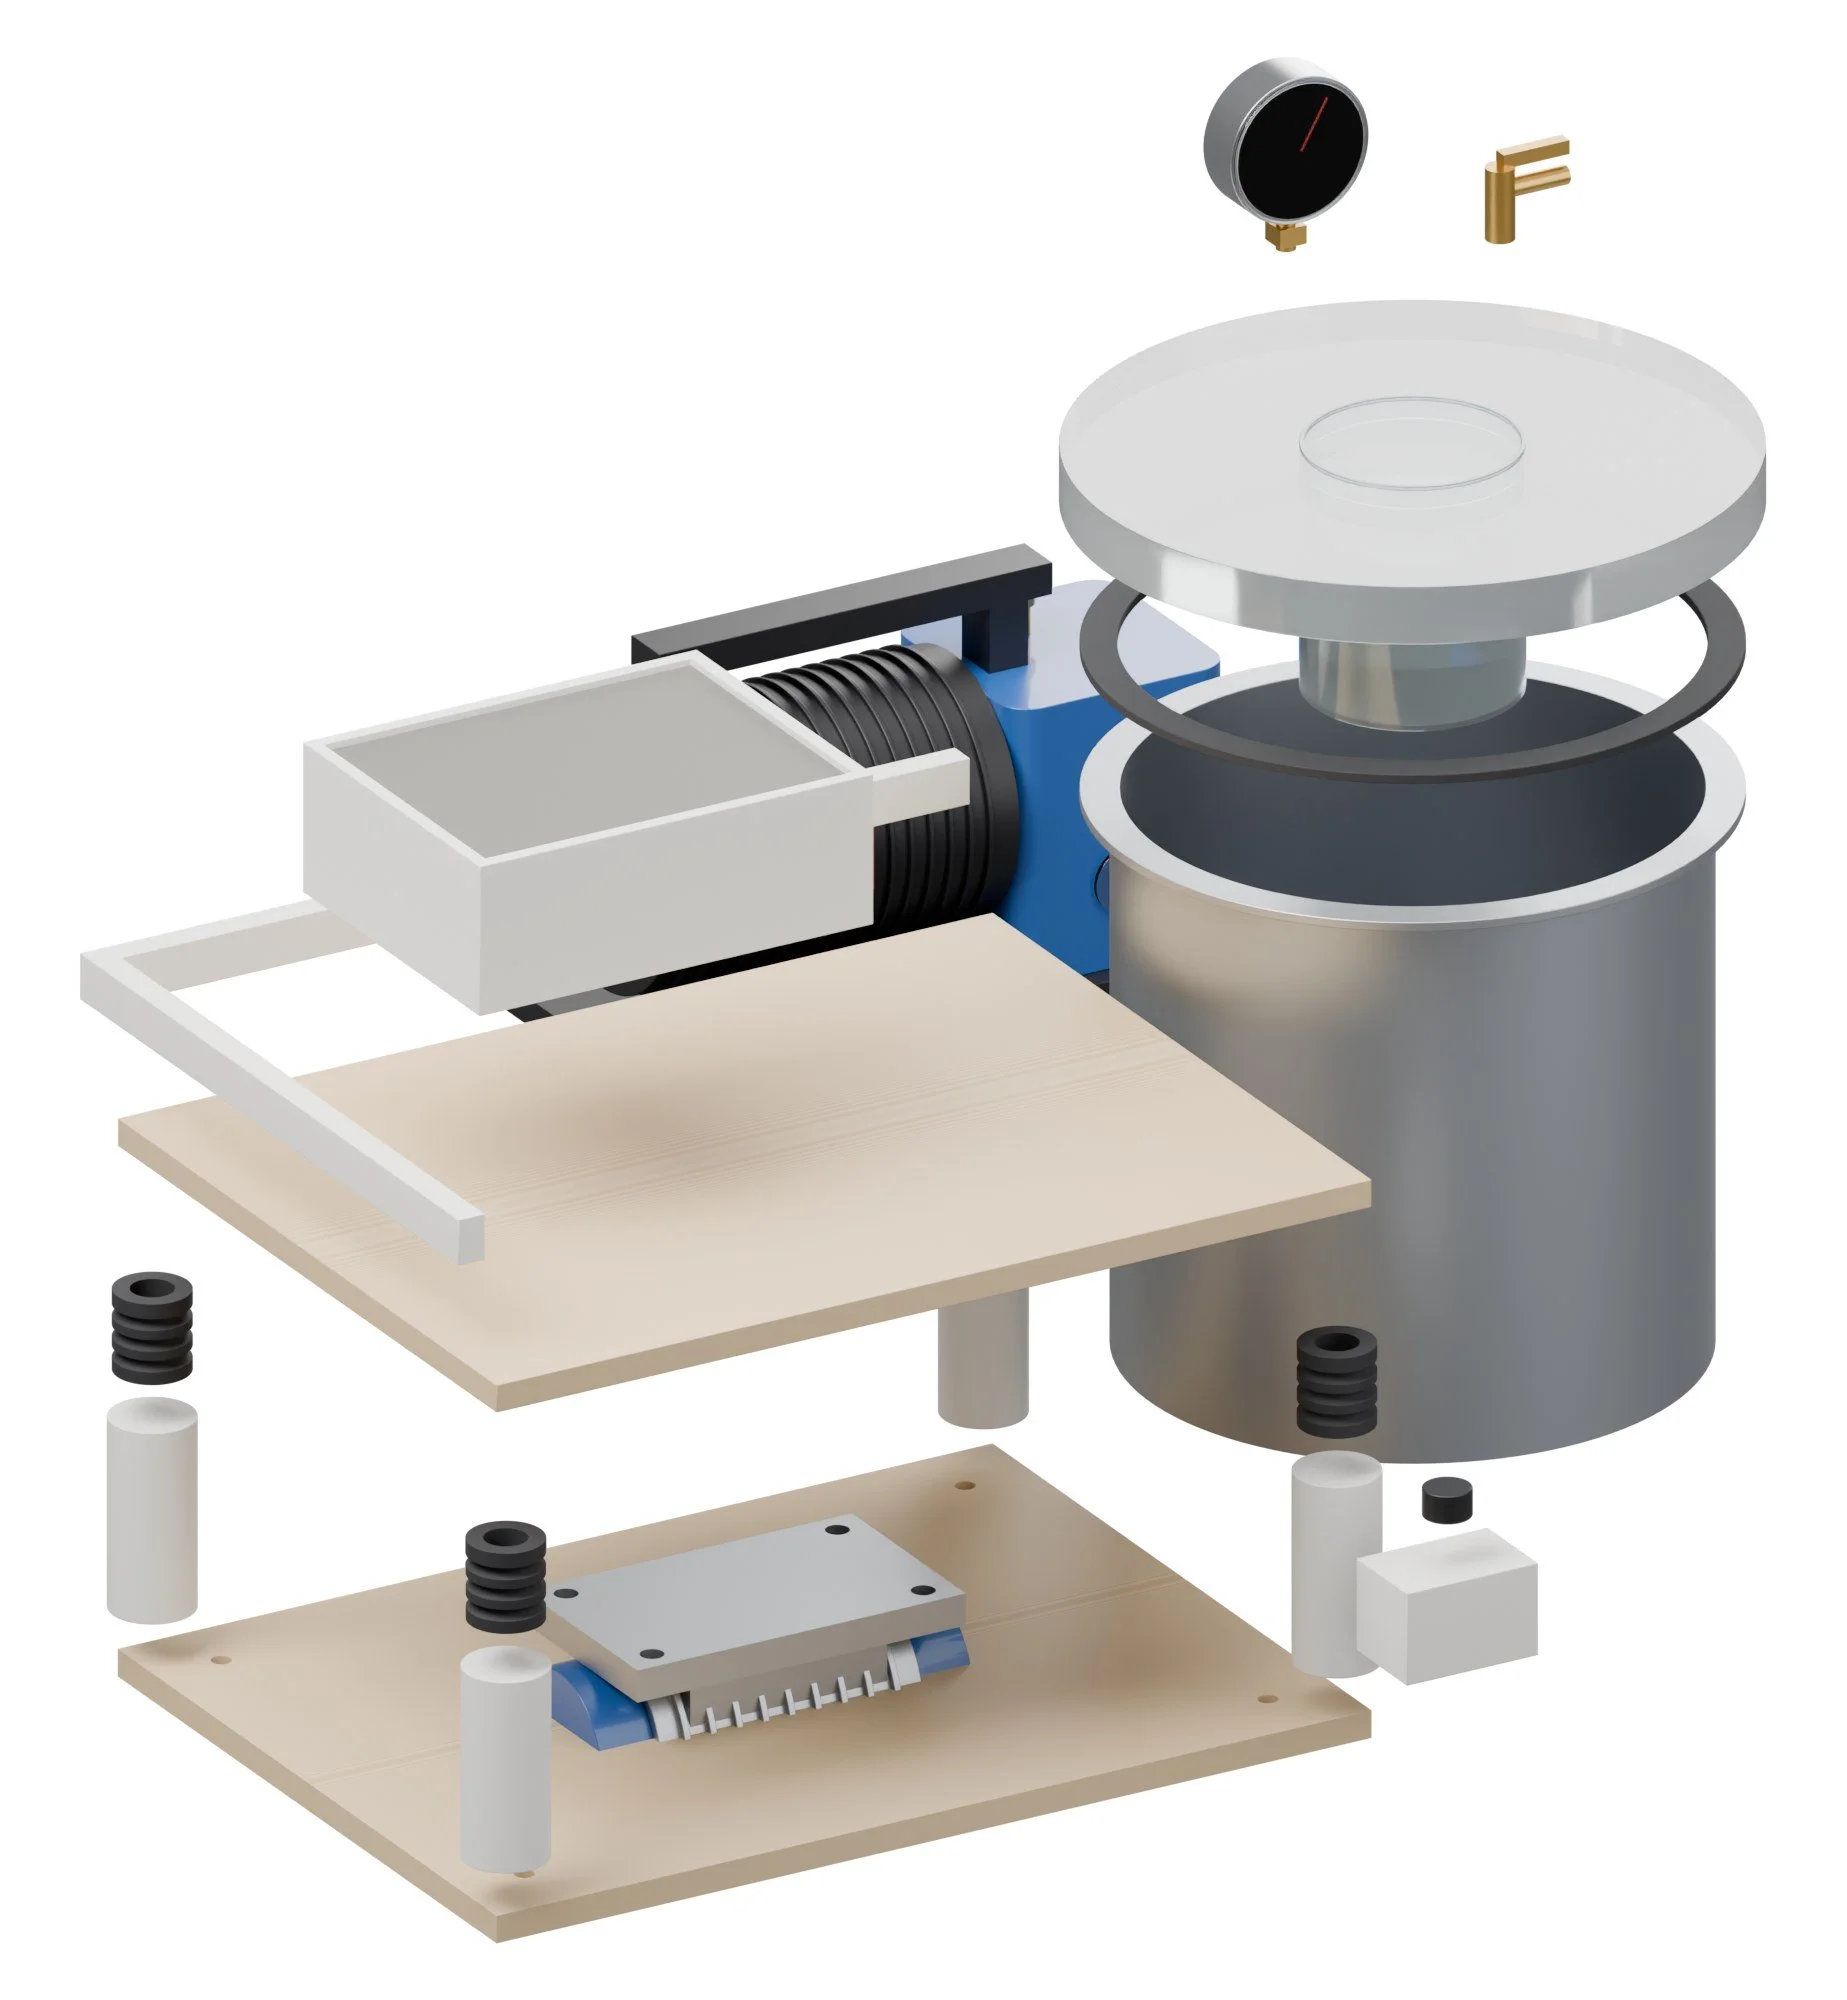
| BaseCut 2 and glue (0.47 in). Holes for the spring posts. | cut |
| LegPETG, 4 off, 40% gyroid. Socket for the spring. | |
| Tpu springTPU 95A, 4 off. The grooves set the stiffness; 3 rings suits up to 15 kg of mold and mix. | |
| LegPETG, 4 off, 40% gyroid. Socket for the spring. | |
| Tpu springTPU 95A, 4 off. The grooves set the stiffness; 3 rings suits up to 15 kg of mold and mix. | |
| LegPETG, 4 off, 40% gyroid. Socket for the spring. | |
| Tpu springTPU 95A, 4 off. The grooves set the stiffness; 3 rings suits up to 15 kg of mold and mix. | |
| LegPETG, 4 off, 40% gyroid. Socket for the spring. | |
| Tpu springTPU 95A, 4 off. The grooves set the stiffness; 3 rings suits up to 15 kg of mold and mix. | |
| TopCut 2 and glue. Shellac it; concrete will land on it. | cut |
| FencePETG, prints in 4 straight pieces with dovetails. | |
| Speed podHolds the 220 V PWM speed controller board and its knob. | |
| Mold boxAny printed mold; shown as a 180 x 140 box. |
Build guide
Tools / parts / every step, start to finish
Open the full build guide
Time: 3 hours plus printing Skill: Easy
Tools
- Hex keys
- Drill
- Wrenches
Parts
Bought (full list with links in the README and buy_list.csv):
- 1 x 3 gal vacuum chamber kit with 3 CFM single-stage pump
- 1 x Vibration motor 60 W (single-phase) with mounting foot
- 1 x PWM speed controller for AC motor, 2000 W
- 1 x TPU 95A filament 1 kg
- 1 x Vacuum pump oil, 16 oz
- 0.039 x 0.24 in birch ply, 12 x 24 in, 6-pack
- 1 x PETG filament 1 kg
- 1 x M3/M4/M5 screws, nuts and inserts (already owned)
Made:
laser/pd_base_6mm.dxf(laser)stl/pd_leg.stl(printed) x 4stl/pd_tpu_spring.stl(printed) x 4laser/pd_top_6mm.dxf(laser)stl/pd_fence.stl(printed)stl/pd_speed_pod.stl(printed)stl/pd_mold_box.stl(printed)
Steps
1. Print and cut
Print every STL in stl/ (PETG unless the part note says otherwise, 0.008 in layers, 4 walls, 30 to 40% gyroid). Cut every file in laser/ on Drag Queen. Print the springs in TPU 95A. Check every MEASURE note in the README against your actual parts before printing the parts they touch.
2. Base
Glue the two 0.24 in base layers; screw the printed legs at the corners.
3. Springs and top
Push the TPU springs onto the legs; glue the two top layers and set the top on the springs.
4. Motor
Bolt the vibration motor under the top with M8 bolts and nyloc nuts; it must not touch the base.
5. Speed pod
Mount the PWM controller in its pod; wire the motor through it.
6. Chamber
Assemble the chamber kit: gasket, lid, gauge and valve with PTFE tape; fill the pump with oil to the sight-glass line.
Wiring
- Vibration motor through the speed controller, mains plug with earth to the motor body.
Firmware
- None.
First test
- Run the table empty: it should buzz evenly without walking across the bench.
- Pull the empty chamber to -29 inHg; it should hold for 10 minutes with the valve closed.
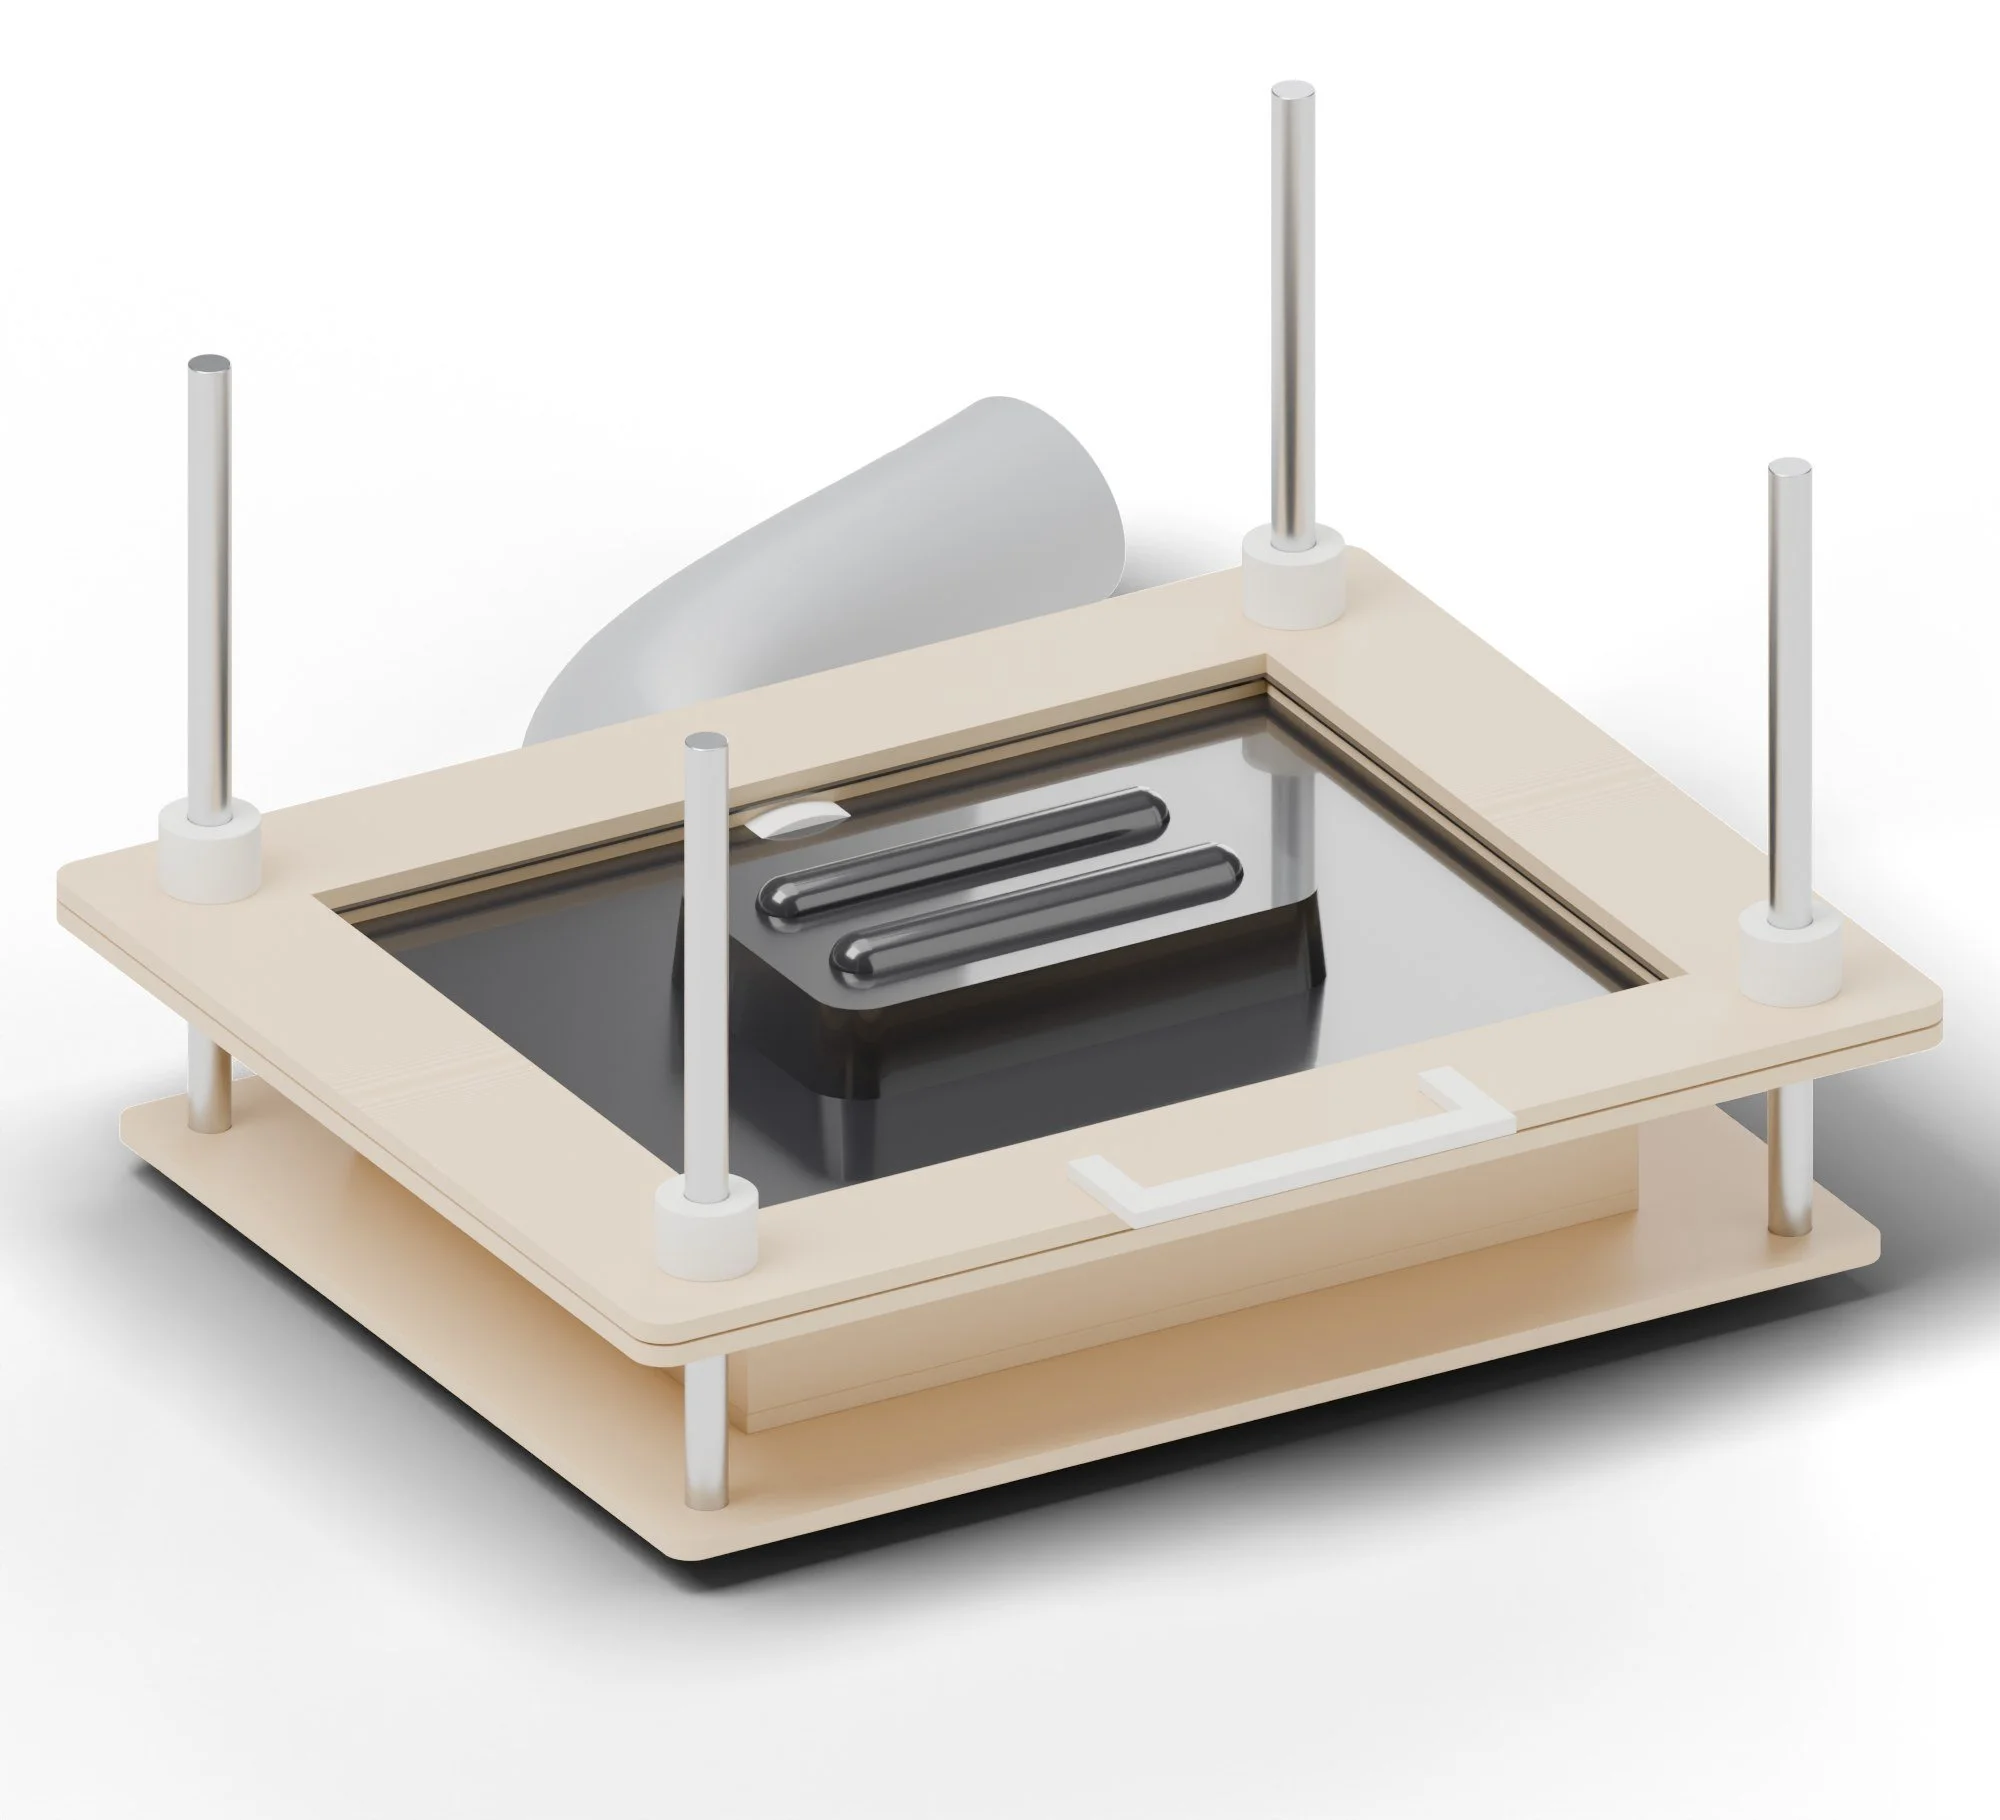
Skin Tight
A vacuum former that pulls hot plastic sheet over 3D-printed molds.
Fairy Ring pipeline / Form / gets vacuum-formed trays and covers
Skin Tight pulls hot plastic sheet over 3D-printed molds. Clamp a sheet in her frame, heat it, drop it, and the shop vac pulls it skin-tight over the mold in about two seconds. She makes tool-tray inserts like the moth doctor's case, packaging, clamshells and small covers.
How it works
Sheet 150 °c / Vacuum on
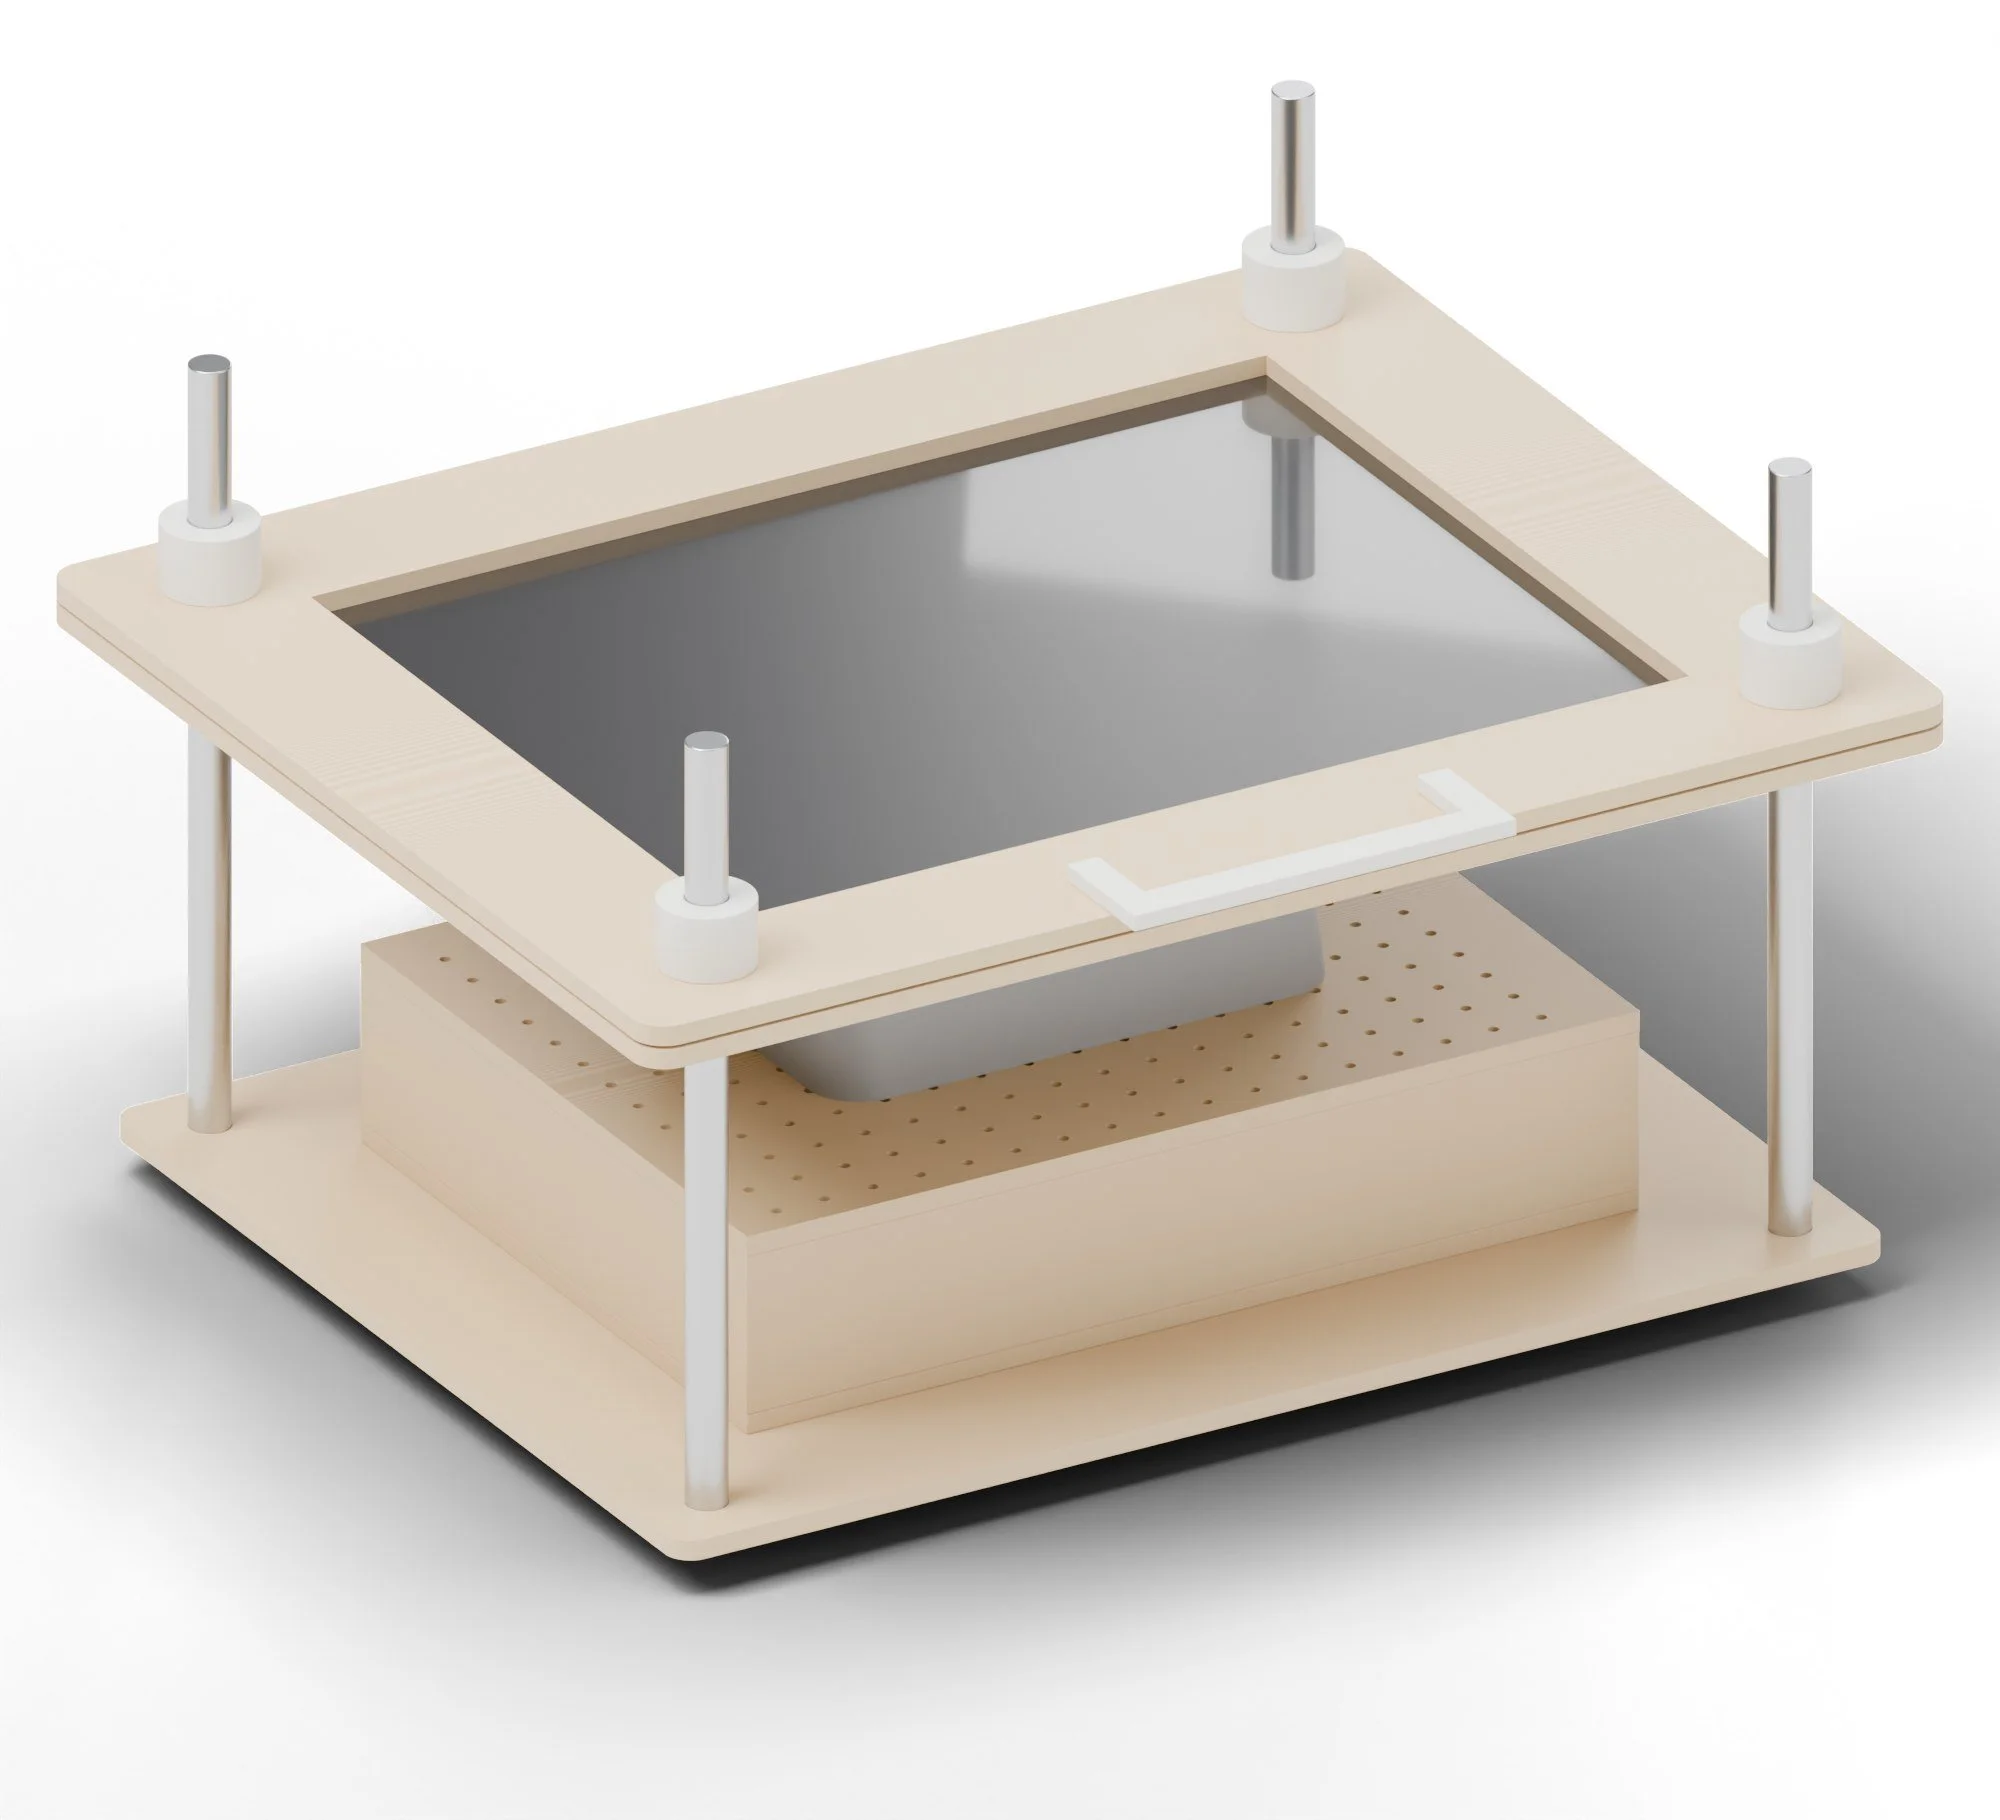
- A 9 x 12 in sheet of PETG or HIPS is clamped between two ply frames that slide on four steel posts.
- The framed sheet is heated in a toaster oven (or under a heater) until it sags, about 140 to 160 C.
- It drops onto the drilled platen, the shop vac switches on, and the sheet hugs the printed mold.
What it can make
Products / and less obvious uses
- Tool-tray inserts
- Pulled over printed tool shapes, for cases like the moth doctor's.
- Clamshell packaging
- For Queen Bee jars and small parts.
- Covers
- Dust covers and button caps for the rig and the machines.
- Soap and chocolate molds
- Thin food-safe PETG pulled over a printed master.
Tricks worth trying
- Molds for wax and concrete A pulled sheet is a cheap, flexible mold: pour Queen Bee wax or a concrete tile into it. To test.
- Pull over a scan Scan an object on Vogue, print a buck from it, and pull a case insert that fits it exactly.
Recipes
Sheet plastics / temperatures / mold rules
Use it for: Vacuum-formed skins over printed molds: trays, covers, packaging and mold liners.
Materials
- HIPS 0.039 in (easiest), PETG 0.03 to 0.039 in (clear), acrylic 0.059 in (needs more heat)
- Printed molds in PLA or PETG with 2 to 3 degree draft and 0.039 in vent holes in deep corners
Settings
| Setting | Value |
|---|---|
| HIPS | Oven 175 to 374 °F, 2 to 4 min until it sags 0.98 to 1 3/16 in |
| PETG | Oven 140 to 320 °F, 1 to 3 min; watch for whitening |
| Acrylic | Oven 160 to 338 °F, 4 to 6 min |
| Vacuum | Shop vac on before the sheet comes out of the oven |
| Transfer time | Under 3 seconds from oven to platen |
Steps
- Clamp the sheet in the two ply frames with the magnets.
- Heat it in Hot Flash or the toaster oven until it sags.
- Turn on the vac, pull the frame out and drop it straight down the posts over the mold.
- Hold 20 seconds; let it cool 1 minute before lifting.
- Trim with a knife or on Drag Queen.
Troubleshooting
| Problem | Fix |
|---|---|
| Webbing at corners | Mold too close to others or too tall; space them out, add draft. |
| Not pulling detail | Sheet too cold or vac leak; seal the platen edges. |
| Bubbles in the sheet | Wet PETG; dry it 2 h at 65 C. |
Safety
- Hot sheet and frames: oven gloves.
- Dedicated oven only, never for food.
- Don't overheat PETG or acrylic; ventilate.
Numbers are starting points. Run one test piece on every new batch of material.
Sheet plastics
What she pulls, and how hotYou need
| PETGClear, tough, food-safe grades exist. Dry it first. | 0.02 to 0.059 in / 284 to 320 °F |
| HIPSCheap, white, easy. Best for test pulls and trays. | 0.02 to 0.059 in / 284 to 320 °F |
| DryingPETG sheet in a low oven or Hot Flash | 149 °F for 2 h |
Method
- Clamp the sheet in the frame. Heat until it sags about 0.98 in in the middle.
- Drop it onto the mold and switch on the vacuum at once.
- Hold for 10 to 20 s, until it is cool enough to touch.
- Pop the mold out with a puff of air. Trim on the xTool or with snips.
If it goes wrong
- Webbing at corners
- Molds too close together or too tall. Space them, add a ring around tall ones.
- Bubbles in PETG
- Wet sheet. Dry it first.
- Soft detail
- Not hot enough, or the vent holes are blocked.
Mold rules
Fairy Ring checks these for youYou need
| DraftEvery side wall tilts out | 3° |
| FilletsNo sharp inside corners | 0.079 in |
| VentsIn every low spot, drilled through | 0.039 in |
| DepthKeep under the width of the mold | < 1 : 1 |
Hot sheet and the heater element burn. Gloves, and never leave the heater on alone.
What to buy
7 parts / $186.00 before tax / estimates, check the links
 01BLACK+DECKER TO1745SSG 4-slice toaster oven (dedicated, non-food)$60.00Heats the framed sheetView on Amazon →
 02uxcell 0.47 x 9 13/16 in chrome rods, 2-pack$20.00Qty 4 · PostsView on Amazon →
 03VSKIZ 0.39 x 0.12 in neodymium magnets, 50-pack$10.00Frame closureView on Amazon →MatterHackers04Vaquform PETG sheets 0.02 in, 35 pack$55.00Cut to sizeView on MatterHackers →
 05White HIPS 0.039 in 12 x 12 in, 10-pack (0.03 in isn't stocked; 0.039 in pulls fine)$25.00Black or whiteView on Amazon →
 06Frost King R538H foam tape, 3/8 in$8.00Platen edge gasketView on Amazon →
 07Rubbermaid stainless oven thermometer$8.00View on Amazon →
What to make
Printed on the printers you have / cut on the xTool or sent out
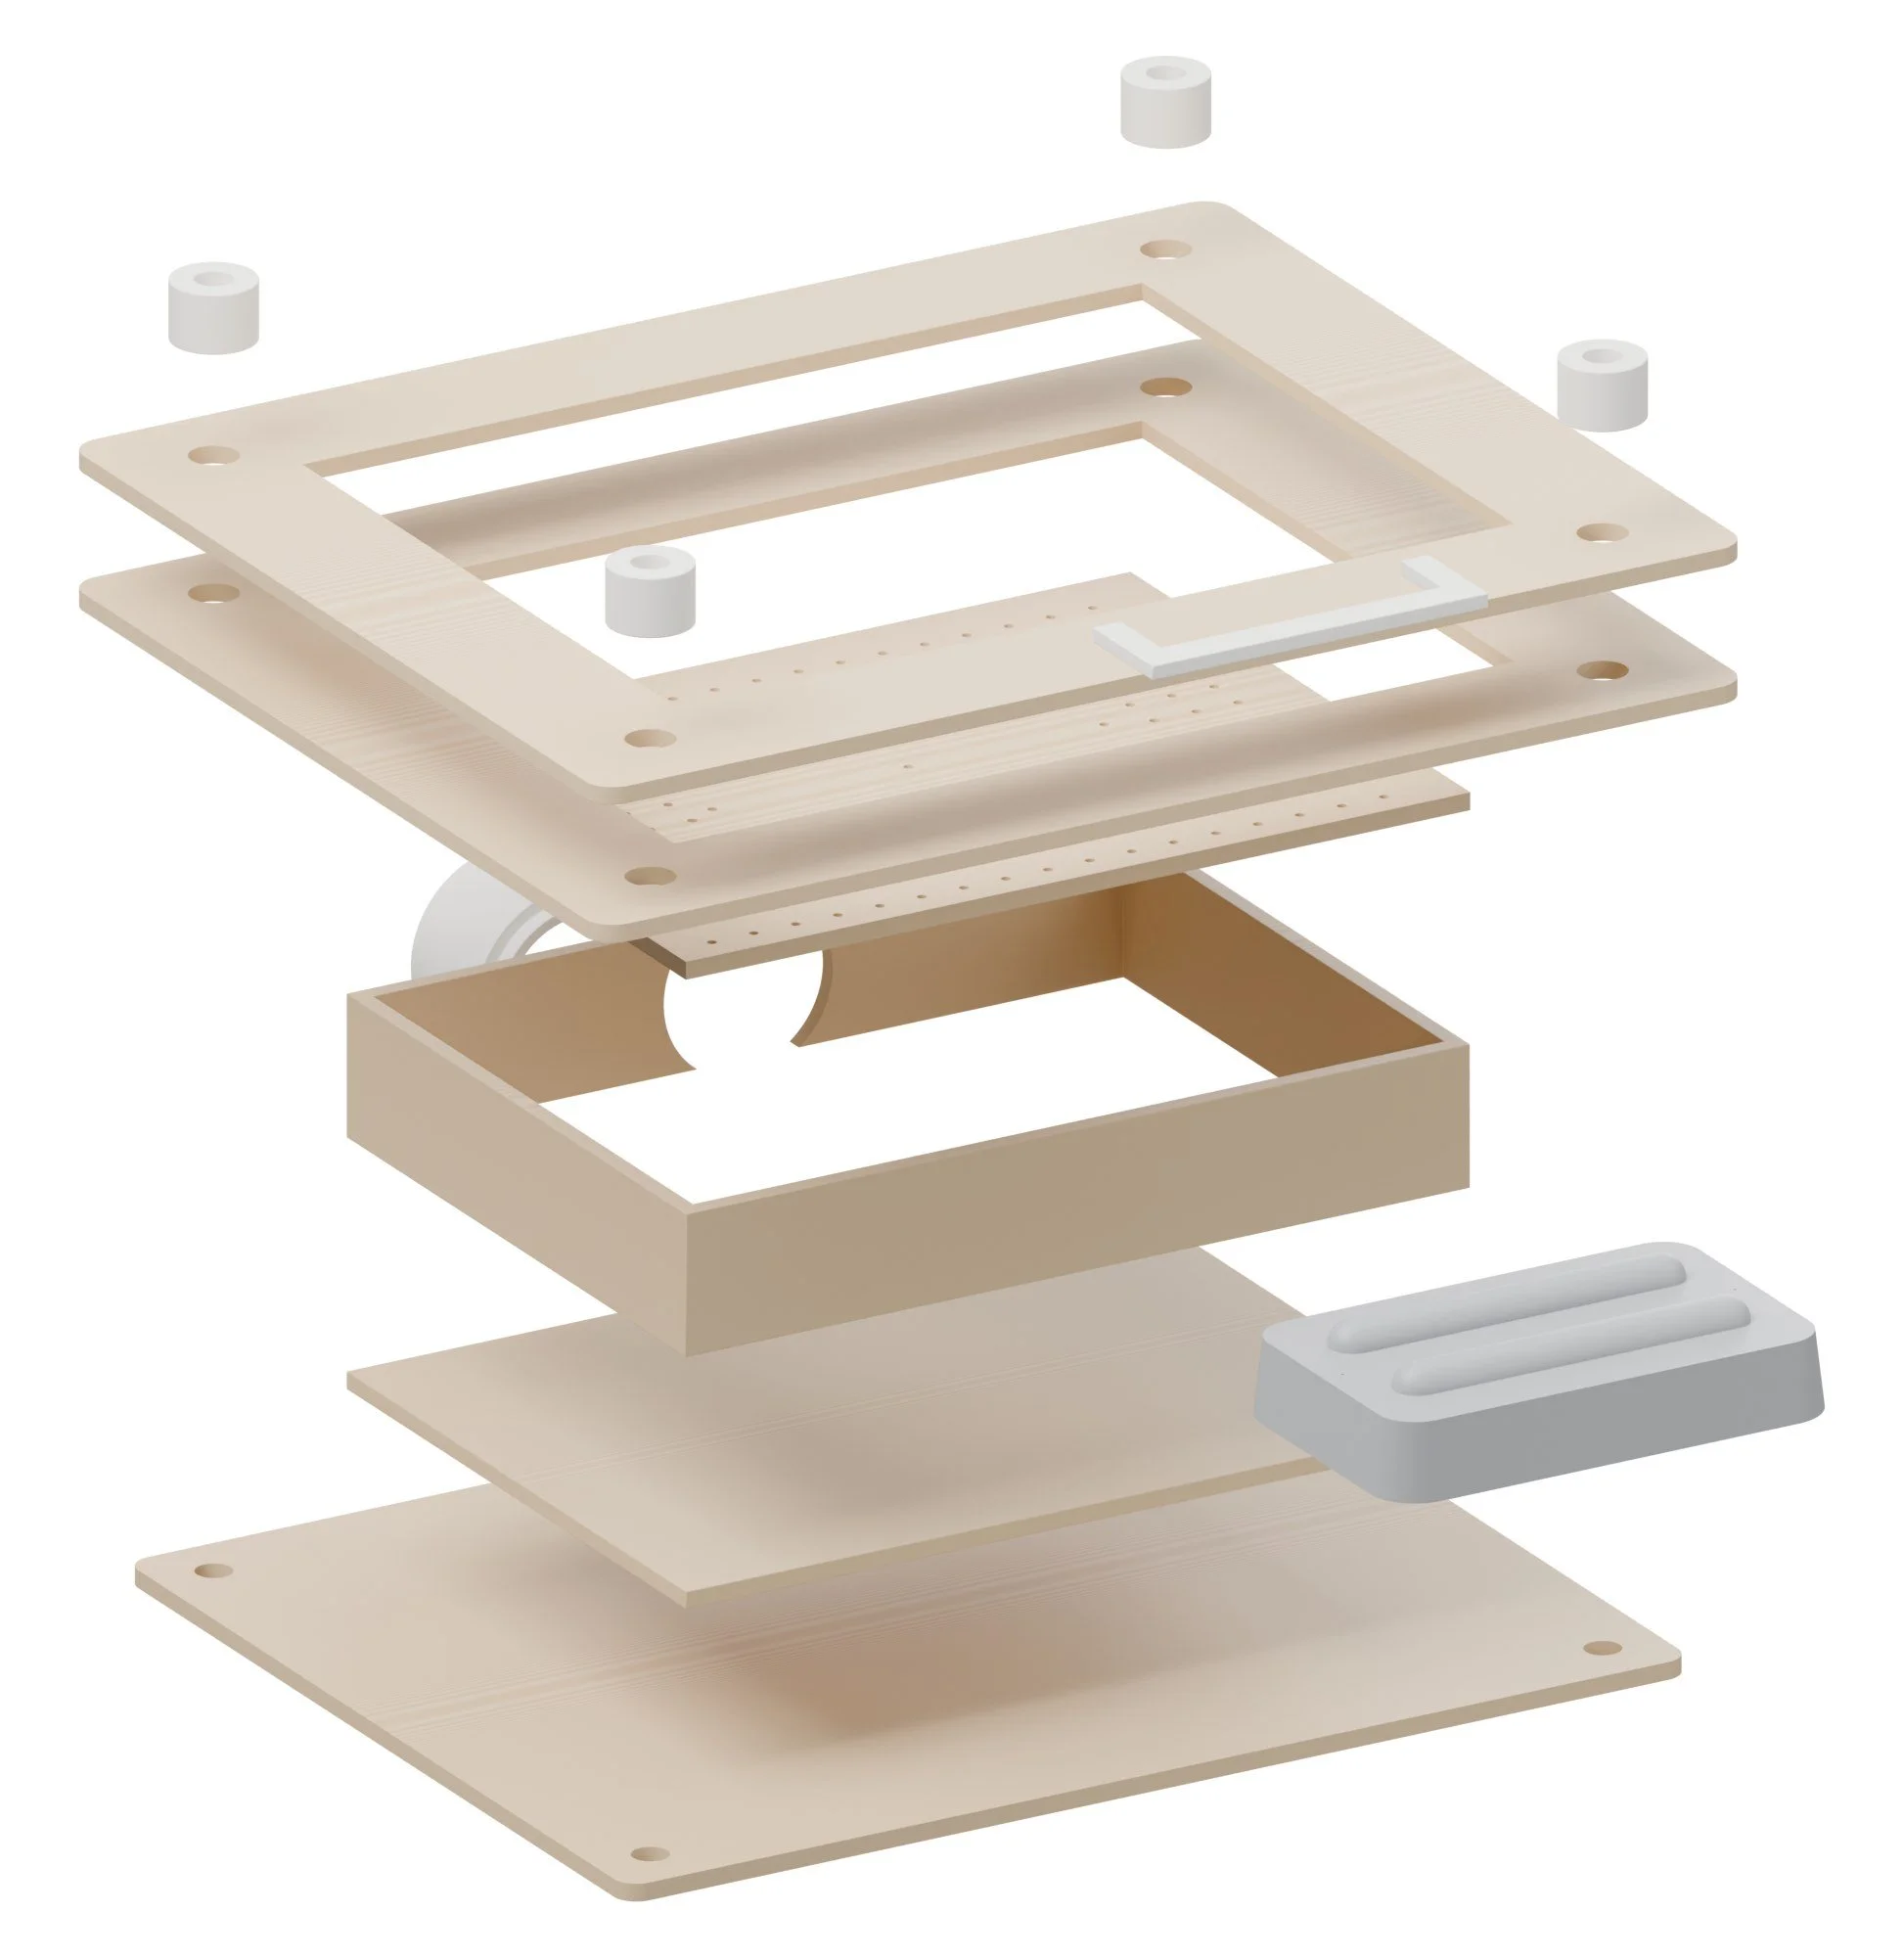
| Base0.24 in ply; posts press through. | cut |
| Platen top0.24 in ply, sealed with shellac. 0.126 in holes on a 0.59 in grid. | cut |
| Platen wall longWalls: 2 long (one with the 2 3/8 in port hole), 2 short (st_platen_wall_short). Glue + seal. | cut |
| Platen wall shortx2, 0.24 in ply. | cut |
| Hose adapterPETG. 2.512 in socket for a 2.5 in shop-vac hose (MEASURE yours). | |
| Framex2 (upper and lower), 0.24 in ply. 0.24 x 0.39 in magnets or 6 binder clips close them on the sheet. | cut |
| Frame bushingx4, PETG. Press-fit on the upper frame; slides on the 0.47 in posts. | |
| HandlePETG. Screws to the upper frame; keeps hands off the hot sheet. | |
| Mold tool trayExample mold: a two-tool tray insert. PETG/ASA, 3 walls, 3 degree draft, 0.039 in vents in the valleys. |
Build guide
Tools / parts / every step, start to finish
Open the full build guide
Time: 3 hours plus printing Skill: Easy
Tools
- Drill
- Hex keys
- Glue
Parts
Bought (full list with links in the README and buy_list.csv):
- 1 x Shop vac (already owned)
- 1 x Toaster oven (dedicated, non-food)
- 0.16 x 0.47 in steel rods 9 13/16 in
- 1 x Neodymium magnets 0.39 x 0.12 in, 50 pack
- 1 x Vaquform PETG sheets 0.02 in, 35 pack
- 1 x HIPS sheets 0.03 in 12 x 12 in, 10 pack
- 1 x Foam weatherstrip
- 1 x Oven thermometer
Made:
laser/st_base_6mm.dxf(laser)laser/st_platen_top_6mm.dxf(laser)laser/st_platen_wall_long_6mm.dxf(laser)laser/st_platen_wall_short_6mm.dxf(laser)stl/st_hose_adapter.stl(printed)laser/st_frame_6mm.dxf(laser)stl/st_frame_bushing.stl(printed)stl/st_handle.stl(printed)stl/st_mold_tool_tray.stl(printed)
Steps
1. Print and cut
Print every STL in stl/ (PETG unless the part note says otherwise, 0.008 in layers, 4 walls, 30 to 40% gyroid). Cut every file in laser/ on Drag Queen. Check every MEASURE note in the README against your actual parts before printing the parts they touch.
2. Platen box
Glue the ply box with the drilled top (0.126 in holes on a 0.59 in grid); seal inside with shellac.
3. Posts
Fit the four 0.47 in rods into the base corners.
4. Frames
Glue the magnets into the two frames and add the foam weatherstrip to the platen top.
5. Vac port
Fit the printed port and connect the shop vac.
Wiring
- None.
Firmware
- None.
First test
- Pull a HIPS sheet over a simple box mold and check the corners are sharp.
Cher Bend
Steam box + laser-cut bending forms with printed cam clamps.
Fairy Ring pipeline / Form / gets bending forms cut from a curve
Cher Bend softens wood with steam and bends it over a form Fairy Ring cut. The box is laser-cut ply with finger joints, lined with foil insulation, fed by a wallpaper steamer. The forms are stacks of laser-cut ply, so any curve on screen becomes a form in an hour, with printed cam clamps and a spring-steel strap to hold the bend while it sets.
How it works
Straight / Bent
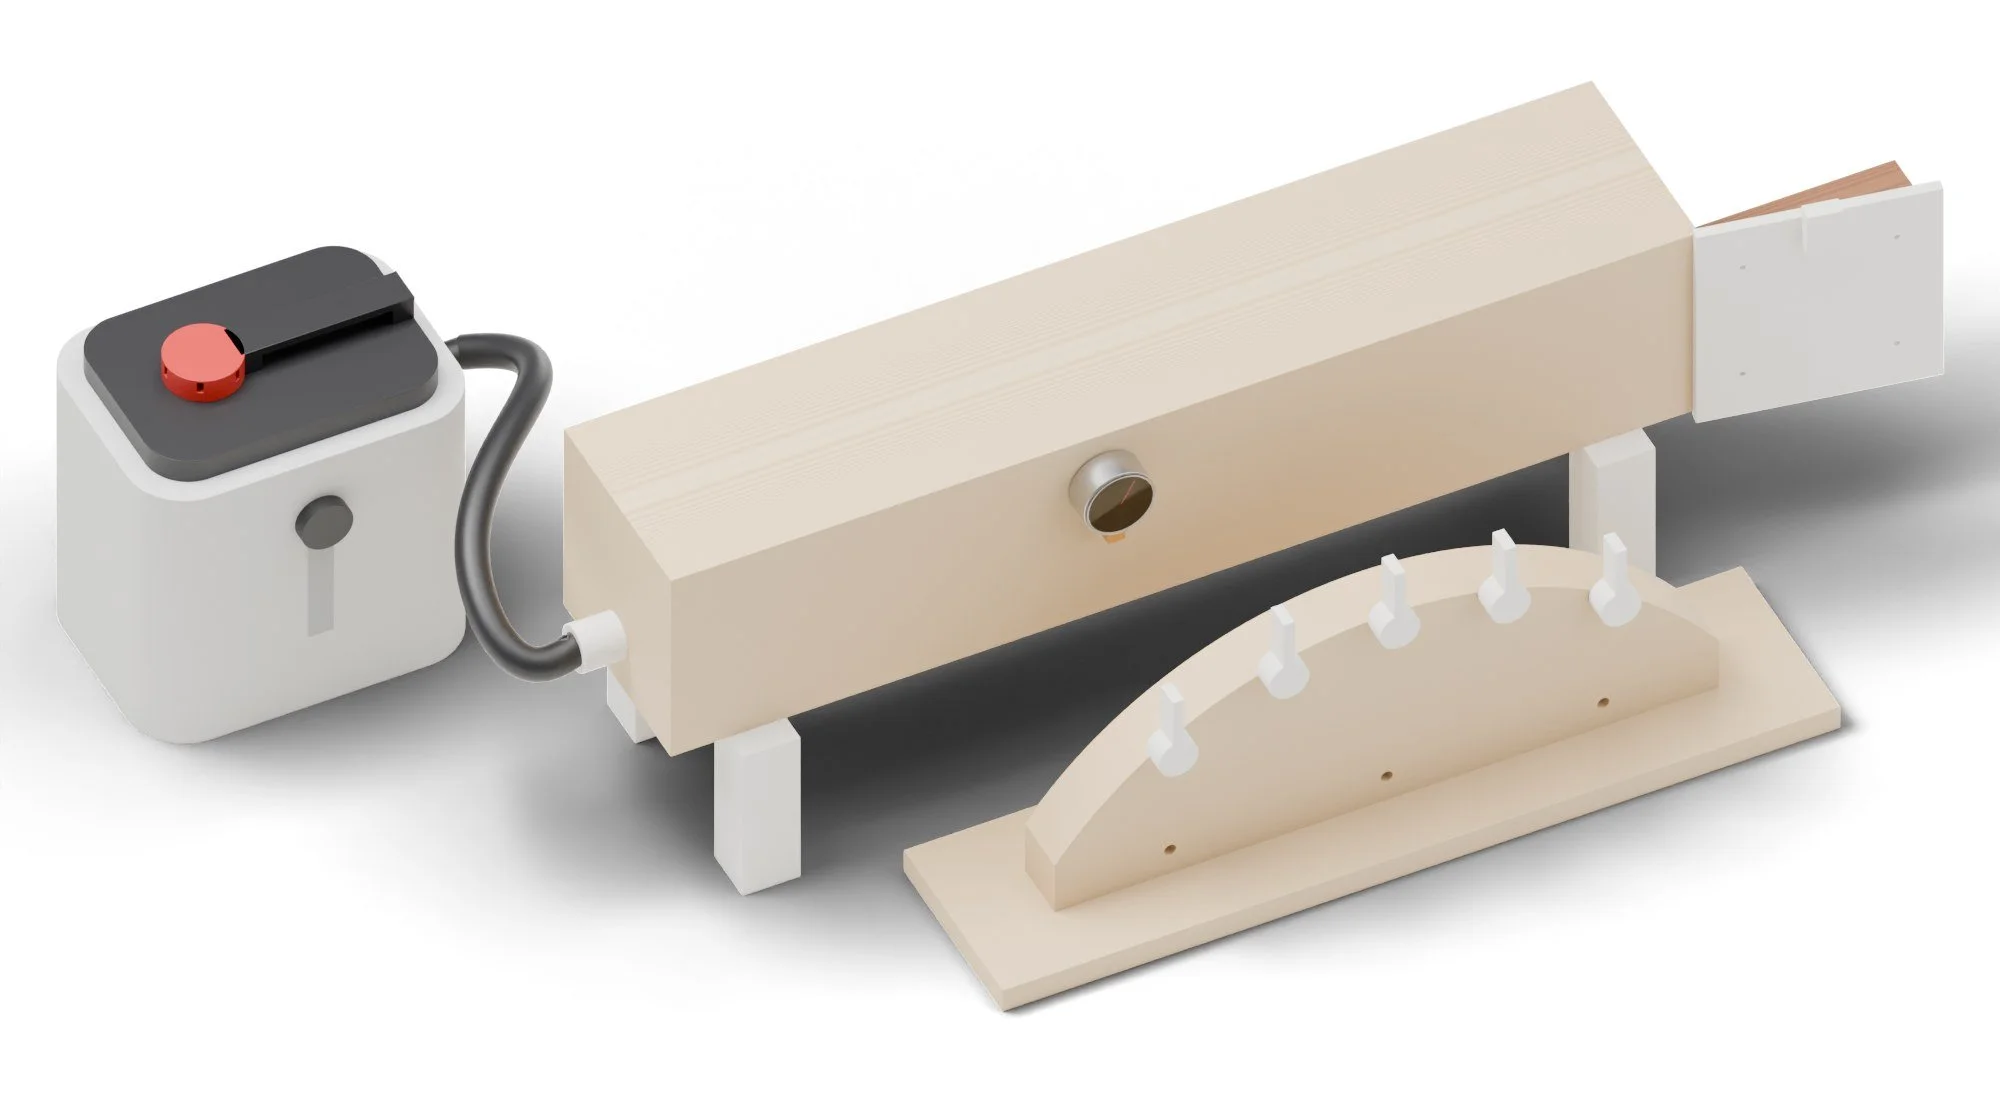
- Steam the strip for about one hour per inch of thickness at 95 to 100 C. The dial thermometer tells you the box is up to temperature.
- Pull it, clamp one end to the form, wrap the steel strap over the outside and bend in one smooth move within 60 seconds.
- Lock the printed cams every 2 3/8 in and leave it overnight, then a day off the form before gluing up.
Recipes
Materials / settings / what to do when it goes wrong
Use it for: Steam-bent chair parts, handles, frames and curved rails.
Materials
- Air-dried white oak, red oak, ash, hickory, cherry or walnut at 15 to 25% moisture (kiln-dried bends poorly)
- Straight grain with no run-out; rive or select it
- Distilled water in the steamer (less scale)
Settings
| Setting | Value |
|---|---|
| Steam time | 1 h per 0.98 in of thickness, measured once the box reads 203 °F |
| Box temperature | 95 to 212 °F |
| Bend window | Within 60 seconds of leaving the box |
| Minimum radius | About 30 x thickness free, 10 x thickness with the strap (oak) |
| Overbend | Cut forms 10% tighter to allow spring-back |
| Set time | Overnight on the form, then 2 to 3 days on a drying form or in Hot Flash at 104 °F |
Steps
- Mill the stock 0.079 in oversize; ease the edges.
- Steam it on the dowel rack for the time above.
- Put on gloves, pull it, clamp one end in the strap handle and on the form.
- Bend smoothly with the strap on the outside, locking the cams as you go.
- Leave it overnight. Move it to a drying jig if you need the form back.
- Mill to final size once it reads under 10% MC (Moisture Madame).
Troubleshooting
| Problem | Fix |
|---|---|
| Splits on the outside | Use the strap, a straighter-grained piece, or wetter stock. |
| Kinks on the inside | Bent too fast or too cold; work faster out of the box, steam longer. |
| Springs back a lot | More overbend; longer time on the form. |
Safety
- Steam burns: heavy gloves and long sleeves, and open the door away from you.
- Don't run the steamer dry; check the water every hour.
- Watch the strap ends; spring steel can whip.
Numbers are starting points. Run one test piece on every new batch of material.
What to buy
9 parts / $196.00 before tax / estimates, check the links
 01Wallpaper steamer, 4 L tank, with hose$55.00Steam sourceView on Amazon →
 02Dial thermometer 0 to 248 °F$12.00Box temperatureView on Amazon →
 03Foil bubble insulation roll, 24 in x 10 ft$15.00Box liningView on Amazon →
 04Spring steel strip 0.031 x 1.575 in, 3.3 ft$18.00Bending strapView on Amazon →
 05Silicone cord 0.16 in, 9.8 ft$8.00Door gasketView on Amazon →
 06M8 bolts 3 1/8 in + wing nuts, 10-pack$12.00Cam clampsView on Amazon →
 07Titebond III, 16 oz$11.00Waterproof glue for the boxView on Amazon →080.24 in birch ply, 12 x 24 in, 6-pack$45.00Laser-cut partsView on Amazon →09PETG filament 1 kg$20.00Printed partsView on Amazon →

What to make
Printed on the printers you have / cut on the xTool or sent out
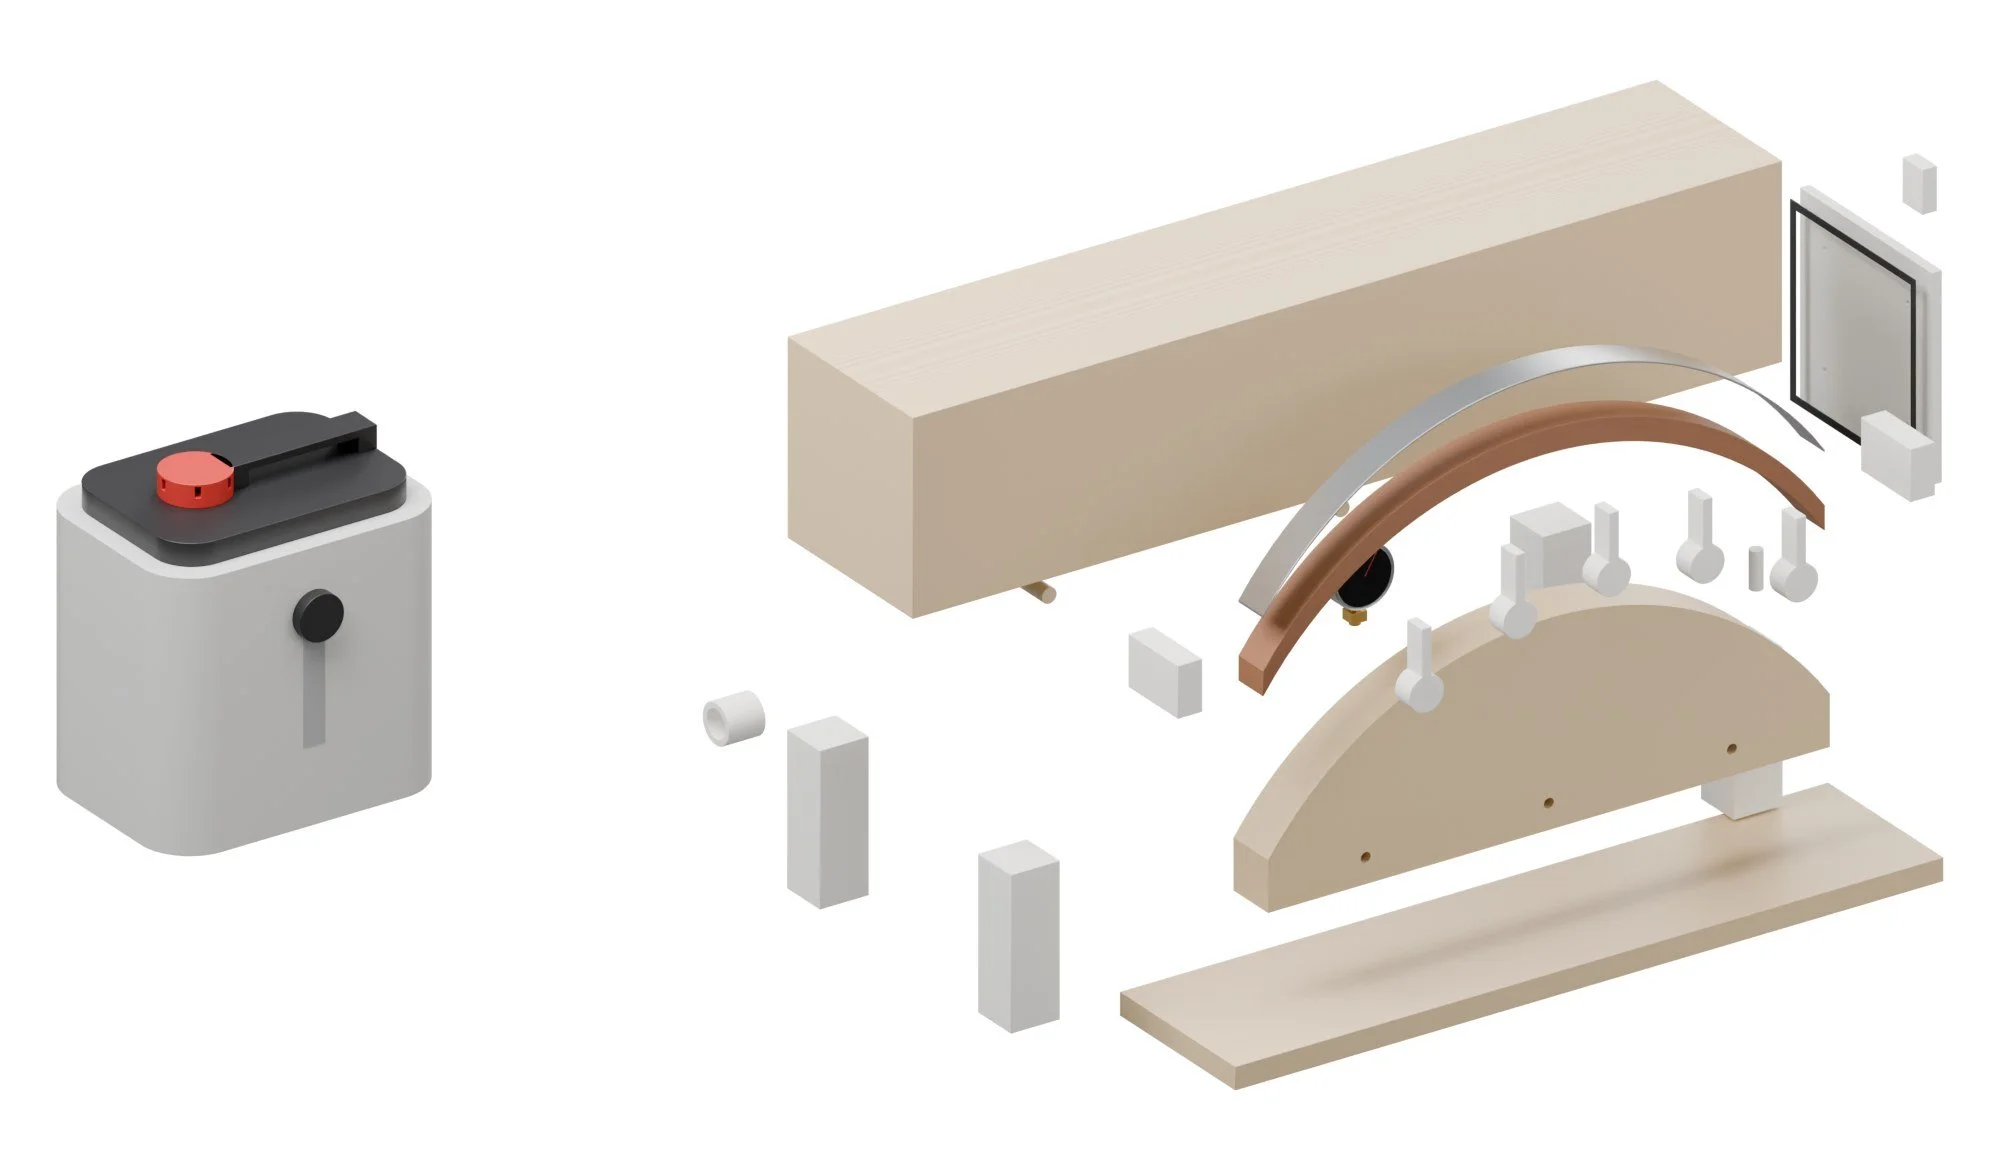
| Box sideCut 4 (two sides, top, bottom). Glue with Titebond III, then line with foil bubble insulation. | cut |
| End panelClosed end, with the steam inlet hole. | cut |
| LegPETG, 4 off. The back pair is 3 degrees taller so the box drains to the door end. | |
| LegPETG, 4 off. The back pair is 3 degrees taller so the box drains to the door end. | |
| LegPETG, 4 off. The back pair is 3 degrees taller so the box drains to the door end. | |
| LegPETG, 4 off. The back pair is 3 degrees taller so the box drains to the door end. | |
| DoorPETG, 5/16 in, gasketed with a silicone cord in a printed groove. | |
| Latch | |
| Steam inletASA or PETG. Push-fits the steamer hose; the flange screws to the end panel. | |
| Form layerCut 7 per form, glue and screw (three 5/16 in alignment dowels). | cut |
| Strap handlePETG; bolts to the strap ends, 2 off. | |
| Strap handlePETG; bolts to the strap ends, 2 off. | |
| Cam clampPETG, 5 per form. Eccentric cam on an M8 bolt through the form. | |
| Cam clampPETG, 5 per form. Eccentric cam on an M8 bolt through the form. | |
| Cam clampPETG, 5 per form. Eccentric cam on an M8 bolt through the form. | |
| Cam clampPETG, 5 per form. Eccentric cam on an M8 bolt through the form. | |
| Cam clampPETG, 5 per form. Eccentric cam on an M8 bolt through the form. |
Build guide
Tools / parts / every step, start to finish
Open the full build guide
Time: 5 to 6 hours plus printing Skill: Easy
Tools
- Clamps
- Brad nailer or screws
- Drill
- Utility knife
Parts
Bought (full list with links in the README and buy_list.csv):
- 1 x Wallpaper steamer, 4 L tank, with hose
- 1 x Dial thermometer 0 to 248 °F
- 1 x Foil bubble insulation roll, 24 in x 10 ft
- 1 x Spring steel strip 0.031 x 1.575 in, 3.3 ft
- 1 x Silicone cord 0.16 in, 9.8 ft
- 1 x M8 bolts 3 1/8 in + wing nuts, 10-pack
- 1 x Titebond III, 16 oz
- 1 x Air-dried white oak strips (bending stock) (optional)
- 0.039 x 0.24 in birch ply, 12 x 24 in, 6-pack
- 1 x PETG filament 1 kg
- 1 x M3/M4/M5 screws, nuts and inserts (already owned)
Made:
laser/cb_box_side_6mm.dxf(laser)laser/cb_end_panel_6mm.dxf(laser)stl/cb_leg.stl(printed) x 4stl/cb_door.stl(printed)stl/cb_latch.stl(printed)stl/cb_steam_inlet.stl(printed)laser/cb_form_layer_6mm.dxf(laser)stl/cb_strap_handle.stl(printed) x 2stl/cb_cam_clamp.stl(printed) x 5
Steps
1. Print and cut
Print every STL in stl/ (PETG unless the part note says otherwise, 0.008 in layers, 4 walls, 30 to 40% gyroid). Cut every file in laser/ on Drag Queen. Check every MEASURE note in the README against your actual parts before printing the parts they touch.
2. Box
Glue the four 0.24 in side panels with Titebond III at the finger joints, then the closed end; clamp square. Line inside with foil bubble insulation, foil facing in.
3. Rack and door
Push the maple dowels through the side holes; hinge the printed door with its gasket; fit the latch.
4. Legs and drain
Screw the legs on (taller pair at the closed end) and drill a 0.39 in drain at the low end.
5. Steam
Screw the printed inlet to the closed end and push the steamer hose on.
6. Forms
Glue and screw seven ribs per form on the base with the three dowels; fit the cam clamps on M8 bolts.
Wiring
- None (the steamer plugs in).
Firmware
- None.
First test
- Run the steamer: the thermometer should reach 203 °F within 20 minutes.
- Bend a 0.39 in ash test strip around the form.
Bog Witch
Moss and lichen grower for living inlays and wall panels.
Fairy Ring pipeline / Form / gets living moss panels
Bog Witch grows the green. A clear laser-cut cabinet over a water tray keeps moss and lichen at 85 to 95% humidity under full-spectrum light, with a fan that keeps the air moving so mold can't settle. Tiles grow in laser-cut ply frames that drop straight into a routed pocket in a cabinet door or wall panel: living inlay.
How it works
Bare / Grown
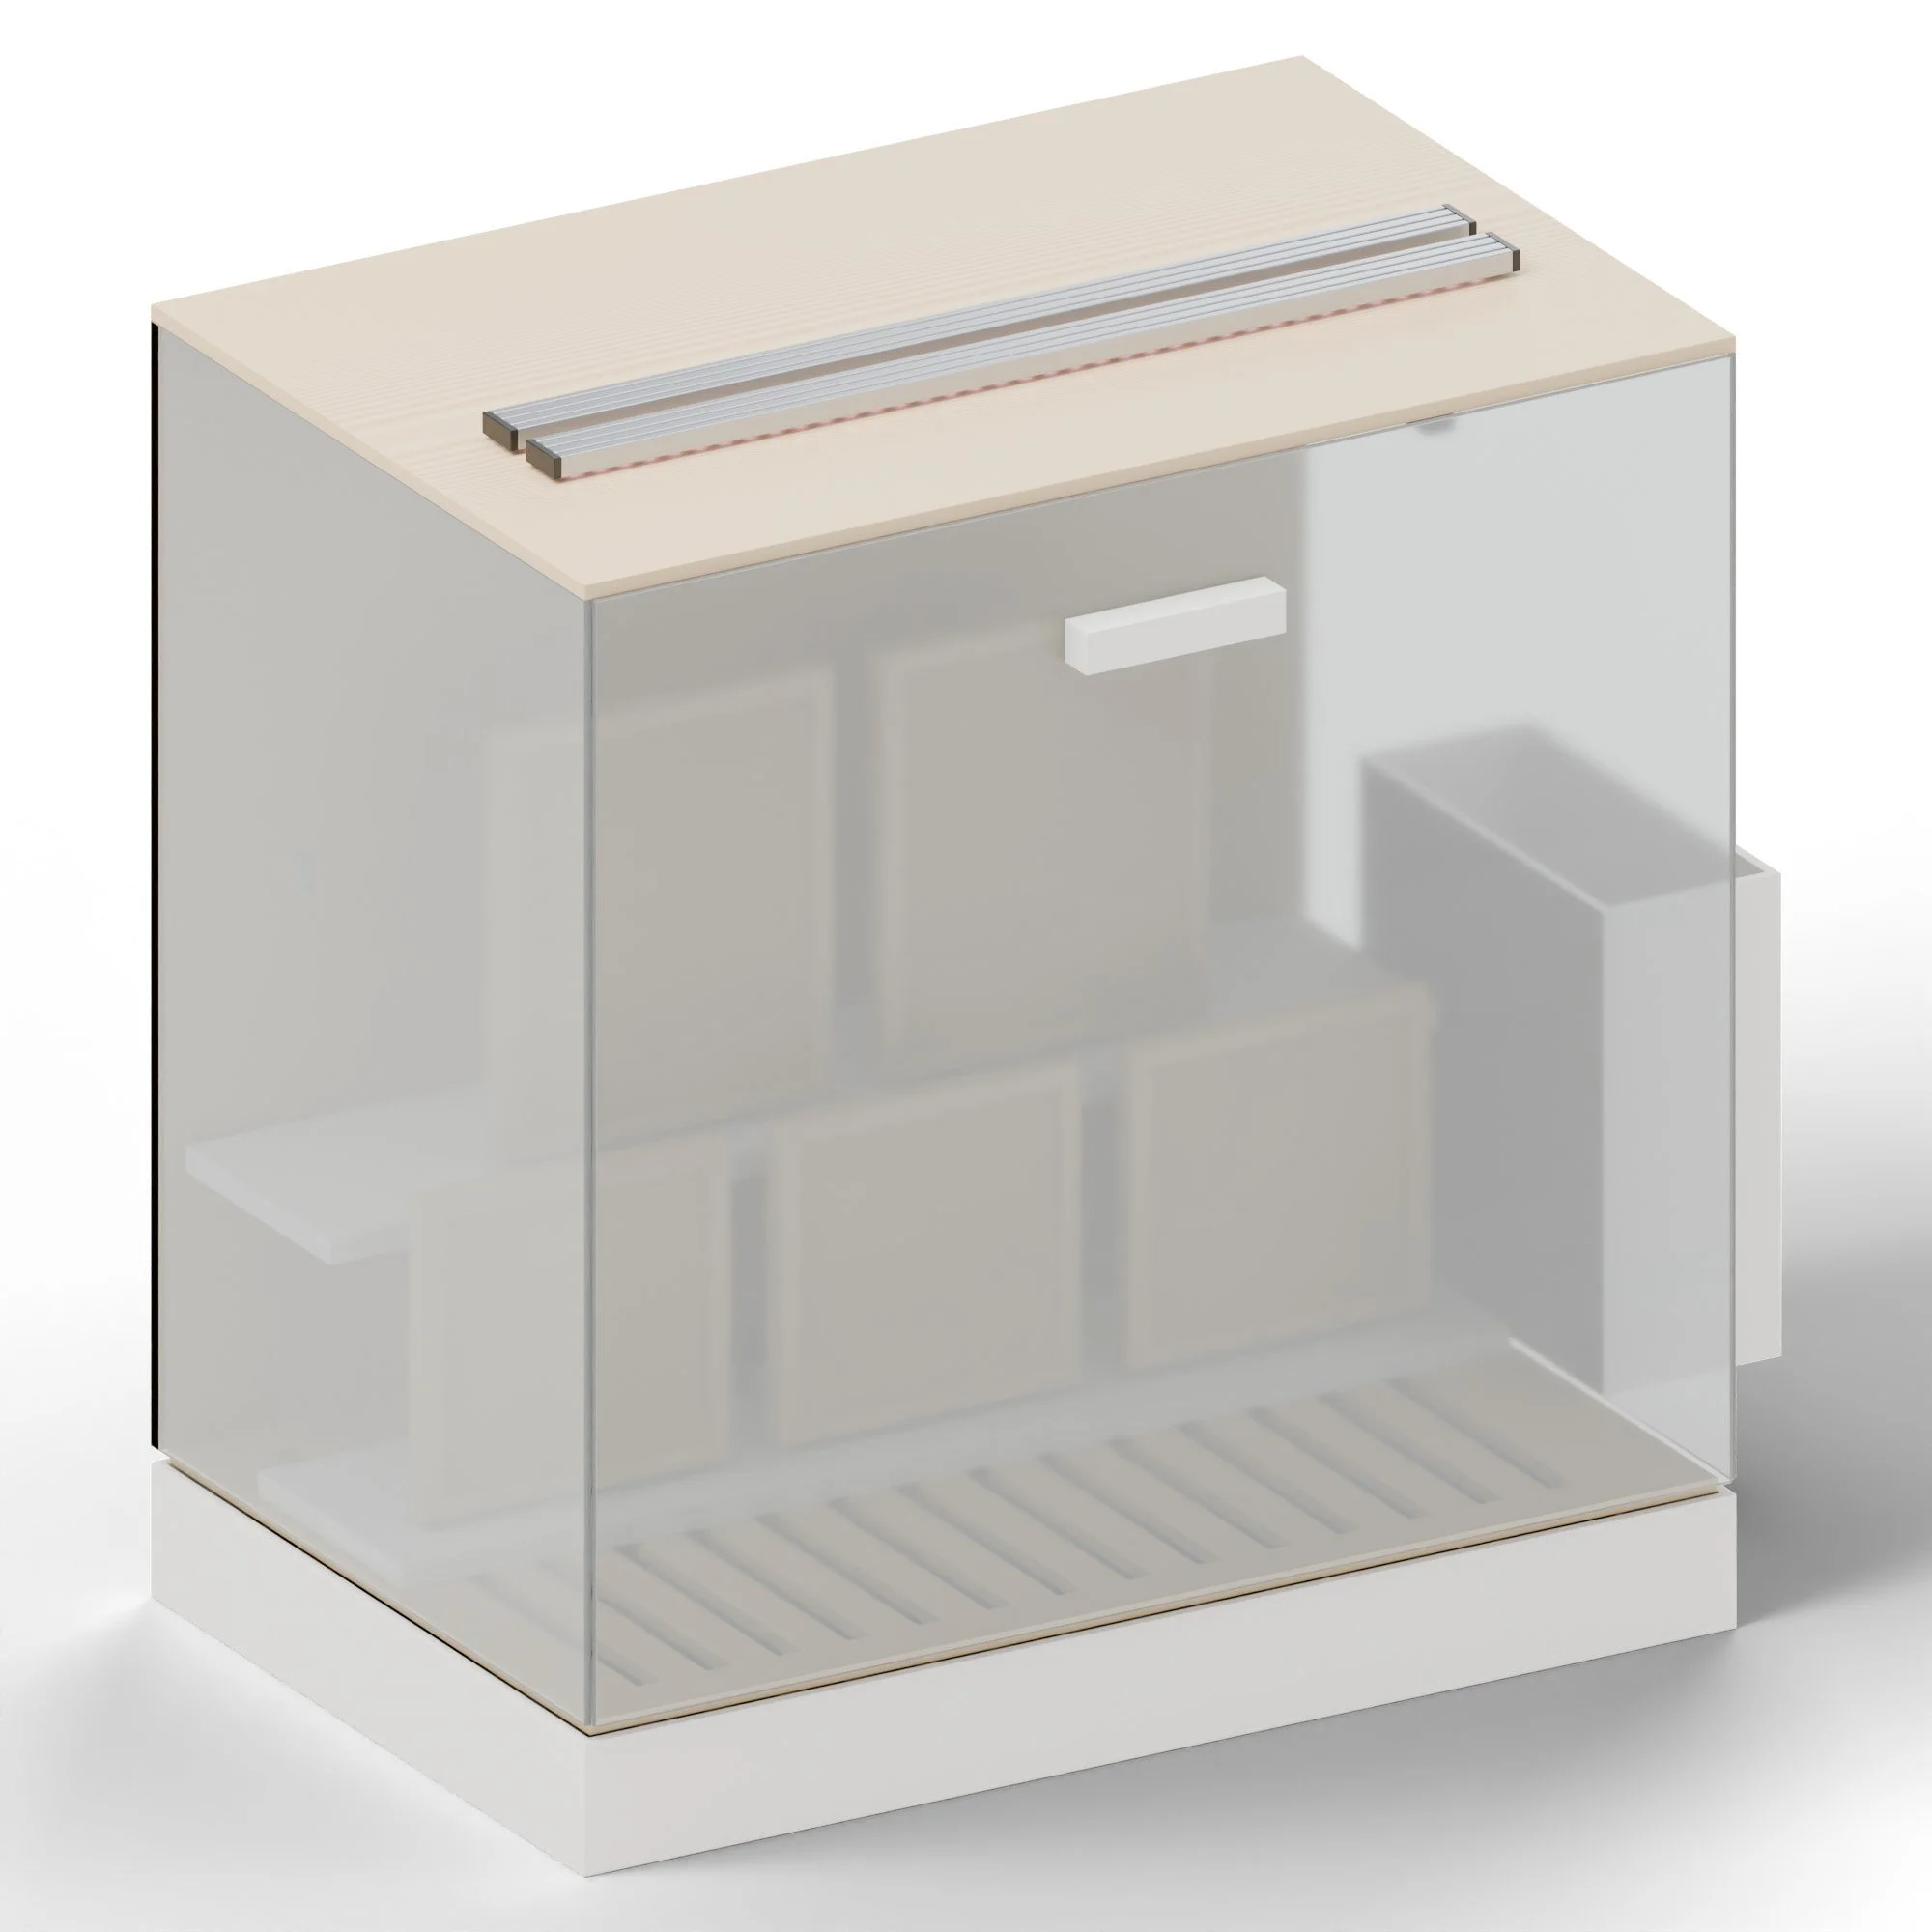
- Press coco coir, cork or felt into a 4 3/4 in tile frame and seed it with blended moss or lichen fragments.
- The ESP32 holds humidity with the ultrasonic mister, runs the fan 30 s every 10 minutes and the lights 12 hours a day.
- Tiles are ready in 6 to 12 weeks. Fairy Ring logs the humidity and photos, so you can see which recipe grew best.
Recipes
Materials / settings / what to do when it goes wrong
Use it for: Living moss and lichen tiles for inlays and wall panels (preserved option for dry rooms).
Materials
- Sheet moss (Hypnum), cushion moss (Leucobryum), or fern moss, collected responsibly or bought live
- Substrate: coco coir pressed 0.39 in, cork sheet or wool felt
- Rainwater or distilled water (no chlorine)
- For preserved tiles: glycerin and water 1:2
Settings
| Setting | Value |
|---|---|
| Humidity | 85 to 95% RH |
| Temperature | 15 to 75 °F |
| Light | 12 h on, low (about 100 to 200 PPFD); keep the bars 5 7/8 in up |
| Fan | 30 s every 10 min |
| Mister | On below 85%, off at 95% |
| Grow time | 6 to 12 weeks to cover a tile |
| Preserving | Soak 2 to 3 days in 1:2 glycerin/water, dry 1 week |
Steps
- Soak the substrate, press it into the tile frame.
- Tear moss into 0.2 to 0.39 in pieces and press it in firmly, gaps no wider than a piece.
- Mist and set the tile on the shelf.
- Check weekly: trim yellow bits, turn tiles every 2 weeks.
- When covered, either keep it living (needs humidity where it's installed) or preserve it before inlaying.
Troubleshooting
| Problem | Fix |
|---|---|
| White fuzz (mould) | More airflow; dab with 3% hydrogen peroxide diluted 1:10. |
| Moss browning | Too much light or too dry; lower the bars or raise RH. |
| Algae on the acrylic | Wipe weekly; reduce light hours. |
Safety
- Mains for the mister supply stays outside the wet box.
- Wash hands after handling wild moss.
Numbers are starting points. Run one test piece on every new batch of material.
What to buy
11 parts / $214.00 before tax / estimates, check the links
 01Ultrasonic mist maker 24 V with float$15.00HumidityView on Amazon →
 02Full-spectrum LED grow bars, 2-pack$25.00LightView on Amazon →
 03SHT31 humidity sensor module$8.00Reads RHView on Amazon →
 04ESP32 DevKit (30-pin)$8.00Controller with Wi-Fi so Fairy Ring can log and call itView on Amazon →
 055 V relay module, 4-channel$8.00Switches the loadsView on Amazon →
 0612 V 4010 fan$7.00Air movementView on Amazon →
 07Clear acrylic 0.12 in, 12 x 24 in, 4-pack$35.00Sides and door (laser-cut)View on Amazon →
 0824 V 2 A + 12 V 2 A supplies$18.00Mister and fanView on Amazon →
 09Coco coir brick + live moss mix$25.00Substrate and seedView on Amazon →100.24 in birch ply, 12 x 24 in, 6-pack$45.00Laser-cut partsView on Amazon →11PETG filament 1 kg$20.00Printed partsView on Amazon →
What to make
Printed on the printers you have / cut on the xTool or sent out
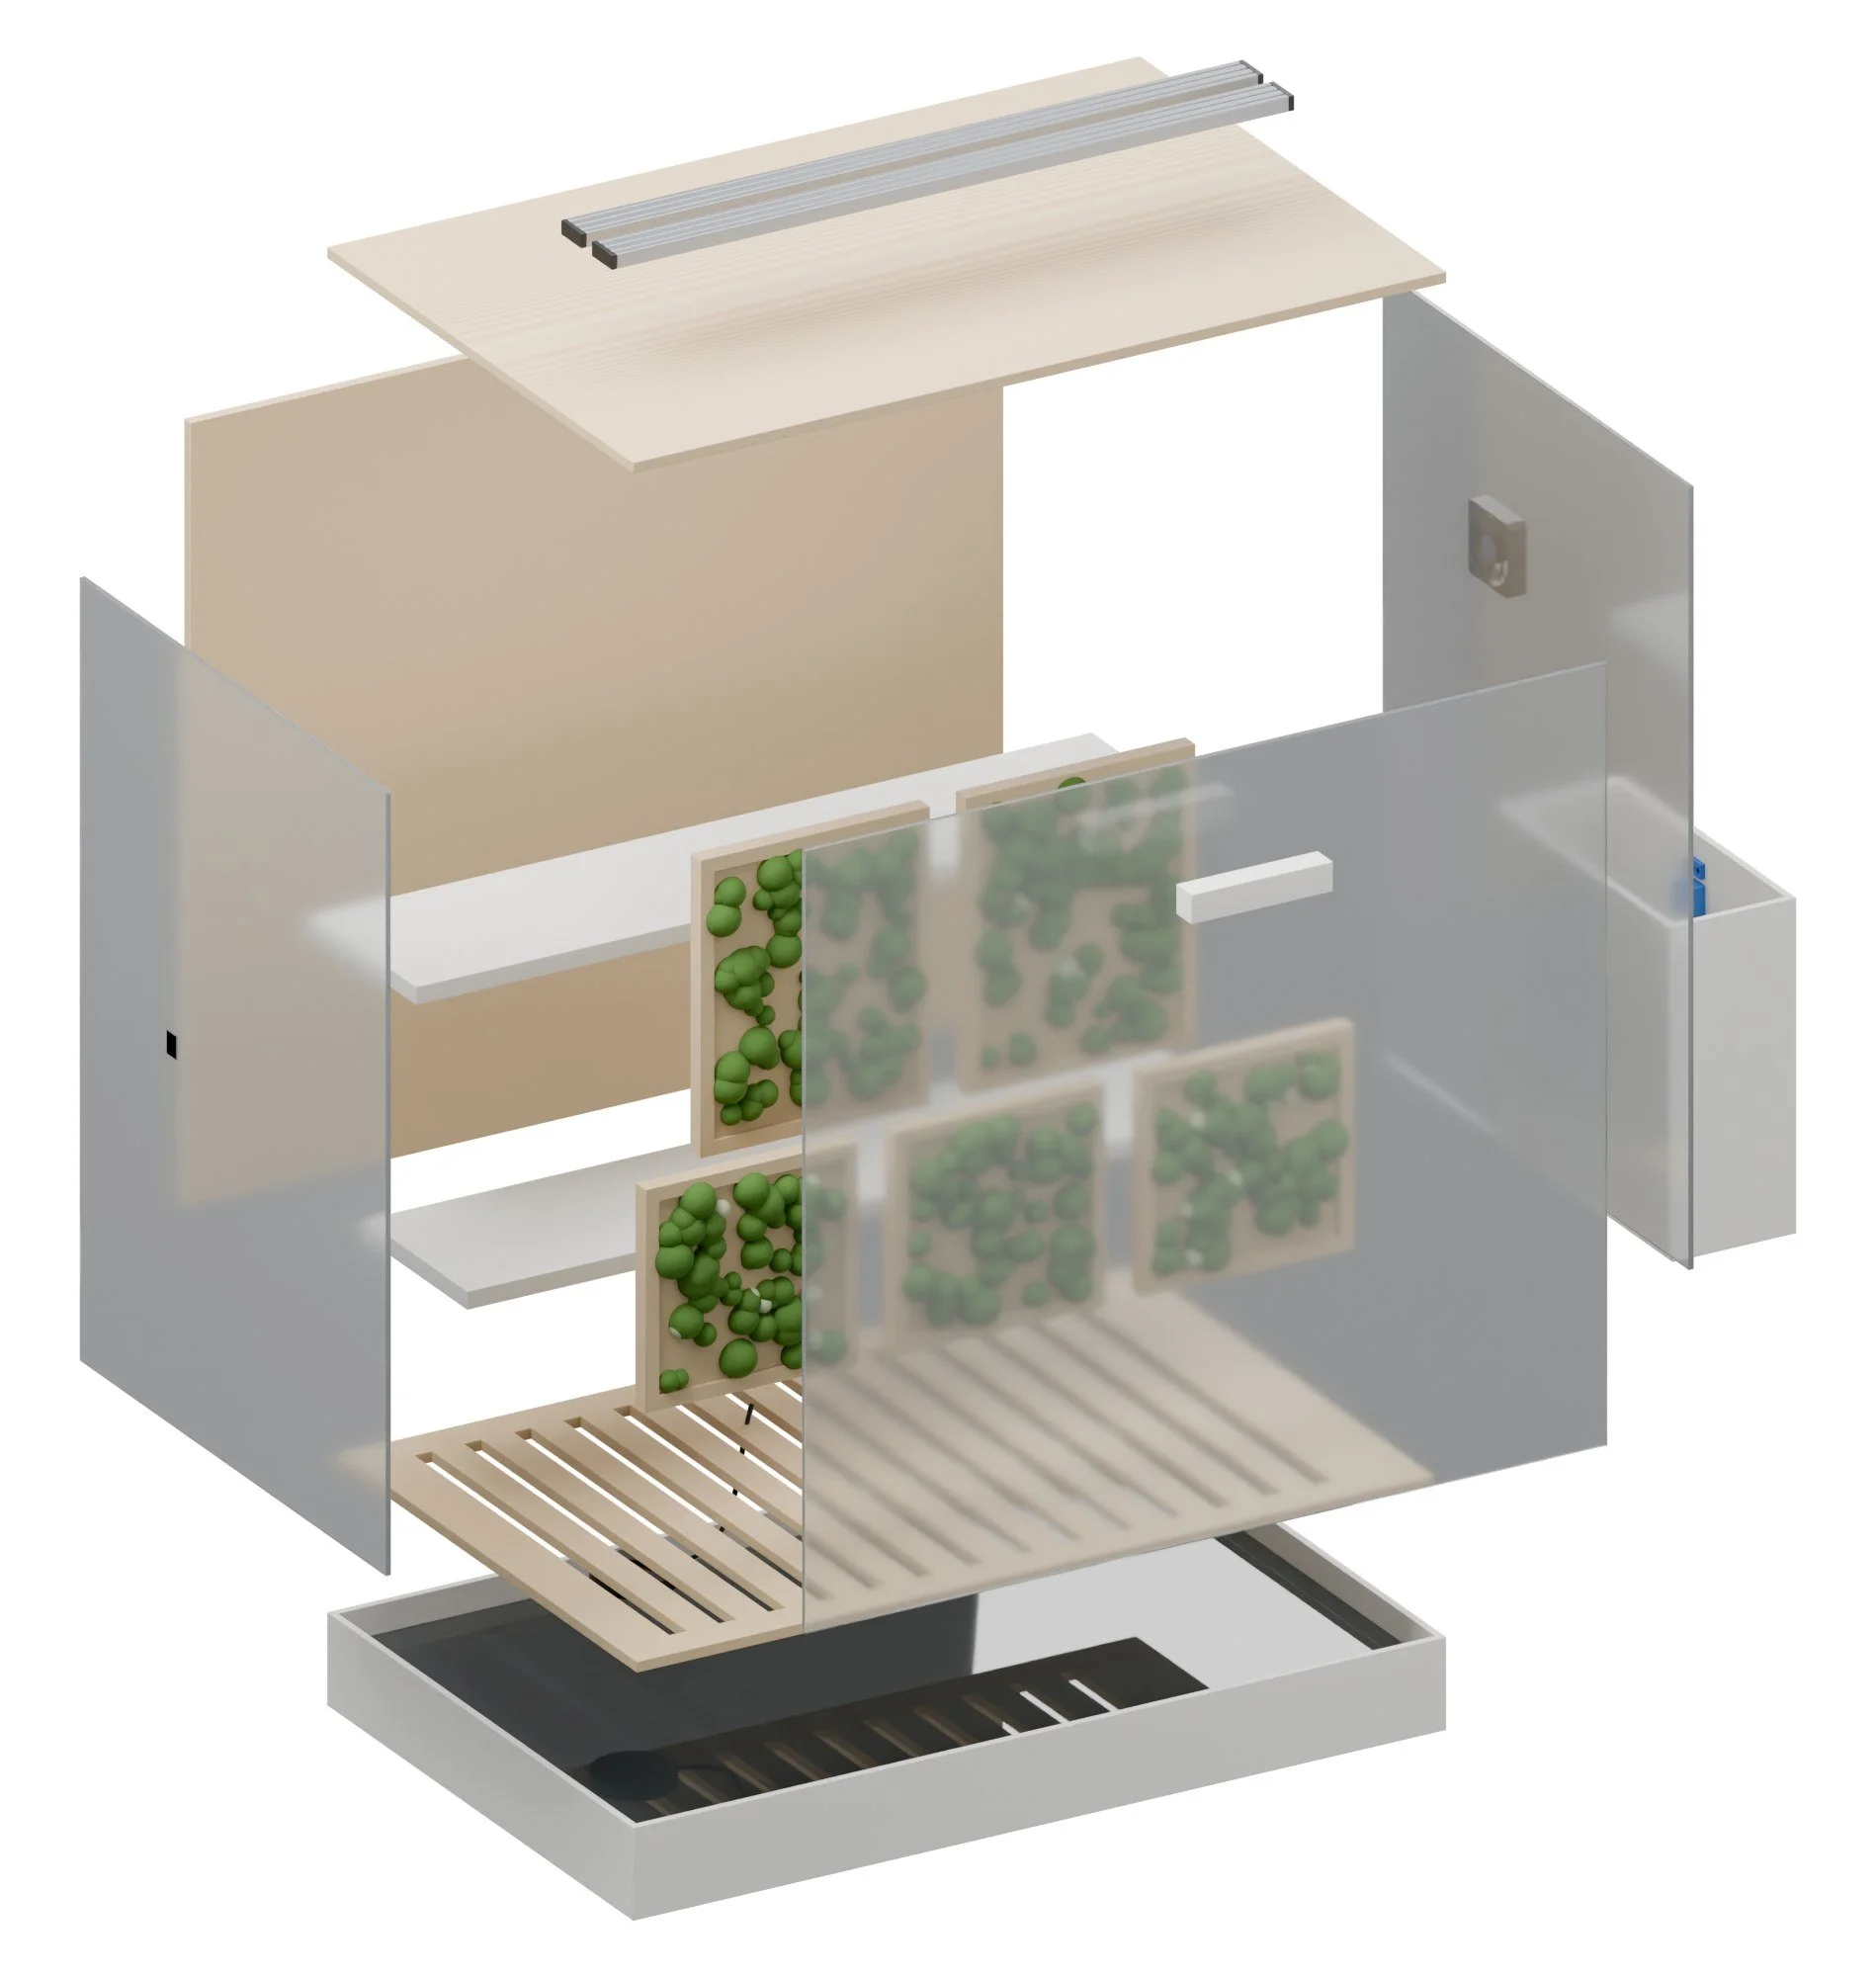
| Water trayPETG, prints in 2 halves with a dovetail; seal the seam with silicone. | |
| Grate0.24 in ply sealed with spar urethane, or 0.12 in acrylic. | cut |
| Side0.12 in clear acrylic, cut 2. | cut |
| Back0.24 in ply, painted inside with white mould-resistant paint. | cut |
| TopSlot for the light bars to shine through a clear strip. | cut |
| Door pull | |
| Controller podPETG. Keep it outside the wet box; cable glands through the side. | |
| ShelfPETG, 2 off; slots hold tiles at 10 degrees. | |
| ShelfPETG, 2 off; slots hold tiles at 10 degrees. | |
| Tile frame0.24 in ply frame, 4 3/4 in tile; make the routed pocket in the door 4.744 in. | cut |
Build guide
Tools / parts / every step, start to finish
Open the full build guide
Time: 4 hours plus printing Skill: Easy
Tools
- Silicone sealant
- Hex keys
- Soldering iron
Parts
Bought (full list with links in the README and buy_list.csv):
- 1 x Ultrasonic mist maker 24 V with float
- 1 x Full-spectrum LED grow bars, 2-pack
- 1 x SHT31 humidity sensor module
- 1 x ESP32 DevKit (30-pin)
- 1 x 5 V relay module, 4-channel
- 1 x 12 V 4010 fan
- 1 x Clear acrylic 0.12 in, 12 x 24 in, 4-pack
- 1 x 24 V 2 A + 12 V 2 A supplies
- 1 x Coco coir brick + live moss mix
- 0.039 x 0.24 in birch ply, 12 x 24 in, 6-pack
- 1 x PETG filament 1 kg
- 1 x M3/M4/M5 screws, nuts and inserts (already owned)
Made:
stl/bw_water_tray.stl(printed)laser/bw_grate_6mm.dxf(laser)laser/bw_side_3mm.dxf(laser)laser/bw_back_6mm.dxf(laser)laser/bw_top_6mm.dxf(laser)stl/bw_door_pull.stl(printed)stl/bw_controller_pod.stl(printed)stl/bw_shelf.stl(printed) x 2laser/bw_tile_frame_6mm.dxf(laser)
Steps
1. Print and cut
Print every STL in stl/ (PETG unless the part note says otherwise, 0.008 in layers, 4 walls, 30 to 40% gyroid). Cut every file in laser/ on Drag Queen. Cut the acrylic with the paper on, slower and in air assist. Check every MEASURE note in the README against your actual parts before printing the parts they touch.
2. Tray
Join the two tray halves; seal the seam with silicone; fill with water to check for leaks.
3. Cabinet
Glue the acrylic sides to the ply back and top with silicone; hang the door on printed hinges.
4. Light, mist, fan
Screw the LED bars over the top slot, drop the mister in the tray, mount the fan through the side.
5. Pod
Mount the pod outside with the ESP32, relay and supplies; pass cables through glands.
Wiring
- ESP32 to the 4-channel relay: mister, fan, lights, spare.
- SHT31 on I2C (SDA 21, SCL 22), on a 3.3 ft cable inside the box.
Firmware
bog_witch.ino(or ESPHome YAML): humidity hysteresis 85 to 95%, fan timer, light schedule from NTP, MQTT logging to Fairy Ring.
First test
- Run empty for 24 h: humidity should hold 85 to 95% and the tray should not leak.
Hot Flash
PID-controlled oven for wax burnout, drying, curing and bisque-drying.
Fairy Ring pipeline / Form / gets bake, burnout and drying schedules
Hot Flash is a countertop convection oven taught to hold a temperature to within a few degrees. A PID controller and a solid-state relay take over from the bimetal thermostat, and a printed side pod keeps the electronics cool. It burns out wax patterns from Queen Bee, dries clay from Mud Diva and Slip Kitten, kills mycelium in Mother's pieces, dries filament from Lazarella and cures epoxy from Glow Diva.
How it works
Cold / Baking
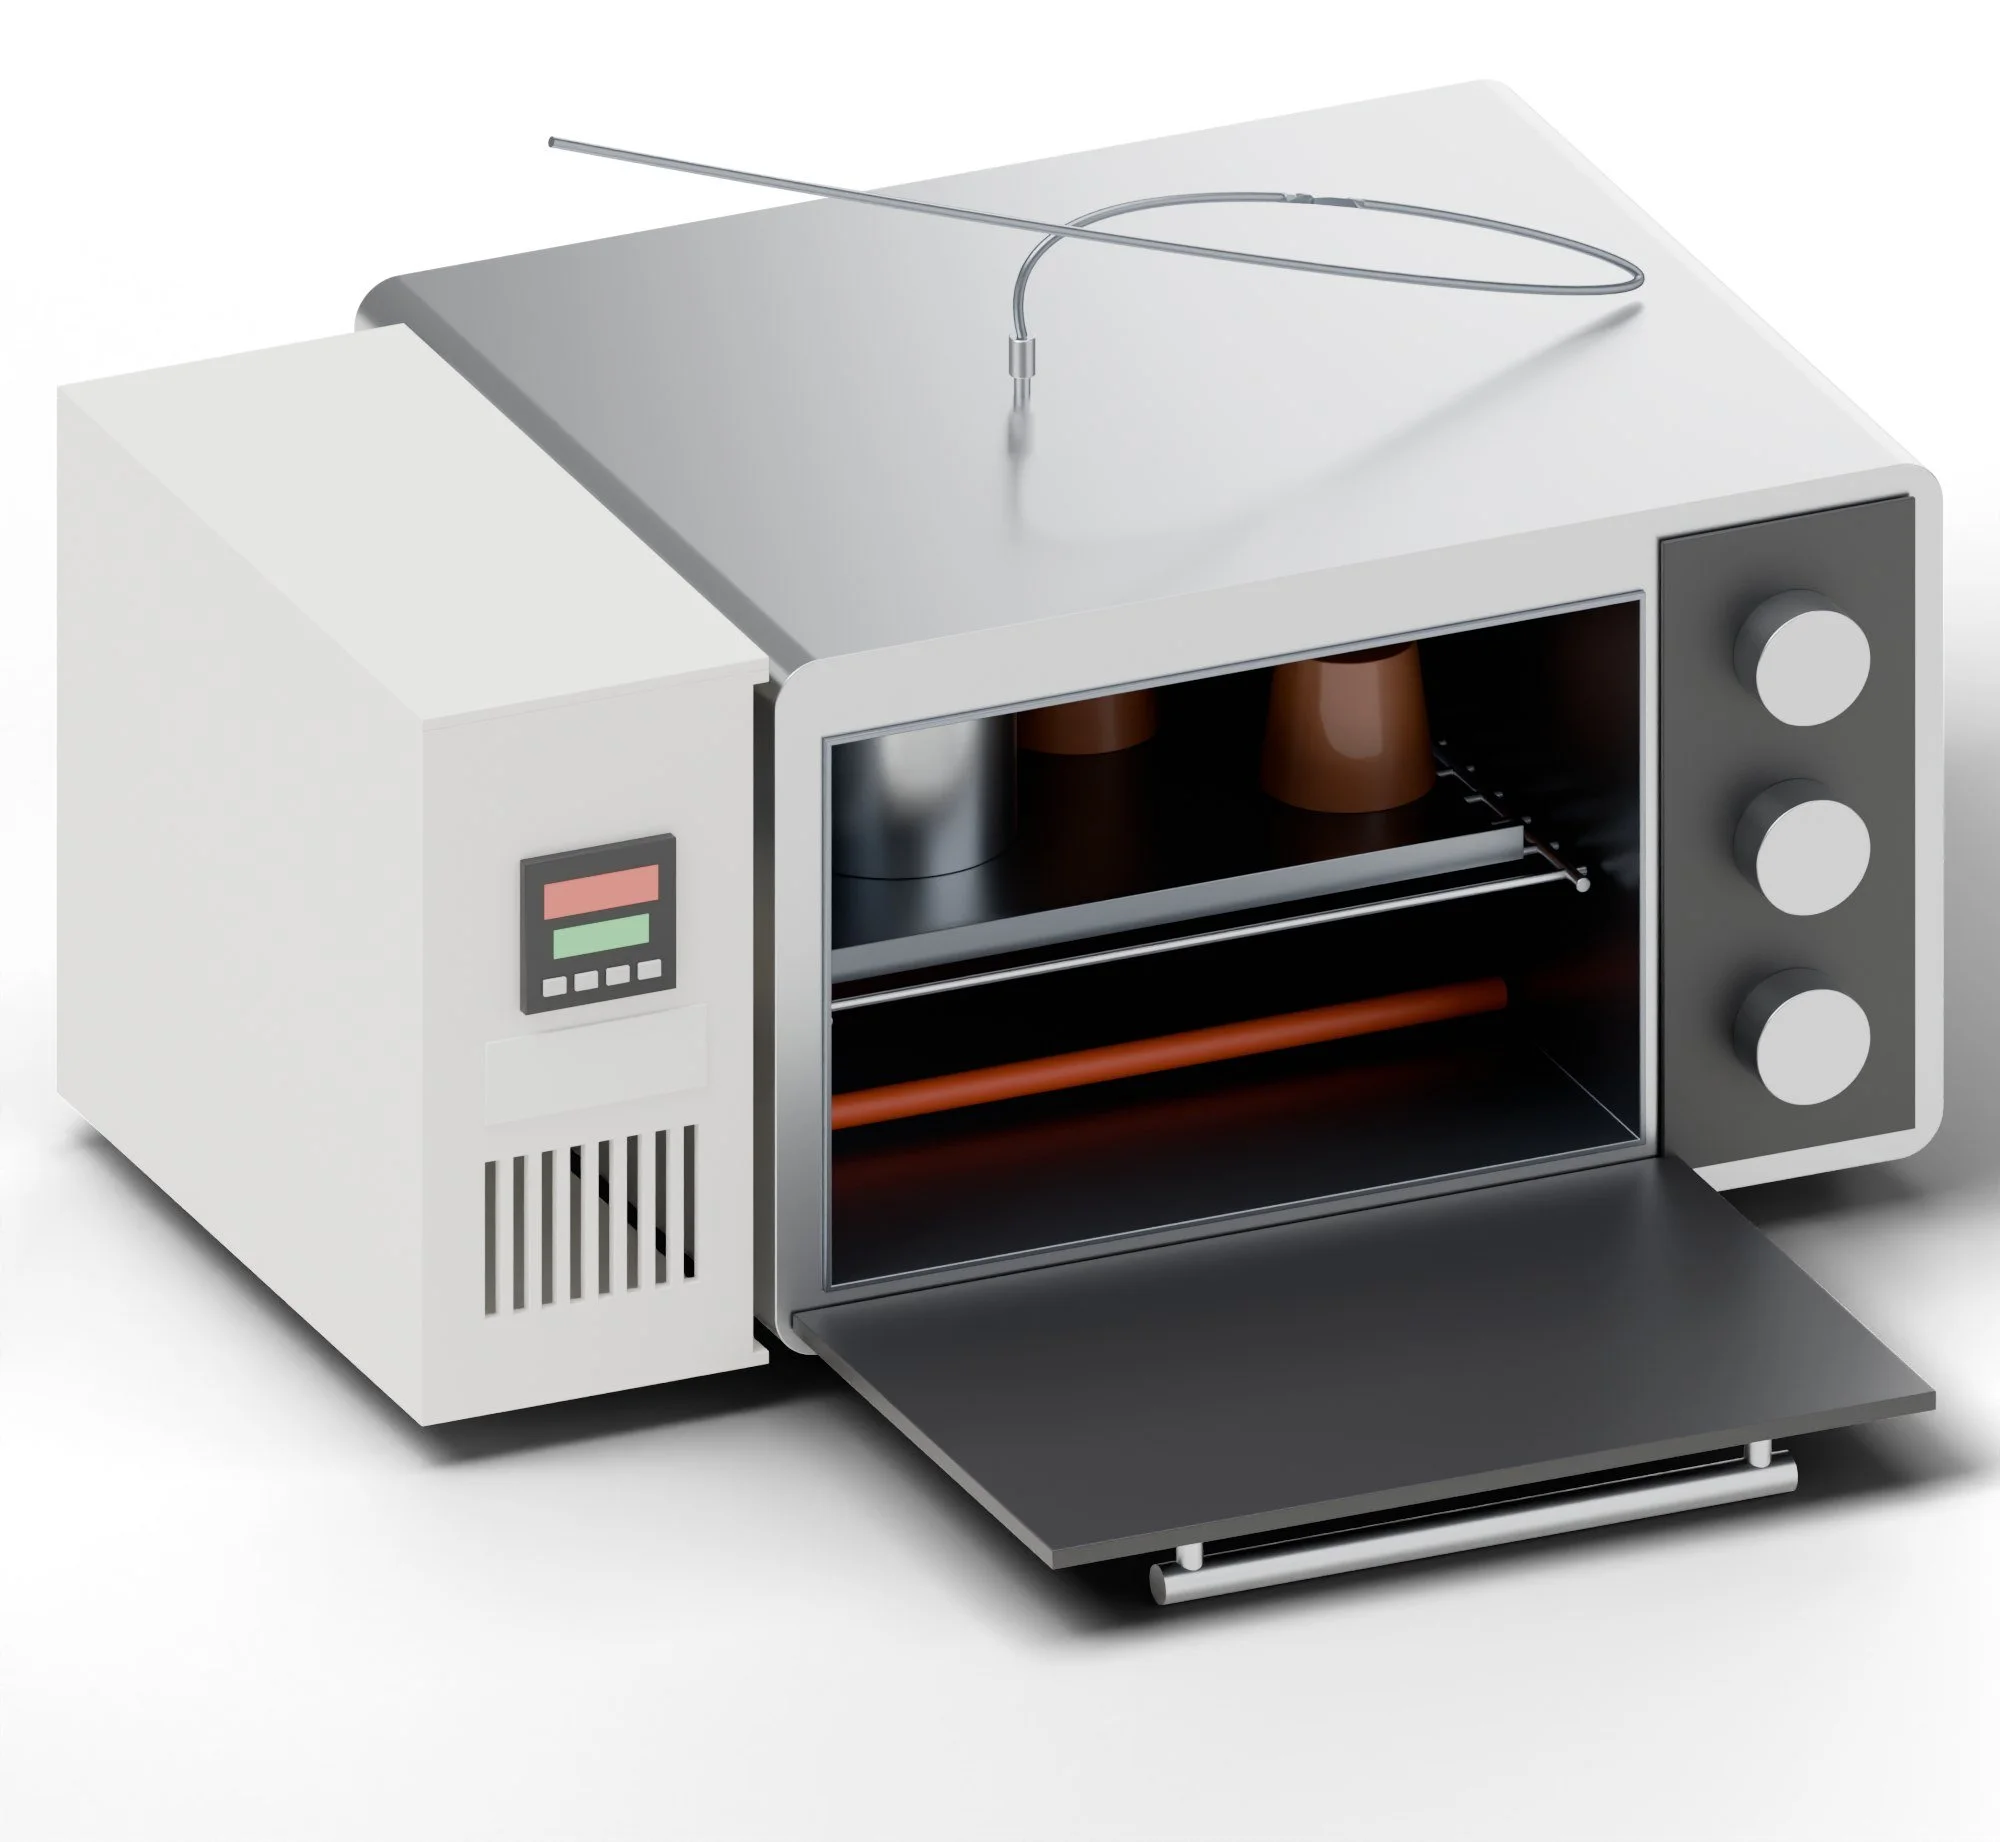
- A K-type thermocouple sits at the rack, where the work is, not at the oven wall.
- The REX-C100 PID switches the elements through a 25 A SSR; the oven's own dial is set to max and becomes a safety cut-out.
- Each recipe is a ramp and hold (for example 36 °F per minute to 302 °F, hold 1 hour). A Nano with a second probe logs the curve to Fairy Ring.
Recipes
Materials / settings / what to do when it goes wrong
Use it for: Dewaxing plaster molds, drying filament and clay, killing mycelium, post-curing epoxy.
Materials
- Metal or ceramic trays only inside the oven
- Silica gel in a metal tin when drying filament
Settings
| Setting | Value |
|---|---|
| Dewax (wax out of plaster molds) | Ramp 2 C/min to 248 °F, hold 1 h, wax drains into a tray; full metal-casting burnout needs a kiln (to 1346 °F), not this oven |
| Filament dry | PLA 45 to 122 °F 4 to 6 h; PETG 149 °F 4 to 6 h; TPU 122 °F 4 h; nylon 167 °F 8 to 12 h |
| Mycelium kill (Mother's pieces) | 203 °F for 2 h, or until the core reads 194 °F for 30 min |
| Clay pre-dry | Leather-hard to bone-dry at 140 °F, rising 50 °F per hour to 203 °F, hold 2 h |
| Epoxy post-cure | Ramp 10 C/h to 122 °F, hold 2 to 4 h |
| PID | Autotune once at 212 °F with the work inside |
Steps
- Pick the profile on the program card and set it on the PID (or send it from Fairy Ring).
- Put the work on the tray with the second probe touching it.
- Start; the PID ramps and holds, and the log shows both probes.
- Let it cool in the oven with the door shut to avoid cracking clay or warping prints.
- Note the result in the log so the profile improves.
Troubleshooting
| Problem | Fix |
|---|---|
| Overshoot | Run autotune again with a load inside; lower the ramp rate. |
| Clay cracks | Too fast: start lower, hold longer at 60 C. |
| Filament still brittle | Longer hold; check the probe sits at the spool. |
| SSR hot | Check the heatsink paste and the pod fan. |
Safety
- Dedicated oven: never food again once wax, clay or resin has been in it.
- Never leave it running unattended overnight without the backup thermostat set at max and a smoke alarm nearby.
- Mains wiring: have it checked by someone qualified if you're unsure. Keep the earth connected to the case.
Numbers are starting points. Run one test piece on every new batch of material.
What to buy
10 parts / $159.00 before tax / estimates, check the links
01BLACK+DECKER TO1745SSG 4-slice toaster oven (dedicated, non-food)$50.00Same model as Skin Tight's heater; buy a second oneView on Amazon → 02REX-C100 PID kit with 25 A SSR and K thermocouple$25.00Same kit as LazarellaView on Amazon →
 03SSR heatsink$8.00Keeps the SSR cool at 13 AView on Amazon →
 04IEC inlet with switch and fuse$9.00Mains inView on Amazon →
 05MAX6675 module + K thermocouple$8.00Second probe for loggingView on Amazon →06Arduino Nano (USB-C clone)$6.00ControllerView on Amazon →0712 V 4010 fan$7.00Cools the podView on Amazon →
 08Mica sheet 0.02 in$9.00Heat shield behind the podView on Amazon →
 09High-temp silicone wire 14 AWG, 10 ft$12.00Element wiringView on Amazon →
 10ASA filament 1 kg$25.00Pod (heat resistant)View on Amazon →
What to make
Printed on the printers you have / cut on the xTool or sent out
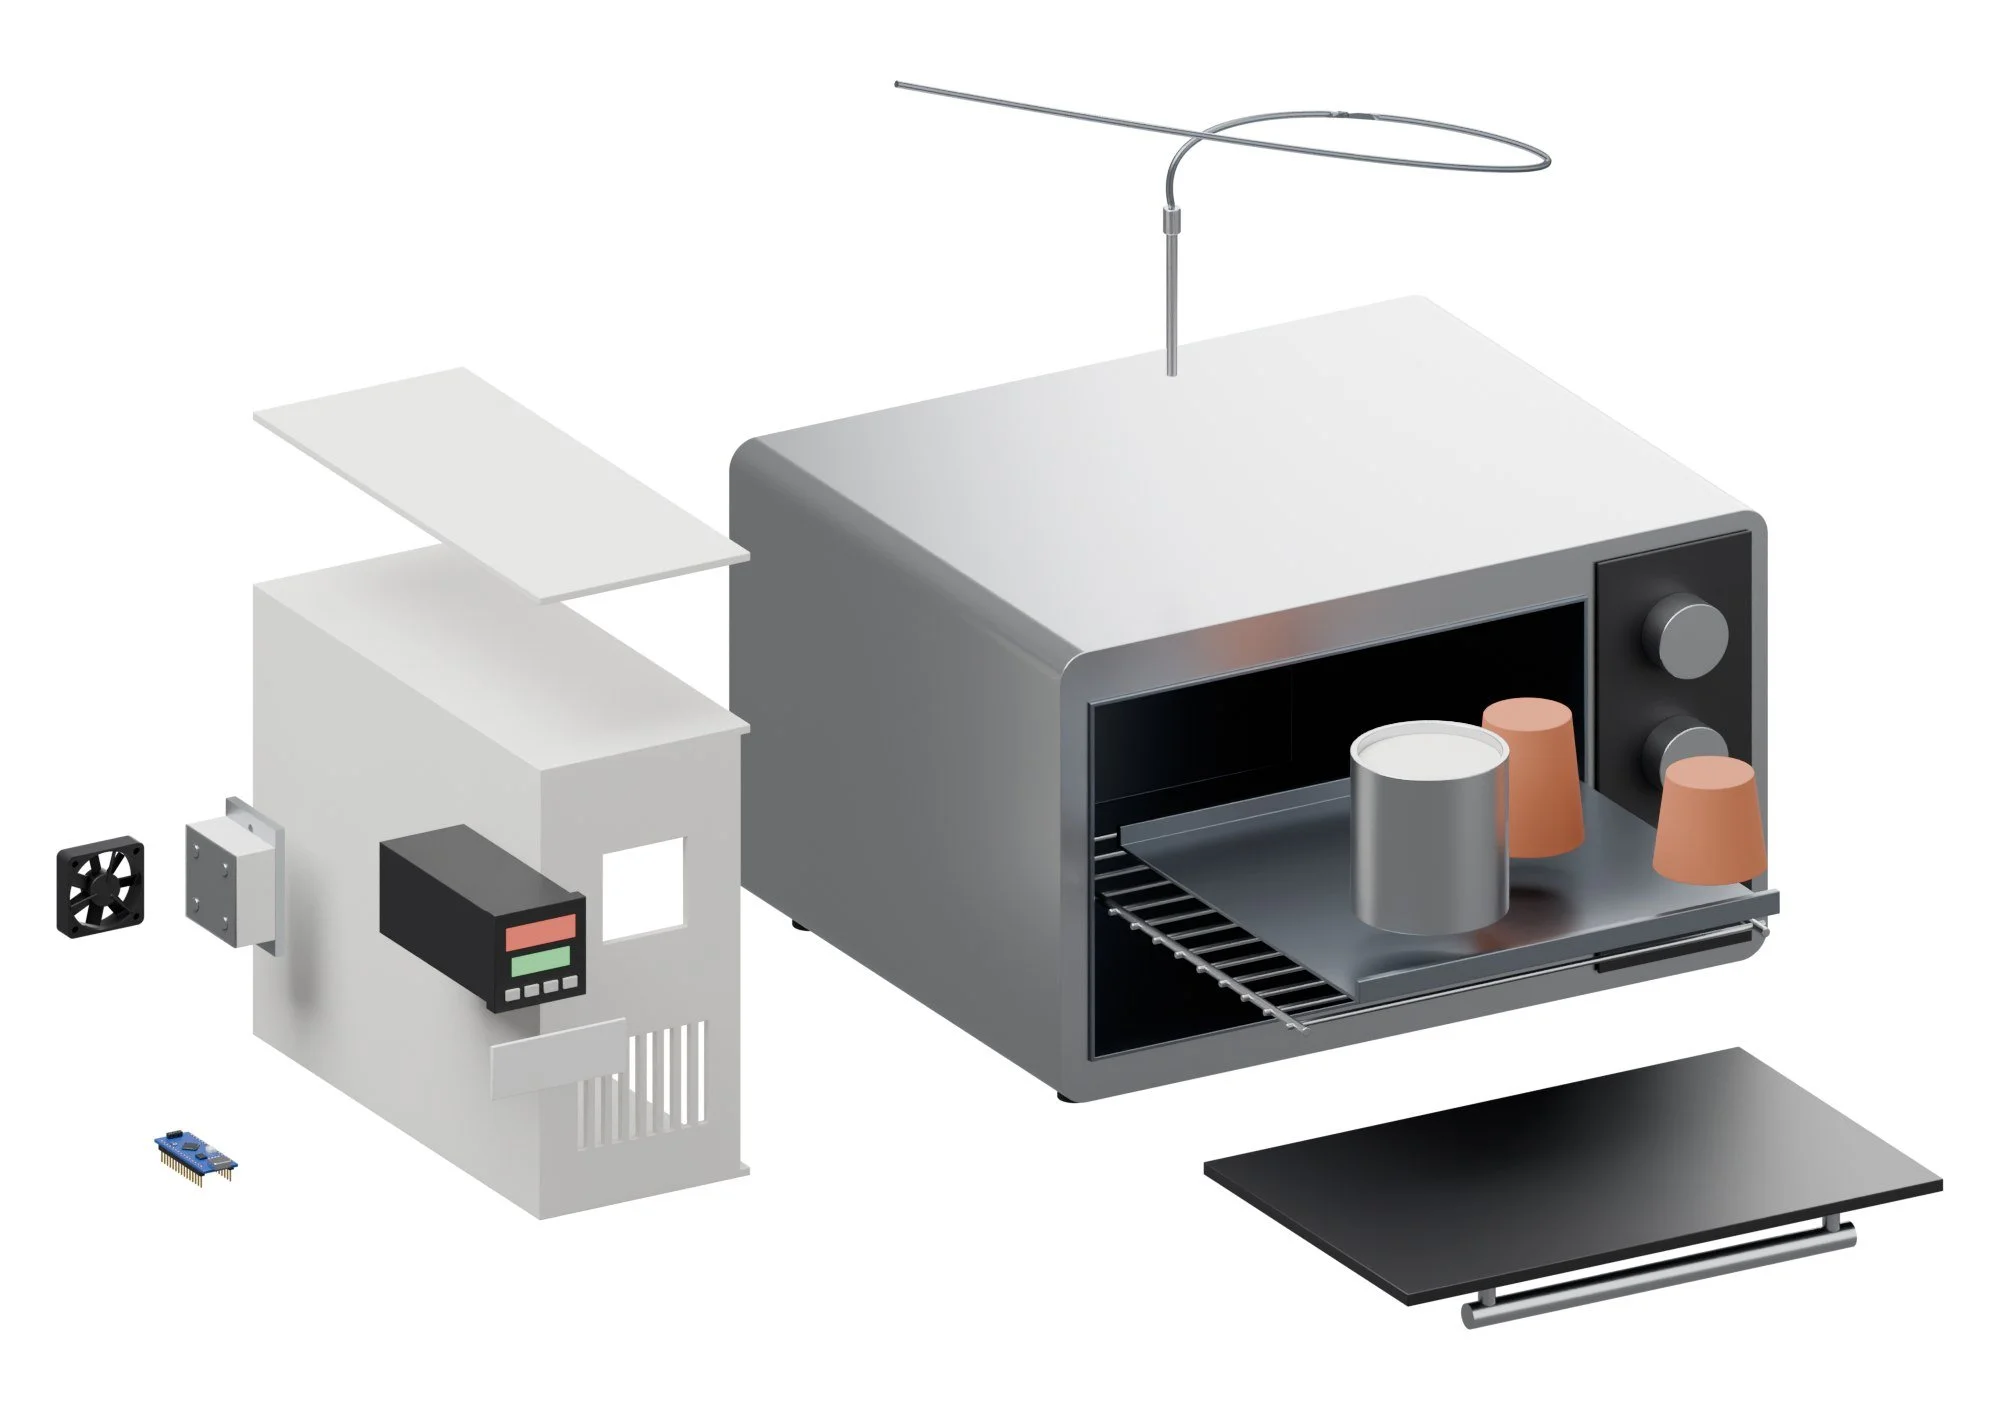
| Control podASA or PETG-CF, 0.12 in walls, mounted 0.079 in off the oven skin on printed standoffs with a sheet of mica between. | |
| Pod lid | |
| Program cardPrint in white, text engraved by Drag Queen. |
Build guide
Tools / parts / every step, start to finish
Open the full build guide
Time: 3 to 4 hours plus printing Skill: Medium: mains wiring
Tools
- Screwdrivers
- Drill with step bit
- Crimp tool for ring terminals
- Multimeter
Parts
Bought (full list with links in the README and buy_list.csv):
- 1 x BLACK+DECKER TO1745SSG 4-slice toaster oven (dedicated, non-food)
- 1 x REX-C100 PID kit with 25 A SSR and K thermocouple
- 1 x SSR heatsink
- 1 x IEC inlet with switch and fuse
- 1 x MAX6675 module + K thermocouple
- 1 x Arduino Nano (USB-C clone)
- 1 x 12 V 4010 fan
- 1 x Mica sheet 0.02 in
- 1 x High-temp silicone wire 14 AWG, 10 ft
- 1 x ASA filament 1 kg
- 1 x M3/M4/M5 screws, nuts and inserts (already owned)
Made:
stl/hf_control_pod.stl(printed)stl/hf_pod_lid.stl(printed)stl/hf_program_card.stl(printed)
Steps
1. Print
Print every STL in stl/ (PETG unless the part note says otherwise, 0.008 in layers, 4 walls, 30 to 40% gyroid). Cut every file in laser/ on Drag Queen. Check every MEASURE note in the README against your actual parts before printing the parts they touch.
2. Open the oven
Unplug it. Remove the side panel and photograph the wiring around the thermostat.
3. Thermocouple
Drill a 0.24 in hole in the top, centred over the rack; fit the probe with a nut so its tip sits 0.79 in above the rack.
4. SSR in
Put the SSR's load side in series with the elements (break the element feed, not neutral); leave the original thermostat in series at max as a backup cut-out.
5. Pod
Mount the mica sheet, standoffs and printed pod; fit the PID, SSR on its heatsink, fan and IEC inlet.
6. Close up
Strain-relieve every wire that passes through the oven skin with a grommet.
Wiring
- IEC inlet (fused 10 A) to the oven's mains feed.
- PID power from the mains side; PID SSR output (+/-) to the SSR's DC input.
- K thermocouple to the PID's TC terminals, red to minus on most REX-C100s.
- Fan 12 V from a small supply in the pod.
Firmware
- PID: set type K, units C, output SSR (code 'V' models), then run AT at 100 C.
First test
- Empty oven: set 212 °F, it should settle within +/- 37 °F in 20 minutes.
- Check the case is cool at the pod and the SSR stays under 60 C.
Flex Appeal
Vacuum bag press for veneer and bent laminations.
Fairy Ring pipeline / Finish / gets veneer and bent-lamination presses
Flex Appeal is a vacuum bag press with a brain. A printed controller box holds a 12 V diaphragm pump, a vacuum sensor and an Arduino that keeps the bag between -60 and -80 kPa and logs every press. Forms are laser-cut ply ribs, so any curve Fairy Ring draws becomes a press form. It finishes the chain Drag Queen starts: cut veneer, lay it up with Honey Glaze, press it here.
How it works
Loose / Pressed
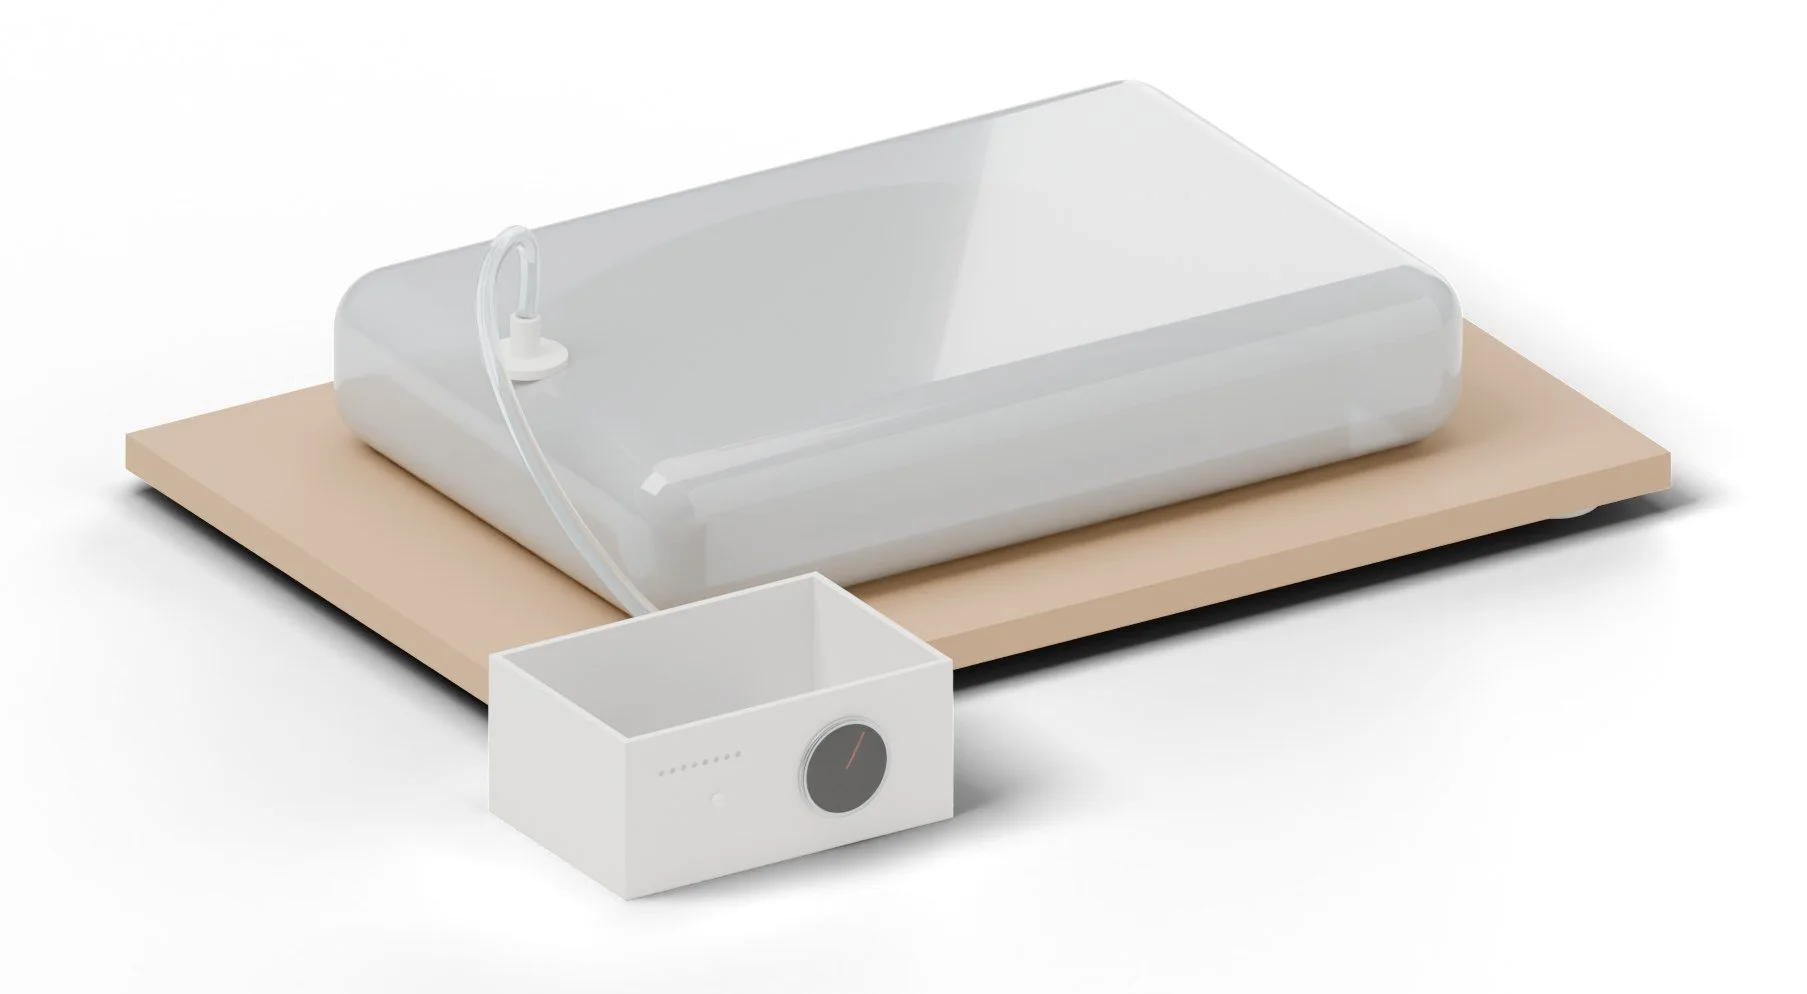
- Lay the veneer stack on the form, add a top caul and breather mesh, and slide it into the vinyl bag on the platen.
- Seal the bag. The pump pulls the air out until the sensor reads -75 kPa, which is about 11 psi on every square inch.
- The Arduino restarts the pump when the bag leaks back past -60 kPa, holds for the glue's press time and logs the curve.
Recipes
Materials / settings / what to do when it goes wrong
Use it for: Veneering flat and curved panels, and bent laminations over laser-cut forms.
Materials
- Veneer glue: Unibond 800 (urea resin, rigid, no creep) or Better Bond Cold Press for flat work
- Bent laminations: Unibond 800 or epoxy (PVA creeps and springs back)
- Plies 0.059 to 0.118 in for laminations; veneer 0.024 in
- Breather mesh and a 0.12 in hardboard caul
Settings
| Setting | Value |
|---|---|
| Bag pressure | -60 to -80 kPa (9 to 12 psi on the work); target -75 |
| Unibond 800 press time | 6 to 8 h at 70 °F (longer when cold) |
| Cold Press veneer glue | 1 to 2 h |
| Glue spread | About 0.008 in wet film; a 0.12 in notched roller or Honey Glaze lines 0.47 in apart |
| Form overbend | Cut forms 5 to 10% tighter than the target curve for PVA; 2% for Unibond or epoxy |
Steps
- Dry-fit the stack on the form; mark the centre lines.
- Spread glue on the substrate (not the veneer) and lay the layers.
- Add the caul, then breather mesh over everything, then slide into the bag.
- Seal the bag and start the controller; watch it reach -75 kPa in under a minute.
- Leave it for the glue's press time. Check the log: one restart every few minutes is fine.
- Unbag, let it rest 24 h before trimming or sanding.
Troubleshooting
| Problem | Fix |
|---|---|
| Pump runs constantly | Bag leak: check the seal and port O-ring; patch pinholes with vinyl tape. |
| Bubbles under veneer | No breather mesh or too little glue; cut and re-glue with a syringe. |
| Lamination springs back | PVA creep; switch to Unibond 800 or overbend the form more. |
| Glue bleeds through | Thin veneer and too much glue; less glue, or a release film under the caul. |
Safety
- Urea resin glues: gloves and a dust mask when mixing the powder.
- Don't exceed -90 kPa on thin cauls; they can crush.
Numbers are starting points. Run one test piece on every new batch of material.
What to buy
13 parts / $247.00 before tax / estimates, check the links
 0112 V diaphragm vacuum pump, -80 kPa class$25.00Pulls the bagView on Amazon →
 02XGZP6847 vacuum sensor module, -100 to 0 kPa$9.00Reads bag pressureView on Amazon →03Arduino Nano (USB-C clone)$6.00ControllerView on Amazon →045 V relay module, 1-channel$3.00Switches the loadView on Amazon →
 052 in vacuum gauge, 1/8 NPT bottom$10.00Visible checkView on Amazon →
 0612 V 3 A power supply$10.00Pump and ArduinoView on Amazon →
 07Vacuum bag kit (20 mil vinyl, 4 x 4 ft) or bulk vinyl + seal$60.00The bagView on Amazon →
 08Breather mesh (fiberglass screen) 3 x 4 ft$10.00Lets air out from under the workView on Amazon →09Clear vinyl tubing 3/8 in ID, 10 ft$12.00Bag to boxView on Amazon →Home Depot10MDF 3/4 in, 2 x 4 ft$25.00PlatenView on Home Depot →
 11Hardboard 1/8 in, 2 x 4 ft$12.00Form skins and caulsView on Amazon →120.24 in birch ply, 12 x 24 in, 6-pack$45.00Laser-cut partsView on Amazon →13PETG filament 1 kg$20.00Printed partsView on Amazon →
What to make
Printed on the printers you have / cut on the xTool or sent out
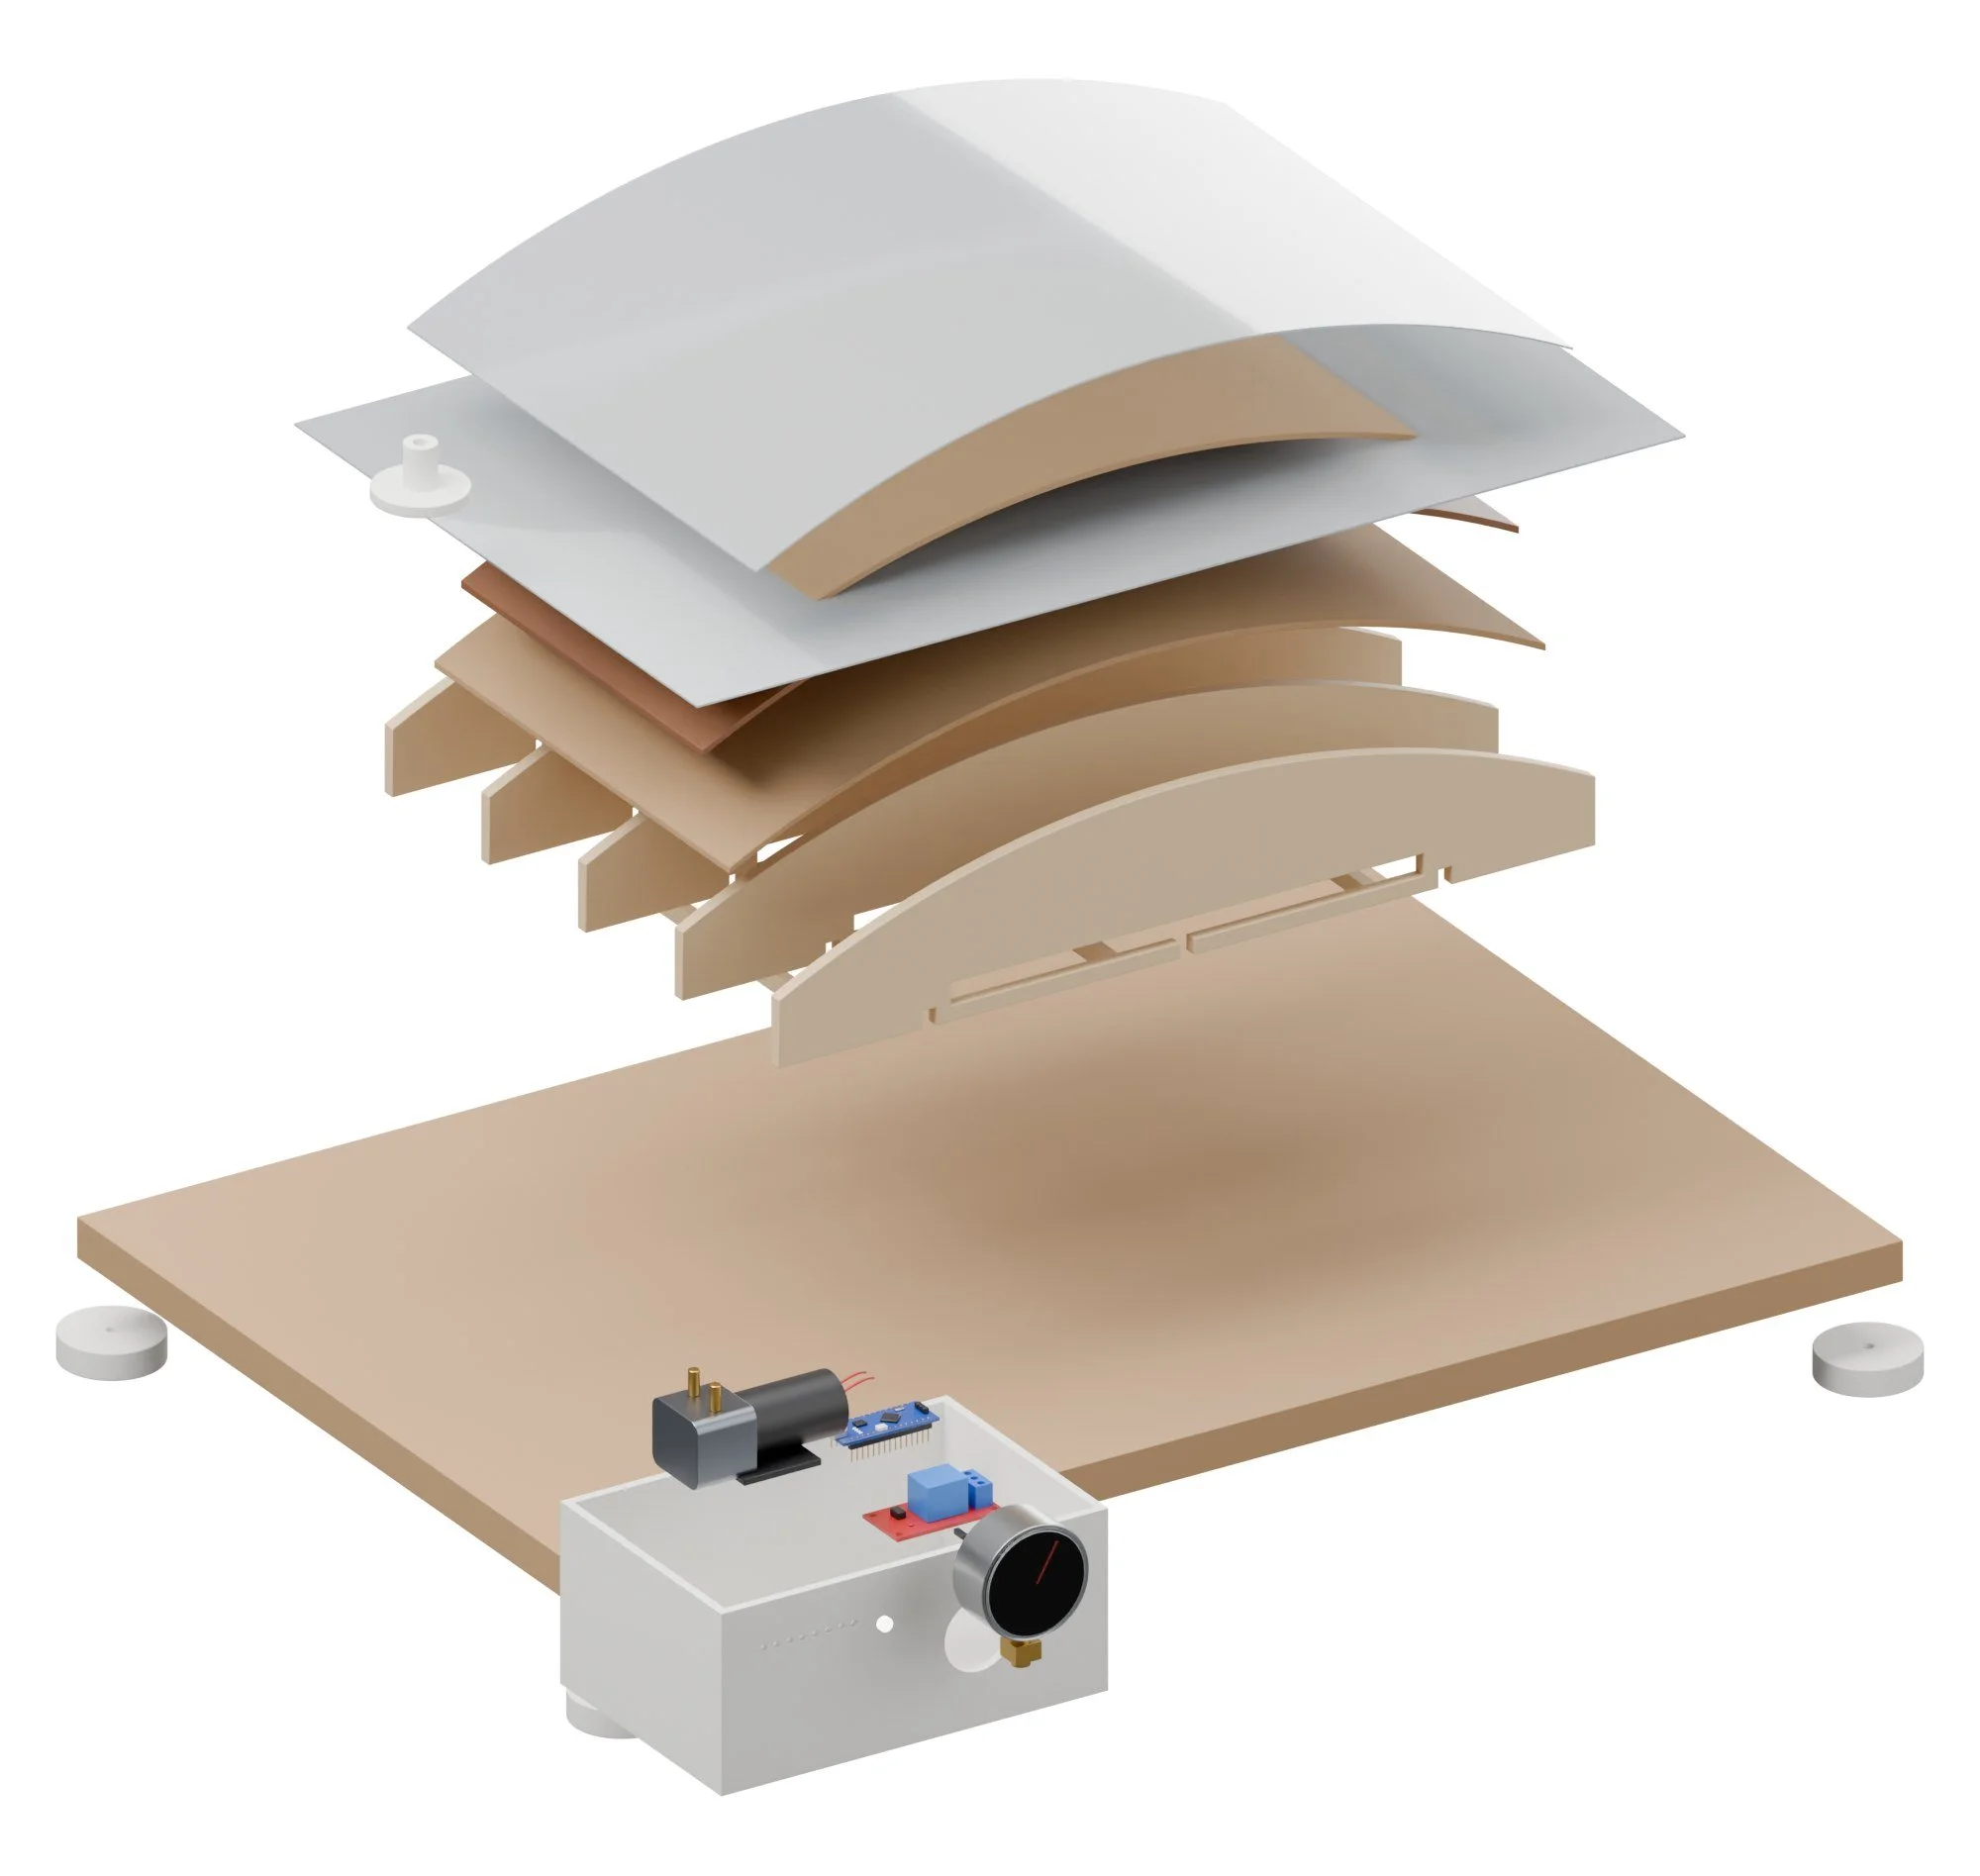
| FootTPU or PETG, 4 off. Keeps the platen off the bench. | |
| FootTPU or PETG, 4 off. Keeps the platen off the bench. | |
| FootTPU or PETG, 4 off. Keeps the platen off the bench. | |
| FootTPU or PETG, 4 off. Keeps the platen off the bench. | |
| Rib 1Cut 5. Draw any curve in LightBurn; the arc here is 15 in long with a 1 13/16 in rise. | cut |
| SpacerCut 3. Slots into the ribs. | cut |
| Bag portPETG, two halves clamp the bag with an O-ring; 3/8 in barb. | |
| Controller boxPETG. Vent slots over the pump. Gauge bores through the front. | |
| Controller lid |
Build guide
Tools / parts / every step, start to finish
Open the full build guide
Time: 4 to 5 hours plus printing Skill: Easy
Tools
- Hex keys
- Soldering iron
- Multimeter
- Utility knife
Parts
Bought (full list with links in the README and buy_list.csv):
- 1 x 12 V diaphragm vacuum pump, -80 kPa class
- 1 x XGZP6847 vacuum sensor module, -100 to 0 kPa
- 1 x Arduino Nano (USB-C clone)
- 1 x 5 V relay module, 1-channel
- 0.039 x 2 in vacuum gauge, 1/8 NPT bottom
- 1 x 12 V 3 A power supply
- 1 x Vacuum bag kit (20 mil vinyl, 4 x 4 ft) or bulk vinyl + seal
- 1 x Breather mesh (fiberglass screen) 3 x 4 ft
- 1 x Clear vinyl tubing 3/8 in ID, 10 ft
- 1 x MDF 3/4 in, 2 x 4 ft
- 1 x Hardboard 1/8 in, 2 x 4 ft
- 0.039 x 0.24 in birch ply, 12 x 24 in, 6-pack
- 1 x PETG filament 1 kg
- 1 x M3/M4/M5 screws, nuts and inserts (already owned)
Made:
stl/fa_foot.stl(printed) x 4laser/fa_rib_1_6mm.dxf(laser)laser/fa_spacer_6mm.dxf(laser)stl/fa_bag_port.stl(printed)stl/fa_controller_box.stl(printed)stl/fa_controller_lid.stl(printed)
Steps
1. Print and cut
Print every STL in stl/ (PETG unless the part note says otherwise, 0.008 in layers, 4 walls, 30 to 40% gyroid). Cut every file in laser/ on Drag Queen. Check every MEASURE note in the README against your actual parts before printing the parts they touch.
2. Platen
Cut the 11/16 in MDF to 600 x 400; seal all edges and faces with two coats of shellac; screw on the four printed feet.
3. Form
Slot the five ribs onto the three spacers, glue, then glue and pin the 0.12 in hardboard skin over the curve. Wax it.
4. Bag
Seal the vinyl envelope (or tube) with its seal strip; cut a 0.39 in hole for the port and clamp the two printed halves with the O-ring between.
5. Controller box
Mount the pump on its rubber feet, the sensor, Nano and relay; push the gauge through the front.
6. Plumbing
Tee the bag line to the sensor and gauge, then to the pump inlet; the pump exhaust vents out of the box's slots.
Wiring
- 12 V in to the relay COM and the Nano's VIN; relay NO to the pump +.
- XGZP6847 analog out to A0, 5 V and ground.
- Status LED on D6 with a 330 ohm resistor.
Firmware
flex_appeal.ino: read A0, convert with the sensor's curve, pump on below -60 kPa, off at -78; log every 10 s over USB; flash the LED if the pump runs more than 15 s in any 30.
First test
- Seal an empty bag: it should reach -75 kPa and hold above -60 for at least 5 minutes with the pump off.
Honey Glaze
Glue and finish dispensing head for a diode-laser gantry.
Fairy Ring pipeline / Finish / gets glue lines and finish passes
Honey Glaze lays glue and finish exactly where the drawing says. On a diode-laser frame, a syringe lays an even serpentine bead of veneer glue across a substrate, or traces a bead along every joint line, and a felt pad wipes on thin coats of oil or shellac. Where the laser would fire, glue flows.
How it works
Dry / Glued
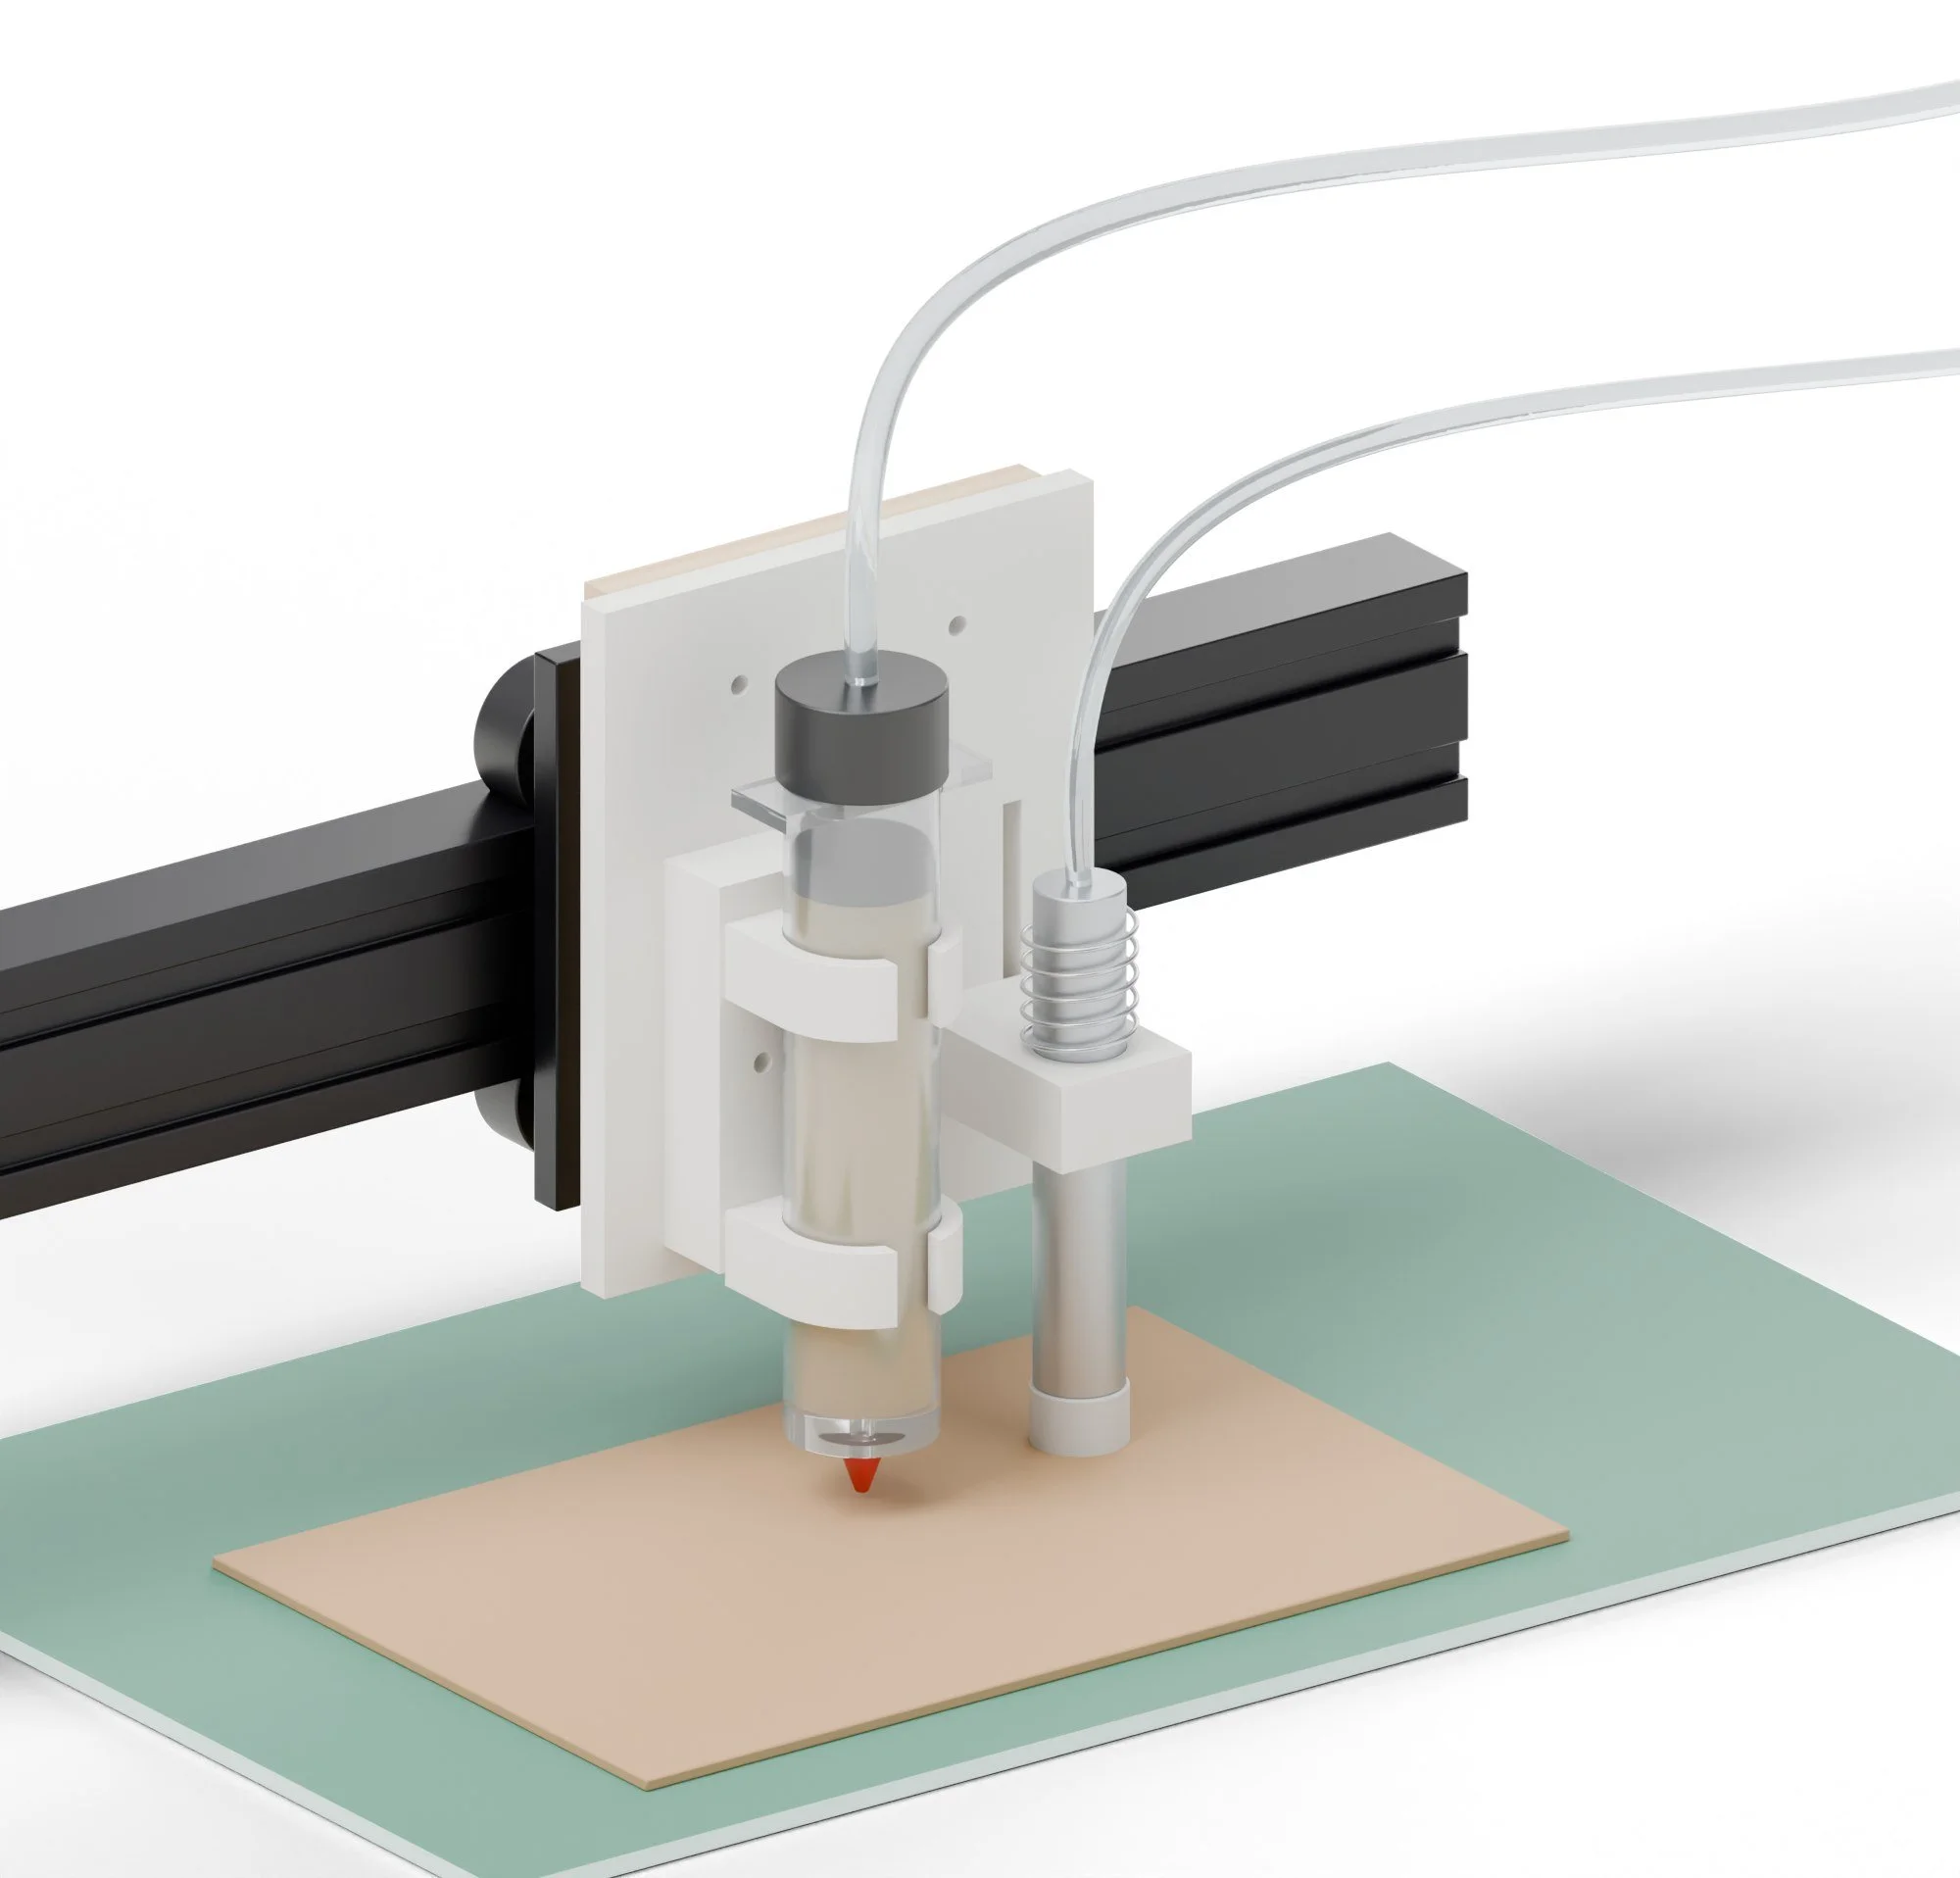
- A 30 cc syringe sits on a bench pneumatic dispenser; the laser's PWM closes its foot-switch input through a small relay, so 'laser on' means 'glue on'.
- Bead size is pressure times speed, set once per glue; the dispenser's suck-back stops drips between moves.
- For finish, a 12 V peristaltic pump feeds a felt pad from the laser's air-assist output, laying thin even coats.
What it can make
Products / and less obvious uses
- Glue lines
- Even beads for veneer layups and edge banding.
- Finish passes
- Oil, shellac or wiping varnish on flat panels.
- Inlay glue dots
- Small CA or PVA dots exactly where each piece lands.
Tricks worth trying
- Epoxy line fill Fill engraved or cut lines with tinted epoxy, then sand flush for a drawn line in the wood. To test.
- Resist patterns Draw a wax or masking resist before stain for two-tone panels. To test.
Recipes
Glues / finishes / how they go on
Use it for: Glue beads for veneer layups and joinery, thin coats of oil or shellac on flat panels.
Materials
- Titebond II or III for veneer and joinery (or Better Bond Cold Press for veneer)
- Danish oil, wiping varnish, or 2 lb-cut shellac for the pad
- 18 ga (0.033 in) tapered tips; 16 ga for thicker glue
Settings
| Setting | Value |
|---|---|
| Dispenser pressure | 15 to 25 psi for Titebond with an 18 ga tip |
| Bead | About 0.059 in wide at 0.39 in/s; lines 0.47 in apart for veneer |
| Suck-back | Set until the tip stops weeping between moves |
| Open time | Titebond II about 5 min; lay veneer and press (Flex Appeal) within that |
| Pad feed | Pump pulses: 1 s on per 7 7/8 in of travel for oil, 1 s per 11 13/16 in for shellac |
| Pad speed | 1,500 to 2,19.7 in/min |
Steps
- Fill a 30 cc barrel, fit the piston and cap, and purge a little onto scrap.
- Set the tool height so the tip clears the work by 0.039 in.
- Run the glue path from Fairy Ring (same file the veneer was cut from).
- Lay the veneer and go straight to Flex Appeal or clamps.
- For finishes, swap to the pad, prime the line, then run the coat path; let it dry and repeat.
Troubleshooting
| Problem | Fix |
|---|---|
| Bead breaks | Pressure too low or tip partly clogged; up 2 psi or change the tip. |
| Blobs at starts | Add a 100 ms lead-in delay; check suck-back. |
| Streaky finish | Too little feed; increase pulse length or slow down. |
Safety
- Oily rags and pads can self-heat and catch fire: lay them flat to dry outdoors or keep them in water in a closed metal can.
- Ventilate when padding shellac or solvent finishes.
Numbers are starting points. Run one test piece on every new batch of material.
Glues
What goes in the syringeYou need
| PVA (yellow wood glue)Most joints and veneer on flat panels. 18 ga tip. | open time: label |
| Urea (powdered resin glue)Veneer and bent work: rigid, no creep. 14 ga tip. | open time: label |
| Hide glue, liquidReversible joints and repairs. 14 ga, warm. | label |
Method
- Fairy Ring writes the glue path as a serpentine, about 5/16 to 0.47 in between lines for veneer.
- Purge the tip on scrap until the bead is steady.
- Run the path, then roll it out evenly before the open time runs out.
- Clamp or bag right away (Flex Appeal for veneer).
- Rinse the tip in warm water for PVA; urea and hide glue clean with warm water too, before they set.
If it goes wrong
- Glue bleeds through veneer
- Too much glue. Widen the line spacing.
- Dry spots
- Too wide a spacing or the open time ran out. Shorter runs, faster passes.
Finishes
Thin coats, many of themYou need
| Oil (tung or Danish oil)Felt pad, flooded then wiped | 3 to 5 coats |
| ShellacDewaxed, 1 to 2 lb cut in alcohol | 3 to 6 coats |
| Beeswax pasteQueen Bee's scrap, 1 part wax to 3 parts mineral oil | last coat |
Method
- Sand to 180 or 220, vacuum, and wipe with a barely damp cloth.
- She passes the pad in overlapping lanes. Oil: wipe off what hasn't soaked in after 15 minutes.
- Let each coat dry by the can. Scuff with a grey pad between coats.
- Wax goes on last, buffed by hand.
Rags and pads soaked in oil finish can catch fire on their own as they dry. Lay them flat outside to dry or keep them in water in a sealed metal can.
What to buy
7 parts / $272.98 before tax / estimates, check the links
 03Fhis 30 cc barrels with pistons and caps, 20-pack$15.00View on Amazon →
 04Jensen tapered dispensing tips, Luer-lock, 50-pack$10.0014 to 22 gaView on Amazon →
 05NOYITO 1-channel 5 V relay module, 3-pack$8.00Closes the foot-switch inputView on Amazon →
 06Gikfun 12 V peristaltic dosing pump$15.00Finish feedView on Amazon →
 07Silicone tube 0.079 x 0.16 in, 3.3 ft (+ felt applicator rod)$15.00View on Amazon →
What to make
Printed on the printers you have / cut on the xTool or sent out
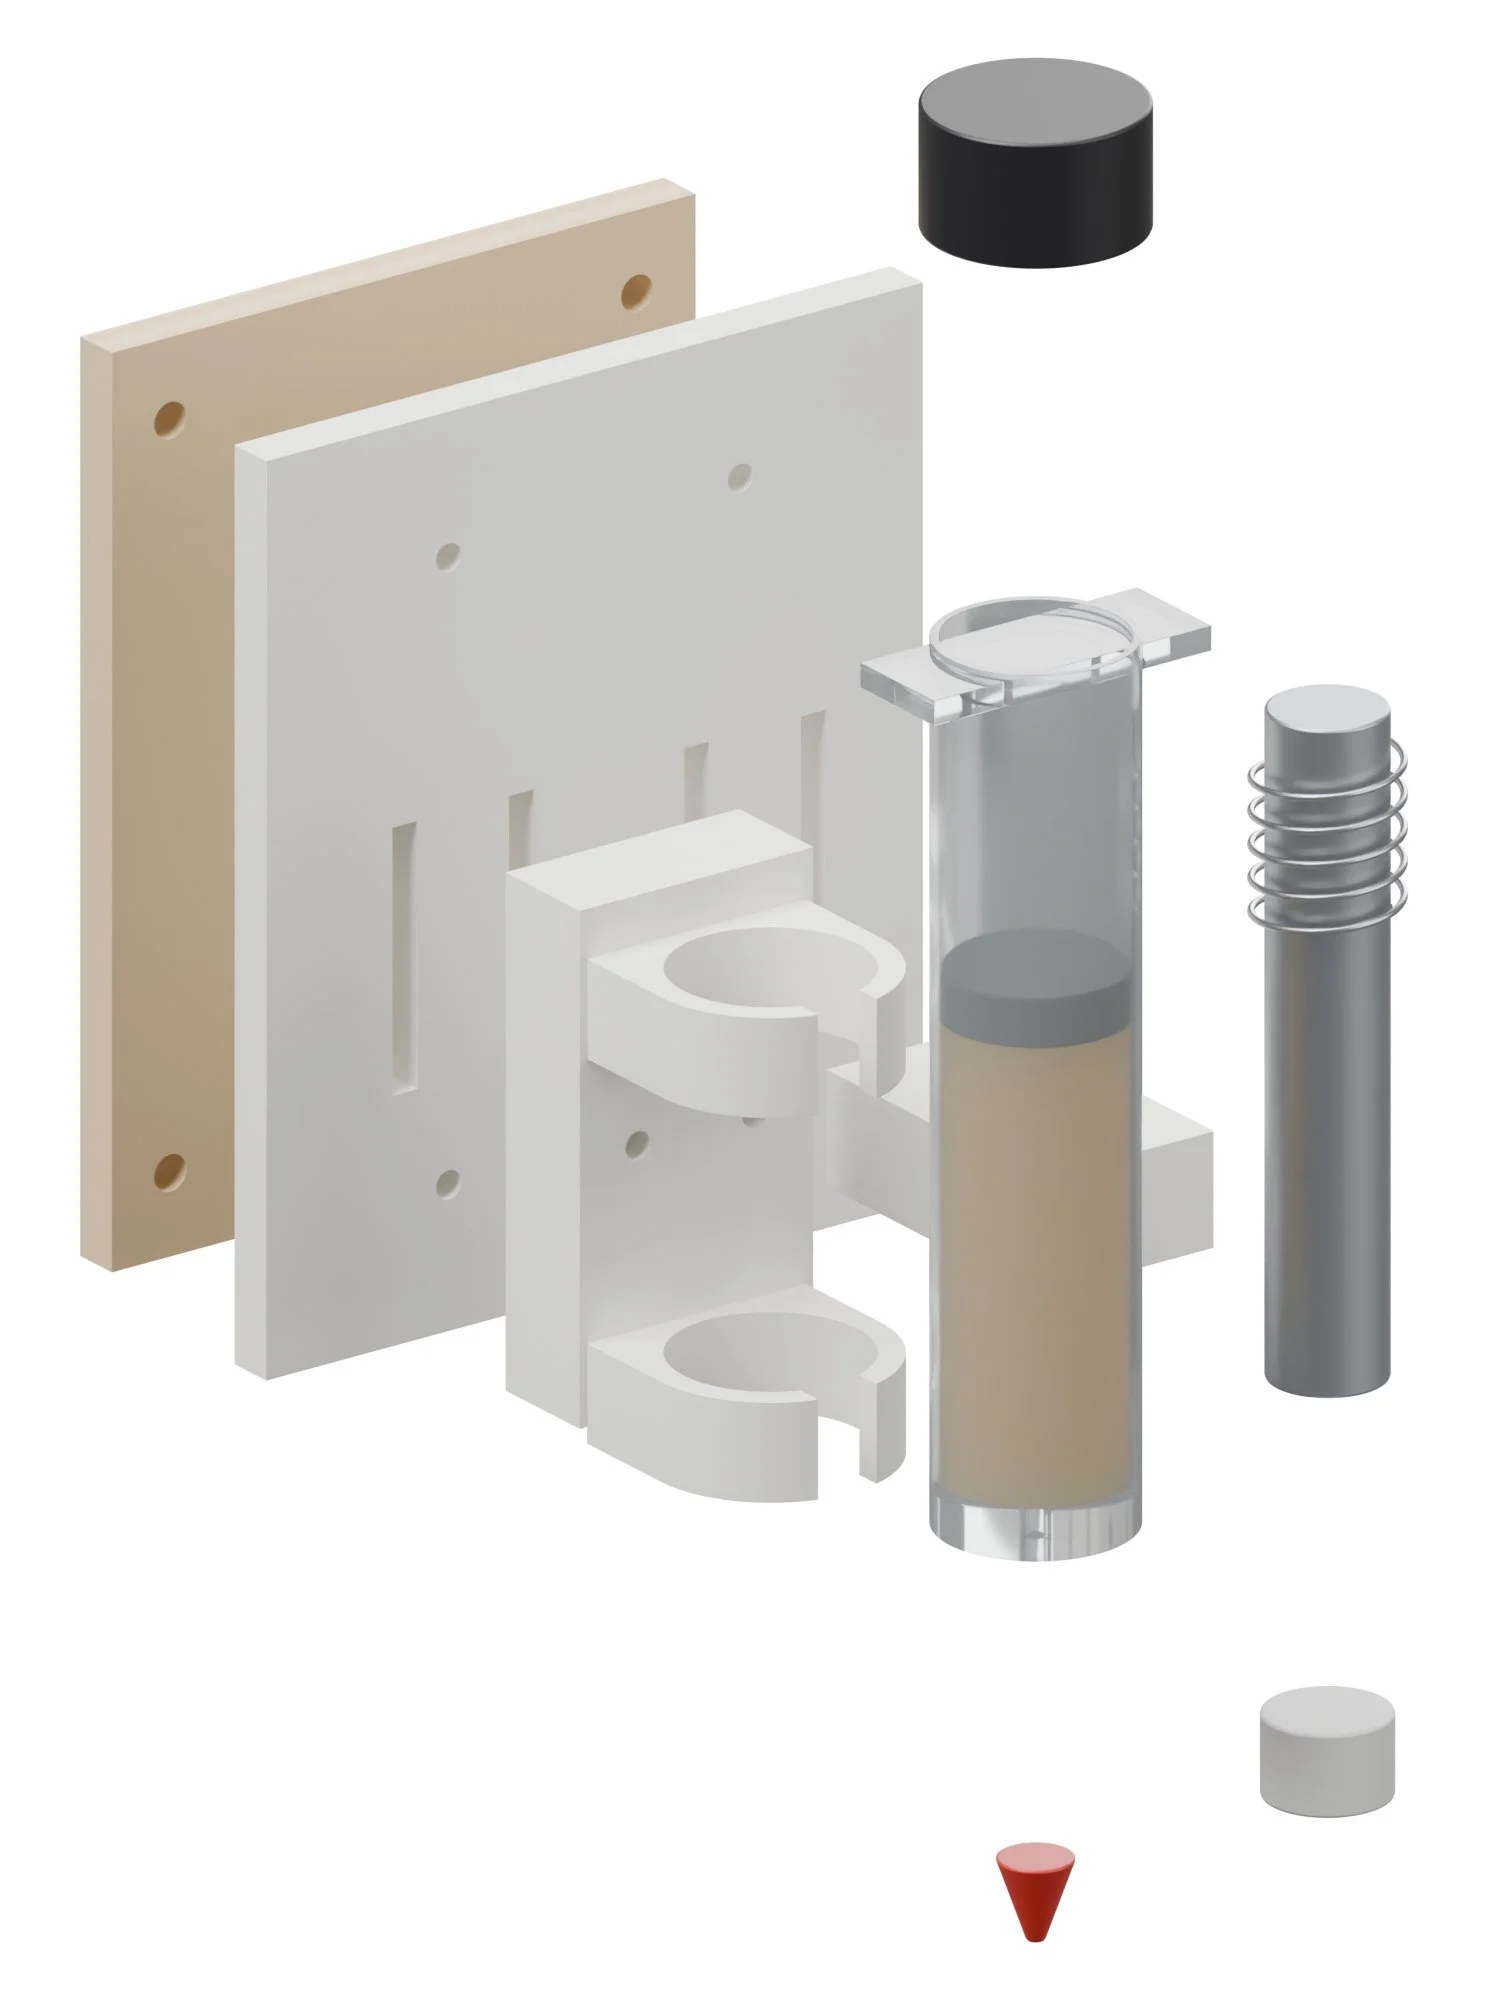
| Adapter plateSame adapter as Lady Liner and Drag Queen. MEASURE the laser's head plate holes. | cut |
| Base platePETG/ASA, flat on its back. Slots give 1 3/16 in of tool height. | |
| Syringe holderPETG. Snap-fits a 30 cc barrel (0.925 in OD, MEASURE). | |
| Pad holderPETG. Holds the pad tube; a light spring keeps the felt on the panel. |
Build guide
Tools / parts / every step, start to finish
Open the full build guide
Time: 4 hours plus printing Skill: Easy
Tools
- Hex keys
- Soldering iron
- Multimeter
Parts
Bought (full list with links in the README and buy_list.csv):
- 1 x Diode laser frame to carry the head (already owned)
- 1 x Second laser frame (optional, so Drag Queen stays a cutter) (optional)
- 1 x Digital glue dispenser 983A type, 110 V
- 1 x Master Airbrush TC-40T compressor with tank
- 1 x 30 cc barrels, pistons, caps, adapter kit
- 1 x Tapered dispensing tips, assorted
- 1 x 5 V relay module
- 1 x 12 V peristaltic pump
- 1 x Felt applicator rod and silicone tube 0.079 x 0.16 in
- 1 x Veneer glue (e.g. Titebond, Unibond 800) (already owned)
Made:
laser/adapter_plate_6mm.dxf(laser)stl/hg_base_plate.stl(printed)stl/hg_syringe_holder.stl(printed)stl/hg_pad_holder.stl(printed)
Steps
1. Print and cut
Print every STL in stl/ (PETG unless the part note says otherwise, 0.008 in layers, 4 walls, 30 to 40% gyroid). Cut every file in laser/ on Drag Queen. Check every MEASURE note in the README against your actual parts before printing the parts they touch.
2. Base and holders
Bolt the syringe holder and pad holder to the base plate through the height slots.
3. Dispenser
Connect the 983A-type dispenser to shop air (or a small compressor) at 60 psi in; set output with its regulator.
4. Pad
Push the felt pad into its tube with the spring above it; run the silicone line to the peristaltic pump.
5. Mount
Bolt to the laser on the swap plate.
Wiring
- Laser PWM to a MOSFET module whose output closes the dispenser's foot-switch input (dry contact).
- Laser air-assist output (or a relay on it) to the 12 V peristaltic pump.
Firmware
- No firmware: in LightBurn, glue layers use power 1000, finish layers use the air-assist layer setting.
First test
- Run a 7 7/8 in line at 0.39 in/s on paper: the bead should be even and stop cleanly.
Sandra Paper
Gantry random-orbit sander for flat panels and veneer faces.
Fairy Ring pipeline / Finish / gets sanding passes
Sandra Paper sands so nobody has to. A 2040 gantry, the same parts family as Mortisha, carries a 5 in random-orbit palm sander on a spring-loaded Z, so the pad floats over a warped panel at a steady 2 to 3 kg. It takes off laser scorch, glue squeeze-out and fuzz from Drag Queen, Honey Glaze and Mortisha's work, grit by grit, and pulls the dust into the vac.
How it works
Scorched / Smooth
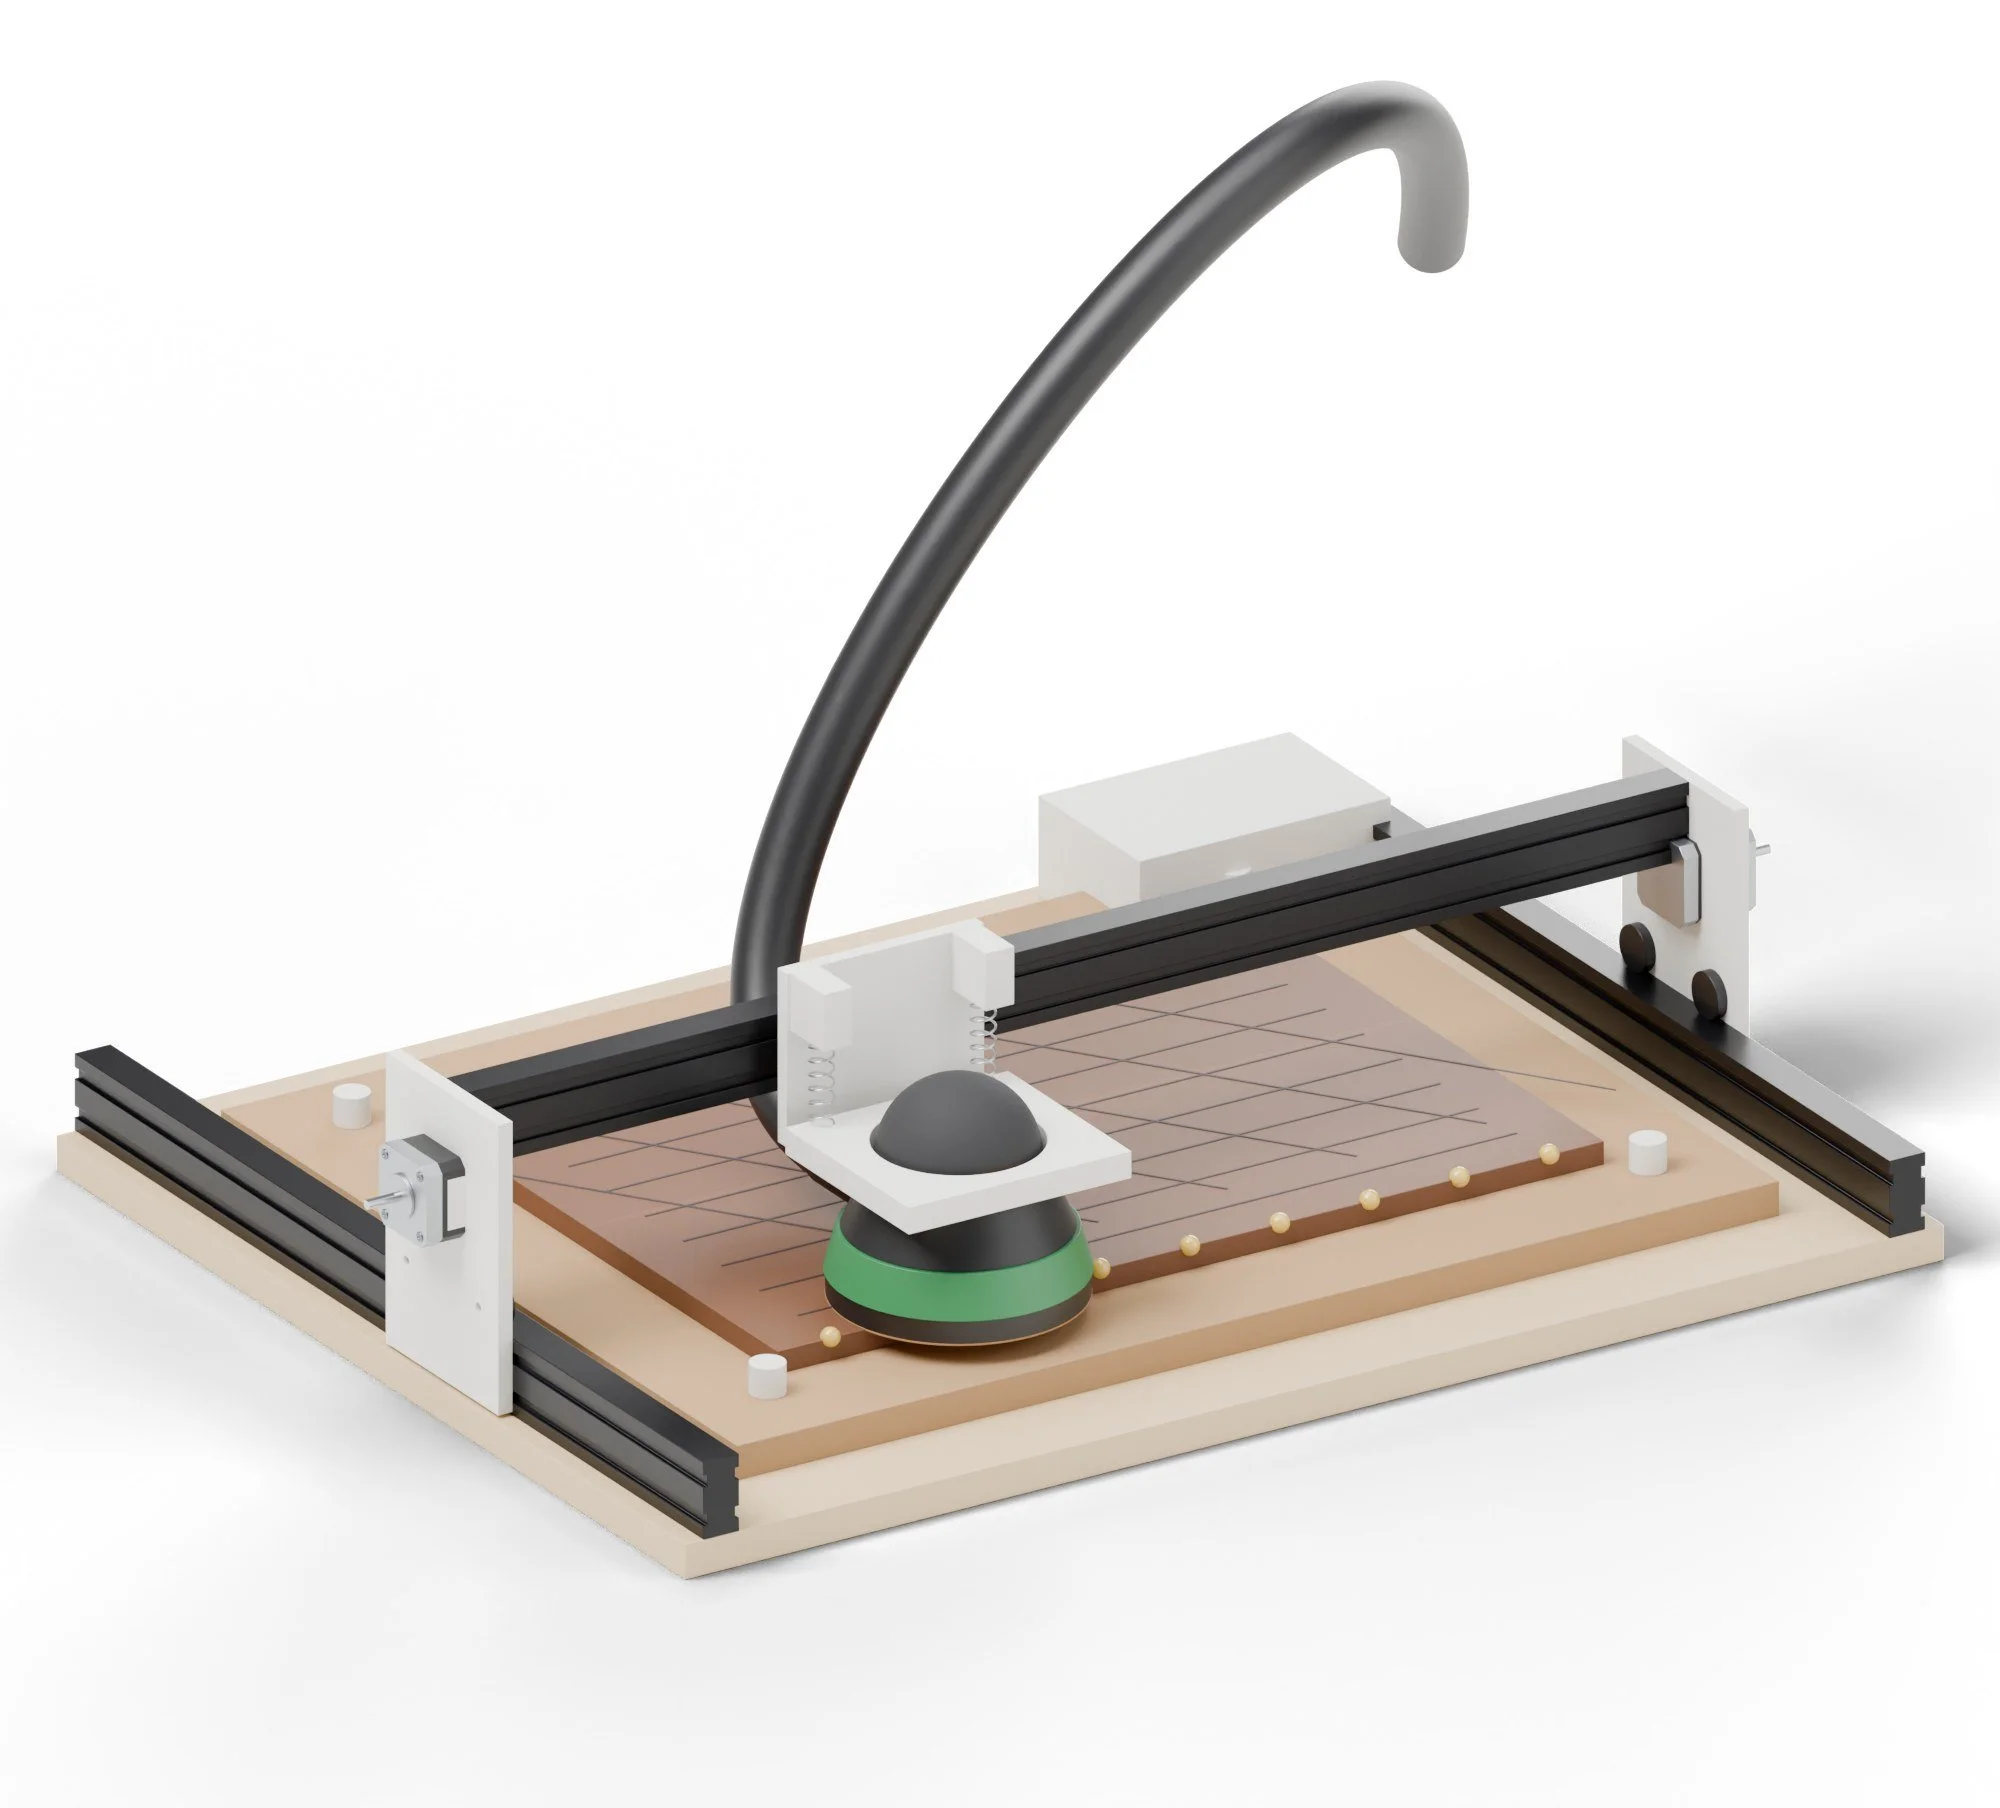
- Clamp the panel with the printed bench dogs and set the grit: 120 to clear scorch, 180 to smooth, 220 or 320 for finish.
- GRBL runs raster passes with 50% overlap at 1,19.7 in/min; a relay switches the sander on at the start and off at the end.
- Springs, not the motor, set the pressure, so the pad never digs in and the edges don't round over.
Recipes
Materials / settings / what to do when it goes wrong
Use it for: Flattening scorch and squeeze-out, and finish-sanding flat panels and veneered faces.
Materials
- 5 in hook-and-loop discs, 8-hole, in 80, 120, 150, 180, 220, 320
- Interface pad for veneer (soft)
Settings
| Setting | Value |
|---|---|
| Grit sequence | 120 (scorch and glue), 150, 180; 220 for oil finishes; 320 between finish coats |
| Feed | 1,19.7 in/min |
| Overlap | 50% of the pad (raster step 2 3/8 in) |
| Pressure | 2 to 3 kg (spring preload, about 5/16 in compression) |
| Passes per grit | 2, the second at 90 degrees |
| Veneer | Start at 180, never below 150; one pass per grit |
Steps
- Clamp the panel with the bench dogs, face up.
- Set Z so the springs compress 5/16 in on the panel.
- Run the raster from Fairy Ring, grit by grit; vacuum the surface between grits.
- Check with a raking light; pencil marks across the panel show missed spots.
- Finish by hand along the grain with the last grit, 30 seconds per panel.
Troubleshooting
| Problem | Fix |
|---|---|
| Swirl marks | Skipped a grit or feed too fast; go back one grit. |
| Sanded through veneer at edges | Raise the edge offset to 0.39 in; finish edges by hand. |
| Uneven | Spring preload uneven; check both towers. |
| Clogging | Dust extraction off or wet glue; let glue cure 24 h. |
Safety
- Dust: run the vac (Dusty Springfield) and wear a mask, especially with walnut and MDF.
- Keep hands off the bed while it runs.
Numbers are starting points. Run one test piece on every new batch of material.
What to buy
12 parts / $319.00 before tax / estimates, check the links
 015 in random-orbit palm sander, 2.4 A, hook-and-loop$45.00The sanding headView on Amazon →02MKS DLC32 V2.1 controller$45.00GRBL/FluidNC, same family as the lasersView on Amazon →0324 V 10 A supply (Mean Well LRS-250-24)$30.00Motors and controllerView on Amazon →04NEMA17 stepper, 1 9/16 in$36.00Qty 3 · X and two Y motorsView on Amazon →052040 V-slot, black, cut to length$56.00Qty 4 · FrameView on Amazon →06V-wheel kits, 20-pack$22.00CarriagesView on Amazon →07MGN12H rail 5 7/8 in + carriage$15.00Floating ZView on Amazon →
 08Compression springs 0.47 x 2 3/8 in assortment$9.00Sets pad pressureView on Amazon →
 09GT2 0.24 in belt 16.4 ft + 20T pulleys + idlers$15.00X and Y driveView on Amazon →
 10Relay module 30 A, 5 V coil$8.00Switches the sanderView on Amazon →
 11Hook-and-loop discs 5 in, 80 to 320 assortment$18.00GritsView on Amazon →12PETG filament 1 kg$20.00Printed partsView on Amazon →
What to make
Printed on the printers you have / cut on the xTool or sent out
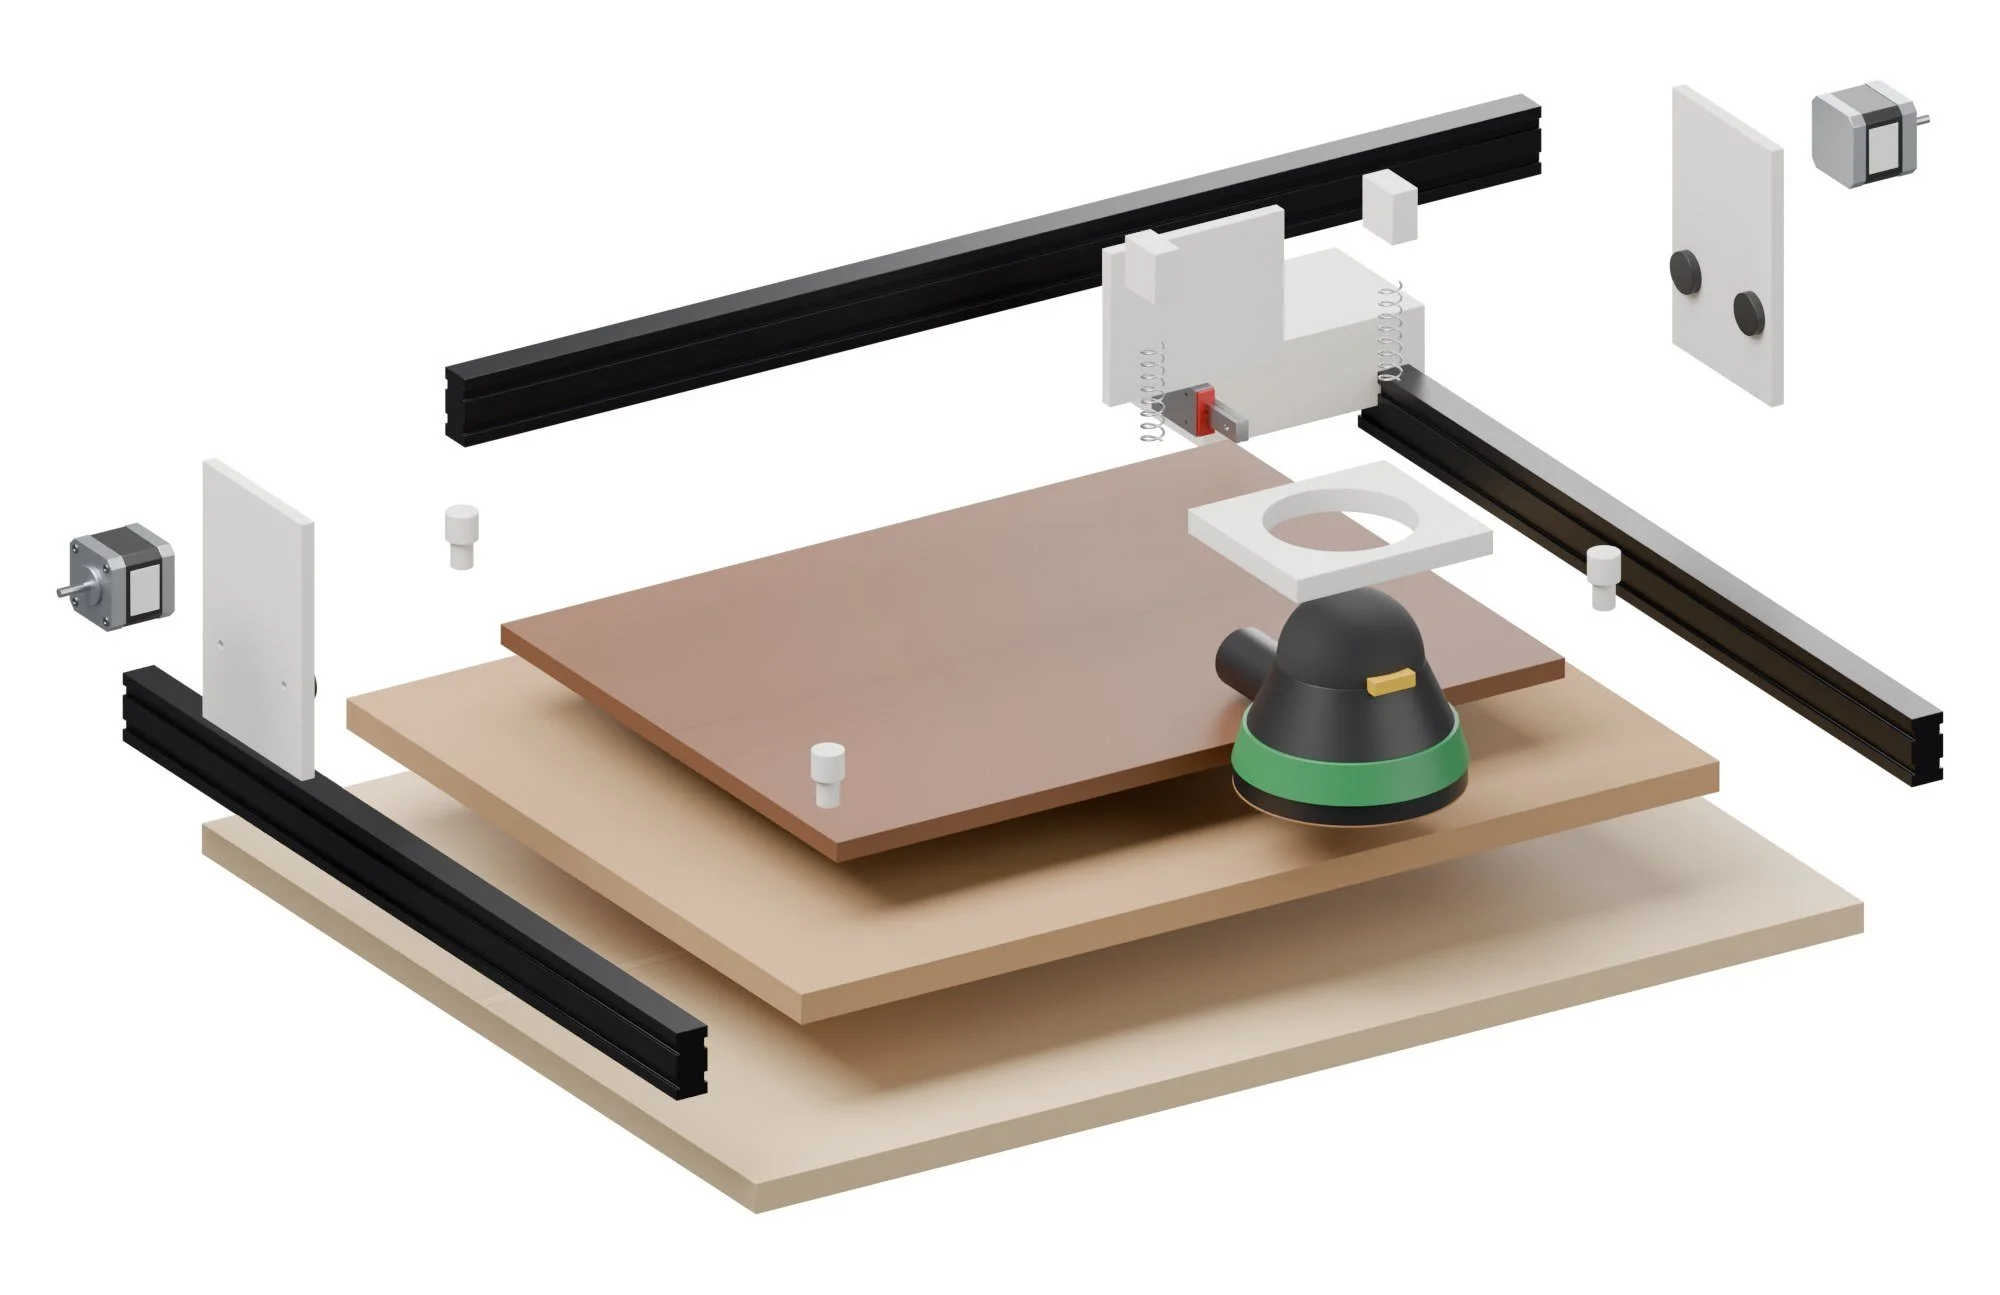
| Gantry platePETG-CF, 2 off (mirror one). Eccentric spacer on the lower wheel. | |
| Gantry platePETG-CF, 2 off (mirror one). Eccentric spacer on the lower wheel. | |
| X carriagePETG-CF. Four V-wheels, MGN12 rail screws to the front. | |
| Spring towerPETG, 2 off. Holds a 0.47 x 2 3/8 in compression spring. | |
| Spring towerPETG, 2 off. Holds a 0.47 x 2 3/8 in compression spring. | |
| Sander clampPETG with TPU liner; clamps the sander's grip collar. | |
| Controller boxHouses the MKS DLC32, relay and 24 V supply terminals. | |
| Bench dogPETG, 4 off, 0.47 in peg into the bed. | |
| Bench dogPETG, 4 off, 0.47 in peg into the bed. | |
| Bench dogPETG, 4 off, 0.47 in peg into the bed. | |
| Bench dogPETG, 4 off, 0.47 in peg into the bed. |
Build guide
Tools / parts / every step, start to finish
Open the full build guide
Time: 8 to 10 hours plus printing Skill: Medium
Tools
- Hex keys
- Square
- Crimp tool
Parts
Bought (full list with links in the README and buy_list.csv):
- 1 x 5 in random-orbit palm sander, 2.4 A, hook-and-loop
- 1 x MKS DLC32 V2.1 controller
- 1 x 24 V 10 A supply (Mean Well LRS-250-24)
- 3 x NEMA17 stepper, 1 9/16 in
- 4 x 2040 V-slot, black, cut to length
- 1 x V-wheel kits, 20-pack
- 1 x MGN12H rail 5 7/8 in + carriage
- 1 x Compression springs 0.47 x 2 3/8 in assortment
- 1 x GT2 0.24 in belt 16.4 ft + 20T pulleys + idlers
- 1 x Relay module 30 A, 5 V coil
- 1 x Hook-and-loop discs 5 in, 80 to 320 assortment
- 1 x PETG filament 1 kg
- 1 x M3/M4/M5 screws, nuts and inserts (already owned)
Made:
stl/sp_gantry_plate.stl(printed) x 2stl/sp_x_carriage.stl(printed)stl/sp_spring_tower.stl(printed) x 2stl/sp_sander_clamp.stl(printed)stl/sp_controller_box.stl(printed)stl/sp_bench_dog.stl(printed) x 4
Steps
1. Print
Print every STL in stl/ (PETG unless the part note says otherwise, 0.008 in layers, 4 walls, 30 to 40% gyroid). Cut every file in laser/ on Drag Queen. Check every MEASURE note in the README against your actual parts before printing the parts they touch.
2. Base and bed
Glue and screw the MDF bed to the ply base; drill the 0.47 in dog holes on a 2 in grid.
3. Y rails
Bolt the 2040 Y rails along both sides, parallel within 0.02 in.
4. Gantry
Assemble the gantry plates with V-wheels on the rails and the 2040 X beam across; square it.
5. Z float
Fit the MGN12 rail to the X carriage, hang the sander clamp on it and add the two springs on their towers.
6. Sander
Clamp the sander by its grip collar, tape its switch on, run its port to the vac hose.
Wiring
- MKS DLC32: X and Y (dual Y motors on the Y and Z driver slots, Z unused).
- Sander through the 30 A relay on the spindle-enable output.
- Limit switches on X and Y.
Firmware
- GRBL: $100/$101 = 80 steps/mm, max rate 3,0 in/min, acceleration 11 13/16 in/s2.
- Fairy Ring 'sand' export: raster at 50% overlap, M3 to start the sander, 2 s dwell, M5 at the end.
First test
- Sand a pencil-scribbled MDF panel with 120: the scribble should vanish evenly.
Glow Diva
Epoxy + glow-powder fill head for engraved channels.
Fairy Ring pipeline / Finish / gets glow fill paths
Glow Diva fills what Drag Queen engraves. She rides the laser frame on the same swap plate as Honey Glaze and pushes a 50 mL dual cartridge through a static mixer, laying glow epoxy into channels along the same vectors the laser cut. A ring of UV LEDs charges each line as it lands, so you watch it glow in. This is where the moonlight look gets literal.
How it works
Engraved / Glowing
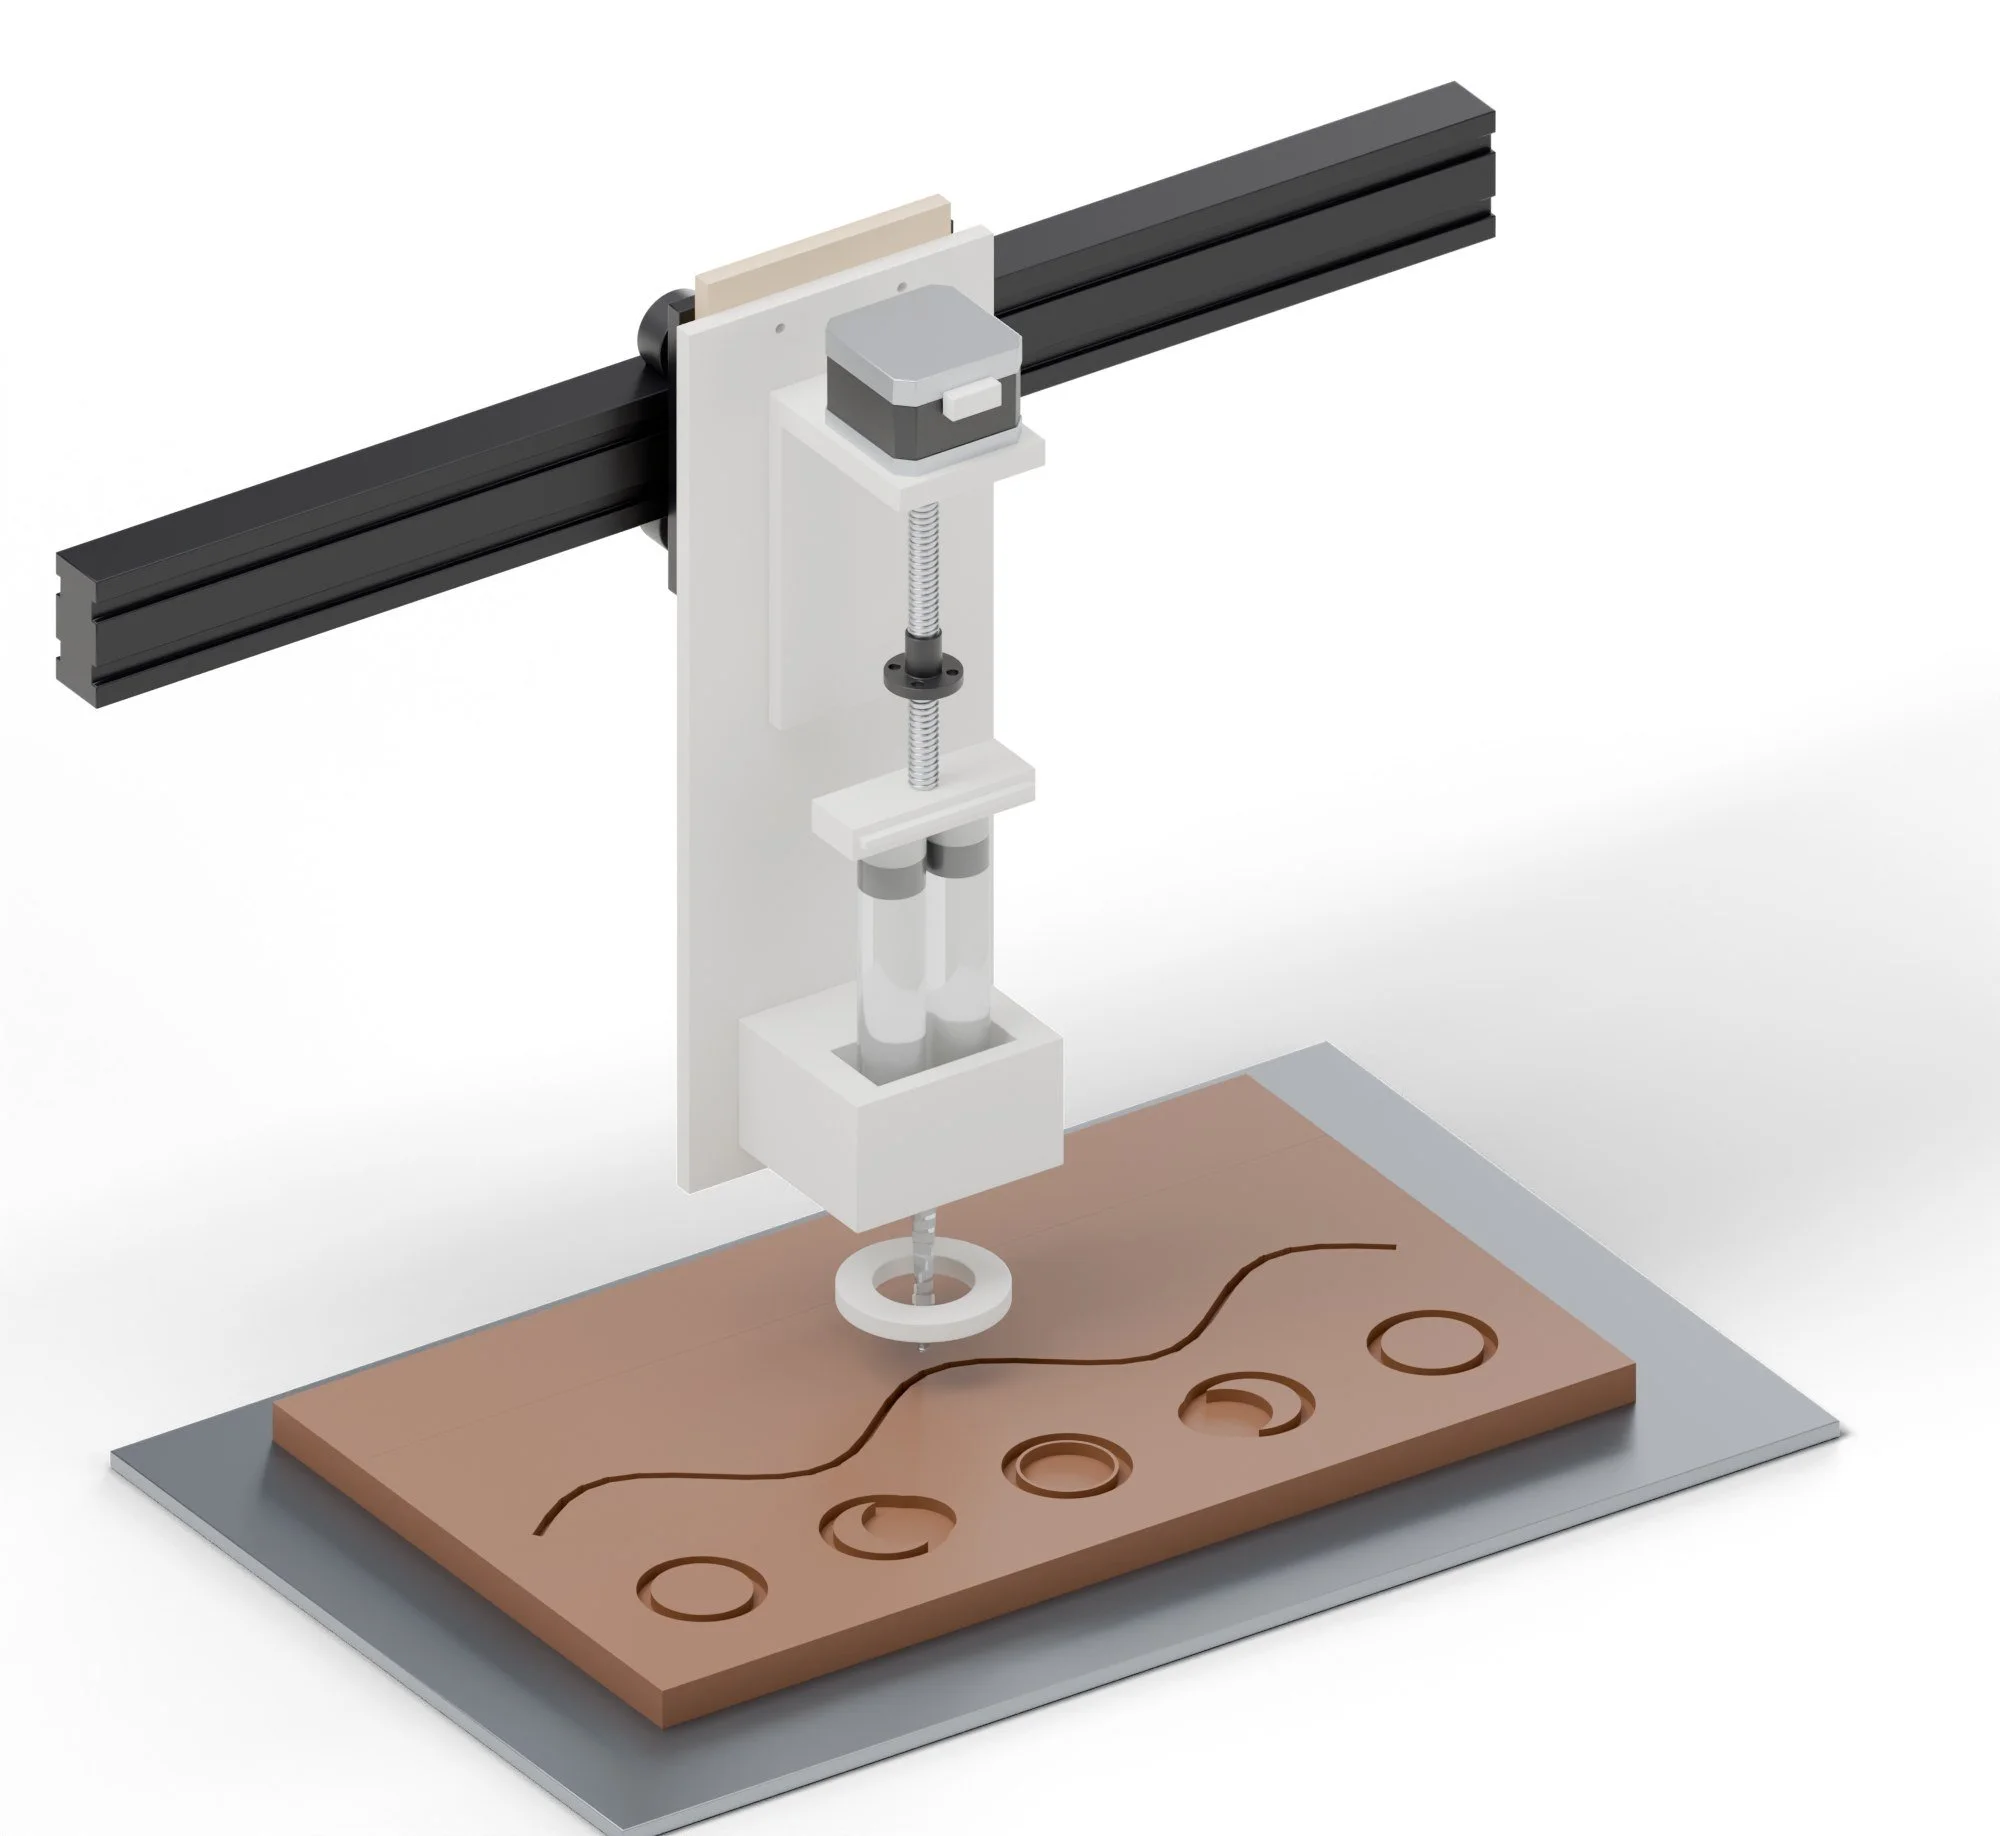
- Engrave the channels 0.079 to 0.12 in deep with Drag Queen, then swap to Glow Diva on the 1 9/16 x 2 15/16 in plate.
- Mix 20 to 25% strontium aluminate powder into the B side, load the cartridge and purge the mixer.
- The lead screw meters the epoxy as the laser path runs; overfill slightly, cure 24 hours, then flush it flat with Sandra Paper.
Recipes
Materials / settings / what to do when it goes wrong
Use it for: Glow-in-the-dark inlay lines, moon phases and constellations in engraved wood.
Materials
- Low-viscosity 1:1 epoxy (casting or deep-pour)
- Strontium aluminate glow powder, 25 to 45 micron, green (brightest) or aqua
- Shellac or thin epoxy to seal the channels first
Settings
| Setting | Value |
|---|---|
| Powder loading | 1 part powder to 4 parts mixed epoxy by weight; because it all goes in the B side, that is 1 part powder to 2 parts B |
| Channel | 0.079 to 0.12 in deep, at least 0.059 in wide (engrave on Drag Queen) |
| Plunger feed | About 0.03 mL per mm of channel at 0.079 in x 0.079 in; overfill 10% |
| Travel speed | 0.2 to 0.31 in/s |
| Cure | 24 h at 21 to 77 °F, then optional 2 h at 122 °F in Hot Flash |
| Charge | 365 nm UV for 1 to 2 min, or sunlight |
Steps
- Engrave the channels; brush out the char and seal with a thin coat of shellac.
- Mix powder into the B side thoroughly; degas it in Pour Decisions.
- Load the cartridge, fit a mixer and purge 2 mL into a cup.
- Swap Glow Diva onto the laser and run the fill path from the same file.
- Torch or heat-gun lightly to pop surface bubbles.
- Cure, then flush flat with Sandra Paper (180, 220, 320) and finish.
Troubleshooting
| Problem | Fix |
|---|---|
| Dim glow | Too little powder or too thin a fill; aim for 0.079 in depth and the full ratio. |
| Powder sinks | Use a thicker epoxy or stir and fill within 10 min. |
| Epoxy bleeds into the grain | Seal the channels first. |
| Mixer clogs | Mixed epoxy is curing in it: change mixers every 20 min. |
Safety
- Epoxy: nitrile gloves; avoid skin contact (sensitiser).
- Glow powder: dust mask when weighing.
- UV LEDs: don't look into them.
Numbers are starting points. Run one test piece on every new batch of material.
What to buy
8 parts / $161.00 before tax / estimates, check the links
 01NEMA17 with integrated Tr8x2 lead screw, 5 7/8 in$28.00Plunger driveView on Amazon →
 0250 mL 1:1 dual cartridges + plungers, 10-pack$25.00Epoxy cartridgesView on Amazon →
 03Static mixers for 50 mL 1:1, 50-pack$15.00Mixing nozzlesView on Amazon →
 04Strontium aluminate glow powder, 100 g$18.00Glow pigmentView on Amazon →
 05Low-viscosity 1:1 casting epoxy, 32 oz kit$40.00FillView on Amazon →
 06365 nm UV LEDs 0.2 in, 20-pack$9.00Charging ringView on Amazon →07Arduino Nano (USB-C clone)$6.00ControllerView on Amazon →08PETG filament 1 kg$20.00Printed partsView on Amazon →
What to make
Printed on the printers you have / cut on the xTool or sent out
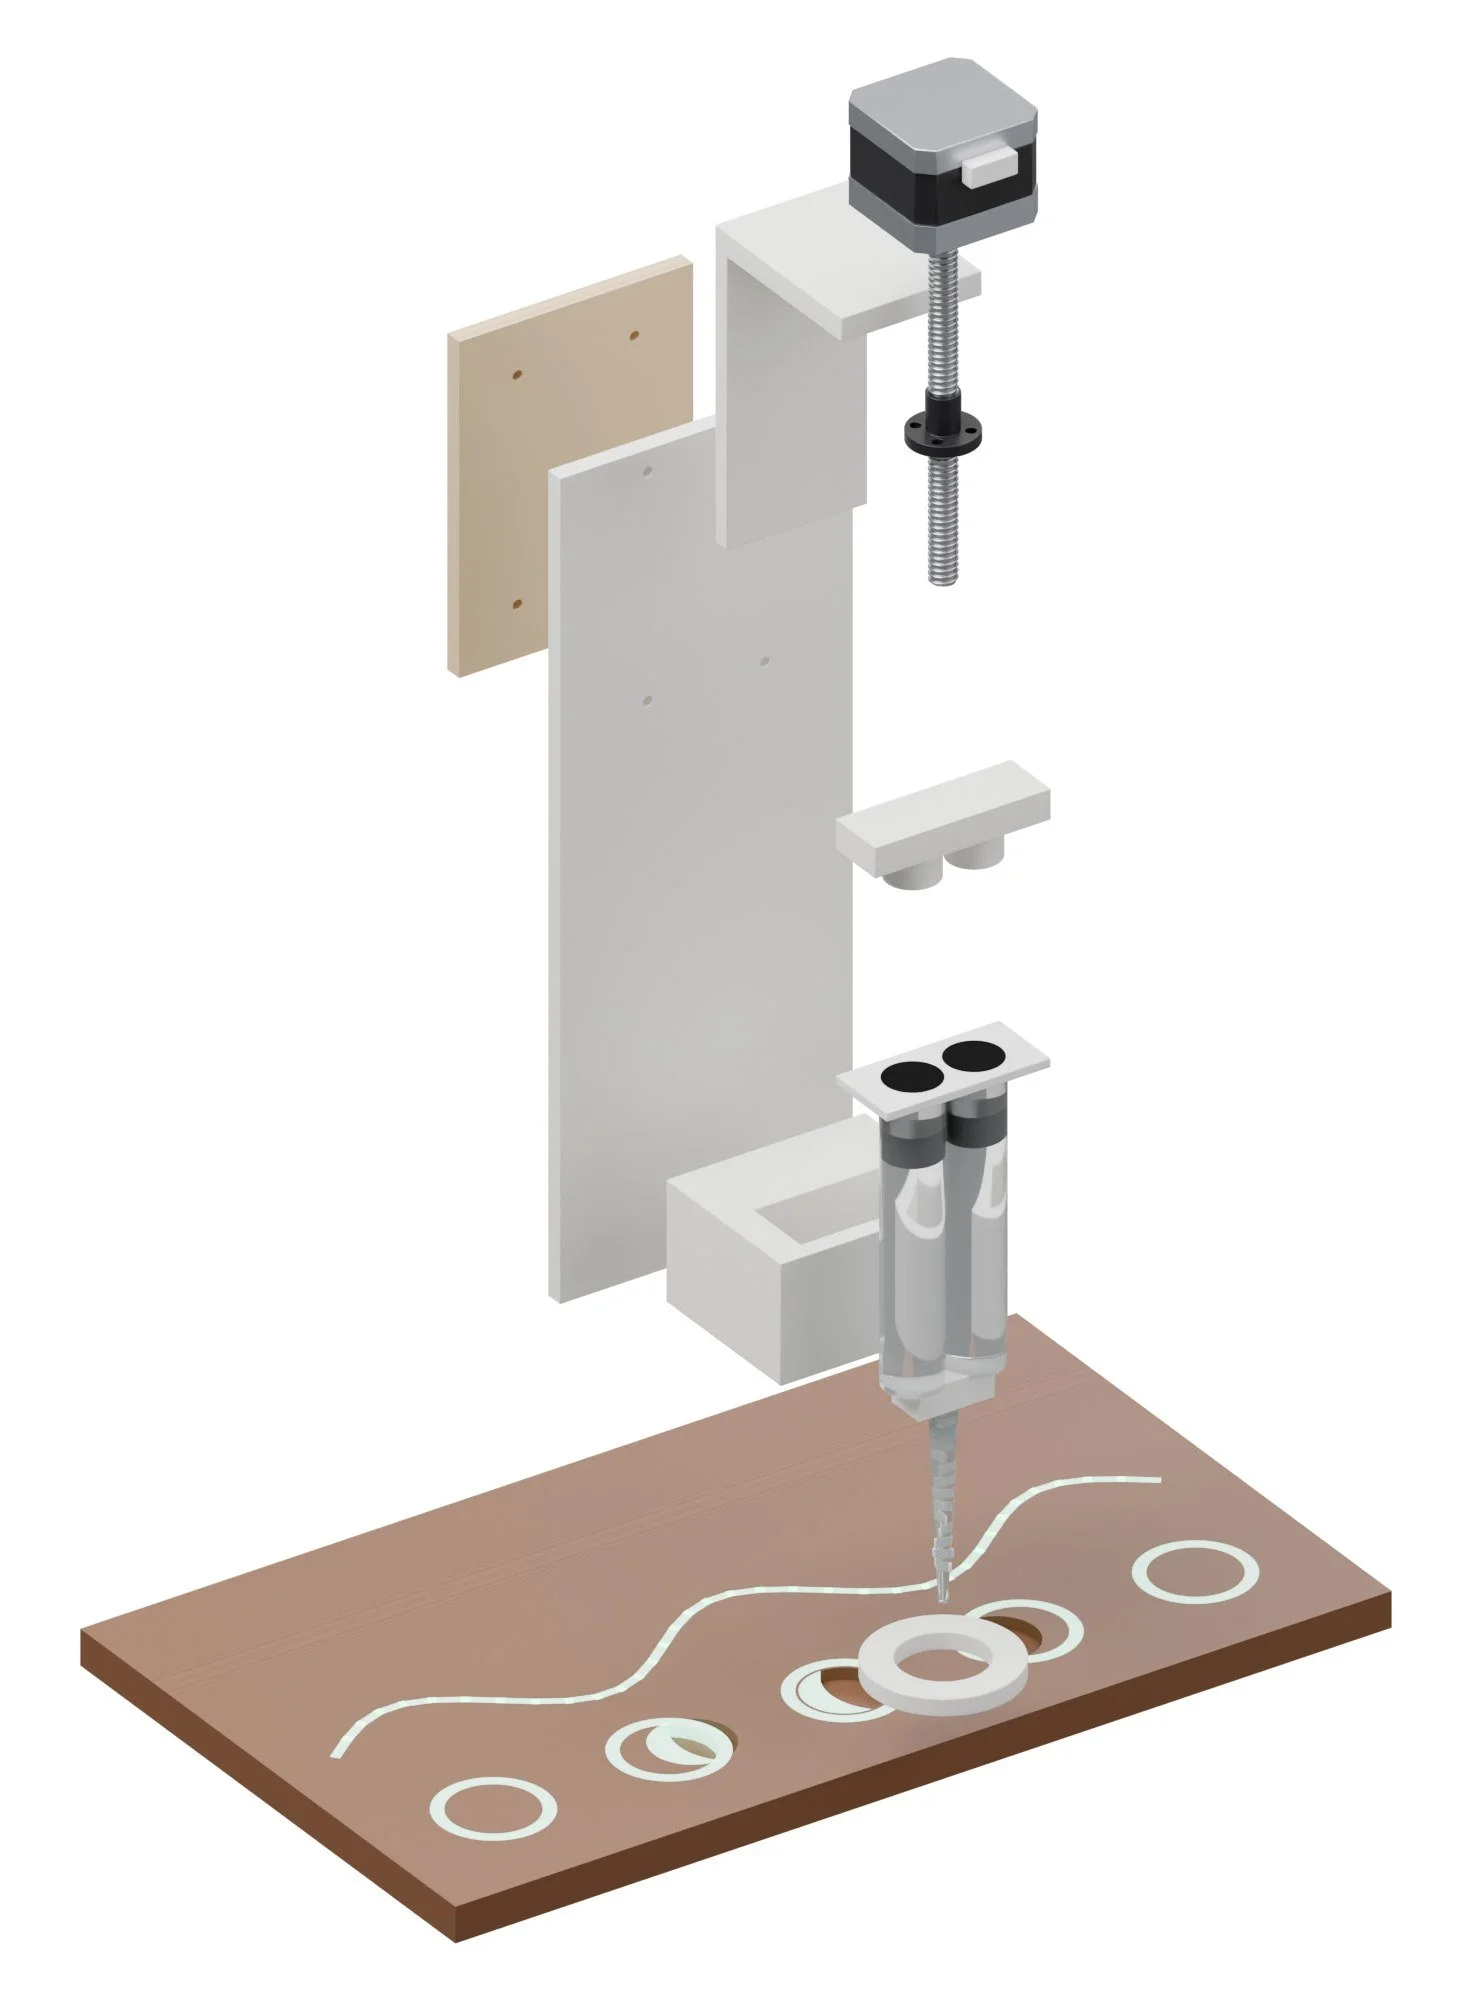
| Adapter plateSame adapter as Lady Liner and Honey Glaze. | cut |
| Back platePETG-CF, flat on its back. | |
| Cartridge cradlePETG. Bayonet slot for a 50 mL 1:1 cartridge (MEASURE flange). | |
| Twin plungerPETG. Captures a T8 brass nut; pushes both pistons equally. | |
| Motor bracket | |
| Uv ring |
Build guide
Tools / parts / every step, start to finish
Open the full build guide
Time: 3 to 4 hours plus printing Skill: Easy
Tools
- Hex keys
- Soldering iron
Parts
Bought (full list with links in the README and buy_list.csv):
- 1 x NEMA17 with integrated Tr8x2 lead screw, 5 7/8 in
- 1 x 50 mL 1:1 dual cartridges + plungers, 10-pack
- 1 x Static mixers for 50 mL 1:1, 50-pack
- 1 x Strontium aluminate glow powder, 100 g
- 1 x Low-viscosity 1:1 casting epoxy, 32 oz kit
- 1 x 365 nm UV LEDs 0.2 in, 20-pack
- 1 x Arduino Nano (USB-C clone)
- 1 x PETG filament 1 kg
- 1 x M3/M4/M5 screws, nuts and inserts (already owned)
Made:
laser/adapter_plate_6mm.dxf(laser)stl/gd_back_plate.stl(printed)stl/gd_cartridge_cradle.stl(printed)stl/gd_twin_plunger.stl(printed)stl/gd_motor_bracket.stl(printed)stl/gd_uv_ring.stl(printed)
Steps
1. Print and cut
Print every STL in stl/ (PETG unless the part note says otherwise, 0.008 in layers, 4 walls, 30 to 40% gyroid). Cut every file in laser/ on Drag Queen. Check every MEASURE note in the README against your actual parts before printing the parts they touch.
2. Head
Bolt the motor bracket and cartridge cradle to the back plate; fit the NEMA17 lead-screw motor and the twin plunger with its brass nut.
3. UV ring
Solder the eight 365 nm LEDs in two series strings of four with resistors for 12 V; press into the printed ring.
4. Mount
Bolt to the laser on the swap plate.
Wiring
- Lead-screw motor on a driver stepped by a Nano reading the laser PWM (feed while firing), or on a spare axis if the laser controller has one.
- UV ring on the air-assist output.
Firmware
glow_diva.ino: while PWM is above 20%, step the plunger at the set mL per mm (from the job's speed).
First test
- Dispense 10 mL into a cup and weigh it; adjust steps per mL.
Cane-Dace
Seat-weaving rig for Danish paper cord and flat cane.
Fairy Ring pipeline / Finish / gets weaving patterns
Cane-dace is a weaver's third hand. The seat frame clamps into a printed jig on a lazy-susan turntable, a stepper turns each side to face you, and a printed cord tower feeds paper cord at an even tension. A foot pedal indexes 90 degrees and the Arduino counts wraps, so every warp lands on its L-nail and the weft matches the pattern Fairy Ring printed on the jig.
How it works
Bare / Woven
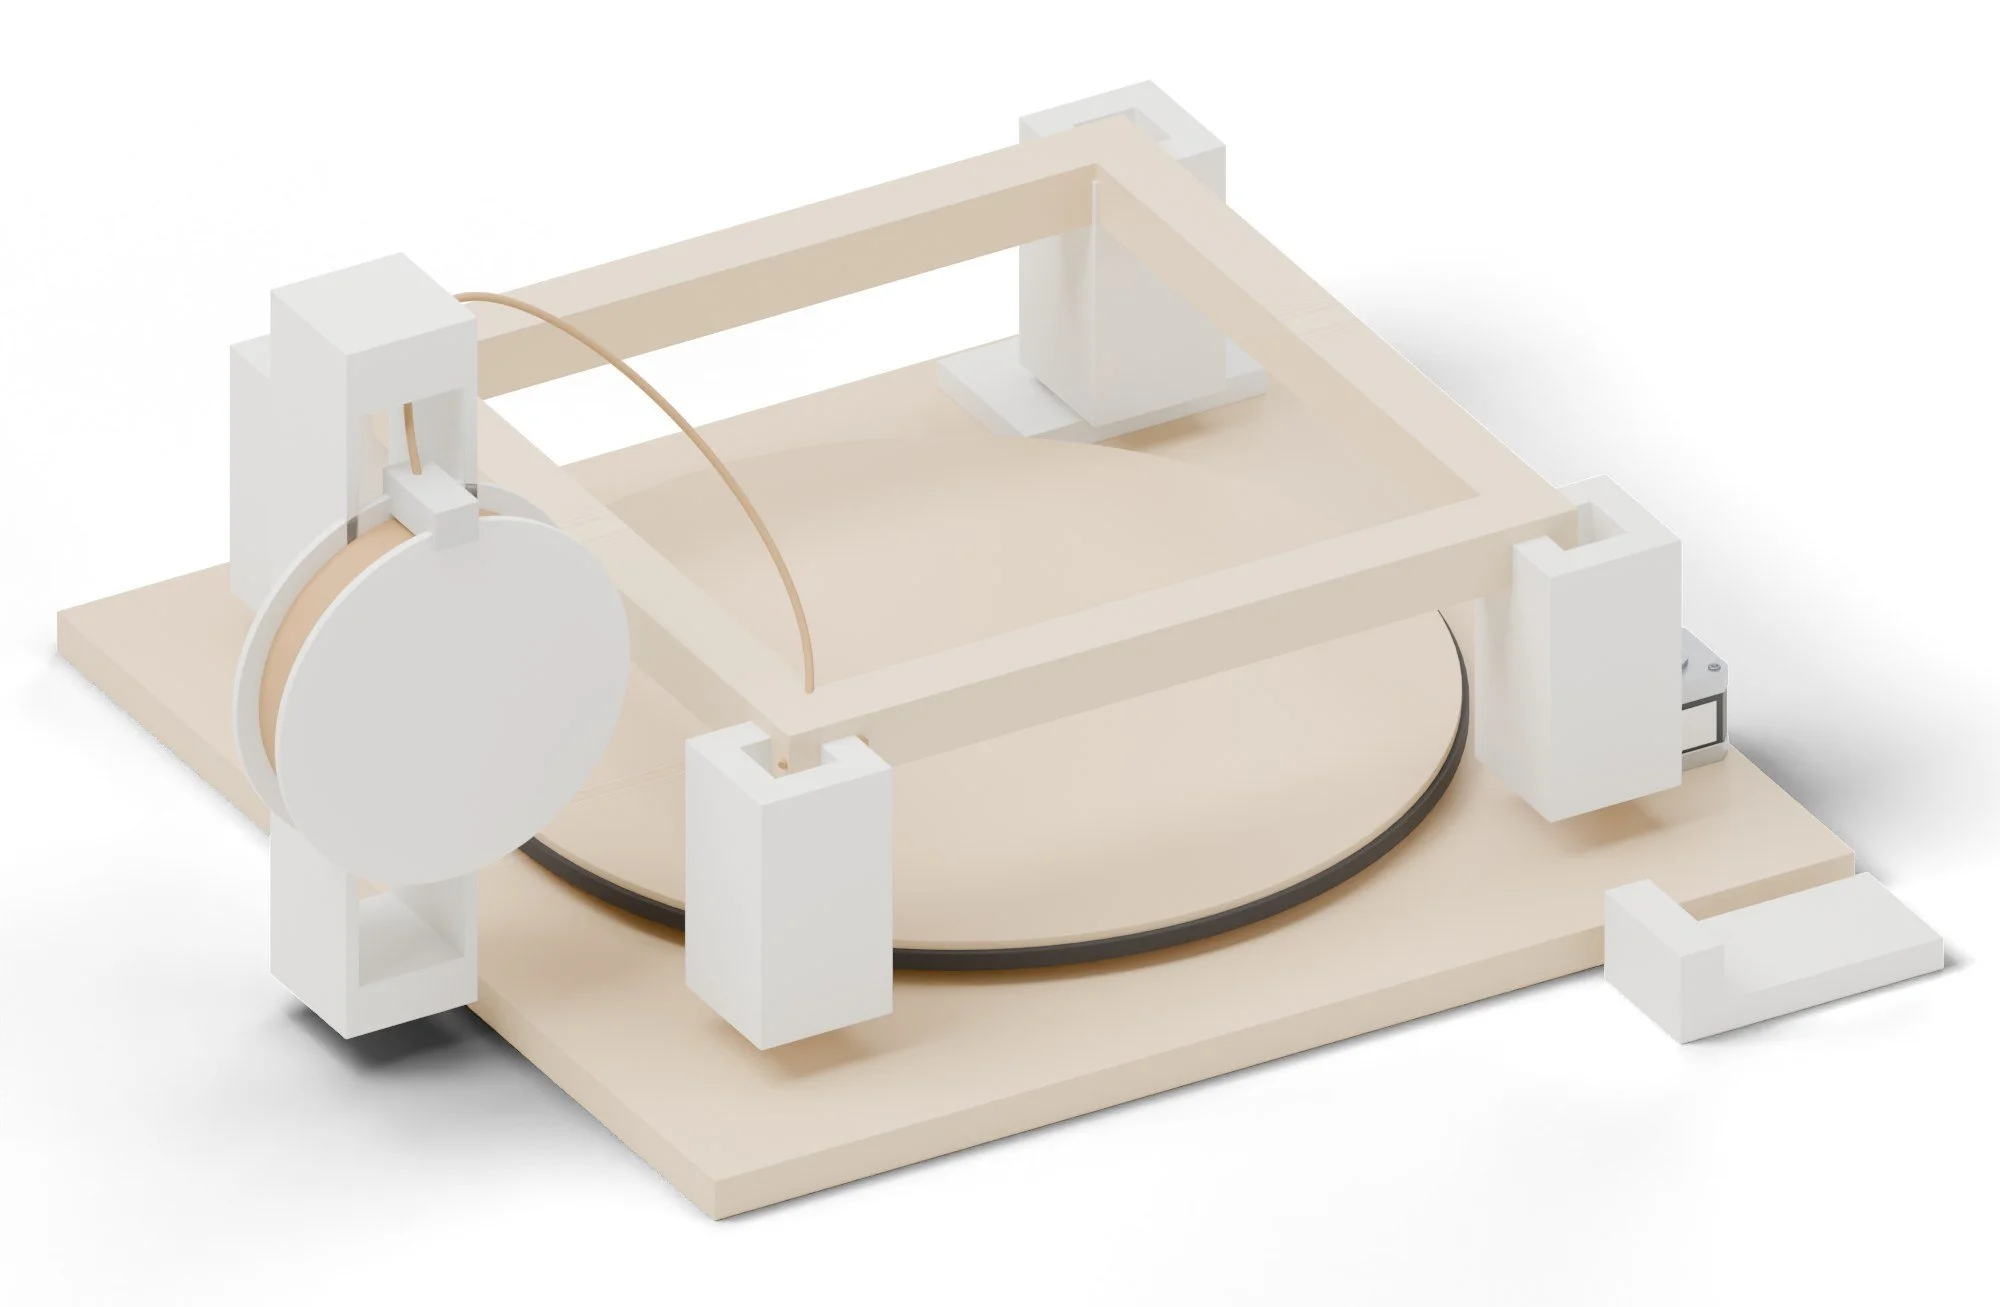
- Drop the seat frame into the four corner cups and tighten the clamp blocks.
- Wrap warps front to back over the L-nails. Each pedal press turns the frame 90 degrees and logs the count.
- Weave the wefts over-under by hand while the tower keeps tension; the count beeps when a side is done.
Recipes
Materials / settings / what to do when it goes wrong
Use it for: Danish cord stool and chair seats; flat-cane and rush seats on the same jig.
Materials
- 3/16 in (0.2 in) Danish paper cord: a 15 3/4 x 15 3/4 in seat takes about 393.7 to 492.1 ft (one 1 kg reel)
- L-nails (cord nails) every 0.98 in on the front and back rails' inside faces
- For cane: binder and strand cane, soaked 15 to 30 min in warm water
Settings
| Setting | Value |
|---|---|
| Tension | Firm, about 2 to 3 kg on the brake; cord should ring when plucked |
| Warp groups | 4 to 6 wraps per L-nail, depending on the design |
| Weft | Over 2 warp groups, under 2, shifting one per row for a herringbone; or 1/1 for a plain weave |
| Index | 90 degrees per pedal press |
| Count | Set wraps per side on the controller; it beeps at the target |
Steps
- Nail the L-nails in, angled 10 degrees outward.
- Clamp the frame in the jig and load the reel on the tower.
- Tie off the cord at the first nail and wrap the warps, hooking each group on its nail.
- Weave the wefts by hand, turning with the pedal; pack each row tight with a blunt stick.
- Finish by tucking the end under and tacking it; mist lightly and let it settle overnight.
Troubleshooting
| Problem | Fix |
|---|---|
| Saggy seat | Tension too low or the cord stretched; re-tension the last warps. |
| Uneven spacing | Count was off; the controller log shows which side. |
| Cord frays | Smooth the rail edges; reduce brake drag slightly. |
Safety
- Keep fingers out of the turntable rim when it indexes.
Numbers are starting points. Run one test piece on every new batch of material.
What to buy
11 parts / $139.00 before tax / estimates, check the links
 016 in steel lazy-susan bearing, 500 lb$9.00Same as VogueView on Amazon →02NEMA17 stepper, 1 9/16 in$12.00Turns the tableView on Amazon →03Arduino Nano (USB-C clone)$6.00ControllerView on Amazon →
 04A4988 driver$8.00Stepper driverView on Amazon →
 05GT2 0.24 in open belt 6.6 ft + 20T pulley$10.00Rim driveView on Amazon →
 06Microswitch with lever, 5-pack$7.00PedalView on Amazon →07608ZZ bearings, 10-pack$8.00Cord guideView on Amazon →
 08Danish paper cord 3/16 in, 1 kg$40.00Weaving cordView on Amazon →
 09L-nails (Danish cord nails), 100$10.00Warp anchorsView on Amazon →
 1012 V 2 A supply$9.00MotorView on Amazon →11PETG filament 1 kg$20.00Printed partsView on Amazon →
What to make
Printed on the printers you have / cut on the xTool or sent out
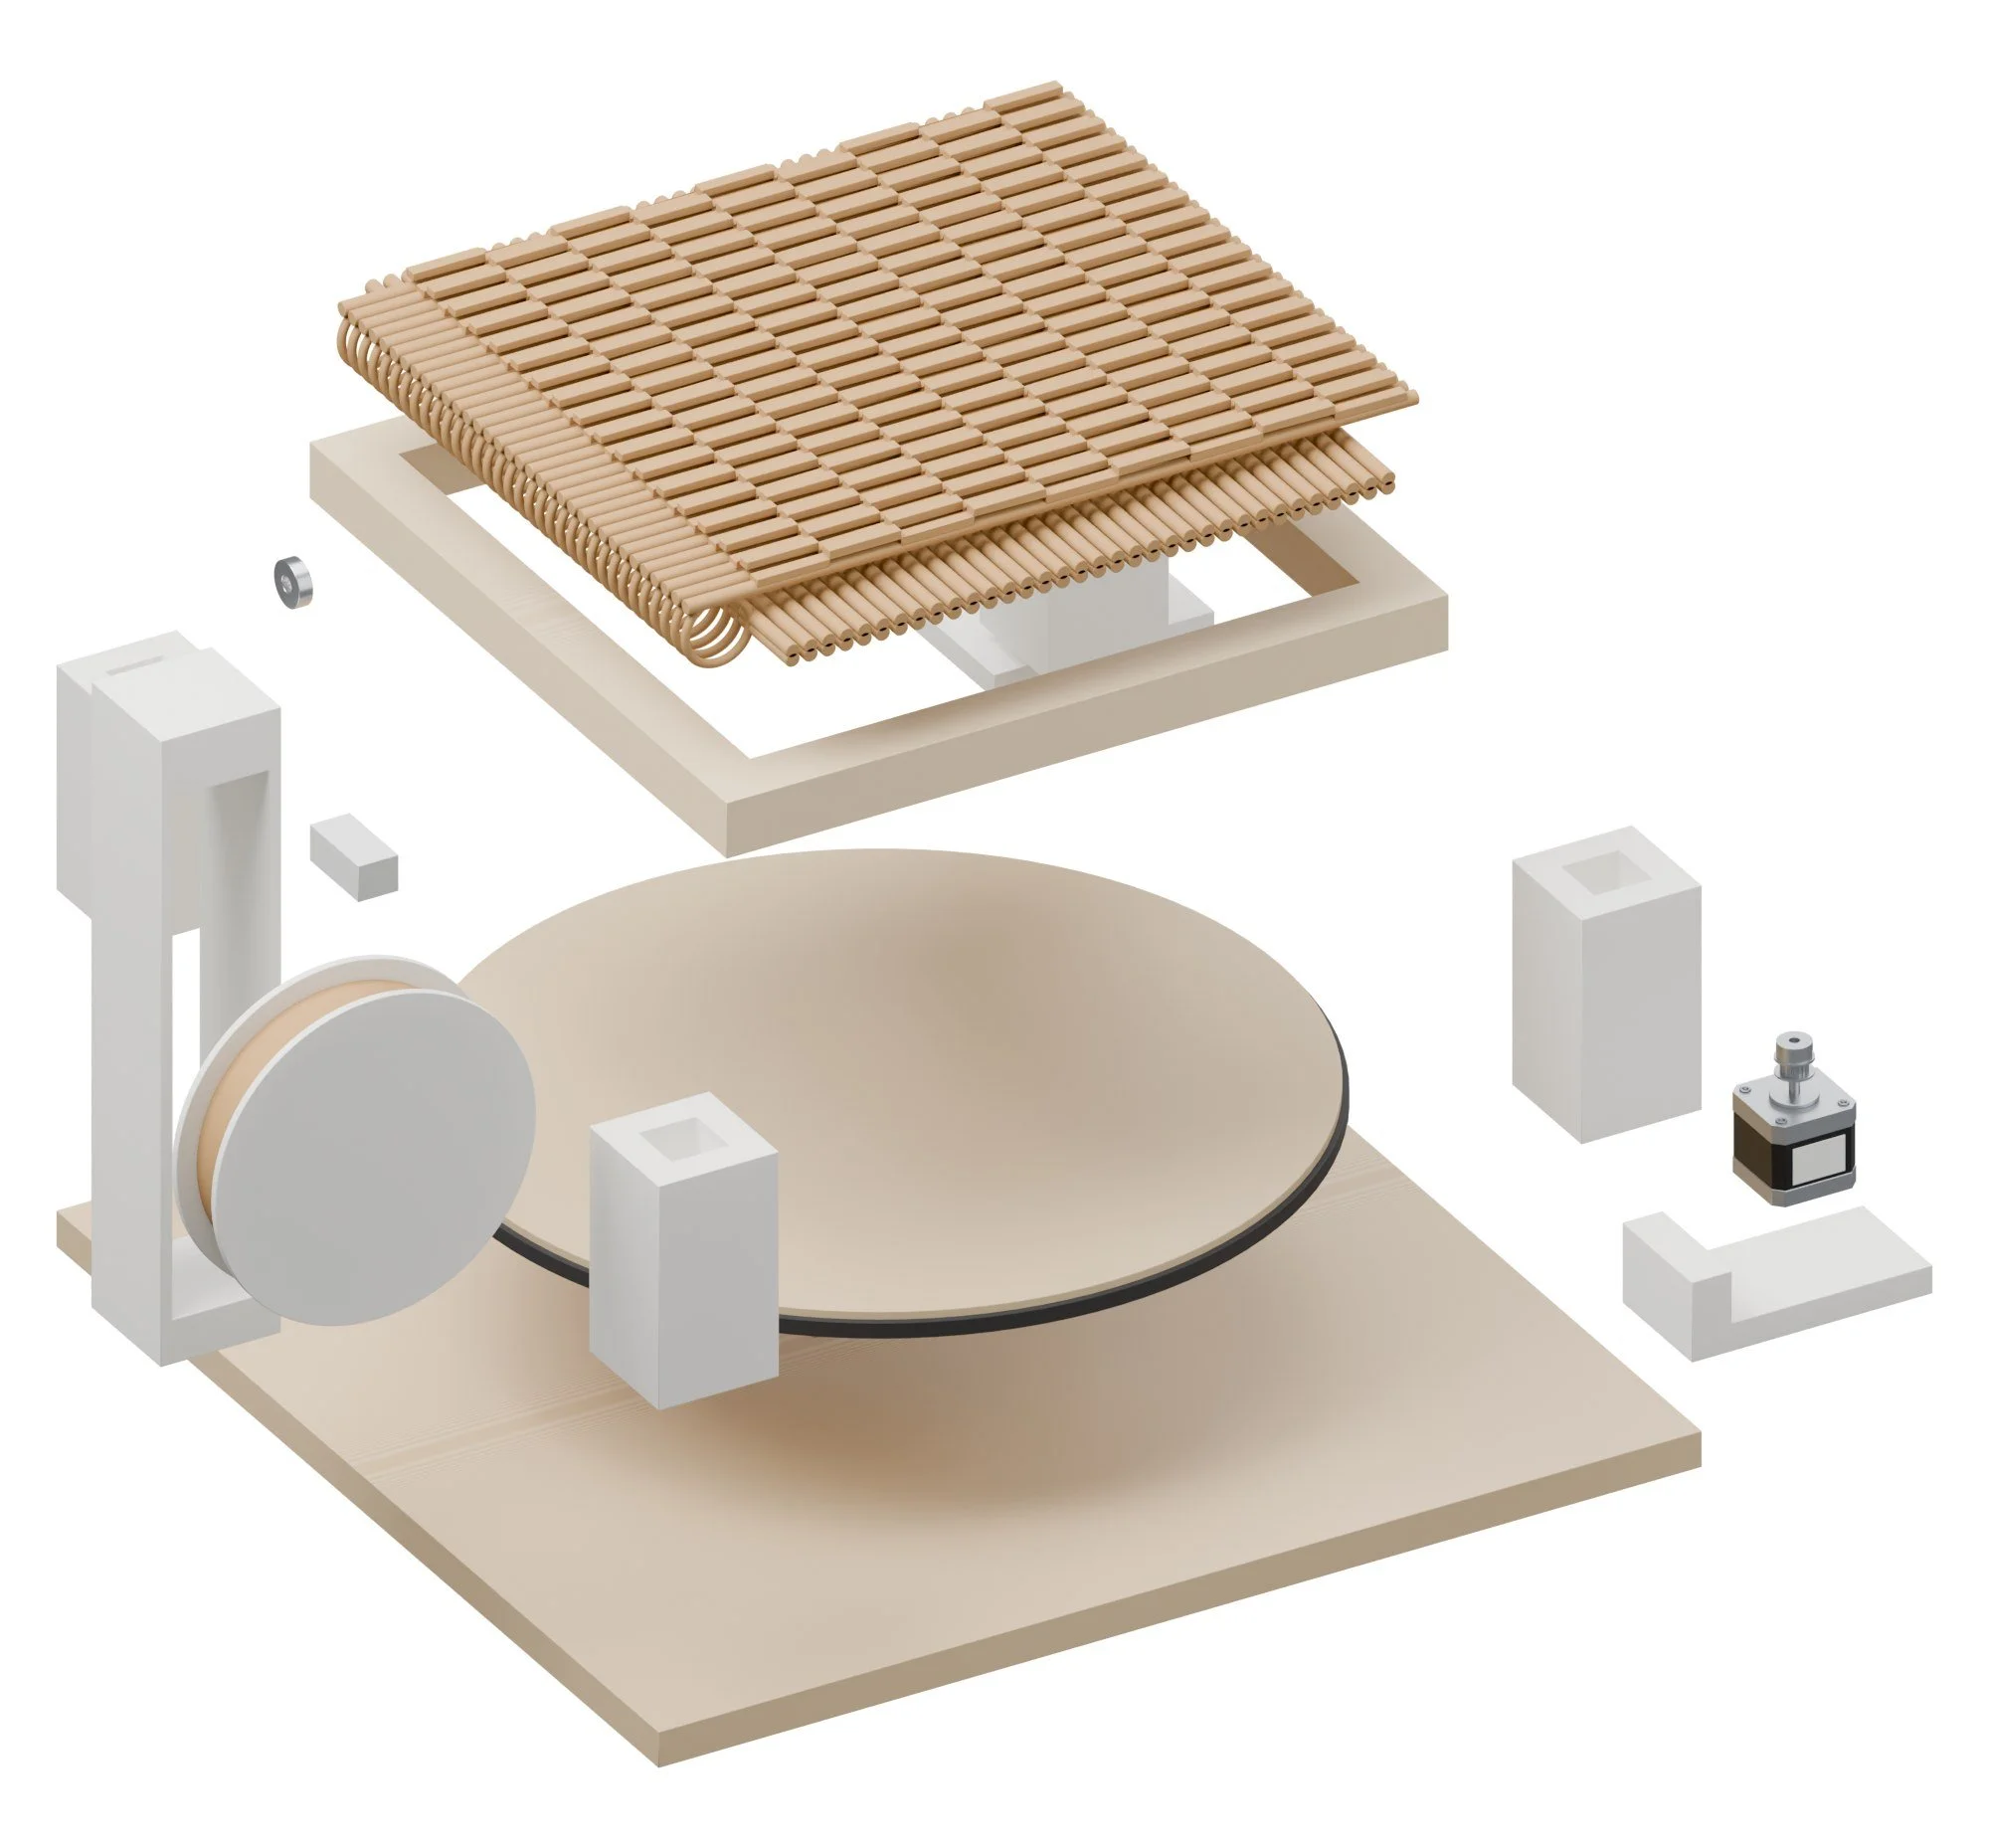
| Corner postPETG, 4 off. Screw to the turntable; the cup takes the seat corner. | |
| Corner postPETG, 4 off. Screw to the turntable; the cup takes the seat corner. | |
| Corner postPETG, 4 off. Screw to the turntable; the cup takes the seat corner. | |
| Corner postPETG, 4 off. Screw to the turntable; the cup takes the seat corner. | |
| Cord towerPETG-CF in 2 halves; spool axle is 5/16 in rod. | |
| Spool flanges | |
| Felt brakeFelt pad on a printed lever, M5 knob sets drag. | |
| Foot pedalPETG, lever on an M5 bolt pressing a microswitch. | |
| Controller box |
Build guide
Tools / parts / every step, start to finish
Open the full build guide
Time: 4 hours plus printing Skill: Easy
Tools
- Hex keys
- Glue
- Soldering iron
Parts
Bought (full list with links in the README and buy_list.csv):
- 1 x 6 in steel lazy-susan bearing, 500 lb
- 1 x NEMA17 stepper, 1 9/16 in
- 1 x Arduino Nano (USB-C clone)
- 1 x A4988 driver
- 1 x GT2 0.24 in open belt 6.6 ft + 20T pulley
- 1 x Microswitch with lever, 5-pack
- 1 x 608ZZ bearings, 10-pack
- 1 x Danish paper cord 3/16 in, 1 kg
- 1 x L-nails (Danish cord nails), 100
- 1 x 12 V 2 A supply
- 1 x PETG filament 1 kg
- 1 x M3/M4/M5 screws, nuts and inserts (already owned)
Made:
stl/cd_corner_post.stl(printed) x 4stl/cd_cord_tower.stl(printed)stl/cd_spool_flanges.stl(printed)stl/cd_felt_brake.stl(printed)stl/cd_foot_pedal.stl(printed)stl/cd_controller_box.stl(printed)
Steps
1. Print and cut
Print every STL in stl/ (PETG unless the part note says otherwise, 0.008 in layers, 4 walls, 30 to 40% gyroid). Cut every file in laser/ on Drag Queen. Check every MEASURE note in the README against your actual parts before printing the parts they touch.
2. Turntable
Screw the lazy-susan bearing between the base and the 0.47 in ply disc; glue the GT2 belt teeth-out round the disc rim.
3. Motor
Mount the NEMA17 with the 20T pulley meshing the rim belt.
4. Jig
Screw the four corner posts into the slots at your seat's size.
5. Tower
Join the tower halves, fit the axle, felt brake and 608 guide.
6. Pedal and box
Mount the microswitch in the pedal; Nano and A4988 in the box.
Wiring
- A4988 on the Nano (STEP D3, DIR D4), 12 V motor supply; pedal switch on D2 to ground; buzzer on D8.
Firmware
cane_dace.ino: pedal press = turn 90 degrees (rim teeth / 20 x 200 x 16 / 4 steps), count presses and wraps, beep at the target.
First test
- Ten presses should bring the table back to the same mark after every 4.
Vogue
Webcam 3D-scanner turntable for photogrammetry (scan pieces, molds, found objects, client parts).
Fairy Ring pipeline / Scan in / gets scans of objects, molds and parts
Vogue is a photogrammetry turntable. Put a piece on the platter and she turns it a step at a time while a webcam takes 72 photos from three heights, then free software builds a mesh. Scan finished work for the site and AR, molds and found objects for new pieces, and parts that need a matching fit.
How it works
Object / Mesh
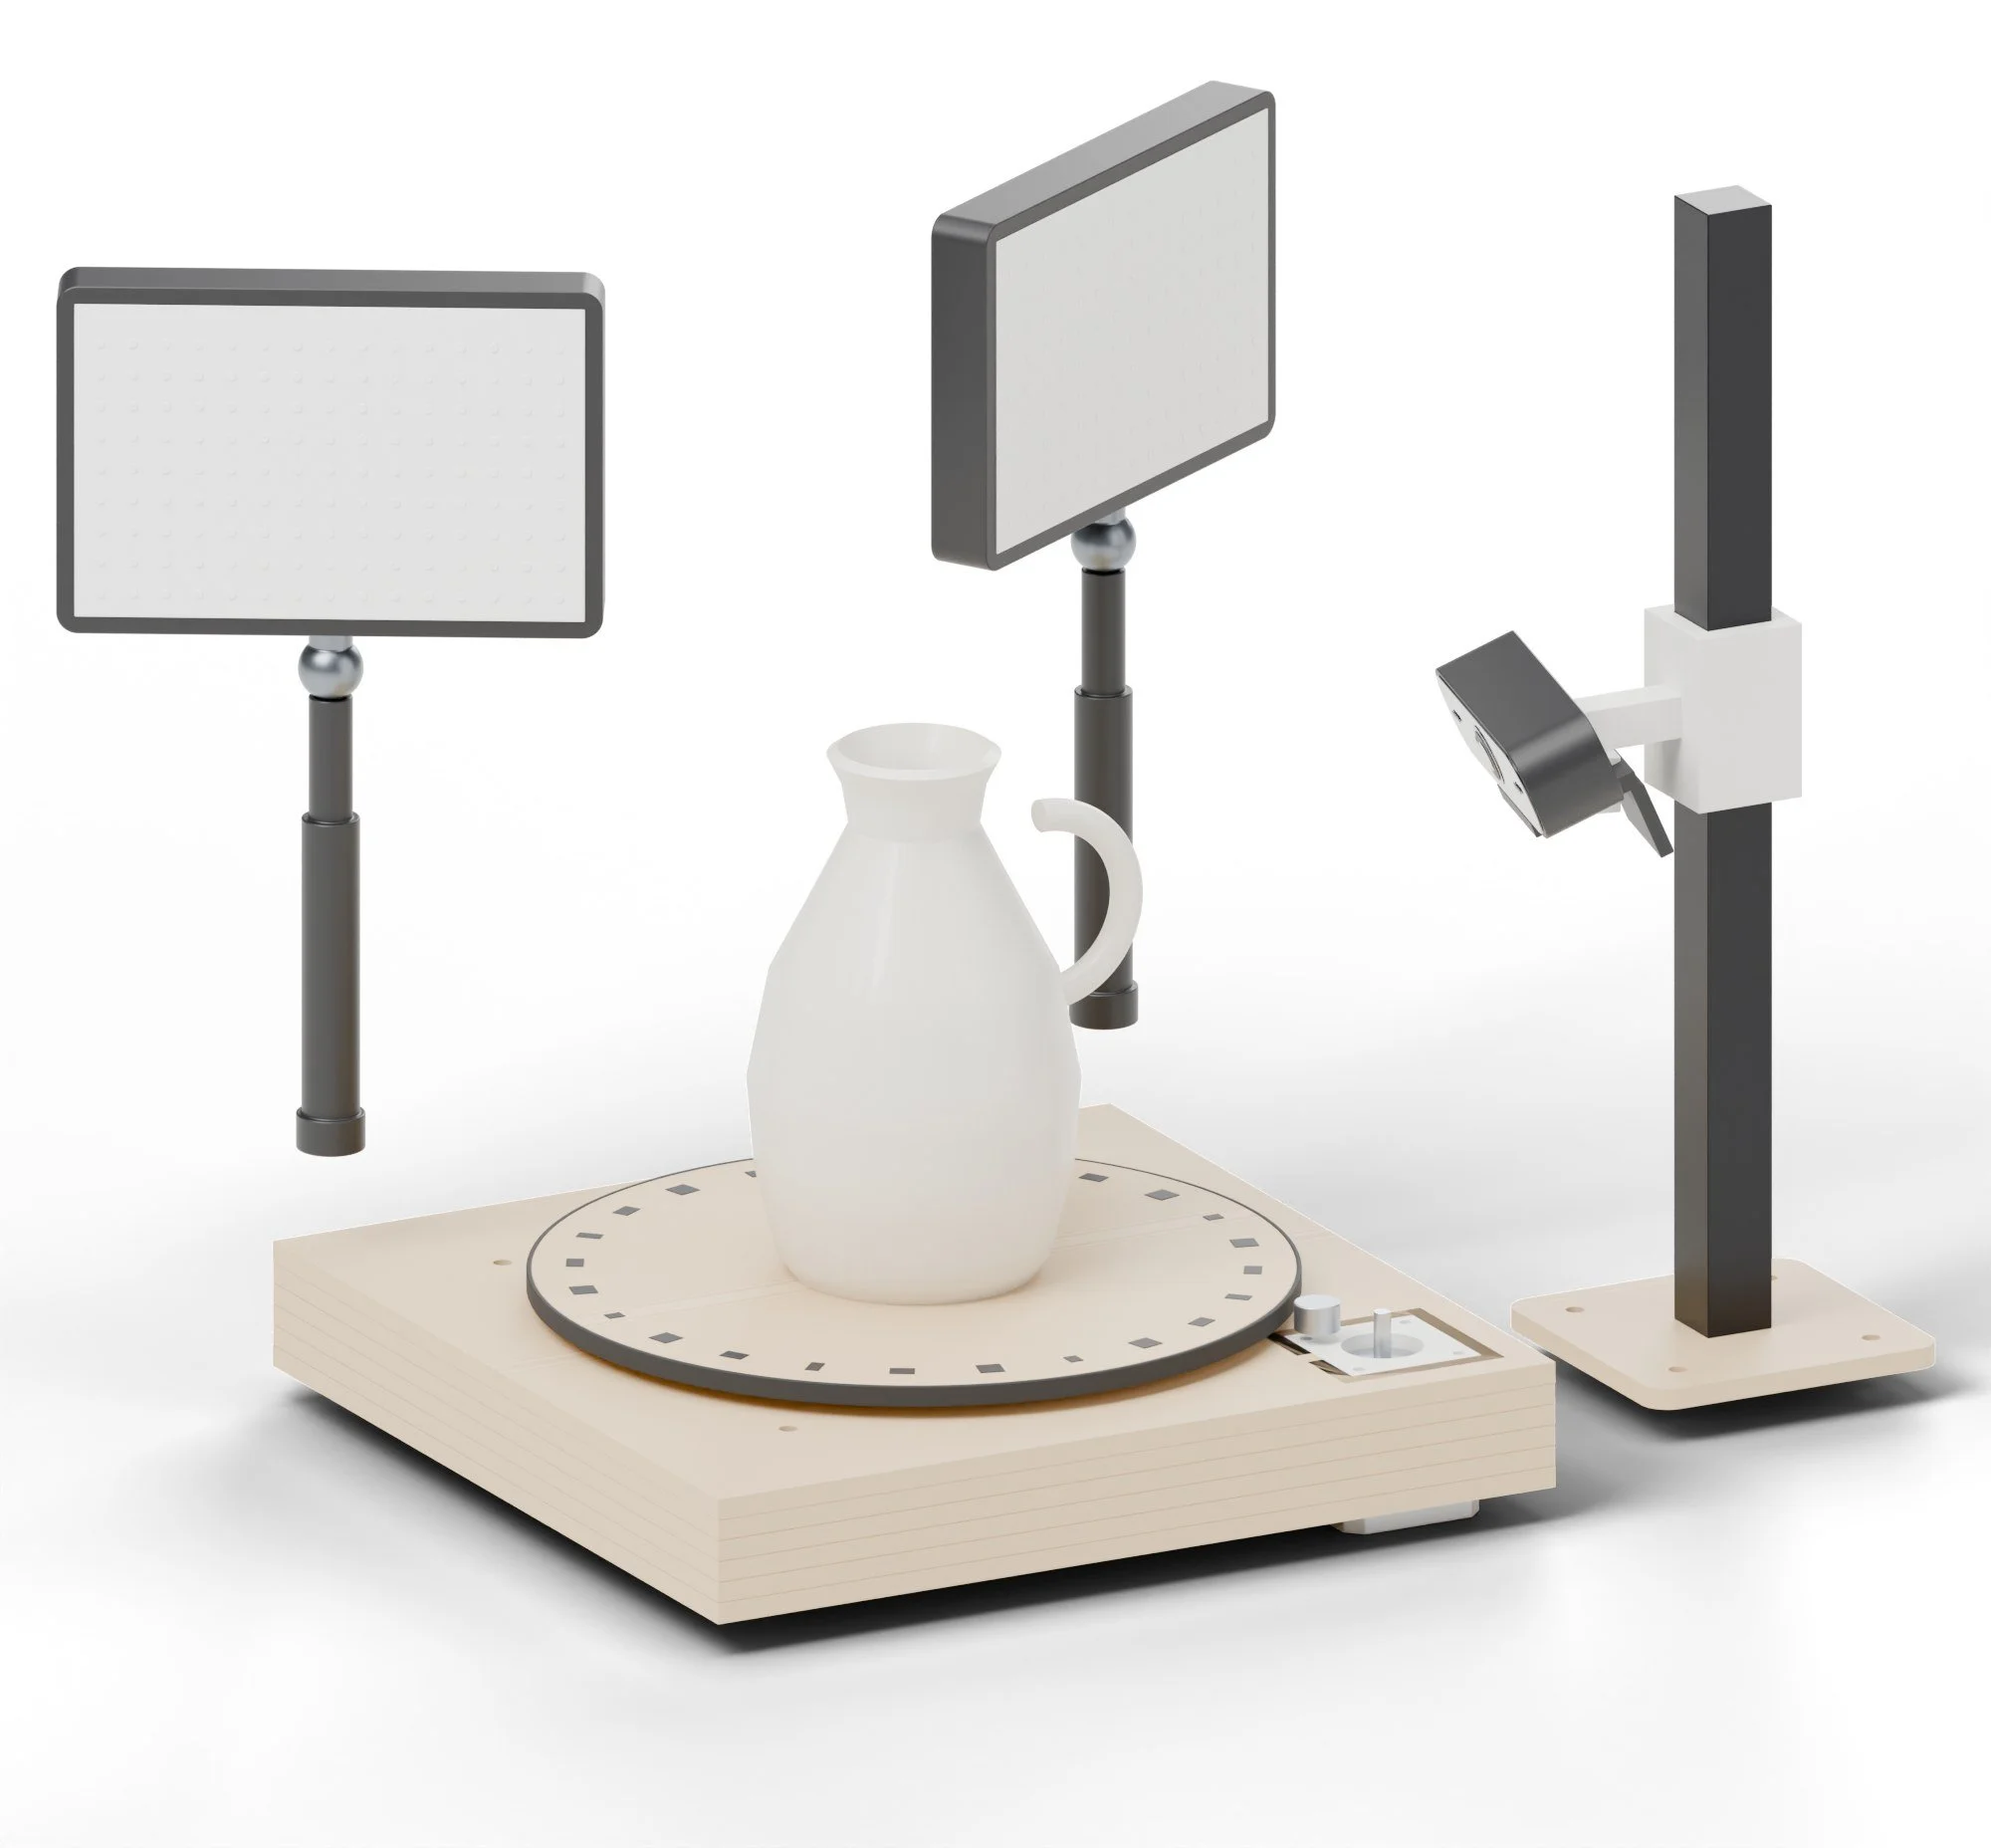
- A NEMA17 with a 20T pulley drives a GT2 belt glued teeth-out around the platter's rim, so each step is small and exact.
- An Arduino turns the platter 15 degrees, pauses, and a Python script on the computer grabs a frame: 24 frames at each of 3 camera heights.
- Meshroom (free) or RealityScan turns the photos into a mesh; laser-engraved markers on the platter help it line up the views.
What it can make
Products / and less obvious uses
- Scans of found objects
- Into Fairy Ring to remodel, scale or mirror.
- Scans of molds and pours
- Check what came out against the model.
- Client parts
- Measure a part you need to fit something to.
- Turntable shots
- Even, shadowless photos of finished pieces for the site.
Tricks worth trying
- Exact-fit cases Scan a ring or a tool, and Fairy Ring makes a Mother insert or a Skin Tight tray that fits it.
Recipes
Light / surface prep / turning photos into a mesh
Use it for: Photogrammetry scans of pieces, molds, found objects and client parts for the site, AR and Fairy Ring.
Materials
- Matte scanning spray (AESUB Blue, vanishes in hours) for shiny or dark objects
- Coded targets printed on the platter (in
laser/) - Free software: Meshroom (AliceVision) or RealityScan
Settings
| Setting | Value |
|---|---|
| Steps per ring | 36 (every 10 degrees); 72 for fine detail |
| Rings | 3 camera heights: 15, 35 and 60 degrees |
| Camera | C920 at 1920 x 1080, manual focus, manual exposure, auto white balance off |
| Lights | Both Neewer panels at 5600 K, 70%, diffusers on |
| Settle time | 0.5 s after each step before the shot |
Steps
- Spray shiny objects lightly; let it dry 2 minutes.
- Centre the object on the platter; set the mast to ring 1.
- Run the capture script: it steps, waits, shoots and names files by ring and angle.
- Repeat for rings 2 and 3, and once with the object on its side for the base.
- Load all photos into Meshroom, run the default pipeline, then decimate and export GLB for the site.
- Scale the model with a known dimension (the platter targets are 2 in apart).
Troubleshooting
| Problem | Fix |
|---|---|
| Holes in the mesh | Add a ring or more steps; check the object stayed centred. |
| Mesh is noisy | More light and lower ISO (exposure); spray reflective spots. |
| Platter shows up in the model | Mask it out, or shoot with the platter's matte black cover. |
Safety
- Use scanning spray outdoors or with ventilation.
Numbers are starting points. Run one test piece on every new batch of material.
Getting a good scan
Light, surface, and photosYou need
| LightBoth LED bars on, room lights off | flat, no shadows |
| SurfaceShiny or dark? Dust with scanning spray or dry shampoo | matte |
| Photos24 per ring, 3 rings | 72 |
Method
- Put a sheet of newspaper on the platter: the print gives the software something to track.
- Run the turntable script. Don't move or touch anything.
- Load the photos in Meshroom (free) and run the default pipeline.
- Clean the mesh in Blender, scale it from a known size, and send it to Fairy Ring.
What to buy
8 parts / $166.95 before tax / estimates, check the links
026 in steel lazy-susan bearing, 500 lb$8.00View on Amazon → 03ZEKOLO GT2 0.24 in open belt, 3.3 ft$7.00Glued teeth-out to the platter rimView on Amazon →
 04CNC Shield V3 + 4 A4988 drivers (plus any Arduino Uno R3)$18.00View on Amazon →
 0512 V 2 A supply, UL listed, 0.217 x 0.083 in$9.00View on Amazon →
 06Neewer dimmable 5600K USB LED lights, 2-pack$30.00View on Amazon →
 07uxcell 2020 extrusion 13 3/4 in, 4-pack$10.00Camera mastView on Amazon →AliceVision08Meshroom photogrammetry softwareFree, open sourceView on AliceVision →
What to make
Printed on the printers you have / cut on the xTool or sent out
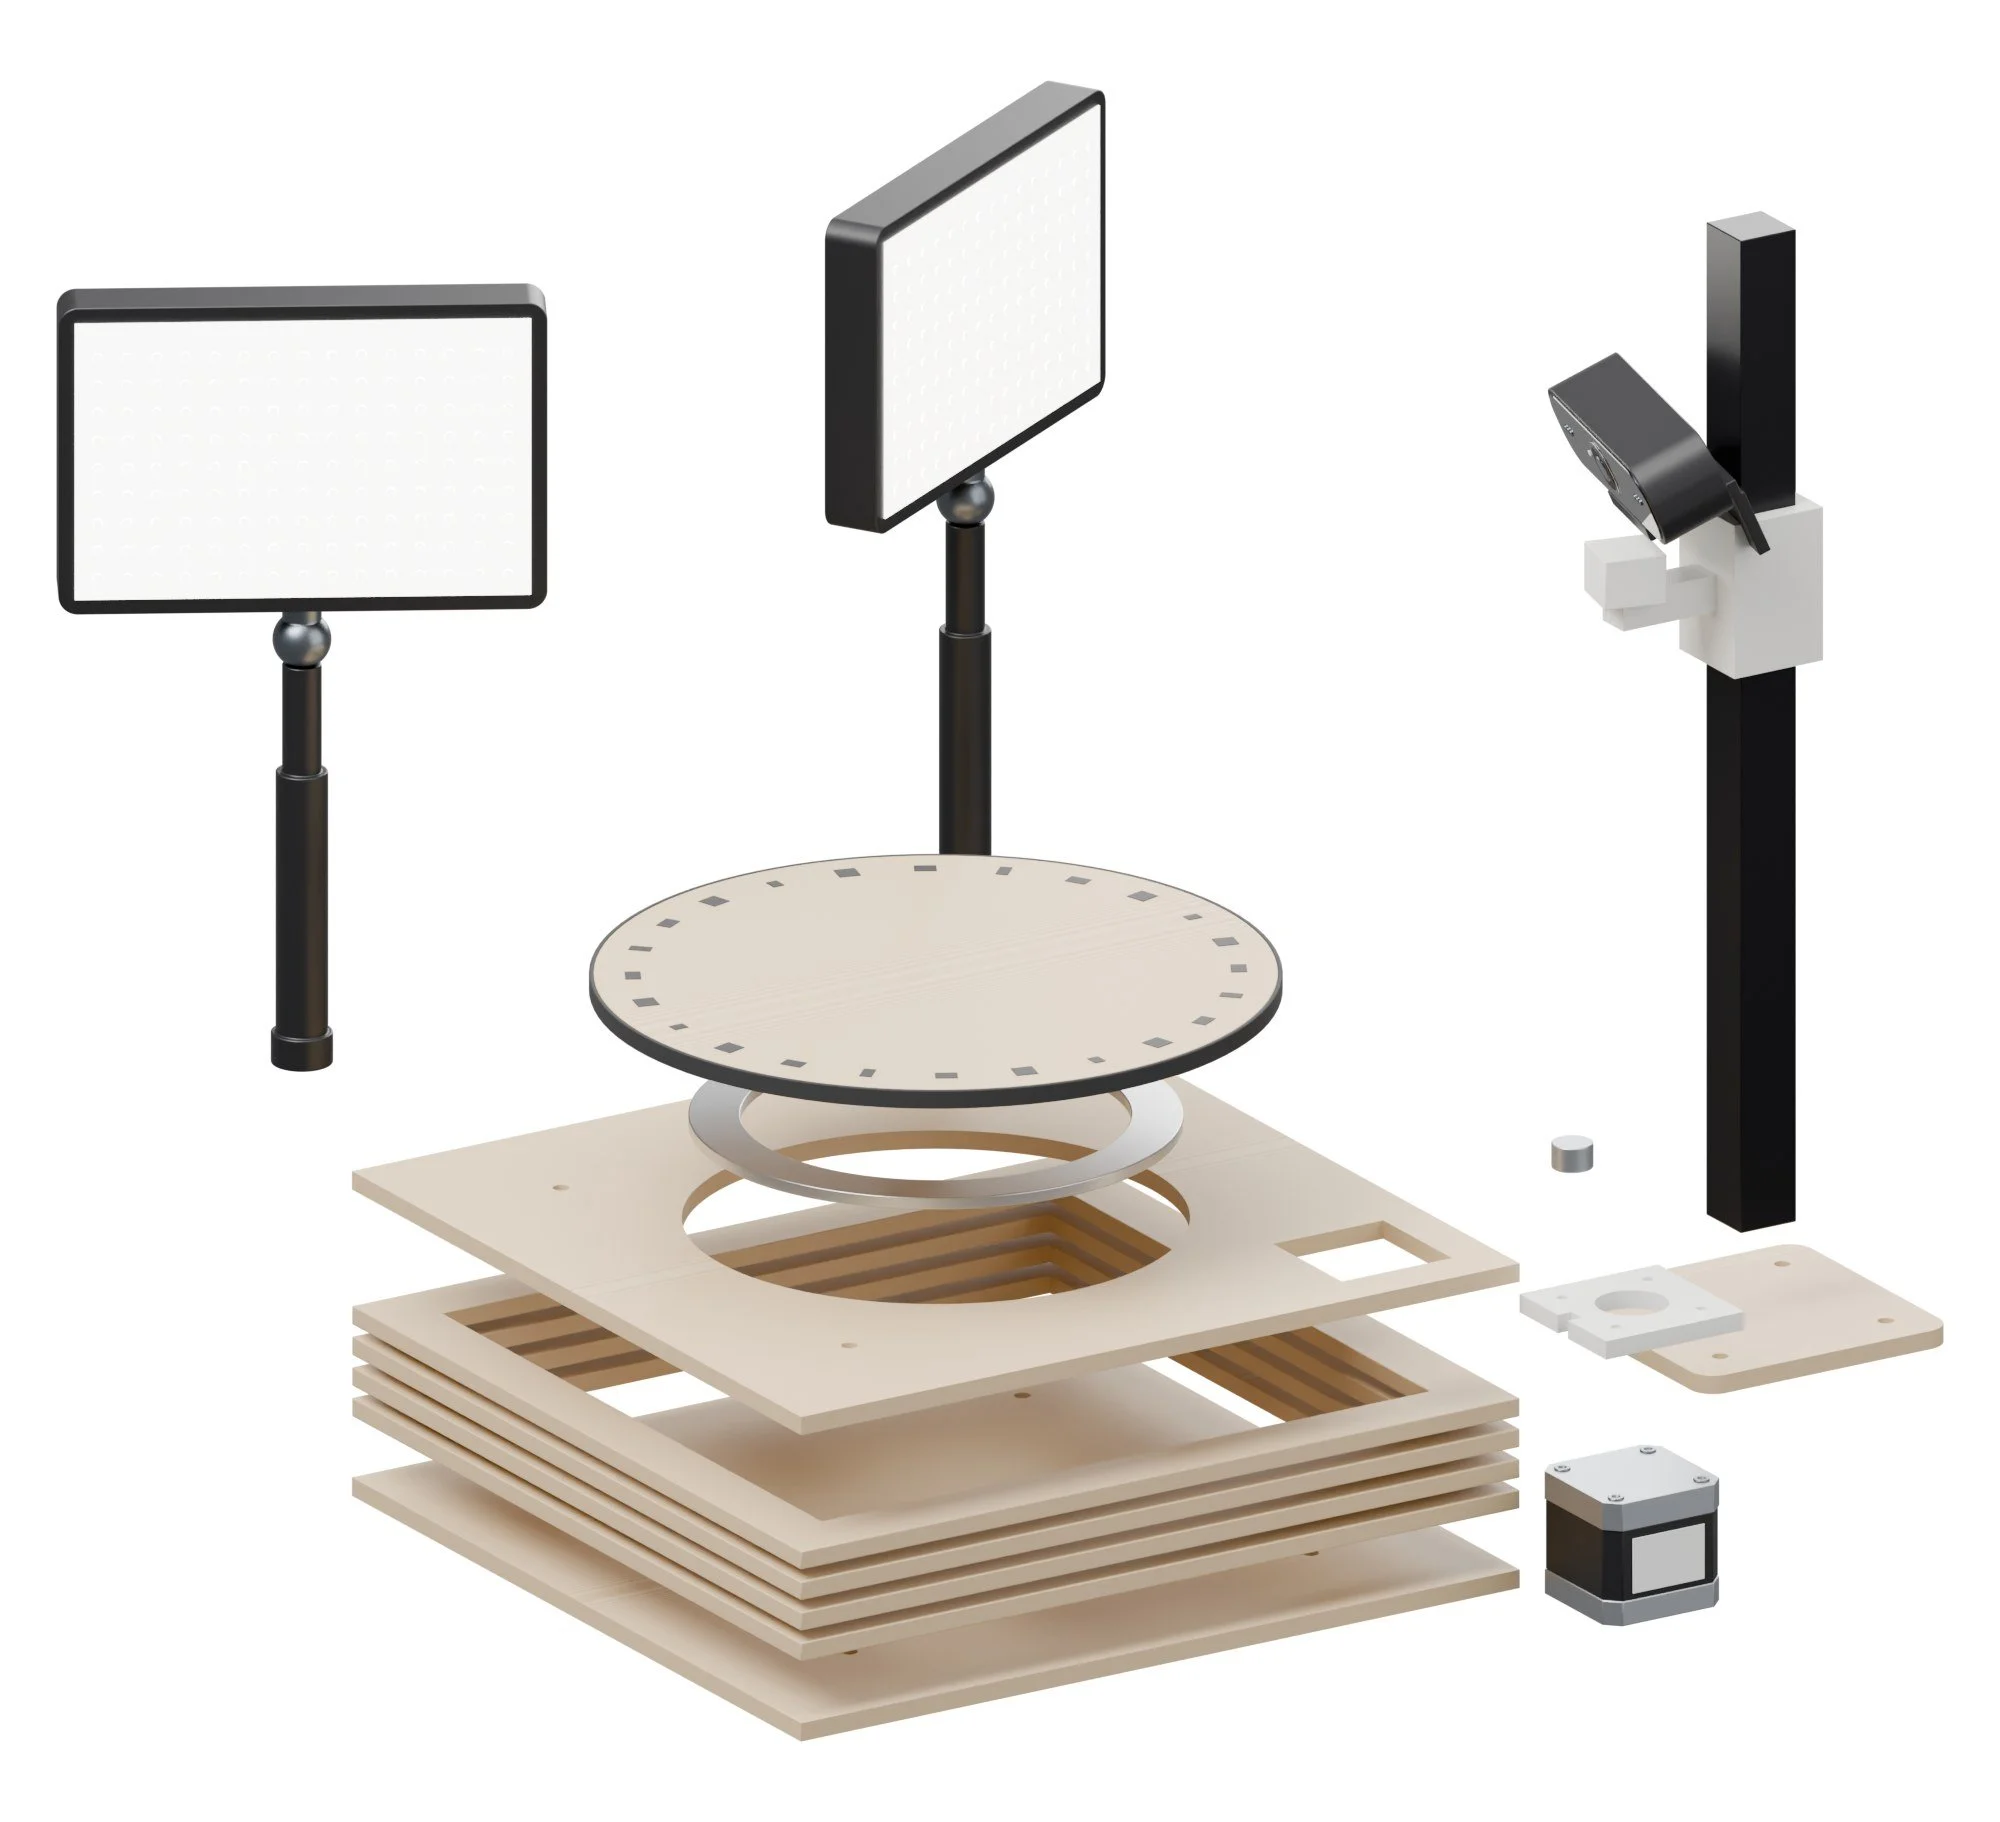
| Base bottom0.24 in birch ply. | cut |
| Base ringx4, 0.24 in birch ply, glued into a 15/16 in wall. | cut |
| Base top0.24 in birch ply. Centre hole clears the bearing; corner pocket is the motor's. | cut |
| Platter0.24 in ply. Engrave the marker ring from the SVG layer (vg_platter_markers). | cut |
| Motor mountPETG. Pivots on one corner screw; a rubber band pulls the pulley into the rim belt. | |
| Mast foot0.24 in ply, x3 glued. | cut |
| Mast carriagePETG. Thumb screw locks it at the 3 height marks. | |
| Cam tiltPETG. 1/4-20 screw for the webcam's tripod thread; 3 tilt detents. |
Build guide
Tools / parts / every step, start to finish
Open the full build guide
Time: 4 to 5 hours plus printing Skill: Easy
Tools
- Hex keys
- Glue for the belt
- Soldering iron
Parts
Bought (full list with links in the README and buy_list.csv):
- 1 x Logitech C920 HD Pro webcam
- 1 x 6 in lazy-susan bearing
- 1 x NEMA17 + 20T GT2 pulley (already owned)
- 1 x GT2 0.24 in open belt, 3.3 ft
- 1 x Arduino Uno + CNC shield + A4988
- 1 x 12 V 2 A supply
- 1 x LED light bars, dimmable, pair
- 1 x 2020 extrusion 13 3/4 in + T-nuts
- 1 x Meshroom photogrammetry software
Made:
laser/vg_base_bottom_6mm.dxf(laser)laser/vg_base_ring_6mm.dxf(laser)laser/vg_base_top_6mm.dxf(laser)laser/vg_platter_6mm.dxf(laser)stl/vg_motor_mount.stl(printed)laser/vg_mast_foot_6mm.dxf(laser)stl/vg_mast_carriage.stl(printed)stl/vg_cam_tilt.stl(printed)
Steps
1. Print and cut
Print every STL in stl/ (PETG unless the part note says otherwise, 0.008 in layers, 4 walls, 30 to 40% gyroid). Cut every file in laser/ on Drag Queen. Check every MEASURE note in the README against your actual parts before printing the parts they touch.
2. Base
Glue the three ply base layers; screw the lazy-susan bearing to the base and the platter.
3. Rim belt
Glue the GT2 belt teeth-out around the platter rim with CA; trim the joint square.
4. Motor
Mount the NEMA17 in its printed mount so the 20T pulley meshes the rim belt.
5. Mast
Bolt the 2020 mast to its foot; slide on the carriage and the C920 tilt mount.
6. Lights
Set the two Neewer panels on the back corners, aimed at the platter centre.
Wiring
- Arduino Uno + CNC shield, A4988 on X for the turntable; 12 V 2 A supply.
- C920 to the PC by USB.
Firmware
- GRBL on the Uno with $100 = steps per degree (200 x 16 x (rim teeth / 20) / 360).
- Capture script:
vogue_capture.py(OpenCV) sends G0 X10, waits, grabs a frame.
First test
- Turn 360 degrees and check the platter returns to the same mark.
- Scan a known box and check its size in the mesh within 0.5%.
Handmaiden
A printed SCARA arm that feeds the printers and the laser.
Fairy Ring pipeline / Serve / gets plate swaps and sheet loading
Handmaiden is a small printed SCARA arm that serves the machines. With a vacuum gripper she lifts veneer leaves and ply blanks off a stack onto the laser bed, and swaps spring-steel build plates on the printers, so a queue of jobs can run while the shop is empty.
How it works
Waiting / Serving
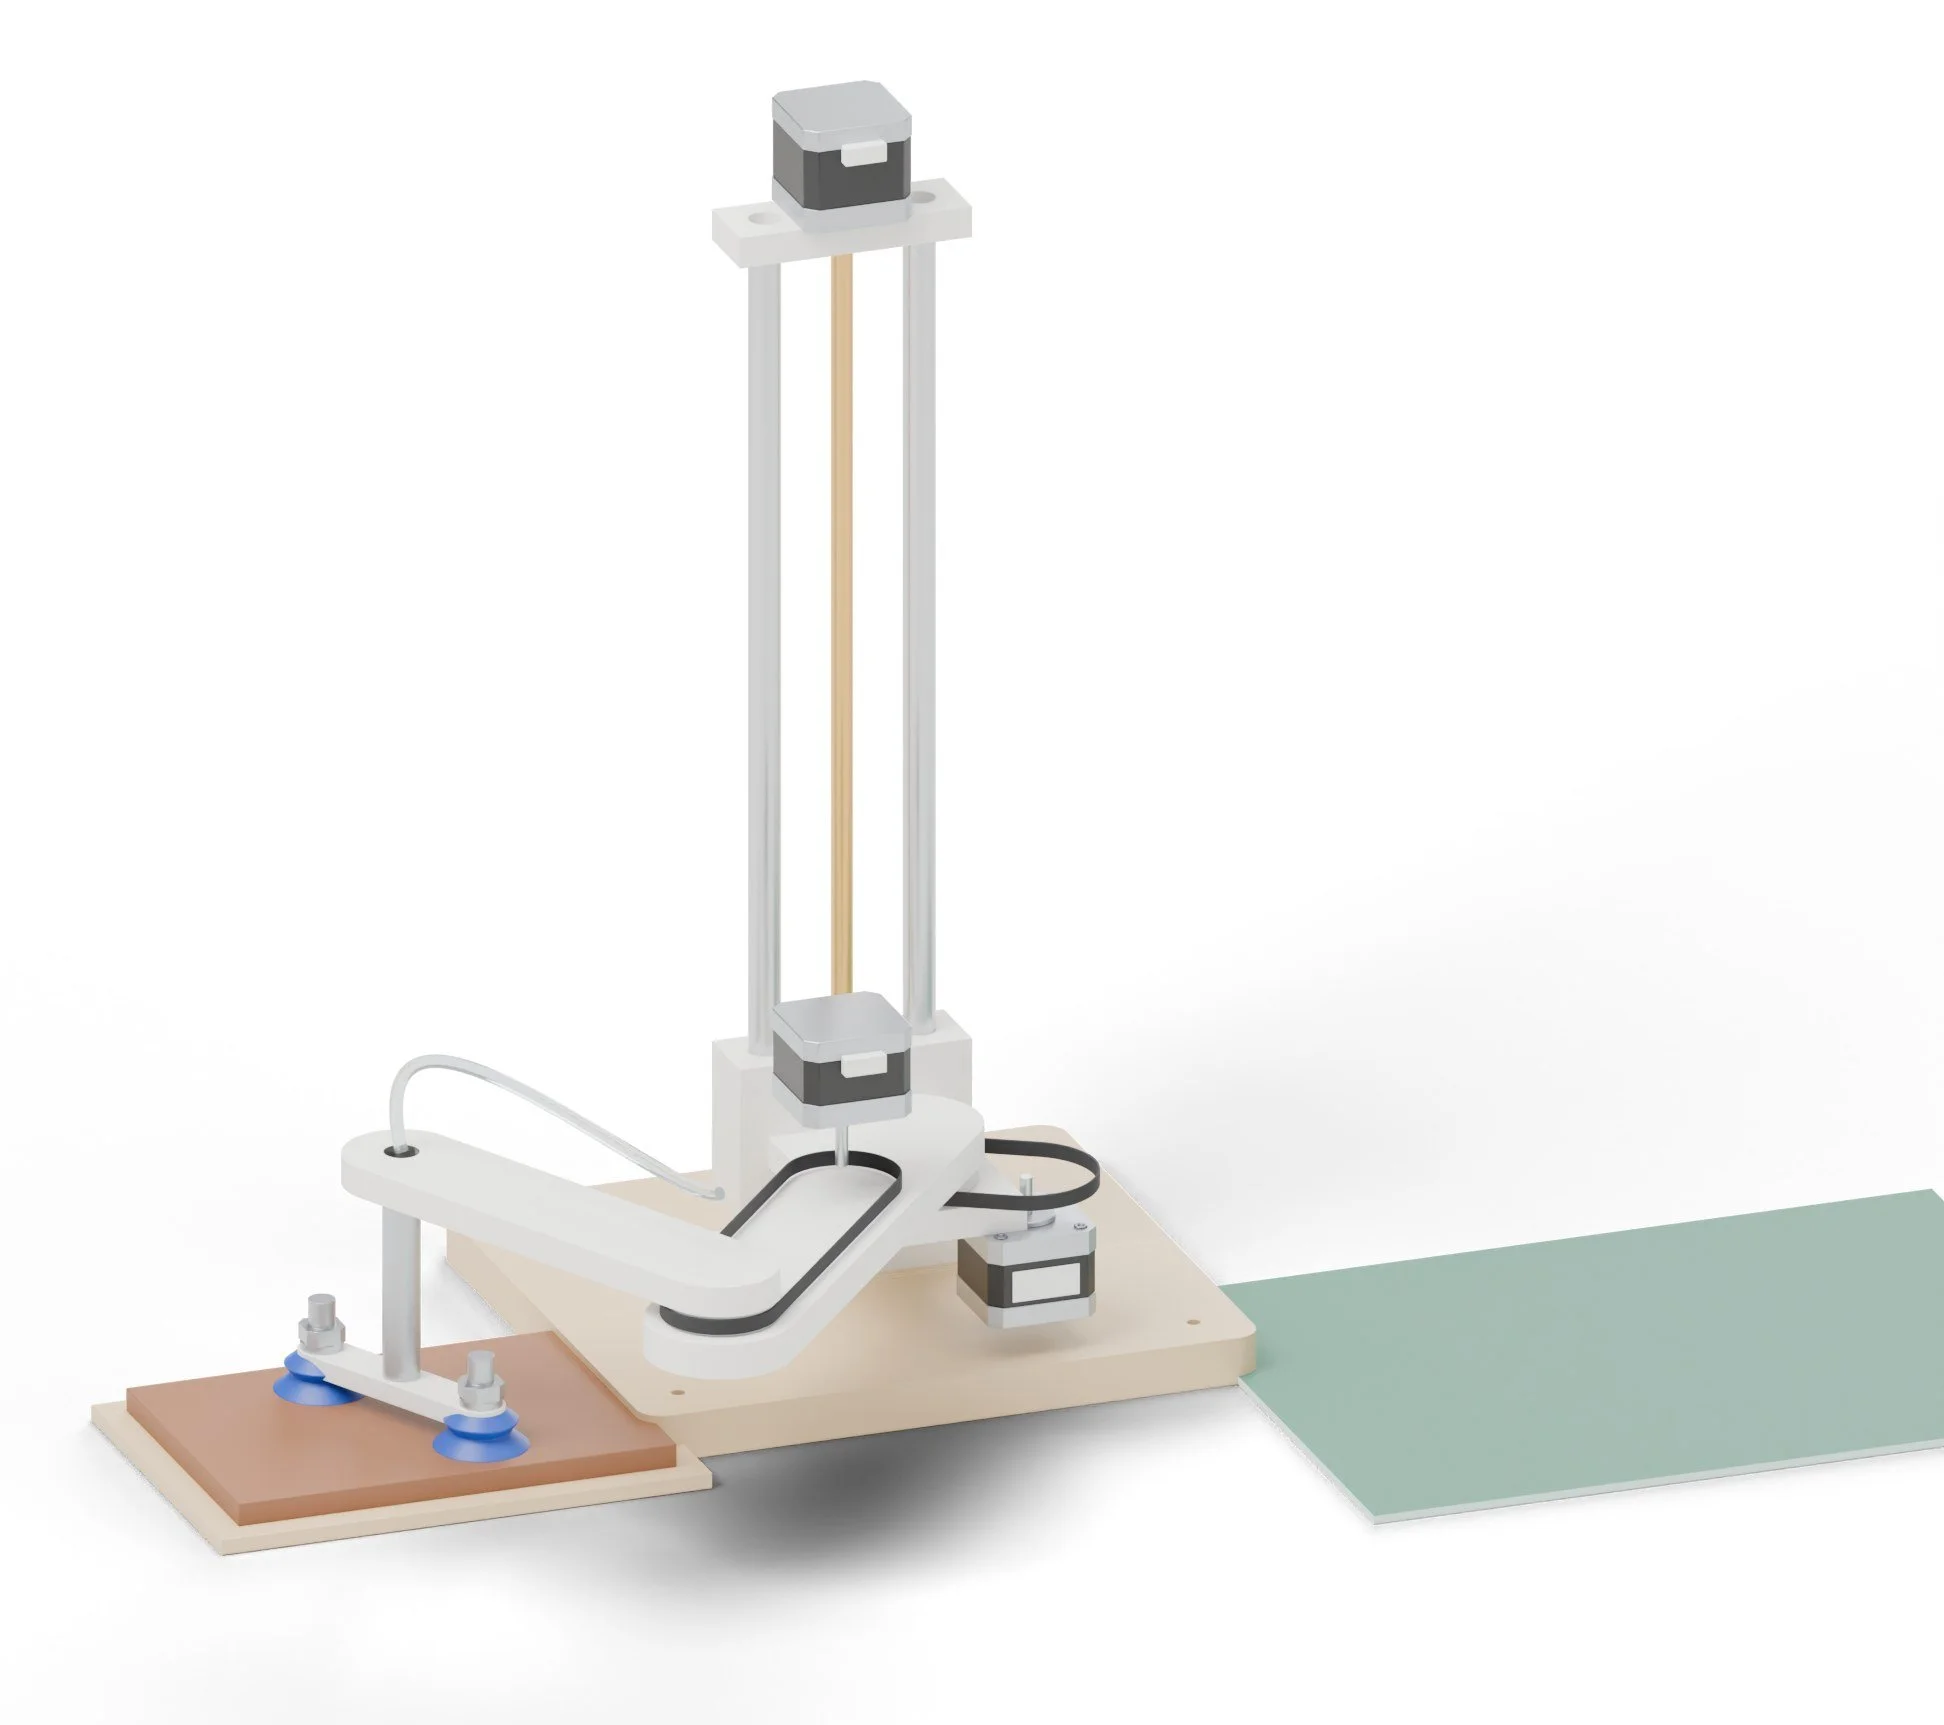
- Two belt-reduced arm joints and a lead-screw Z column give about 14 in of reach and 400 g of payload.
- Two bellows suction cups, a small 12 V pump and a valve pick up sheets and plates; a vacuum switch confirms the grip.
- A small Python host does the SCARA maths and sends joint moves to a FluidNC board, taking jobs from the same queue as the printers.
What it can make
Products / and less obvious uses
- Overnight batches
- Swaps print plates so 20 mold halves come off in one night.
- Sheet loading
- Feeds veneer leaves and ply blanks to the laser.
- Sorting
- Moves finished parts to a shelf by job.
Tricks worth trying
- Dip coating Dips small Mother pieces in the Queen Bee wax pot, the same depth and time every time. To test.
Recipes
What she can lift / and how to teach her
Use it for: Loads veneer sheets and printed parts onto the laser bed and printers, and unloads finished pieces.
Materials
- Flat sheets up to 300 g (veneer, 0.12 in ply, acrylic)
- Bellows cups need a sealed surface; very porous veneer may need a 2nd cup
Settings
| Setting | Value |
|---|---|
| Vacuum threshold | Grip confirmed at -40 kPa or lower |
| Speed | Joints 90 degrees/s, Z 0.79 in/s |
| Pick height | Cups touch +0.079 in compression |
| Release | Valve opens for 0.3 s, then the cups lift |
Steps
- Stack sheets in the tray, square to the corner posts.
- Teach the pick and place points once (jog and save) or load them from the Fairy Ring job.
- Run: pick, check vacuum, move, place, release, return.
- If the vacuum check fails twice, it stops and asks.
Troubleshooting
| Problem | Fix |
|---|---|
| Drops sheets | Leak at a cup: check the M10 threads and add a second cup. |
| Picks two sheets | Fan the stack or add a 0.5 s peel move. |
| Misses the corner | Re-home; check the arm's set screws. |
Safety
- Keep hands out of the arm's reach while it runs; it does not sense you.
- E-stop in reach.
Numbers are starting points. Run one test piece on every new batch of material.
What to buy
11 parts / $218.51 before tax / estimates, check the links
 01LM12UU bearings, 10-pack (+ 0.47 in x 17 11/16 in rods)$30.00Z columnView on Amazon →
 02YEJMKJ T8 lead screw 15 3/4 in + brass nut, 2-pack$14.00View on Amazon →StepperOnline03NEMA17 17HS19-2004S1$36.00Qty 3 · Shoulder, elbow, ZView on StepperOnline →
 04GT2 pulleys with closed-loop 0.24 in belt (pick 20T; add a 16T)$12.00View on Amazon →05608ZZ bearings, 10-pack$8.00View on Amazon →Kingroon06Makerbase MKS DLC32 controller$28.00FluidNCView on Kingroon →SparkFun07SparkFun 12 V vacuum pump ROB-10398$28.51View on SparkFun →
 08uxcell 12 V 3-way mini solenoid valve, 2-pack$10.00Releases the sheetView on Amazon →
 09SAB40 bellows suction cups (M10 male)$12.00Qty 2 · View on Amazon →10XGZP6847 vacuum sensor module, -100 to 0 kPa, 0.5-4.5 V$10.00Grip checkView on Amazon →
 11E-stop (7/8 in, NC) + 24 V 5 A supply$30.00View on Amazon →
What to make
Printed on the printers you have / cut on the xTool or sent out
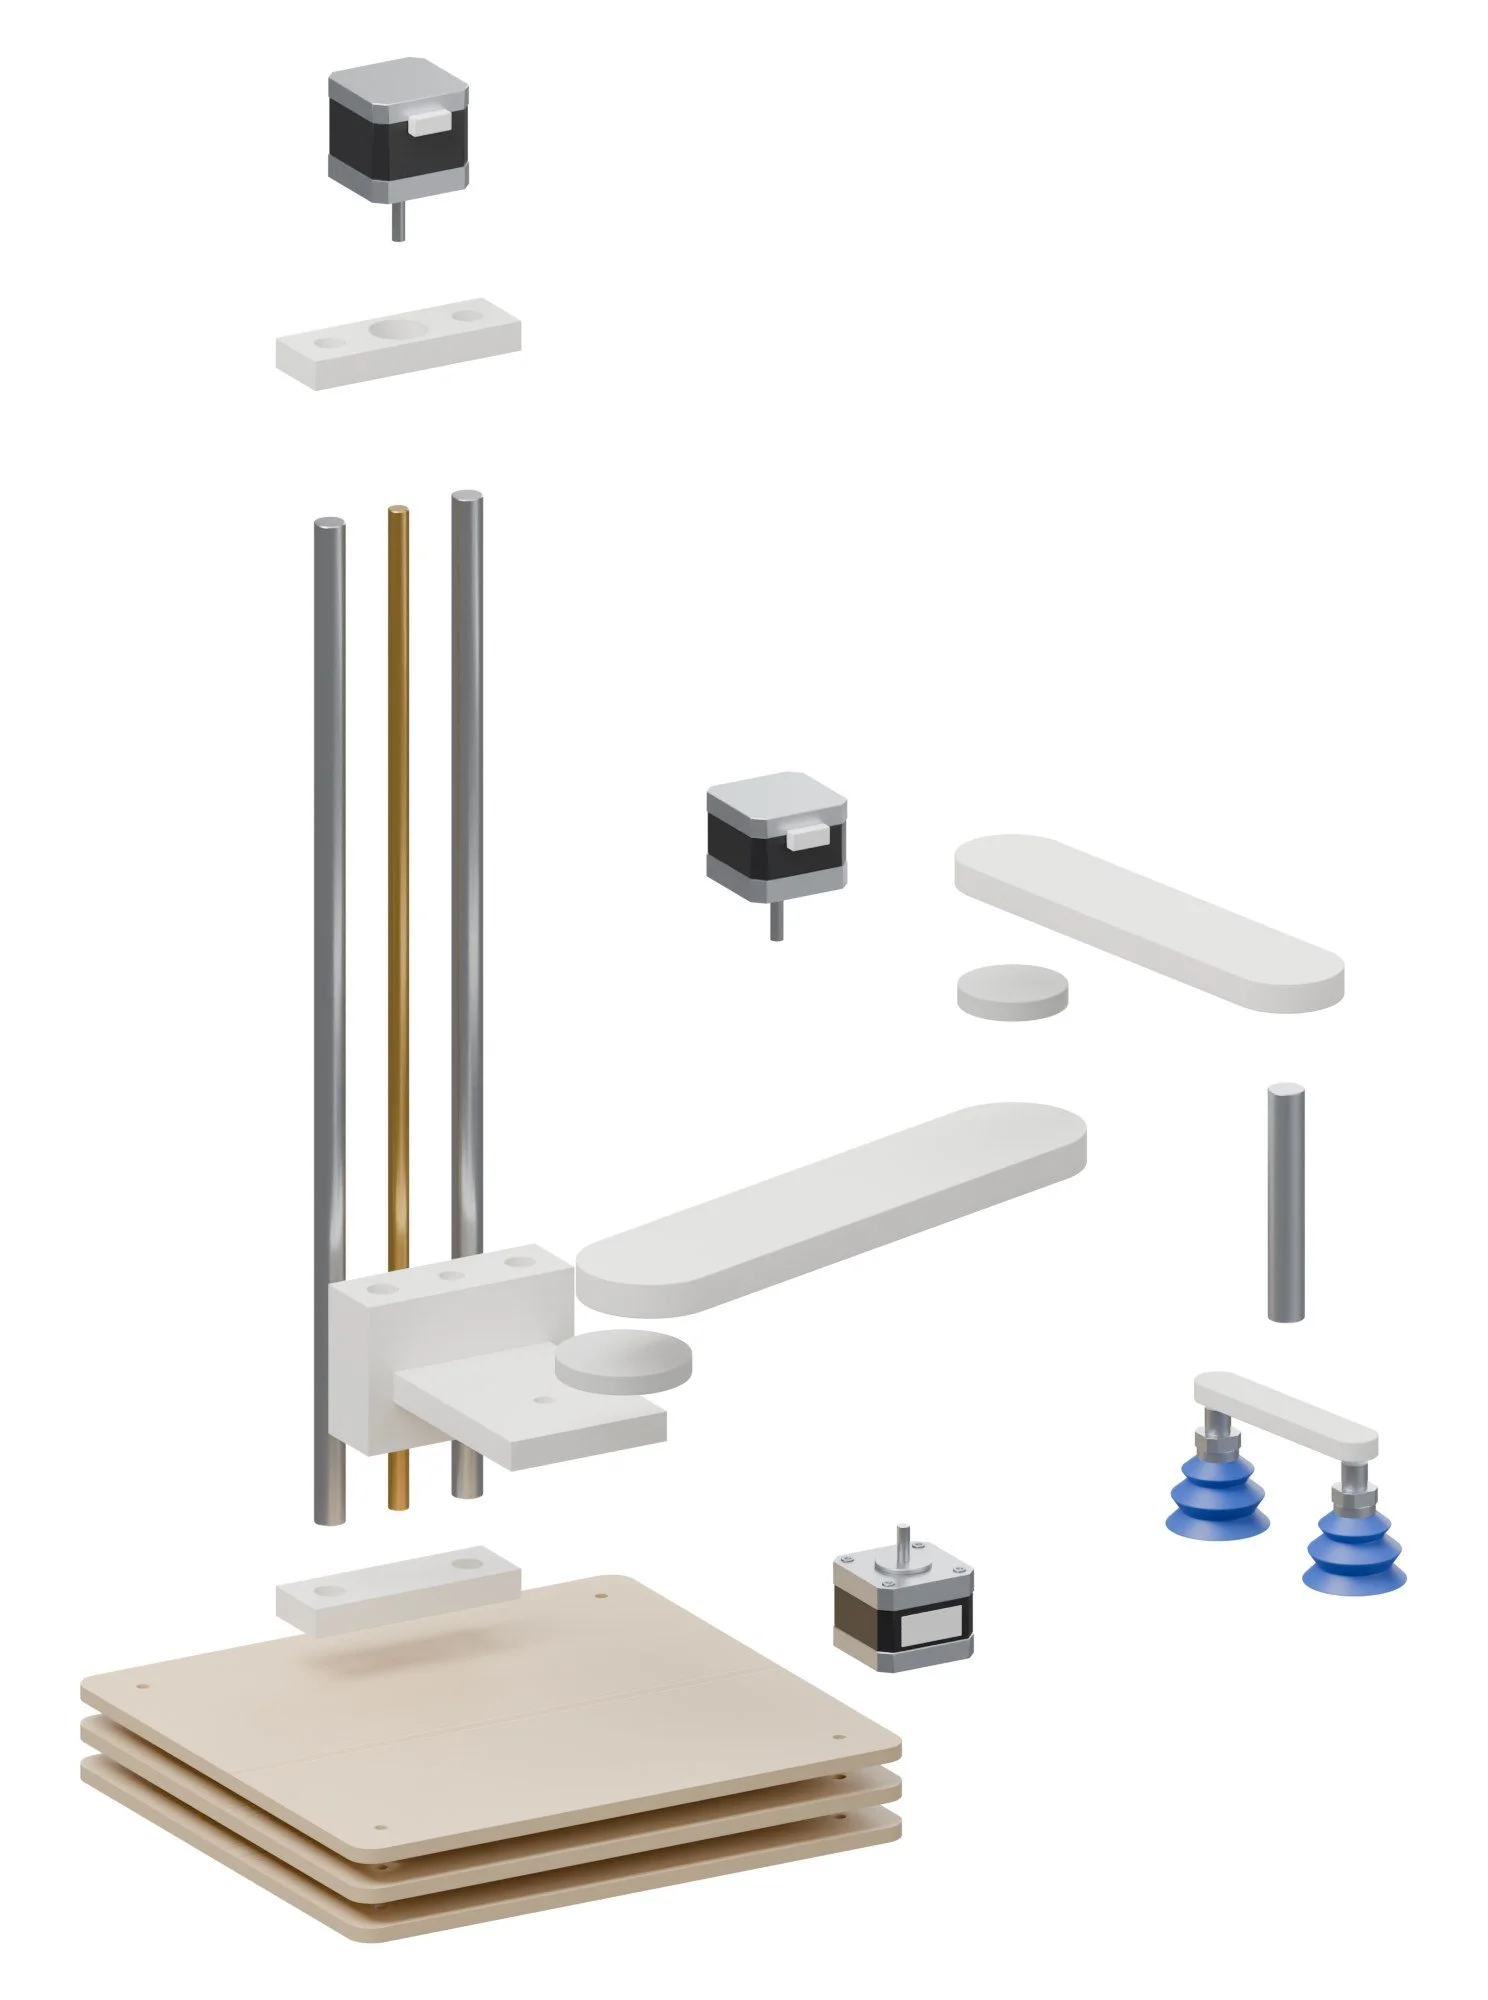
| Base layerx3, 0.24 in birch ply, glued. Bolt or clamp to the bench. | cut |
| Top platePETG. Holds the rod tops and the Z motor (shaft down). | |
| Rod footPETG. Screws to the ply base. | |
| CarriagePETG or ASA, 6 walls. 2 x LM12UU press in; T8 nut screws to the top. MEASURE bearing OD. | |
| Shoulder pulley 80tPrint with the GT2 80T profile (generate in the CAD engine). Shown simplified. | |
| Link1PETG, flat, 4 walls, 30% gyroid. 608 bearings at both ends. | |
| Elbow pulley 64tGT2 64T, printed. Shown simplified. | |
| Link2PETG, flat. Hollow channel for the vacuum line. | |
| Cup barPETG. Two 1 9/16 in bellows cups, M10 threads. | |
| Sheet tray0.24 in ply tray + 4 corner posts; the stack's top is found by the cups' vacuum switch. | cut |
Build guide
Tools / parts / every step, start to finish
Open the full build guide
Time: 8 to 10 hours plus printing Skill: Medium
Tools
- Hex keys
- Press for bearings
- Soldering iron
Parts
Bought (full list with links in the README and buy_list.csv):
- 0.039 x 0.47 in rods 17 11/16 in + 4 x LM12UU
- 1 x T8 lead screw 15 3/4 in + nut
- 3 x NEMA17 17HS19-2004S1
- 1 x GT2 closed belts (2) + 20T/16T pulleys
- 1 x 608 bearings, 10 pack
- 1 x Makerbase MKS DLC32 controller
- 1 x SparkFun 12 V vacuum pump ROB-10398
- 1 x 12 V 3-way solenoid valve
- 0.079 x 1 9/16 in bellows suction cups, M10
- 1 x Vacuum switch or XGZP6847 sensor
- 1 x E-stop + 24 V 5 A supply
Made:
laser/hm_base_layer_6mm.dxf(laser)stl/hm_top_plate.stl(printed)stl/hm_rod_foot.stl(printed)stl/hm_carriage.stl(printed)stl/shoulder pulley 80T.stl(printed)stl/hm_link1.stl(printed)stl/elbow pulley 64T.stl(printed)stl/hm_link2.stl(printed)stl/hm_cup_bar.stl(printed)laser/hm_sheet_tray_6mm.dxf(laser)
Steps
1. Print and cut
Print every STL in stl/ (PETG unless the part note says otherwise, 0.008 in layers, 4 walls, 30 to 40% gyroid). Cut every file in laser/ on Drag Queen. Check every MEASURE note in the README against your actual parts before printing the parts they touch.
2. Column
Fit the 0.47 in rods into the base and top plates; press LM12UU bearings into the Z carriage; add the T8 screw and Z motor.
3. Arm
Press 608 bearings into the links; mount the shoulder and elbow motors with GT2 closed belts.
4. Gripper
Screw the bellows cups into the cup bar; run the vacuum line to the solenoid valve, sensor and pump.
5. Tray and bed
Place the tray and Drag Queen's bed at the taught positions.
Wiring
- FluidNC ESP32 board: shoulder, elbow and Z drivers, homing switches, pump on a MOSFET, valve on a second MOSFET, XGZP6847 analog to an input.
- E-stop in series with motor power.
Firmware
- FluidNC config with axes as joints (degrees); host script does the SCARA maths.
- Homing: Z up, shoulder and elbow to their switches.
First test
- Pick and place one sheet 20 times; it should land within 0.039 in.
Dusty Springfield
Dust collection that opens the right blast gate by itself.
Fairy Ring pipeline / Serve / gets which gates to open
Dusty Springfield keeps the air clean without anyone touching a gate. Current clamps on each tool's cord tell an ESP32 which tool just started; it opens that tool's blast gate with a servo, closes the others and switches on the shop vac, then runs on for 3 seconds after the tool stops. A printed cyclone on a bucket catches the chips before the vac does. The CNC bots can call their own gate over Wi-Fi before they cut.
How it works
Quiet / Breathing
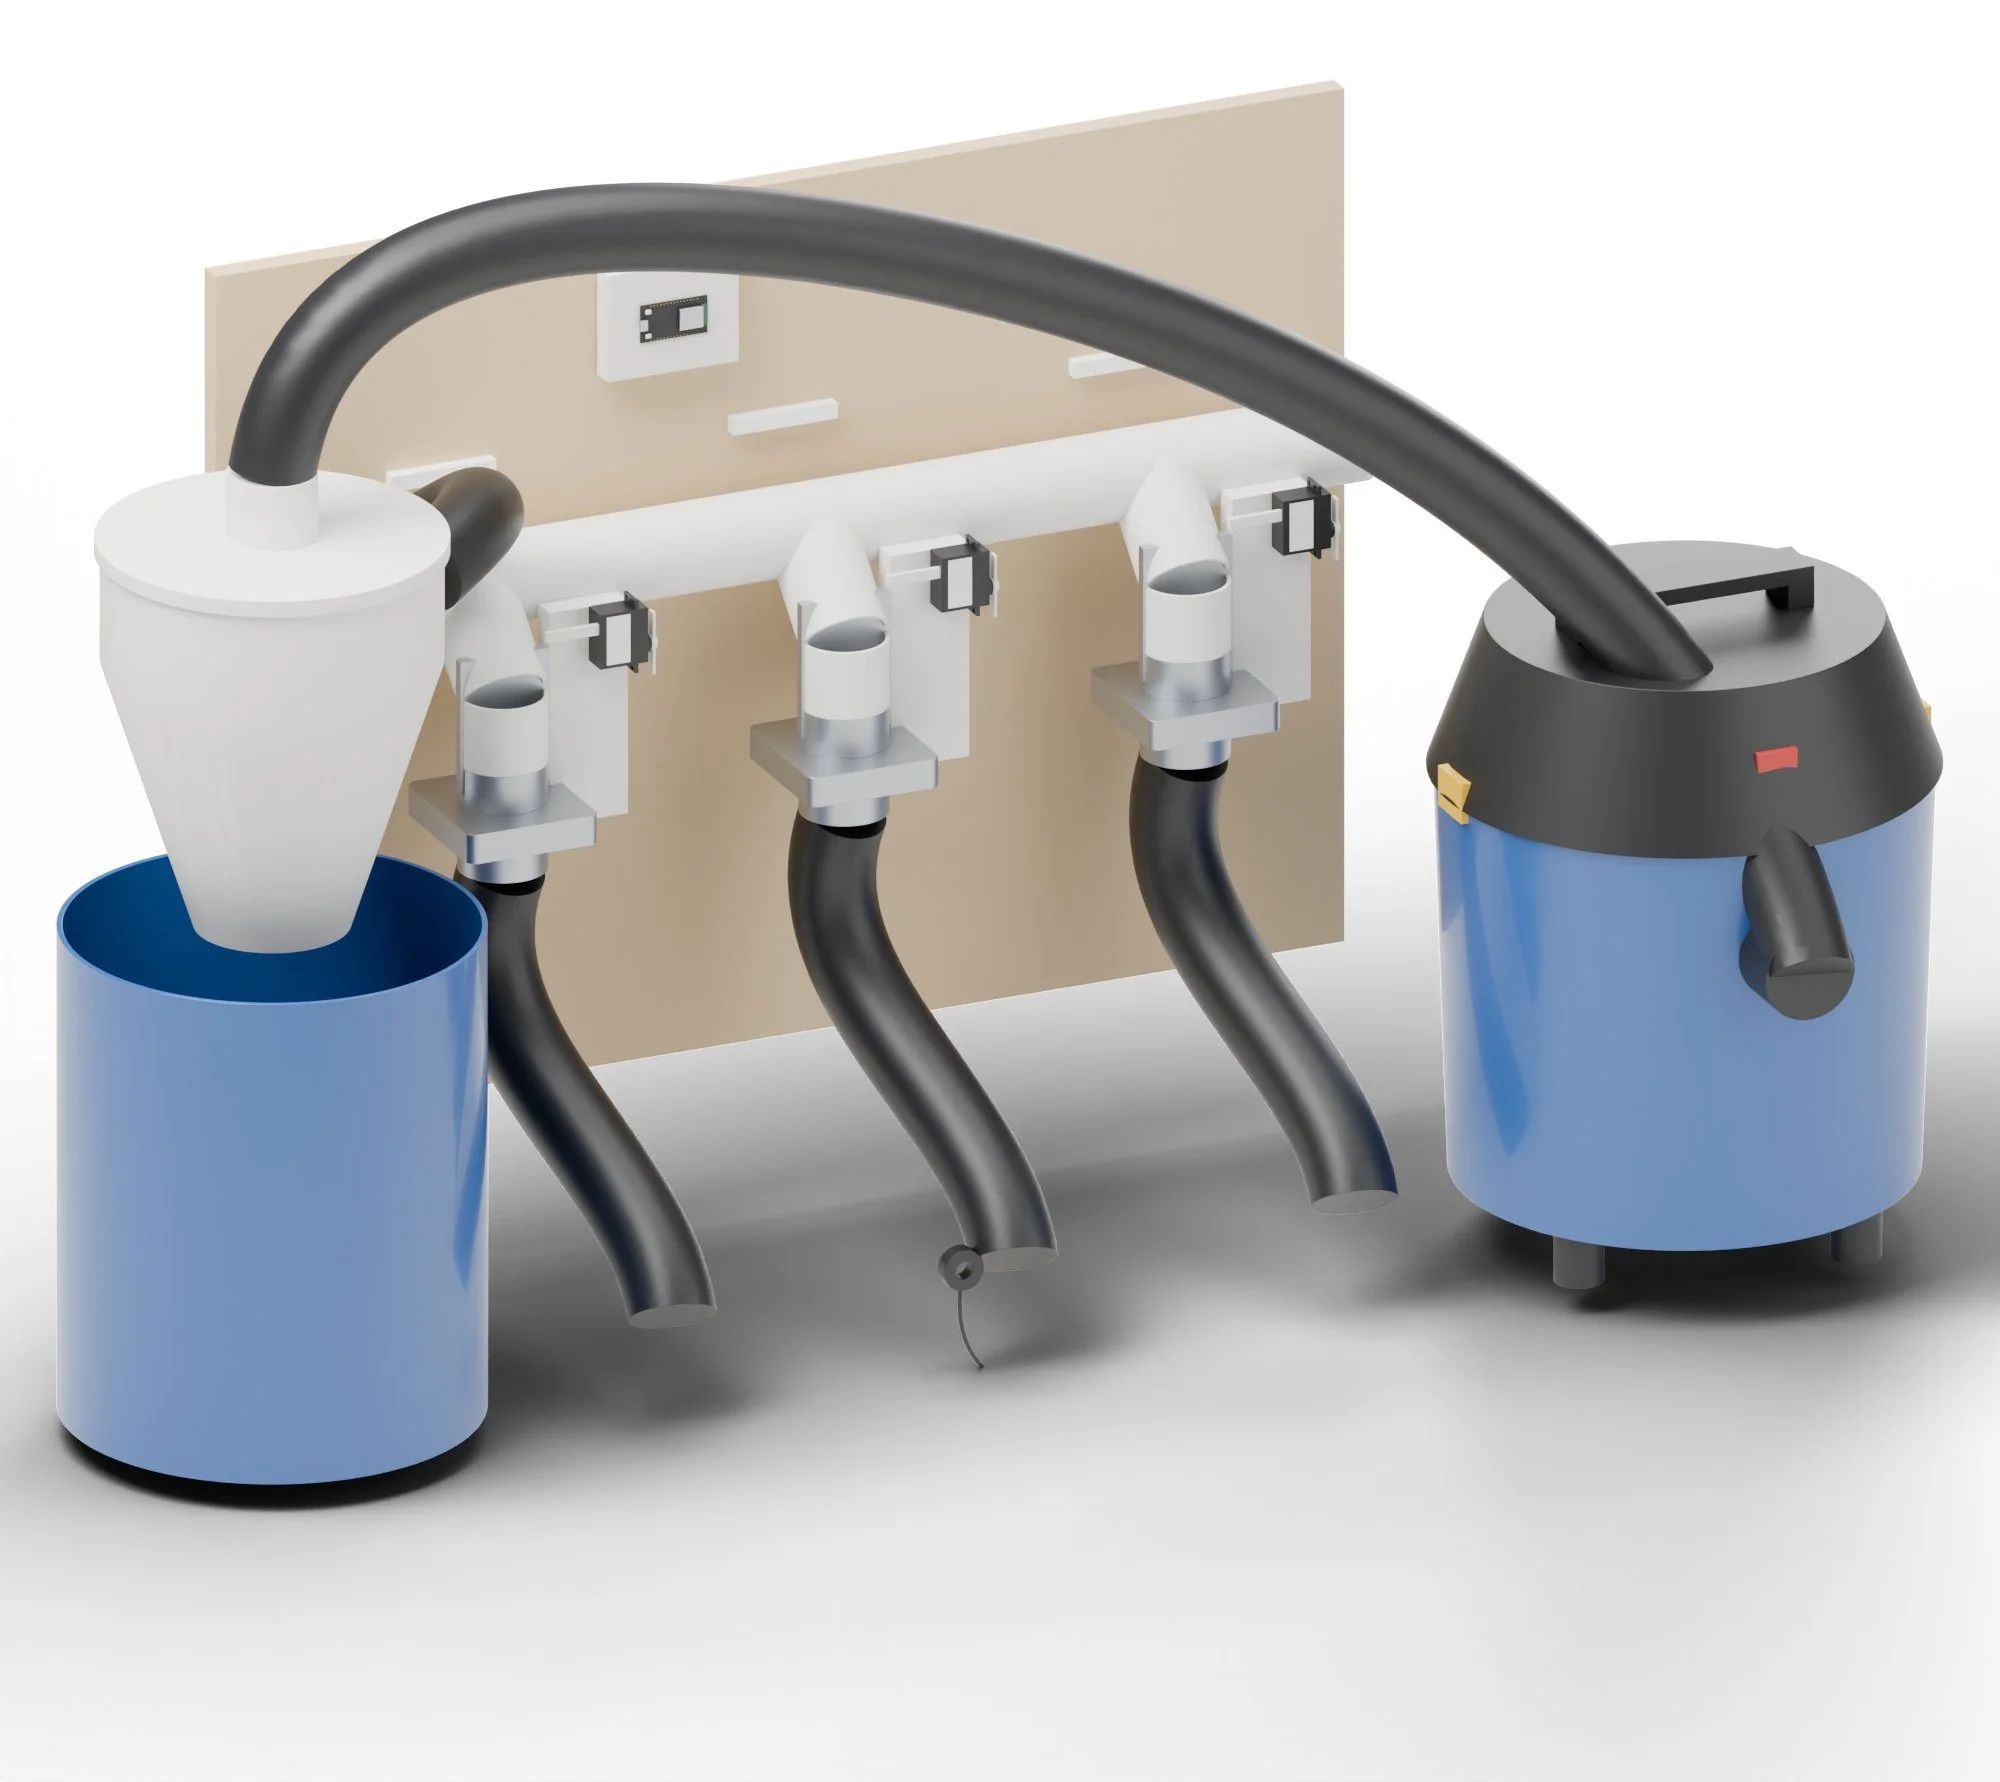
- A tool starts and its current clamp sees the draw.
- The ESP32 opens that gate (servo pulls the slide), closes the others and turns on the vac through a relay.
- Chips drop in the cyclone bucket, fine dust goes to the vac filter, and the LEDs show which gate is open.
Recipes
Materials / settings / what to do when it goes wrong
Use it for: Dust collection for the shop: saws, sanders, routers and the CNC Dancers.
Materials
- Anti-static hose or a bare copper wire inside the hose, grounded
- HEPA filter bag in the vac for fine dust
Settings
| Setting | Value |
|---|---|
| Current threshold | 0.5 A above idle starts a tool |
| Spin-up delay | 1 s from gate open to vac on |
| Run-on | 3 s after the tool stops (10 s for sanders) |
| Gate travel | 2 3/8 in (servo 0 to 180 degrees through the linkage) |
| Bucket | Empty at 2/3 full |
Steps
- Plug each tool through its clamp lead and name it in the config.
- Start a tool: the gate opens, the vac starts.
- For CNC Dancers, Fairy Ring calls the gate before the job (HTTP: /gate/2/open).
- Empty the cyclone bucket weekly; check the vac filter monthly.
Troubleshooting
| Problem | Fix |
|---|---|
| Gate doesn't move | Servo power too low; use a 5 V 5 A supply, not USB. |
| False starts | Raise the threshold; tools with soft-start ramp slowly. |
| Weak suction | Another gate is ajar; check the slides seal; seal joints with foil tape. |
Safety
- Static shocks in plastic ducting: ground the wire.
- Fine dust (MDF, walnut) is a health hazard; HEPA filter and a mask still apply.
Numbers are starting points. Run one test piece on every new batch of material.
What to buy
9 parts / $165.00 before tax / estimates, check the links
 012.5 in aluminium blast gates, 3-pack$25.00GatesView on Amazon →
 02MG996R servos, 4-pack$25.00Gate drivesView on Amazon →
 03SCT-013-030 current clamps$24.00Qty 3 · Tool sensingView on Amazon →04ESP32 DevKit (30-pin)$8.00Controller with Wi-Fi so Fairy Ring can log and call itView on Amazon →0515 A relay module (or smart plug)$8.00Vac on/offView on Amazon →
 065 V 5 A supply$12.00ServosView on Amazon →
 072.5 in hose 10 ft + fittings (wye, couplers)$35.00DuctingView on Amazon →
 085 gal bucket with lid$8.00Cyclone binView on Amazon →09PETG filament 1 kg$20.00Printed partsView on Amazon →

What to make
Printed on the printers you have / cut on the xTool or sent out
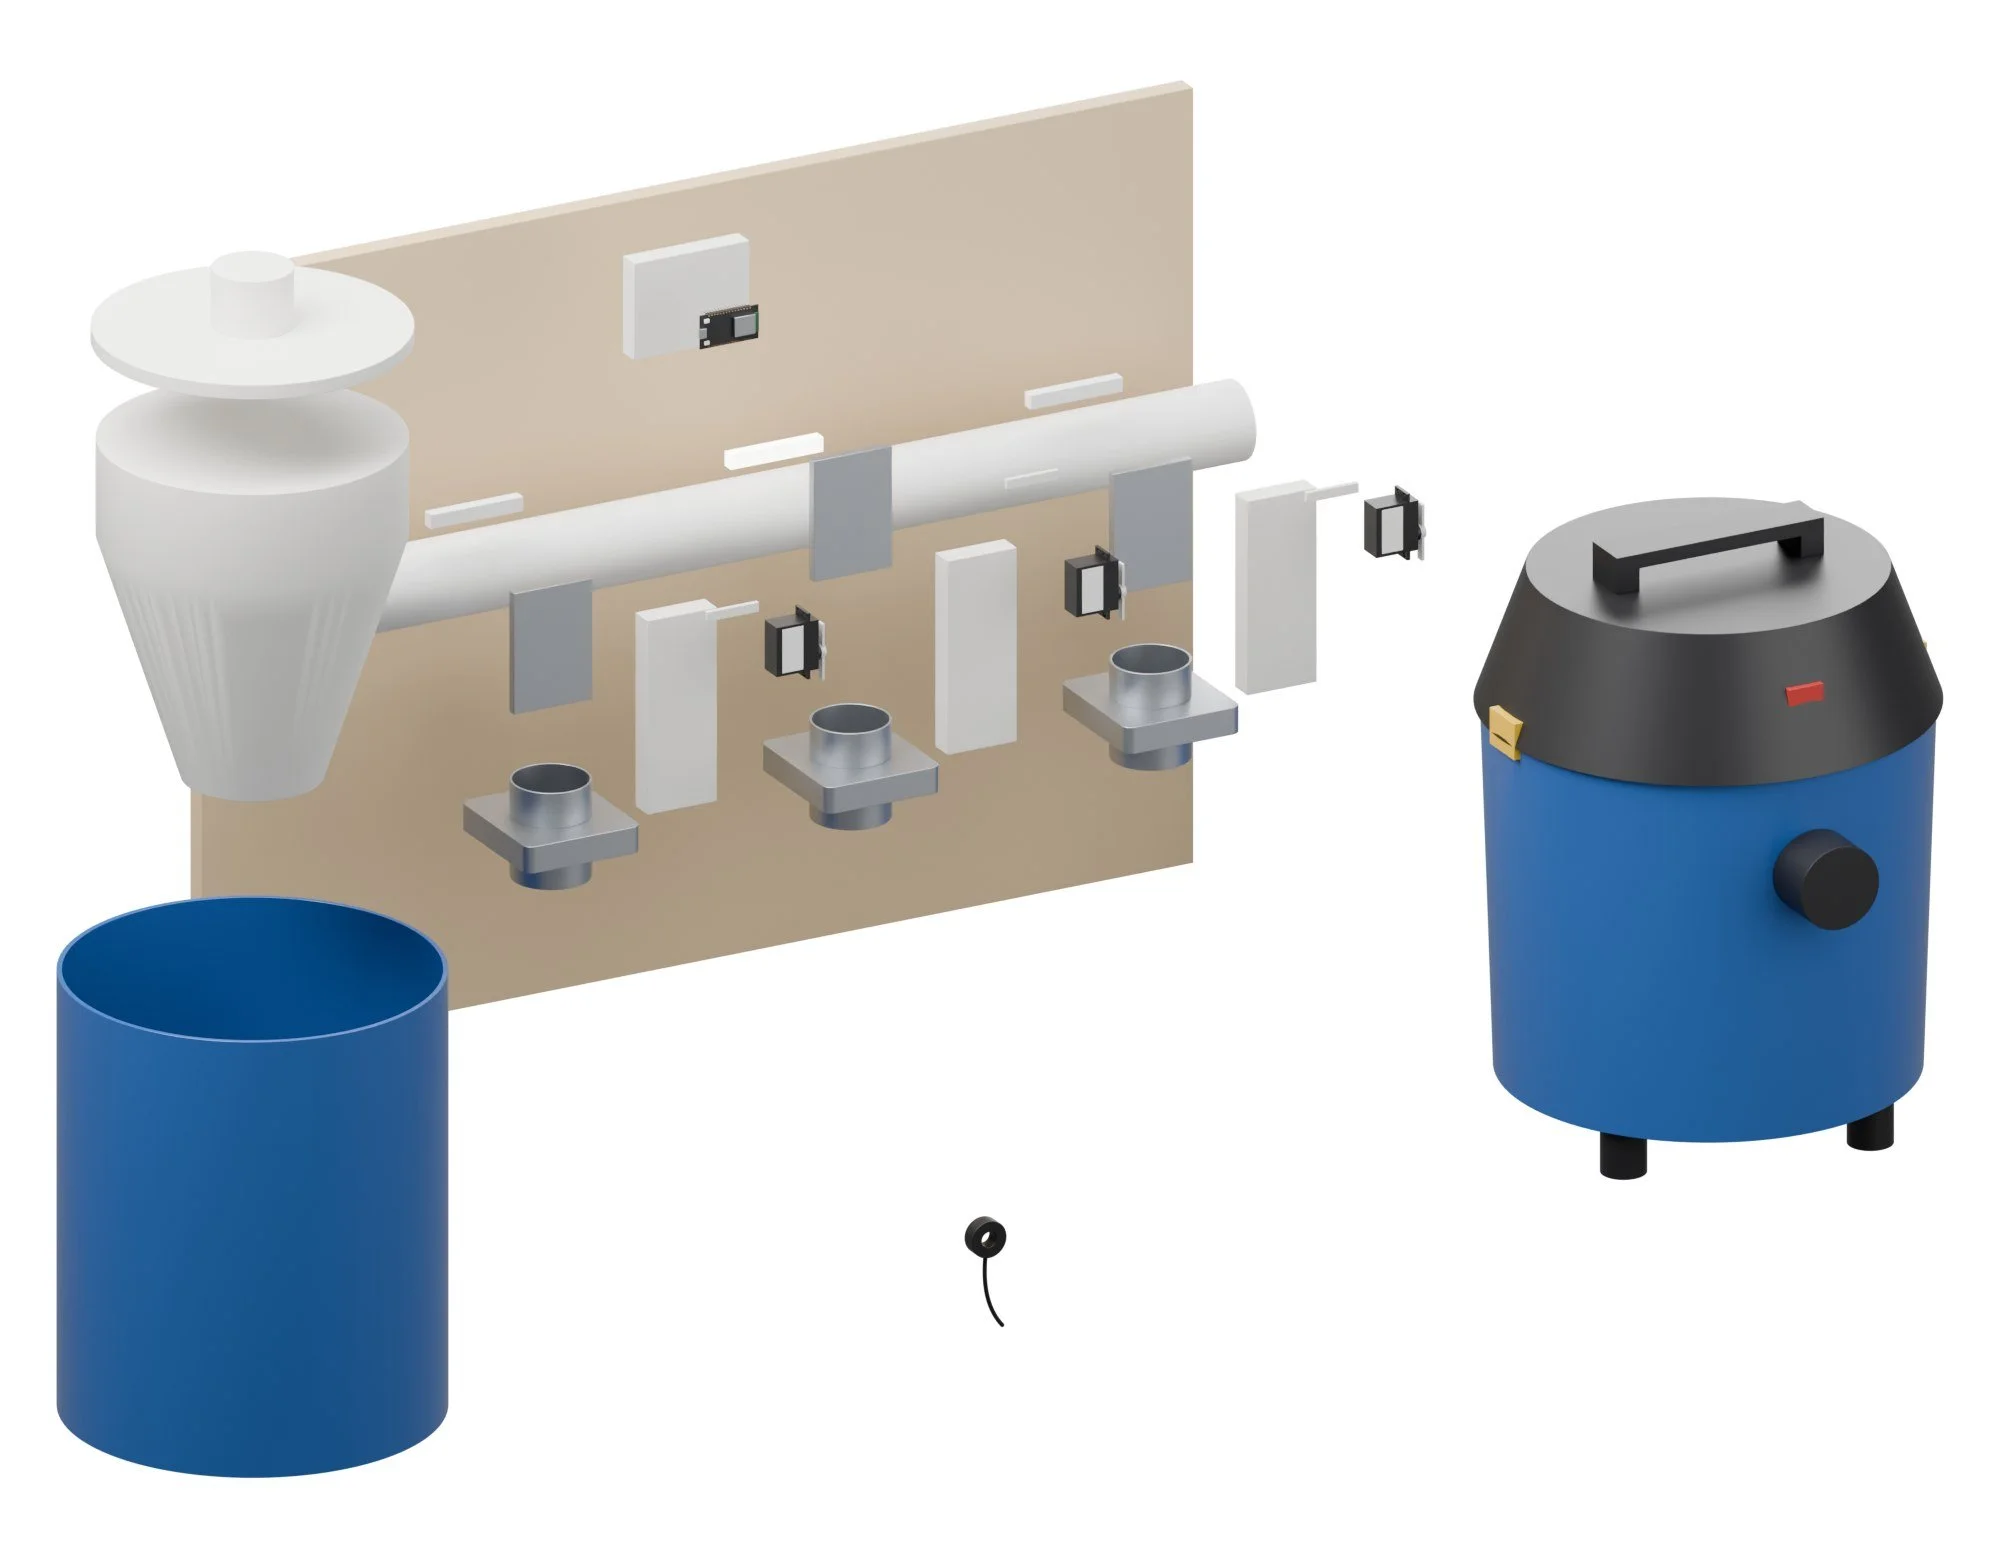
| Servo bracketPETG-CF, 3 off. Hose-clamps to the gate collar. | |
| Linkage | |
| Servo bracketPETG-CF, 3 off. Hose-clamps to the gate collar. | |
| Linkage | |
| Servo bracketPETG-CF, 3 off. Hose-clamps to the gate collar. | |
| Linkage | |
| CyclonePETG, prints in 3 rings. 2.5 in tangential inlet, 2.5 in top outlet. | |
| Cyclone lid | |
| Controller boxHolds the ESP32, relay and three clamp jacks. |
Build guide
Tools / parts / every step, start to finish
Open the full build guide
Time: 5 to 6 hours plus printing Skill: Easy to medium
Tools
- Hacksaw for pipe
- Hex keys
- Foil tape
- Soldering iron
Parts
Bought (full list with links in the README and buy_list.csv):
- 1 x 2.5 in aluminium blast gates, 3-pack
- 1 x MG996R servos, 4-pack
- 3 x SCT-013-030 current clamps
- 1 x ESP32 DevKit (30-pin)
- 1 x 15 A relay module (or smart plug)
- 1 x 5 V 5 A supply
- 1 x 2.5 in hose 10 ft + fittings (wye, couplers)
- 1 x 5 gal shop vac (optional)
- 1 x 5 gal bucket with lid
- 1 x PETG filament 1 kg
- 1 x M3/M4/M5 screws, nuts and inserts (already owned)
Made:
stl/ds_servo_bracket.stl(printed) x 3stl/ds_linkage.stl(printed) x 3stl/ds_cyclone.stl(printed)stl/ds_cyclone_lid.stl(printed)stl/ds_controller_box.stl(printed)
Steps
1. Print
Print every STL in stl/ (PETG unless the part note says otherwise, 0.008 in layers, 4 walls, 30 to 40% gyroid). Cut every file in laser/ on Drag Queen. Check every MEASURE note in the README against your actual parts before printing the parts they touch.
2. Wall board
Screw the 11/16 in ply board to studs at about 19 11/16 in.
3. Manifold
Hang the 2.5 in pipe on printed clips, add the wyes and drops, seal joints with foil tape.
4. Gates
Fit the blast gates in the drops; clamp a servo bracket to each; connect the linkages to the slides.
5. Cyclone
Stack the three printed rings on the bucket lid; hoses from the manifold to the inlet and from the outlet to the vac.
6. Controller
Mount the box with the ESP32, relay, supply and clamp jacks.
Wiring
- Servos on GPIO 13, 14, 27 with the 5 V 5 A supply (common ground).
- Current clamps through 33 ohm burden resistors to ADC pins 32, 33, 34 (bias at 1.65 V).
- Vac relay on GPIO 26.
Firmware
dusty_springfield.inoor ESPHome: read RMS current per clamp, open/close gates, vac relay with spin-up and run-on, HTTP endpoints for the CNC Dancers.
First test
- Start each tool in turn: only its gate opens and the vac follows within a second.
Moisture Madame
Lumber drying rack that weighs every board and says when it's ready.
Fairy Ring pipeline / Serve / gets boards to dry and weigh
Moisture Madame knows when the wood is ready. Each shelf of the drying rack rests on four load cells, so Fairy Ring watches every stack lose water by weight, day by day. A pin meter calibrates day one, an SHT31 logs the room, and each shelf's LED turns green when its boards reach the target moisture content, 6 to 8% for furniture.
How it works
Wet / Ready
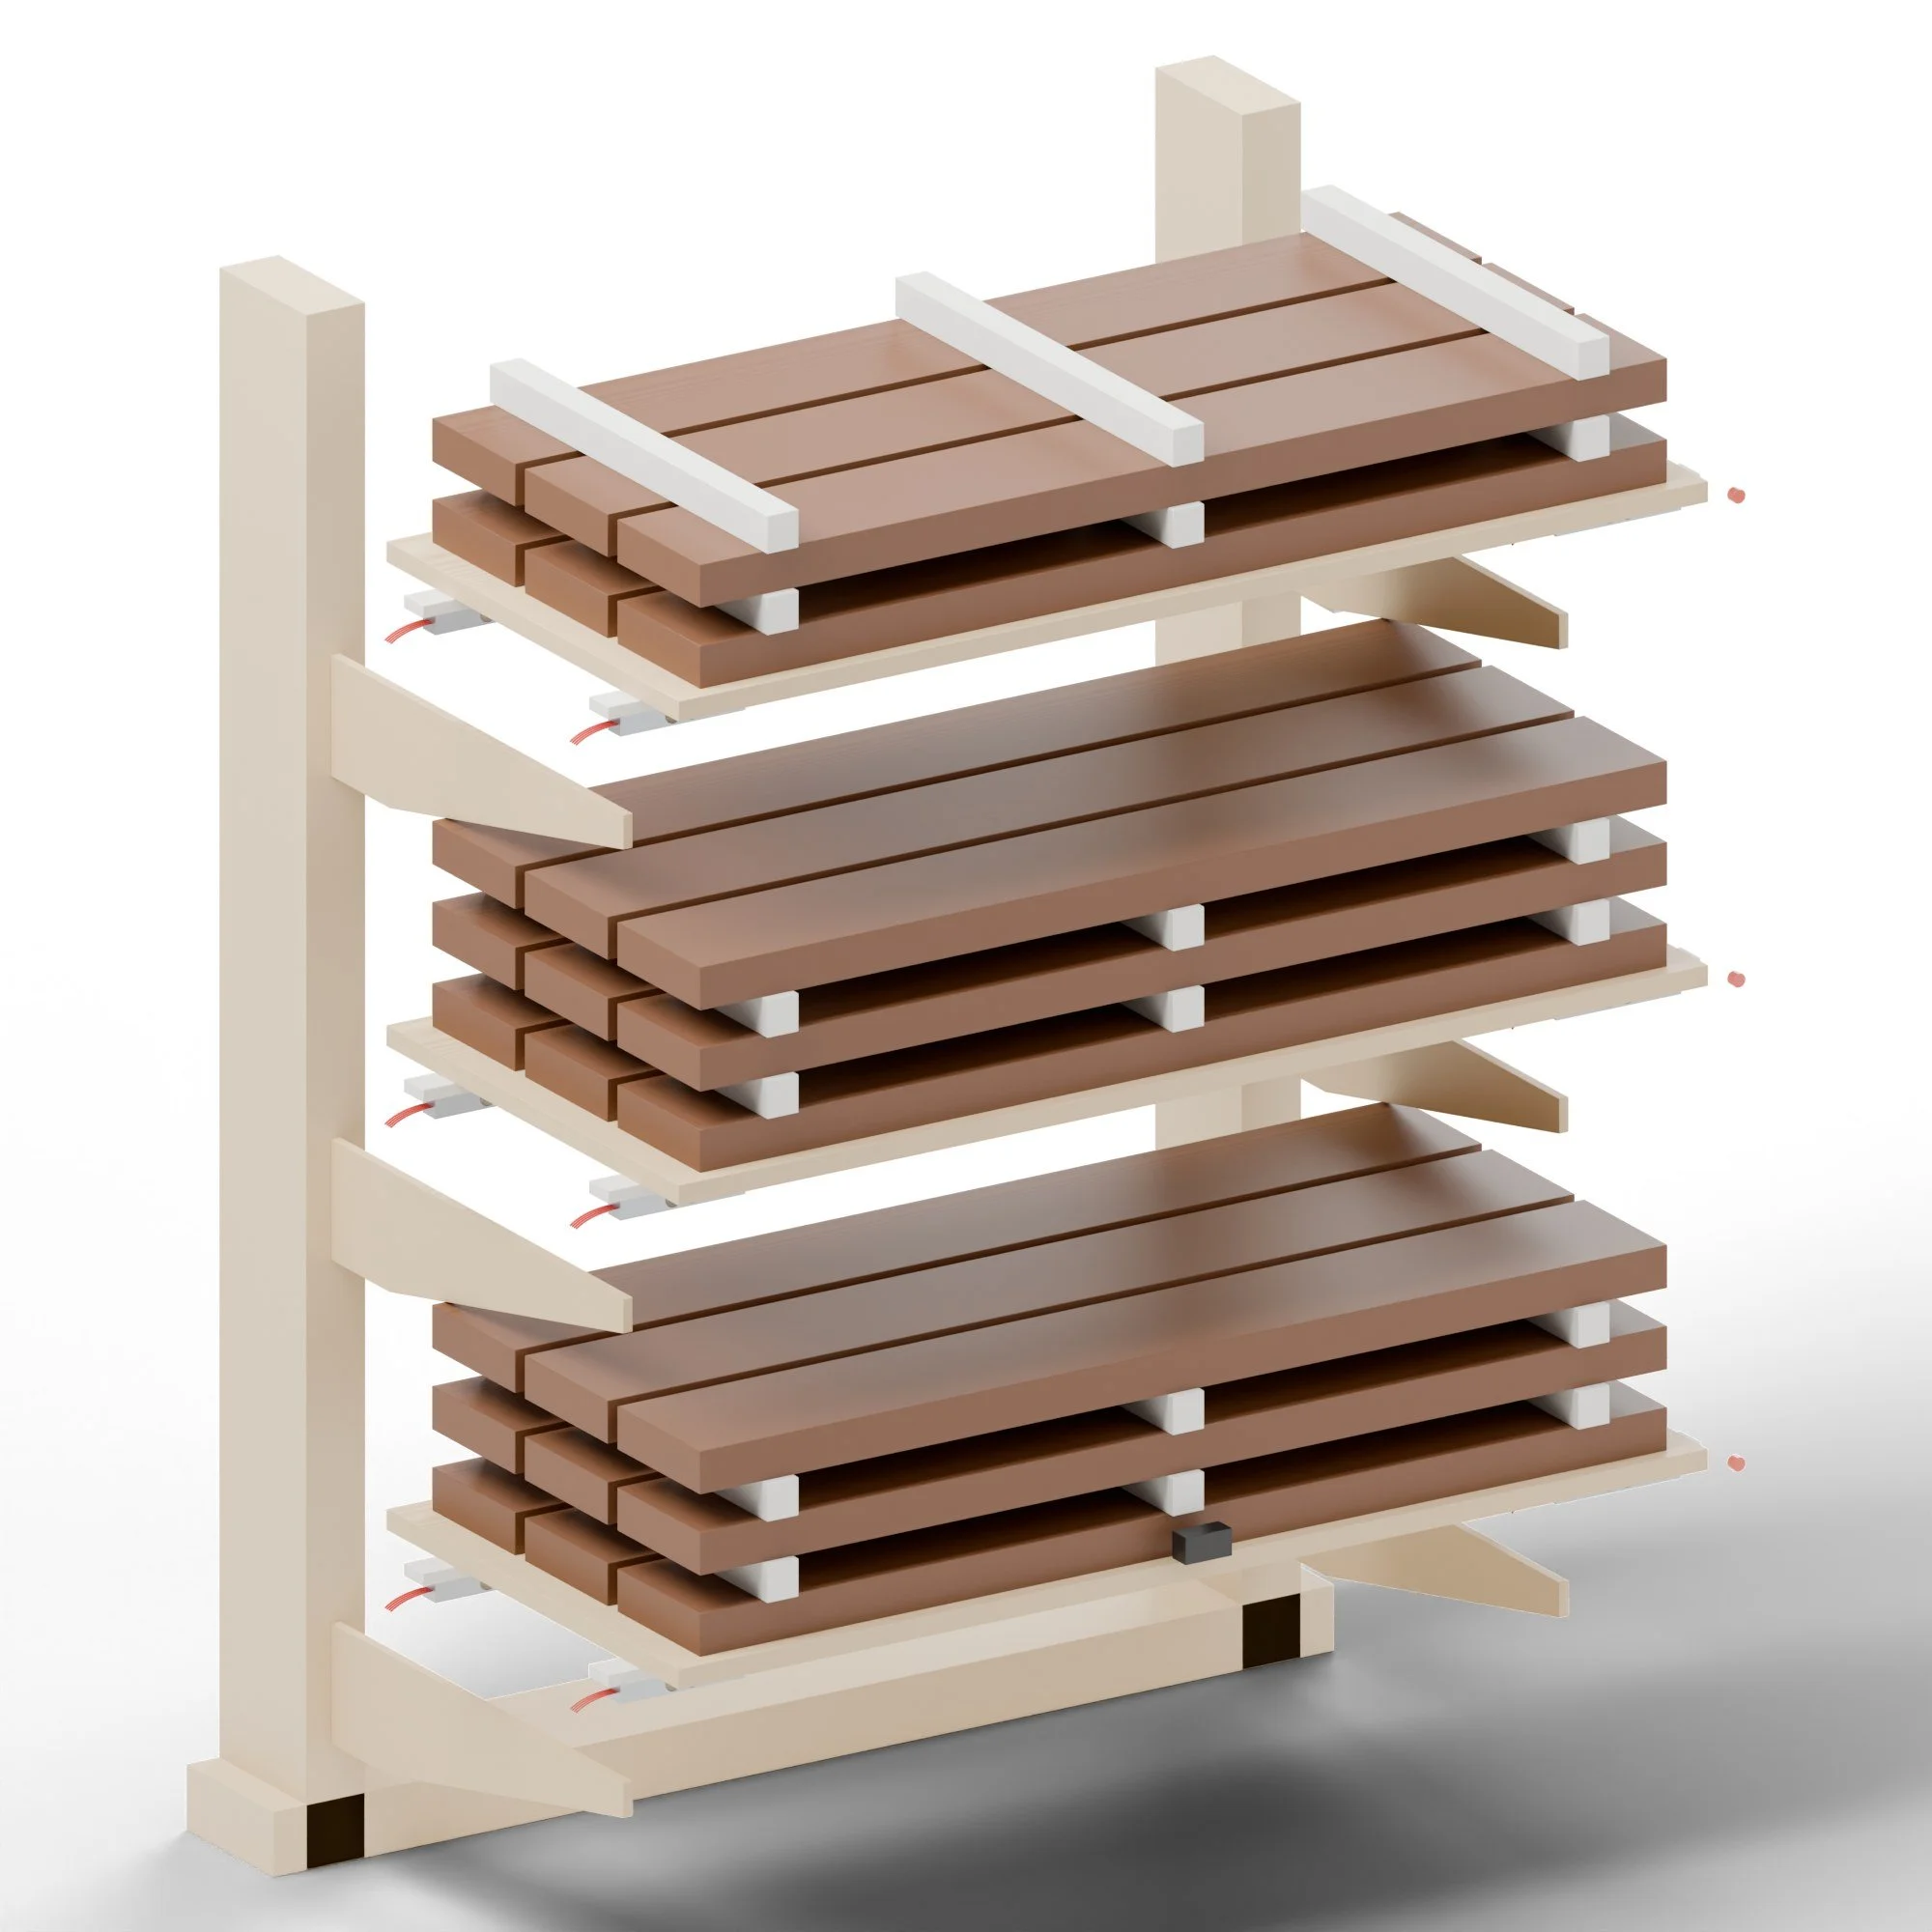
- Sticker the boards on a shelf, take one pin-meter reading and weigh the stack; Fairy Ring estimates the oven-dry weight from that.
- The load cells log the weight every hour. Moisture = (current weight / oven-dry weight - 1) x 100.
- The shelf LED goes from amber to green at the target MC, and the board list on Fairy Ring marks them ready.
Recipes
Materials / settings / what to do when it goes wrong
Use it for: Drying lumber to a known moisture content before it becomes furniture.
Materials
- Boards stickered 3/4 in apart with stickers every 15 3/4 in, ends sealed (Anchorseal or wax)
- A pin meter for the day-one reading
Settings
| Setting | Value |
|---|---|
| Target MC | 6 to 8% for indoor furniture in most of the US; 9 to 11% in humid regions |
| Room | 40 to 50% RH, 18 to 75 °F for indoor final drying |
| Logging | Every hour |
| Oven-dry weight | ODW = weight on day one / (1 + MC on day one / 100) |
| MC now | MC = (weight now / ODW - 1) x 100 |
| Rule of thumb | Air-drying takes about a year per 0.98 in outdoors to 12 to 15%, then weeks indoors |
Steps
- Weigh in: put a stack on a shelf and tare-free log it.
- Take three pin-meter readings on one board (ends, middle) and enter the average.
- Leave it; the shelf LED is amber while it dries.
- When the LED goes green, re-check one board with the pin meter.
- Move the boards to the shop to acclimatise a week before milling.
Troubleshooting
| Problem | Fix |
|---|---|
| Readings jump | Load cell touching the arm; check saddles, re-zero. |
| Ends checking | Seal ends better; slow drying (raise room RH). |
| Never reaches target | Room too humid; dehumidify or set a realistic target. |
Safety
- Wall-mount the uprights; a loaded rack is heavy and can tip.
- Don't exceed 150 kg per shelf.
Numbers are starting points. Run one test piece on every new batch of material.
What to buy
10 parts / $204.50 before tax / estimates, check the links
 0150 kg bar load cells, 4-pack + HX711$36.00Qty 3 · One set per shelfView on Amazon →02ESP32 DevKit (30-pin)$8.00Controller with Wi-Fi so Fairy Ring can log and call itView on Amazon →03SHT31 humidity sensor module$8.00Room RH and temperatureView on Amazon →
 04Pin-type wood moisture meter$25.00Day-one calibrationView on Amazon →
 05Bicolour LEDs 0.2 in, 20-pack$6.00Shelf statusView on Amazon →Home Depot062x4 x 8 ft studs$13.50Qty 3 · Uprights and baseView on Home Depot →Home Depot071/2 in ply, 2 x 4 ft$36.00Qty 2 · ShelvesView on Home Depot →
 085 V 2 A USB supply$7.00ESP32View on Amazon →090.24 in birch ply, 12 x 24 in, 6-pack$45.00Laser-cut partsView on Amazon →10PETG filament 1 kg$20.00Printed partsView on Amazon →
What to make
Printed on the printers you have / cut on the xTool or sent out
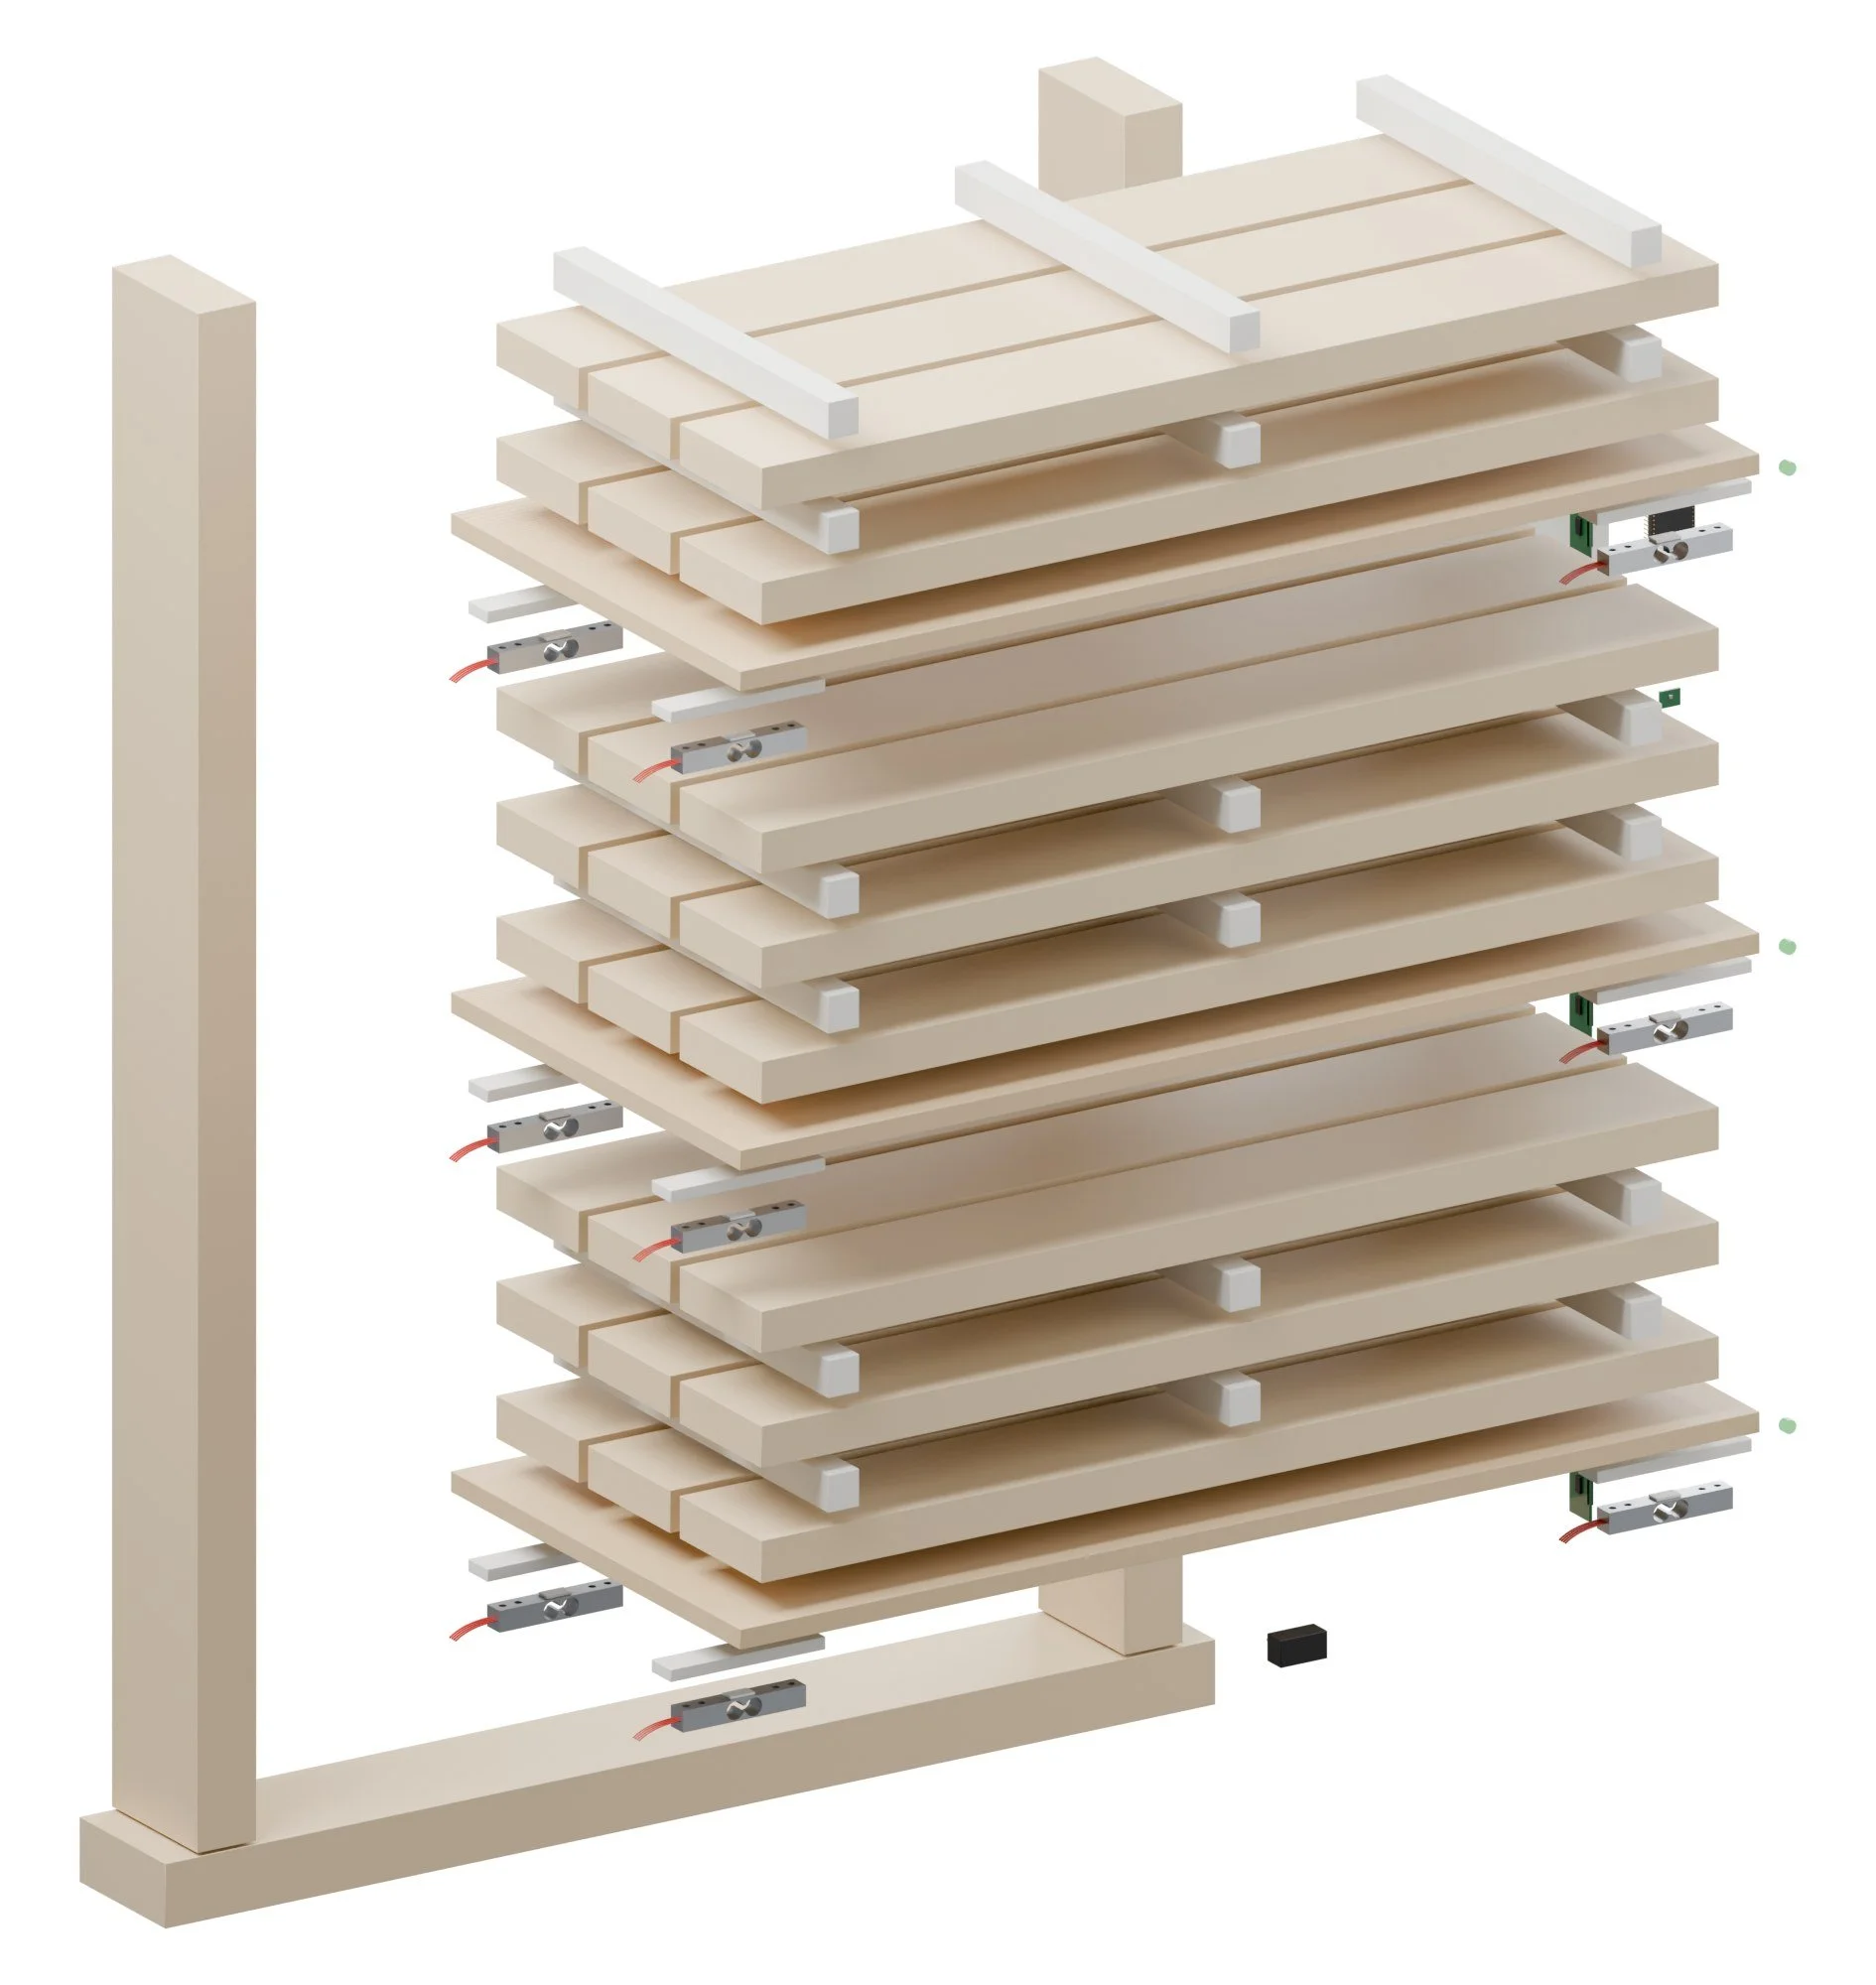
| Arm0.24 in ply, cut 12 and glue in pairs (0.47 in). Screws into the uprights. | cut |
| Cell saddlePETG, 12 off. Lifts the shelf off the arm onto the cell's free end. | |
| Cell saddlePETG, 12 off. Lifts the shelf off the arm onto the cell's free end. | |
| Cell saddlePETG, 12 off. Lifts the shelf off the arm onto the cell's free end. | |
| Cell saddlePETG, 12 off. Lifts the shelf off the arm onto the cell's free end. | |
| StickerPETG, 3/4 in tall with a ribbed top, 9 per shelf. | |
| StickerPETG, 3/4 in tall with a ribbed top, 9 per shelf. | |
| StickerPETG, 3/4 in tall with a ribbed top, 9 per shelf. | |
| StickerPETG, 3/4 in tall with a ribbed top, 9 per shelf. | |
| StickerPETG, 3/4 in tall with a ribbed top, 9 per shelf. | |
| StickerPETG, 3/4 in tall with a ribbed top, 9 per shelf. | |
| Cell saddlePETG, 12 off. Lifts the shelf off the arm onto the cell's free end. | |
| Cell saddlePETG, 12 off. Lifts the shelf off the arm onto the cell's free end. | |
| Cell saddlePETG, 12 off. Lifts the shelf off the arm onto the cell's free end. | |
| Cell saddlePETG, 12 off. Lifts the shelf off the arm onto the cell's free end. | |
| StickerPETG, 3/4 in tall with a ribbed top, 9 per shelf. | |
| StickerPETG, 3/4 in tall with a ribbed top, 9 per shelf. | |
| StickerPETG, 3/4 in tall with a ribbed top, 9 per shelf. | |
| StickerPETG, 3/4 in tall with a ribbed top, 9 per shelf. | |
| StickerPETG, 3/4 in tall with a ribbed top, 9 per shelf. | |
| StickerPETG, 3/4 in tall with a ribbed top, 9 per shelf. | |
| Cell saddlePETG, 12 off. Lifts the shelf off the arm onto the cell's free end. | |
| Cell saddlePETG, 12 off. Lifts the shelf off the arm onto the cell's free end. | |
| Cell saddlePETG, 12 off. Lifts the shelf off the arm onto the cell's free end. | |
| Cell saddlePETG, 12 off. Lifts the shelf off the arm onto the cell's free end. | |
| StickerPETG, 3/4 in tall with a ribbed top, 9 per shelf. | |
| StickerPETG, 3/4 in tall with a ribbed top, 9 per shelf. | |
| StickerPETG, 3/4 in tall with a ribbed top, 9 per shelf. | |
| StickerPETG, 3/4 in tall with a ribbed top, 9 per shelf. | |
| StickerPETG, 3/4 in tall with a ribbed top, 9 per shelf. | |
| StickerPETG, 3/4 in tall with a ribbed top, 9 per shelf. | |
| Controller podScrews to the right upright; vented bottom for the SHT31. |
Build guide
Tools / parts / every step, start to finish
Open the full build guide
Time: 5 hours plus printing Skill: Easy
Tools
- Saw
- Drill
- Screws
- Soldering iron
Parts
Bought (full list with links in the README and buy_list.csv):
- 3 x 50 kg bar load cells, 4-pack + HX711
- 1 x ESP32 DevKit (30-pin)
- 1 x SHT31 humidity sensor module
- 1 x Pin-type wood moisture meter
- 1 x Bicolour LEDs 0.2 in, 20-pack
- 3 x 2x4 x 8 ft studs
- 2 x 1/2 in ply, 2 x 4 ft
- 1 x 5 V 2 A USB supply
- 0.039 x 0.24 in birch ply, 12 x 24 in, 6-pack
- 1 x PETG filament 1 kg
- 1 x M3/M4/M5 screws, nuts and inserts (already owned)
Made:
laser/mm_arm_6mm.dxf(laser)stl/mm_cell_saddle.stl(printed) x 12stl/mm_sticker.stl(printed) x 18stl/mm_controller_pod.stl(printed)
Steps
1. Print and cut
Print every STL in stl/ (PETG unless the part note says otherwise, 0.008 in layers, 4 walls, 30 to 40% gyroid). Cut every file in laser/ on Drag Queen. Check every MEASURE note in the README against your actual parts before printing the parts they touch.
2. Uprights
Screw the 2x4 uprights to the base rail and to the wall studs.
3. Arms
Glue the ply arm pairs and screw them to the uprights at 5 1/2, 16 9/16 and 27.6 in.
4. Cells
Bolt four load cells per shelf to the arms, fixed end down; printed saddles on the free ends.
5. Shelves
Set the 0.47 in ply shelves on the saddles; they must only touch the saddles.
6. Electronics
HX711 per shelf, ESP32 and SHT31 in the pod, LEDs at the shelf fronts.
Wiring
- Each shelf: four cells wired as a full bridge into one HX711 (E+, E-, A+, A-).
- HX711 DOUT/SCK pairs to ESP32 GPIO 16/17, 18/19, 21/22; SHT31 on a second I2C bus.
- Bicolour LEDs on PWM pins.
Firmware
moisture_madame.ino(or ESPHome): tare per shelf, calibrate with a known 10 kg weight, compute MC from ODW, MQTT to Fairy Ring.
First test
- Put a 10 kg weight on each shelf: reading within 20 g.
Lazarella
Filament and wax recycler.
Fairy Ring pipeline / Recycle / gets failed prints and wax scraps
Lazarella brings failures back. Failed prints, supports and purge go through a shredder with laser-cut steel blades, then a small screw extruder turns the chips into new 0.069 in filament on a spool. In wax mode she melts Queen Bee's scraps and refills her syringes.
How it works
Scrap / Spool
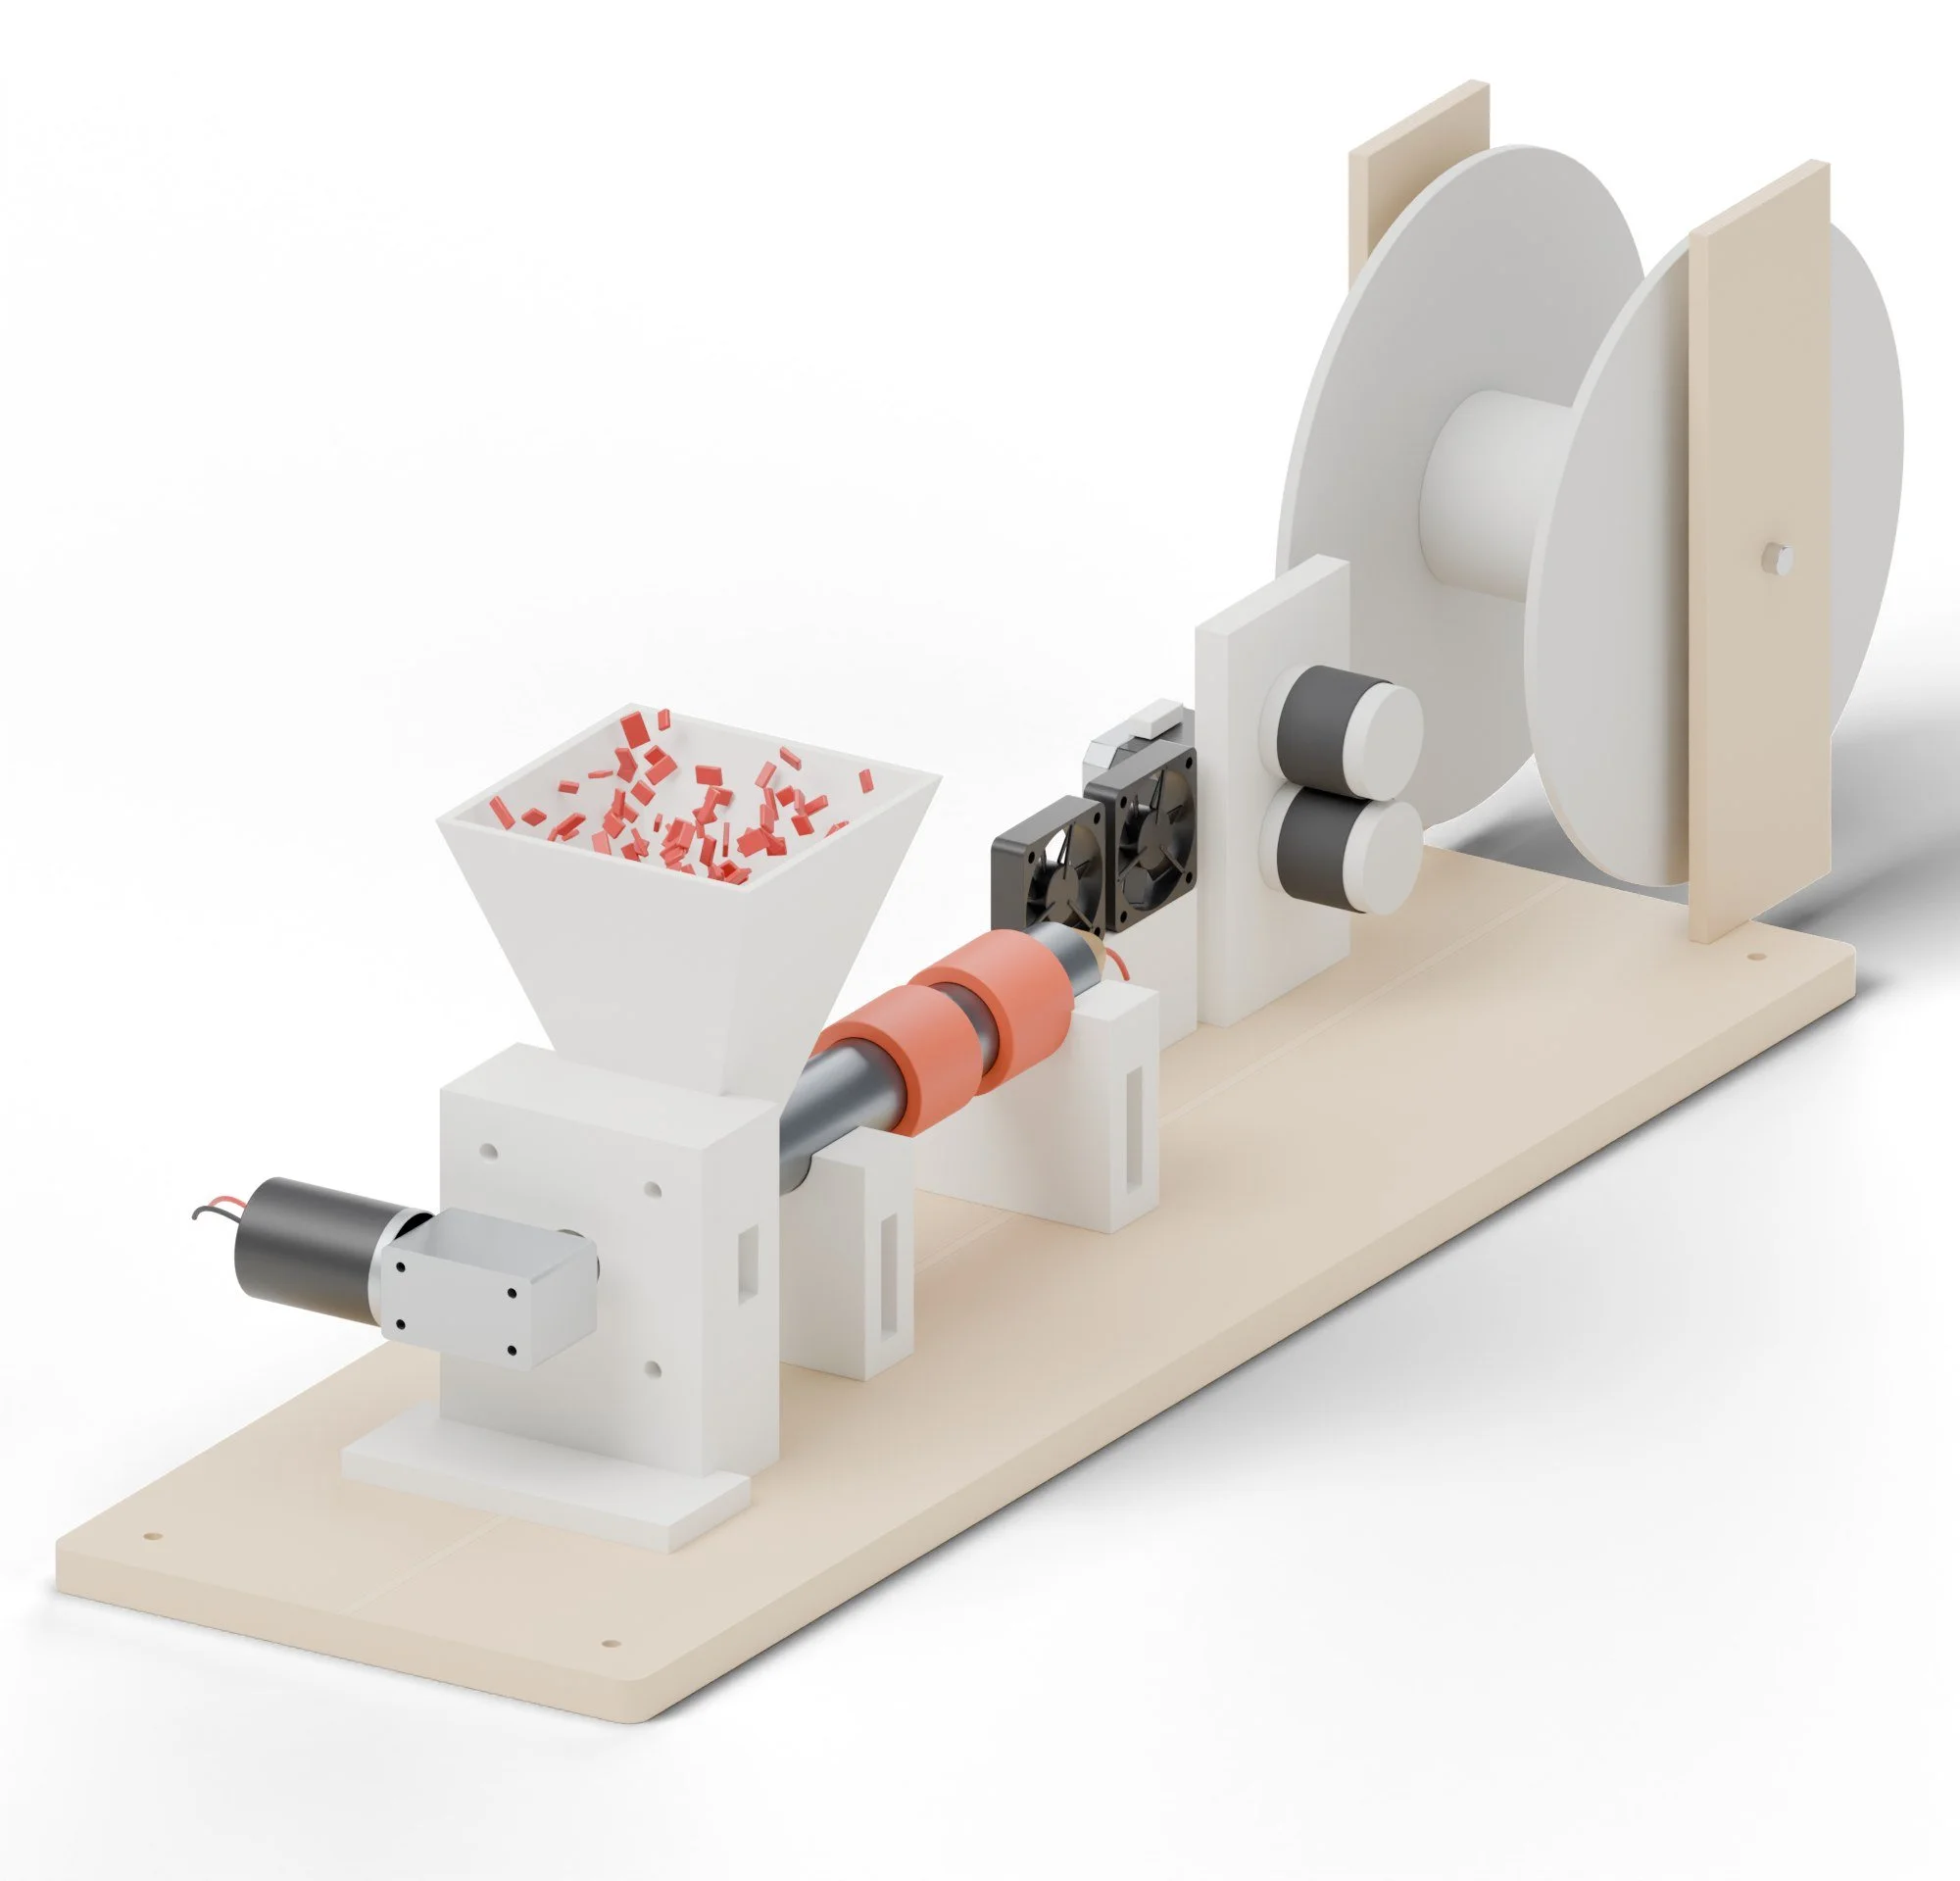
- Shred: scraps go through laser-cut steel blades into small chips.
- Extrude: a wood-auger screw in a heated steel pipe melts the chips and pushes them out of a 0.069 in nozzle; fans cool the strand.
- Pull and spool: a printed puller sets the diameter by its speed and a spooler winds it. In wax mode, the barrel runs at 65 to 158 °F and fills Queen Bee's syringes.
What it can make
Products / and less obvious uses
- Recycled filament
- PLA and PETG from failed prints and supports.
- Wax refills
- Scrap beeswax straight back into Queen Bee's syringes.
- Wax rods
- Extruded beeswax for candles and wax-working.
Tricks worth trying
- Terrazzo filament Mixed-colour scrap ground together prints as speckled stone. To test.
- Wood-fill from the shop Fine sanding dust from the wood path blended into PLA. To test.
Recipes
Plastic by plastic / drying / the remelt loop
Use it for: Failed prints and supports back into filament, and wax scraps back into Queen Bee's syringes.
Materials
- Clean PLA or PETG regrind, one type and colour per run, dried
- Wax scraps (casting wax) for the wax mode
- 0.069 in brass nozzle
Settings
| Setting | Value |
|---|---|
| PLA barrel | Feed zone 347 °F, nozzle zone 365 °F |
| PETG barrel | 428 °F / 446 °F |
| Wax | 75 to 185 °F, puller off, syringe on the nozzle |
| Auger speed | 8 to 15 rpm |
| Target diameter | 0.069 in, +/- 0.002 in (adjust puller speed) |
| Drying first | PLA 122 °F for 4 h, PETG 149 °F for 4 h in Hot Flash |
Steps
- Shred prints into chips under 0.2 in; sieve out dust.
- Dry the chips in Hot Flash.
- Heat the barrel 15 minutes to temperature before turning the auger.
- Start the auger, catch the first 6.6 ft (purge), then thread the strand through the fans, puller and spooler.
- Adjust puller speed until the width gauge reads 0.069 in; then leave it.
- Spool, label with material and date, and store with desiccant.
Troubleshooting
| Problem | Fix |
|---|---|
| Bubbly filament | Wet chips; dry longer. |
| Diameter wanders | Uneven chip size; sieve, and keep the hopper half full. |
| Brown streaks | Too hot or too slow; drop 5 C. |
| Auger stalls | Feed zone too cold or chips too big. |
Safety
- Hot barrel, 446 °F; let it cool fully before touching.
- Ventilate: melting plastic gives off fumes, especially PETG.
- Never put PVC, ABS mixed with PLA, or unknown plastics in.
Numbers are starting points. Run one test piece on every new batch of material.
Plastic by plastic
One plastic per batch, alwaysYou need
| PLAMost failed prints | 347 to 365 °F |
| PETGDry first, 4 h at 149 °F | 428 to 446 °F |
| Wax scrapBack into Queen Bee cubes | 149 to 158 °F |
Method
- Sort scrap by plastic and colour into labeled bins. Mixed plastic makes weak filament.
- Shred, then sieve out dust and big chunks.
- Dry the flakes. Wet PETG foams and snaps.
- Extrude slowly and let the puller and gauge hold 0.069 in.
- Check the diameter every metre for the first spool, and print a calibration cube before trusting it.
If it goes wrong
- Diameter wanders
- Feed is uneven. Sieve tighter, keep the hopper full.
- Brittle filament
- Too hot, or recycled too many times. Mix one part new pellets to two parts scrap.
- Bubbles
- Wet plastic. Dry longer.
Shredder blades take fingers. Feed with a stick, never by hand. Extruding plastic gives off fumes: run it under the extractor or by an open window.
What to buy
9 parts / $164.00 before tax / estimates, check the links
01uxcell 12 V worm gearmotor, 15 rpm, 20 kg·cm$30.00Extruder driveView on Amazon → 025/8 x 12 in ship auger bit, 3/8 in hex shank$15.00ScrewView on Amazon →Home Depot033/4 in x 8 in black steel pipe nipple$8.00BarrelView on Home Depot →
 04Mica band heaters 0.98 x 0.98 in, 2-pack (lowest stocked is 70 W; run it under the PID)$24.00Qty 2 · View on Amazon →05REX-C100 PID kit with 25 A SSR and K thermocouple$30.00Qty 2 · View on Amazon →
 0651104 thrust ball bearing, 0.79 x 1 3/8 x 0.39 in$6.00View on Amazon →
 07WINSINN 4010 12 V fans, 2-pack$18.00Qty 2 · View on Amazon →
 08Female Luer-lock to 1/8 NPT male, brass, 2-pack$8.00Wax modeView on Amazon →09Mean Well LRS-350-24 supply$25.00View on Amazon →

What to make
Printed on the printers you have / cut on the xTool or sent out
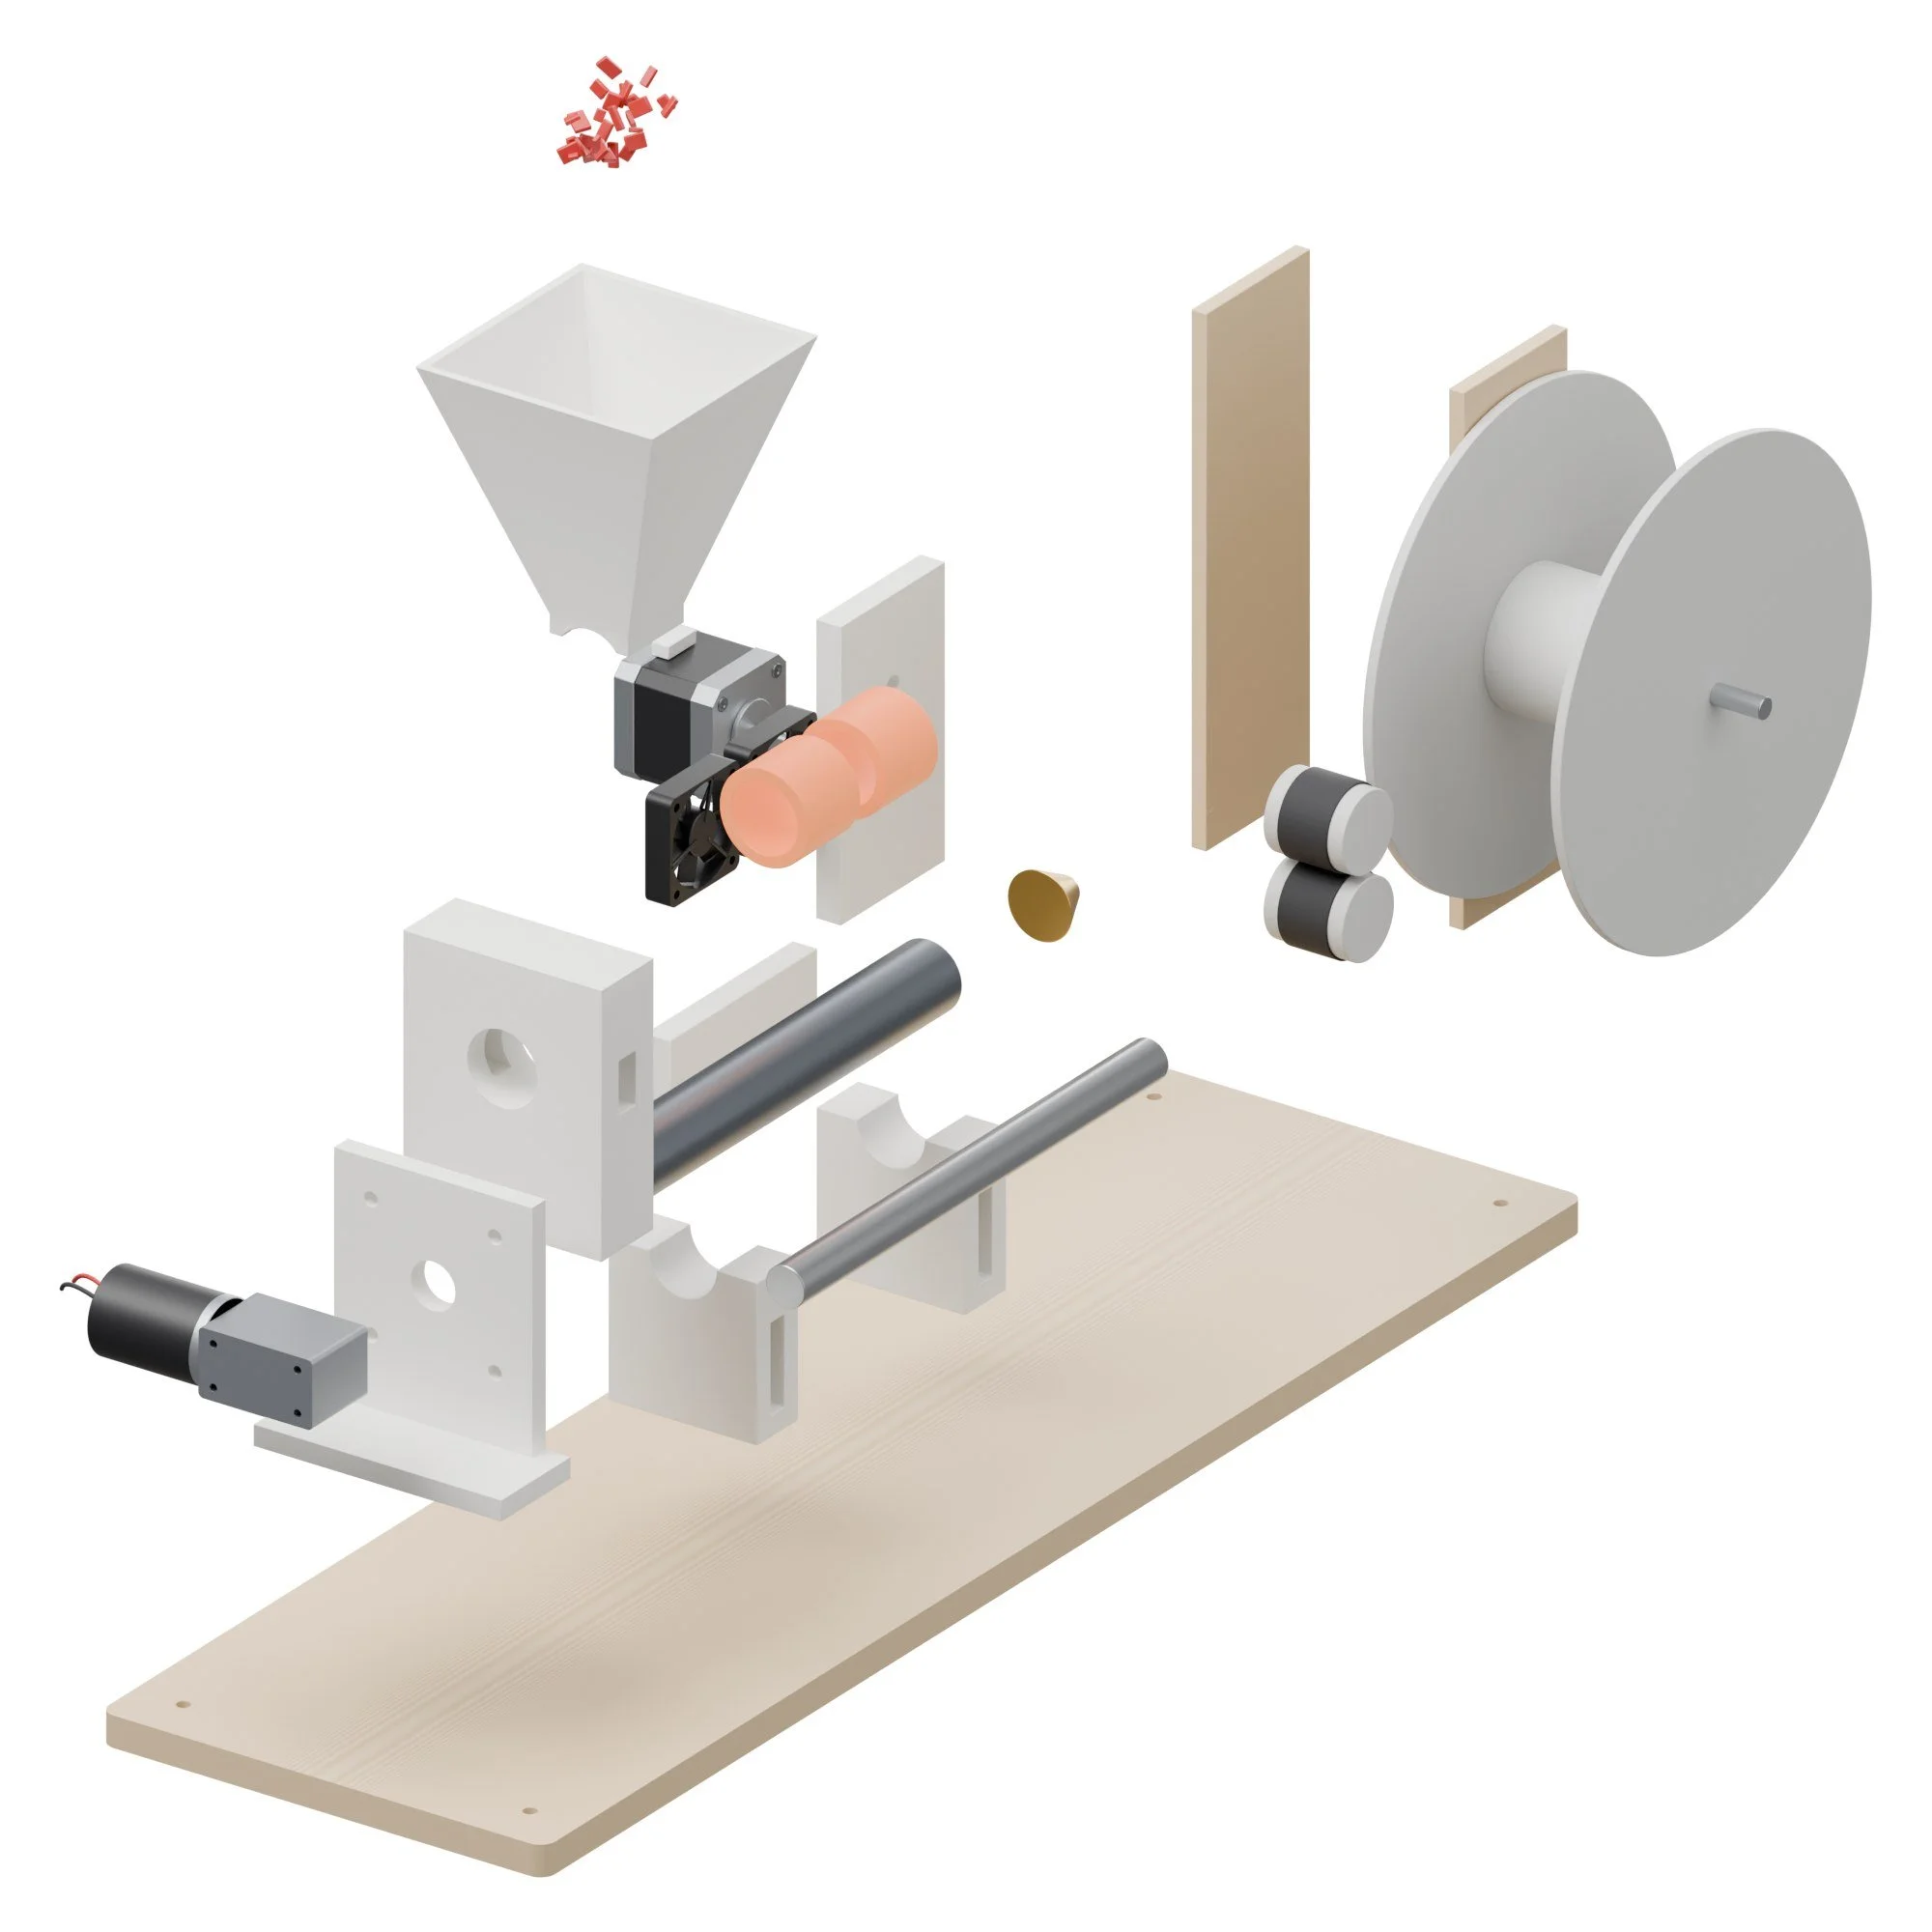
| Base0.47 in birch ply (or 0.079 x 0.24 in glued). | cut |
| Motor bracketPETG or ASA, 6 walls. MEASURE the gearmotor's flange. | |
| Thrust blockASA. Holds a 51104 thrust bearing; the auger pushes back hard. | |
| Barrel standPC or PETG-CF, x2. The slot is a heat break; never let it touch a heater. | |
| HopperPETG, upright, no supports. Saddles the barrel above the feed slot. | |
| Fan standPETG. | |
| Puller framePETG. The top roller's arm is sprung (rubber band) onto the filament. | |
| Spool uprightx2, 0.24 in ply. | cut |
| Shredder bladex14, 0.2 in mild steel or AR400 via a laser service. 7/8 in hex bore. Alternate with spacers on a hex shaft. | cut |
| Shredder spacerx14, 0.2 in steel. Offsets the two blade stacks. | cut |
Build guide
Tools / parts / every step, start to finish
Open the full build guide
Time: 8 hours plus printing Skill: Medium: mains wiring for the heaters (or have it checked)
Tools
- Hex keys
- Pipe wrench
- Drill and bits
- Soldering iron
Parts
Bought (full list with links in the README and buy_list.csv):
- 1 x 12 V worm gearmotor, about 15 rpm, high torque
- 1 x 5/8 in x 12 in wood auger bit
- 1 x 3/4 in x 8 in black steel pipe nipple
- 2 x Band heaters 0.98 to 1 3/32 in ID, 40 W
- 2 x PID controller kit (REX-C100, SSR, K thermocouple)
- 1 x 51104 thrust bearing
- 0.079 x 1 9/16 in 12 V fans
- 1 x NEMA17 + A4988 + Arduino Nano (already owned)
- 1 x Filament width sensor (optional)
- 1 x Shredder blades + spacers, 0.2 in steel (28 parts) (optional)
- 1 x 1/8 NPT to Luer-lock adapter, brass
- 1 x 24 V 10 A supply
Made:
laser/lz_base_12mm.dxf(laser)stl/lz_motor_bracket.stl(printed)stl/lz_thrust_block.stl(printed)stl/lz_barrel_stand.stl(printed)stl/lz_hopper.stl(printed)stl/lz_fan_stand.stl(printed)stl/lz_puller_frame.stl(printed)laser/lz_spool_upright_6mm.dxf(laser)laser/lz_shredder_blade_5mm.dxf(laser)laser/lz_shredder_spacer_5mm.dxf(laser)
Steps
1. Print and cut
Print every STL in stl/ (PETG unless the part note says otherwise, 0.008 in layers, 4 walls, 30 to 40% gyroid). Cut every file in laser/ on Drag Queen. Check every MEASURE note in the README against your actual parts before printing the parts they touch.
2. Barrel
Cut the 3/4 in pipe to 7 7/8 in; drill and file the feed slot; thread the nozzle end.
3. Auger
Cut the 5/8 in ship auger bit to length; fit the thrust bearing in its block.
4. Drive
Mount the worm gearmotor so its output couples to the auger's hex.
5. Heat
Clamp the band heaters and thermocouple; wire the PID and SSR.
6. Puller and spooler
Assemble the rubber-faced rollers on the NEMA17 puller; mount the spooler.
Wiring
- REX-C100 PID, SSR and band heaters on mains with a fuse and earth on the barrel.
- Gearmotor on a 12 V PWM board; puller NEMA17 on a driver with a speed knob.
Firmware
- PID autotune (AT) at 365 °F with the auger turning.
First test
- Run 200 g of new PLA pellets before any regrind; measure diameter every 19 11/16 in.
Why make it this way
Studies and research / what the materials cost the planet
Every dancer was picked to waste less: thin veneer instead of solid stock, grown parts instead of foam, clay formwork that washes off and gets reused, and failed prints that become new filament. Here is the research behind those choices.
Cement is the binder in concrete, and making it releases about 8% of the world's CO₂. That's why Mud Diva prints thin, only where the part needs it, into clay formwork that is washed off and reused.
Chatham House, Making Concrete Change (2018) →
Mycelium composites are fungal root grown through farm waste like hemp hurd. Reviews find them low-energy to make, light, insulating, and compostable at the end of their life, with weak points too: they soak up water and aren't structural. Mother uses them for shapes, packaging and insulating forms, sealed when they'll see water.
Jones et al., Materials & Design (2020), engineered mycelium composites review →
How the mycelium is fed, packed and pressed changes how strong, dense and water resistant it ends up. That's why Mother packs every mold by weight, and why the drying is tested.
Appels et al., Materials & Design (2019) →
Turning waste plastic into filament at home, rather than making new filament in a factory, saved from 3% to over 80% of the energy, depending on where you live and how the power is made.
Kreiger, Mulder, Glover & Pearce, Journal of Cleaner Production (2014) →
Pairing a recyclebot with a 3D printer in the same shop, so failed prints become new filament, cut the embodied energy of the parts in half and their cost to pennies. Lazarella is that loop.
Zhong & Pearce, Resources, Conservation & Recycling (2018) →
Only about 9% of the world's plastic waste is recycled. The rest is burned, landfilled or leaks into the environment. Keeping shop plastic in a loop is a small piece of that.
OECD, Global Plastics Outlook (2022) →
Simple arithmetic: a 1 in board resawn as solid stock gives two faces, but sliced into veneer about 0.024 in thick it gives dozens of leaves, each one a full face. Figured and rare woods go furthest that way, which is why Drag Queen works in veneer.
A hive makes only a pound or two of wax a year, and bees eat a lot of honey to make it. Queen Bee's wax is precious, so every brim and failed print gets remelted, and casting work leans on the 80 / 20 blend.
FAO, Value-added products from beekeeping →